
I’m so excited to share this recipe with you! This Chocolate Oreo Cheesecake is a show-stopping dessert that’s surprisingly straightforward to create at home.
Cheesecake Doesn’t Have to Be Hard—This Recipe Proves It
Cheesecake is definitely among my family’s top three favorite desserts. Whenever I make one, it never lasts long—everyone always asks for another slice.
Whether it’s a refreshing no-bake version like my Matcha Oreo Cheesecake or a rich, baked one like the Basque Cheesecake, cheesecake always finds its way to our table.
I know many people feel that cheesecakes are complicated to make, but the truth is, they are much easier than you might expect. With just a few simple steps and the right ingredients, you can create a dessert that looks impressive and tastes absolutely divine.
Today, I want to share one of my favorites—Chocolate Oreo Cheesecake. This recipe combines two of the best flavors in the dessert world: rich chocolate and crunchy, irresistible Oreos.
I’ll admit, this cheesecake does take a few steps and requires a bit of patience, but that’s exactly what makes it special.
From melting the chocolate to layering the cheesecake filling and finishing with a glossy ganache, the process feels almost therapeutic. And when you finally slice into it, you’ll know every moment spent was absolutely worth it.

Why You‘ll Love This Recipe
- Three layers of indulgence: fudgy brownie, creamy cheesecake, and silky ganache.
- The Oreo crumbs add a crunchy contrast to the creamy layers.
- Can be made in advance, perfect for parties or family treats.
- Looks bakery-quality but is completely doable at home.

Ingredients
For the Chocolate Brownie Base:
- 120g Dark chocolate (50%-70% cocoa)
- 70g Unsalted butter, softened
- 3 Large eggs, room temperature
- 45g Fine sugar
- 70g Low-gluten flour
- 10g Cocoa powder
- 3g Baking powder
For the Oreo Cheesecake Layer:
- 150g Cream cheese, softened
- 25g Fine sugar
- 120g Heavy cream
- 60g Hot milk (approx. 50°C)
- 10g Gelatin sheets
- 20g Oreo crumbs (filling removed)
For the Chocolate Ganache Topping:
- 60g Dark chocolate
- 40g Heavy cream
- 10g Unsalted butter
Instructions
- Make the Chocolate Brownie Base:
Preheat your oven to 175°C (350°F).
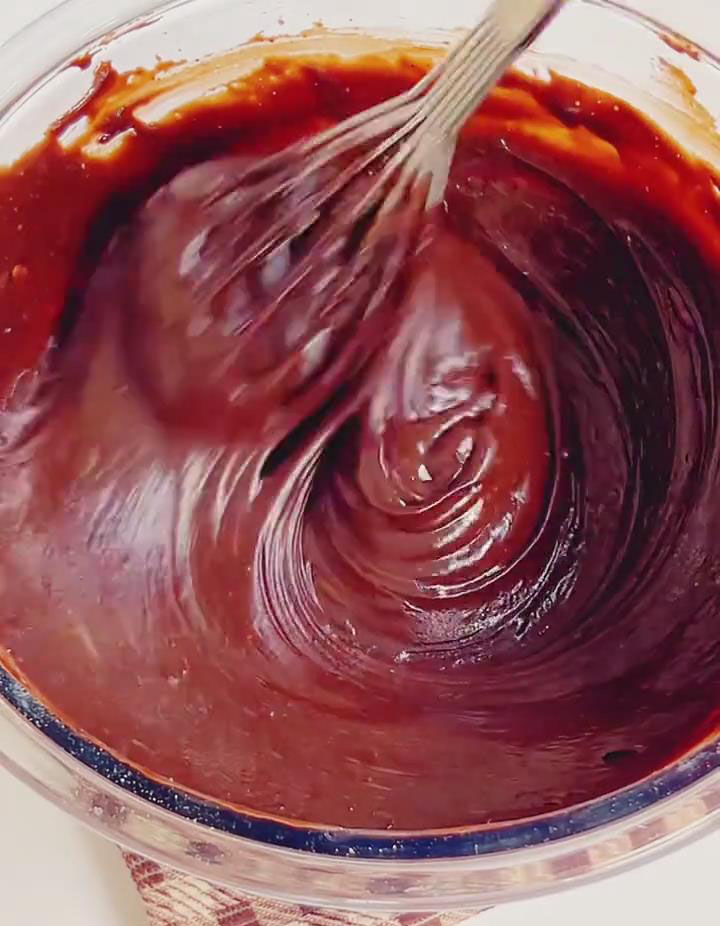
Melt the 120g of dark chocolate and 70g of softened butter together in a heatproof bowl set over a pot of simmering water (double boiler). Stir until smooth and fully combined. Remove from heat and allow to cool to room temperature.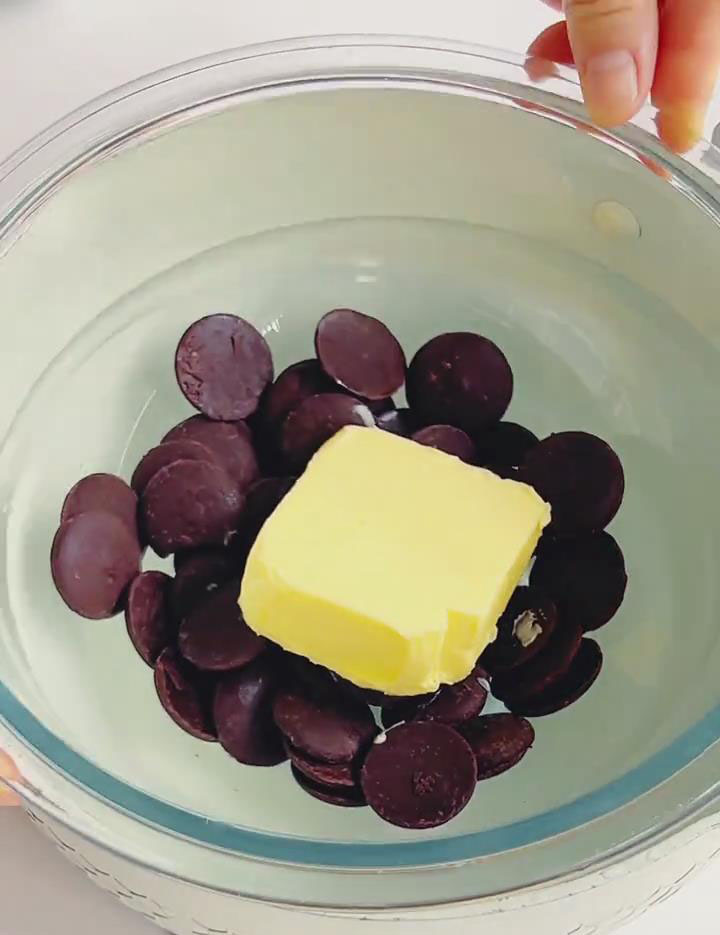
Once cooled, whisk in the 3 eggs and 45g of fine sugar until the mixture is well blended.
Sift the 70g of low-gluten flour, 10g of cocoa powder, and 3g of baking powder into the wet ingredients. Gently fold with a whisk until just combined and no dry streaks remain.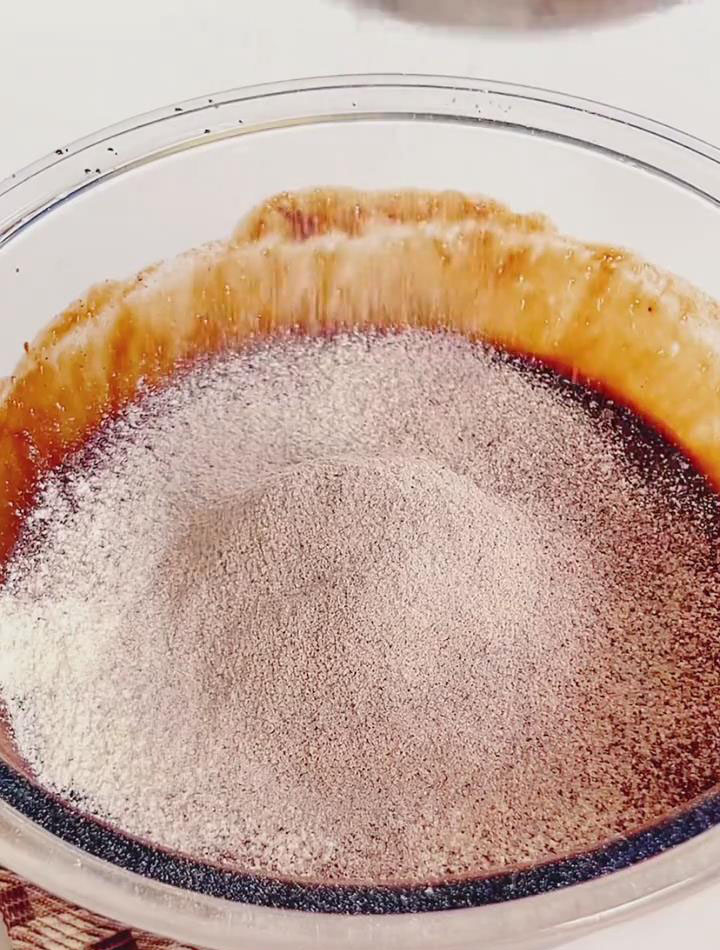
 Pour the batter into a 6-inch cake pan that has been lined with parchment paper. Gently tap the pan on the counter to release any air bubbles.
Bake for 25 minutes in the preheated oven. Place the pan on a wire rack and allow the brownie base to cool completely.
- Assemble the Plastic Collar:
Once the brownie base is completely cool, securely wrap a plastic cake collar around the inside edge of the cake pan. The collar should extend 4-5 cm above the top of the brownie to contain the cheesecake layer. This is a crucial step to prevent leakage.
- Prepare the Oreo Cheesecake Layer:
In a bowl, beat the 150g of softened cream cheese with the 25g of fine sugar using an electric mixer on low speed until smooth and creamy.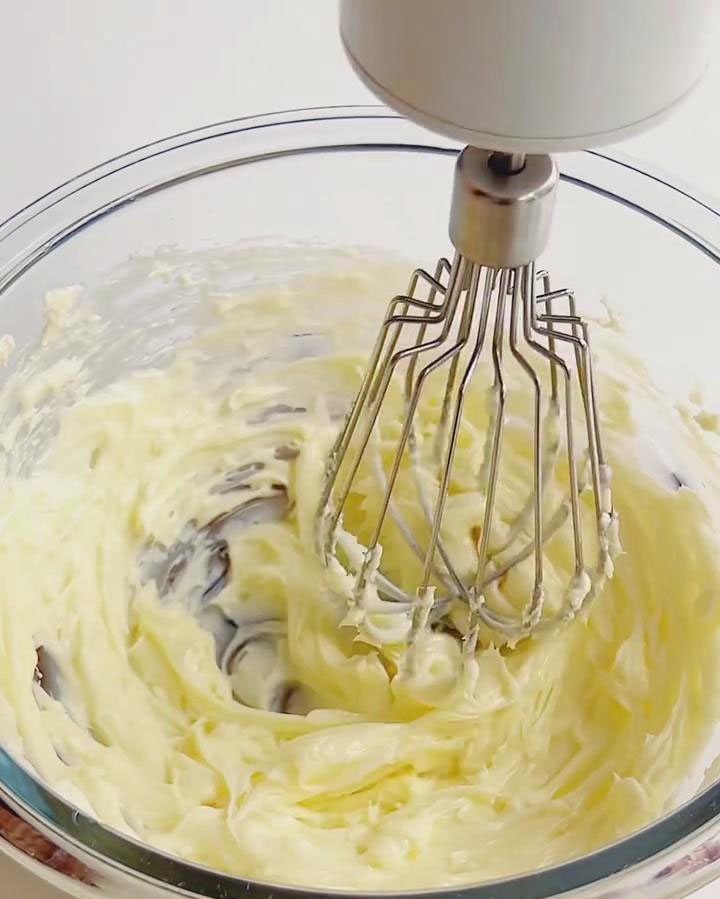
Add heavy cream and whip until thickened to yogurt-like texture (visible lines, does not drip). Avoid overwhipping.
Soak the 10g of gelatin sheets in a bowl of ice water for 5-8 minutes until soft and pliable.
Heat the 60g of milk until hot (about 50°C). Squeeze excess water from the softened gelatin and whisk it into the hot milk until it is completely dissolved. Let this mixture cool slightly.
Slowly stream the slightly cooled milk and gelatin mixture into the cheesecake batter while stirring continuously.
Fold in the 20g of Oreo crumbs, reserving a small amount for garnish.
Pour the Oreo cheesecake mixture over the cooled brownie base. Gently tap the pan again to settle the mixture and remove air bubbles.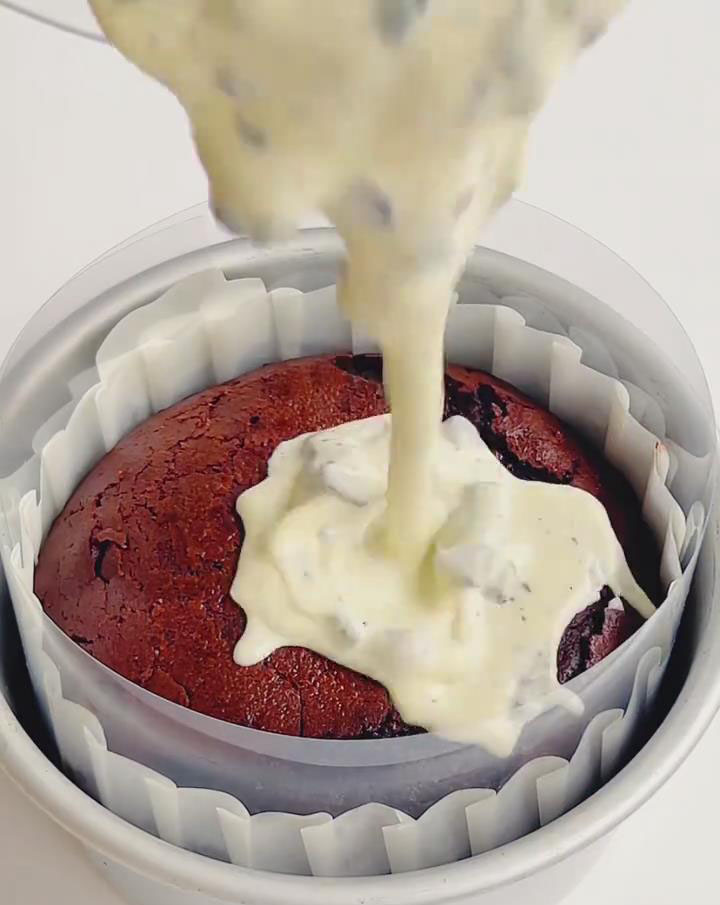
Refrigerate the cake for at least 4 hours, or until the cheesecake layer is completely set.
- Make the Chocolate Ganache and Final Assembly:
Place the 60g of dark chocolate, 40g of heavy cream, and 10g of unsalted butter in a heatproof bowl.
Melt them together over a double boiler, stirring until the mixture is glossy and smooth. Alternatively, heat in short bursts in the microwave, stirring between each interval. Allow the ganache to cool to room temperature.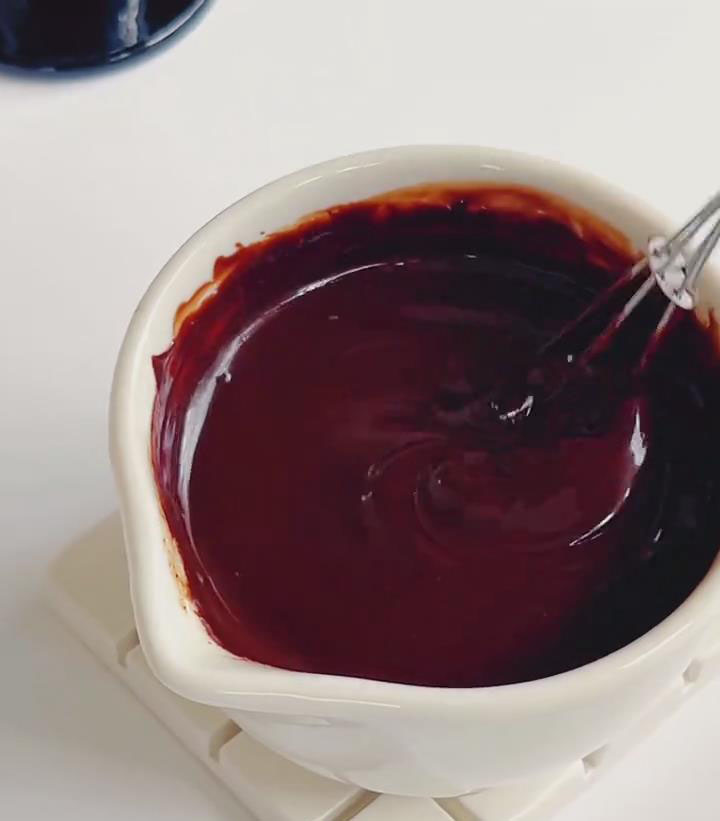
Remove the chilled cake from the refrigerator. Slowly pour the cooled ganache over the top of the set cheesecake layer, tilting the pan to create an even coating.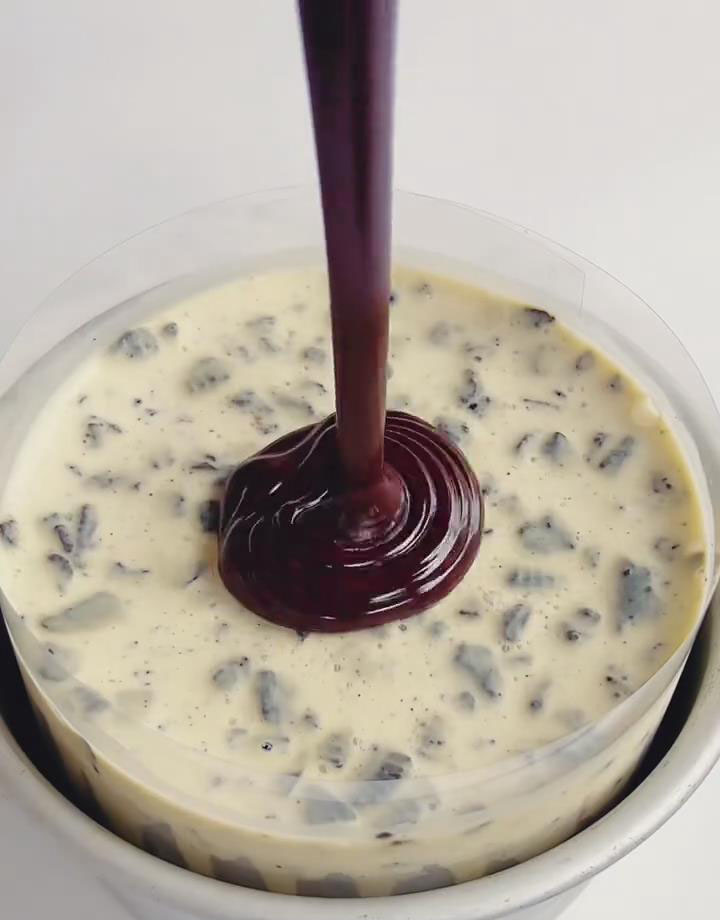
Sprinkle the reserved Oreo crumbs over the wet ganache.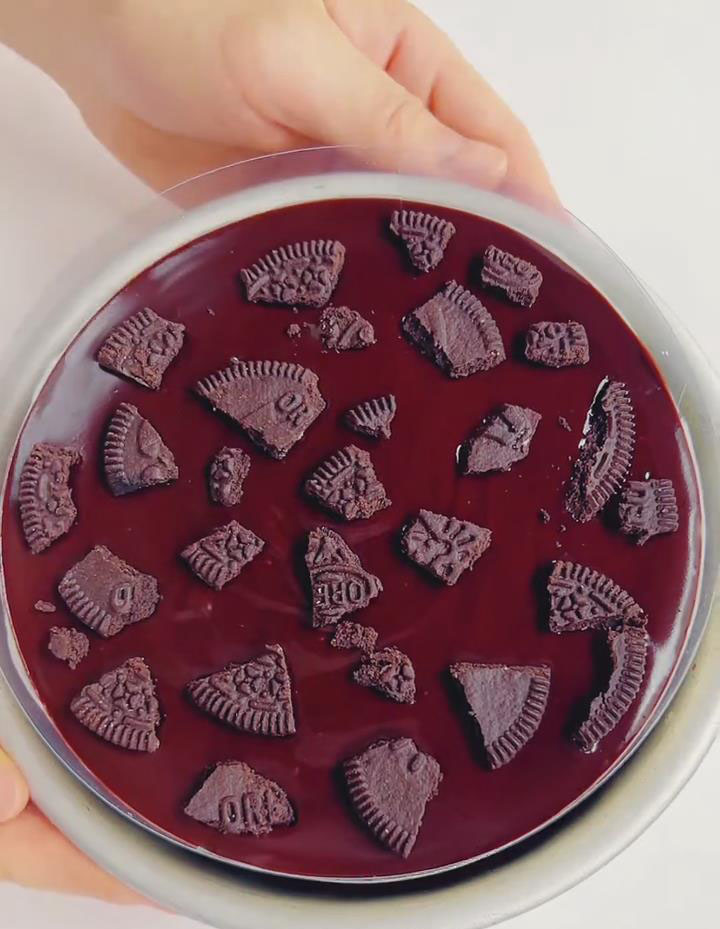
Return the cake to the refrigerator for another 10-15 minutes to allow the ganache to set completely before slicing and serving.
Note: Using room temperature ingredients for the brownie base and allowing the melted chocolate to cool are key steps to achieving the right texture. The plastic cake collar is essential for a clean, layered look.
Frequently Asked Questions
Q: Can I use gelatin powder instead of sheets?
A: Yes, you can use 10g of powdered gelatin. Sprinkle it over the hot milk and whisk vigorously to dissolve any lumps.
Q: My brownie layer is very dense. What happened?
A: This can occur if the batter is overmixed after adding the flour. Fold gently until just combined to avoid developing gluten.
Q: How should I store this cheesecake?
A: Keep it covered in the refrigerator for up to 5 days. The layers will remain distinct and delicious.
Leave a Reply