
Make these pink swirled bagels at home—no oil, no sugar, and naturally colored with cranberries! Soft, chewy, and perfect with cream cheese. Save this recipe for your next baking day!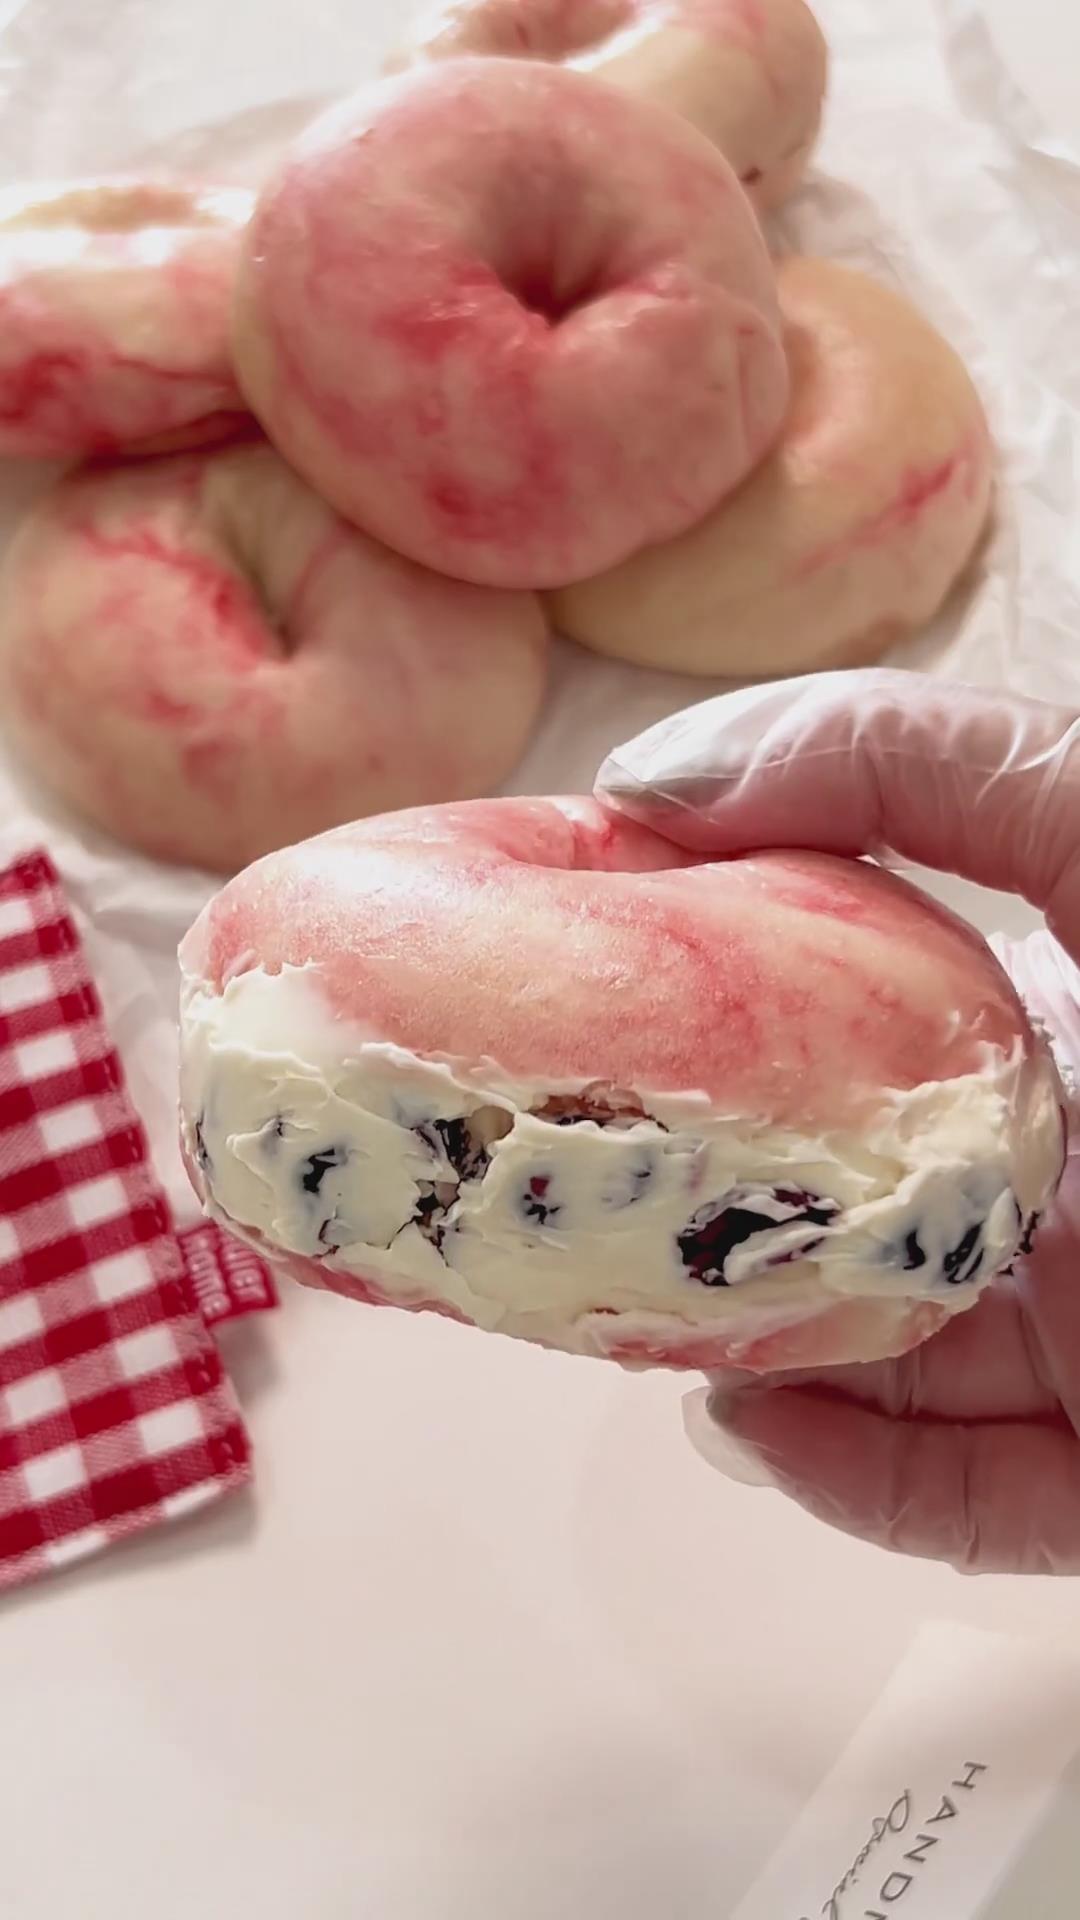
I used my stand mixer to make the dough because it’s quick and easy, but you can absolutely make these by hand if you prefer!
I know the process might look like it has a lot of steps, but I promise it’s not complicated.
I’ve broken it down into simple, easy-to-follow instructions.
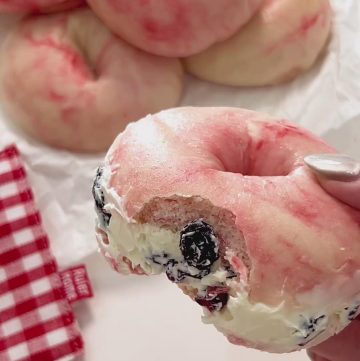
The resulting bagels are not only gorgeous with their pink and white swirls, but they’re also made with a “no-oil, no-sugar” dough, making them a healthy, low-fat option.
They have a wonderfully dense and chewy texture that gets more flavorful with every bite.
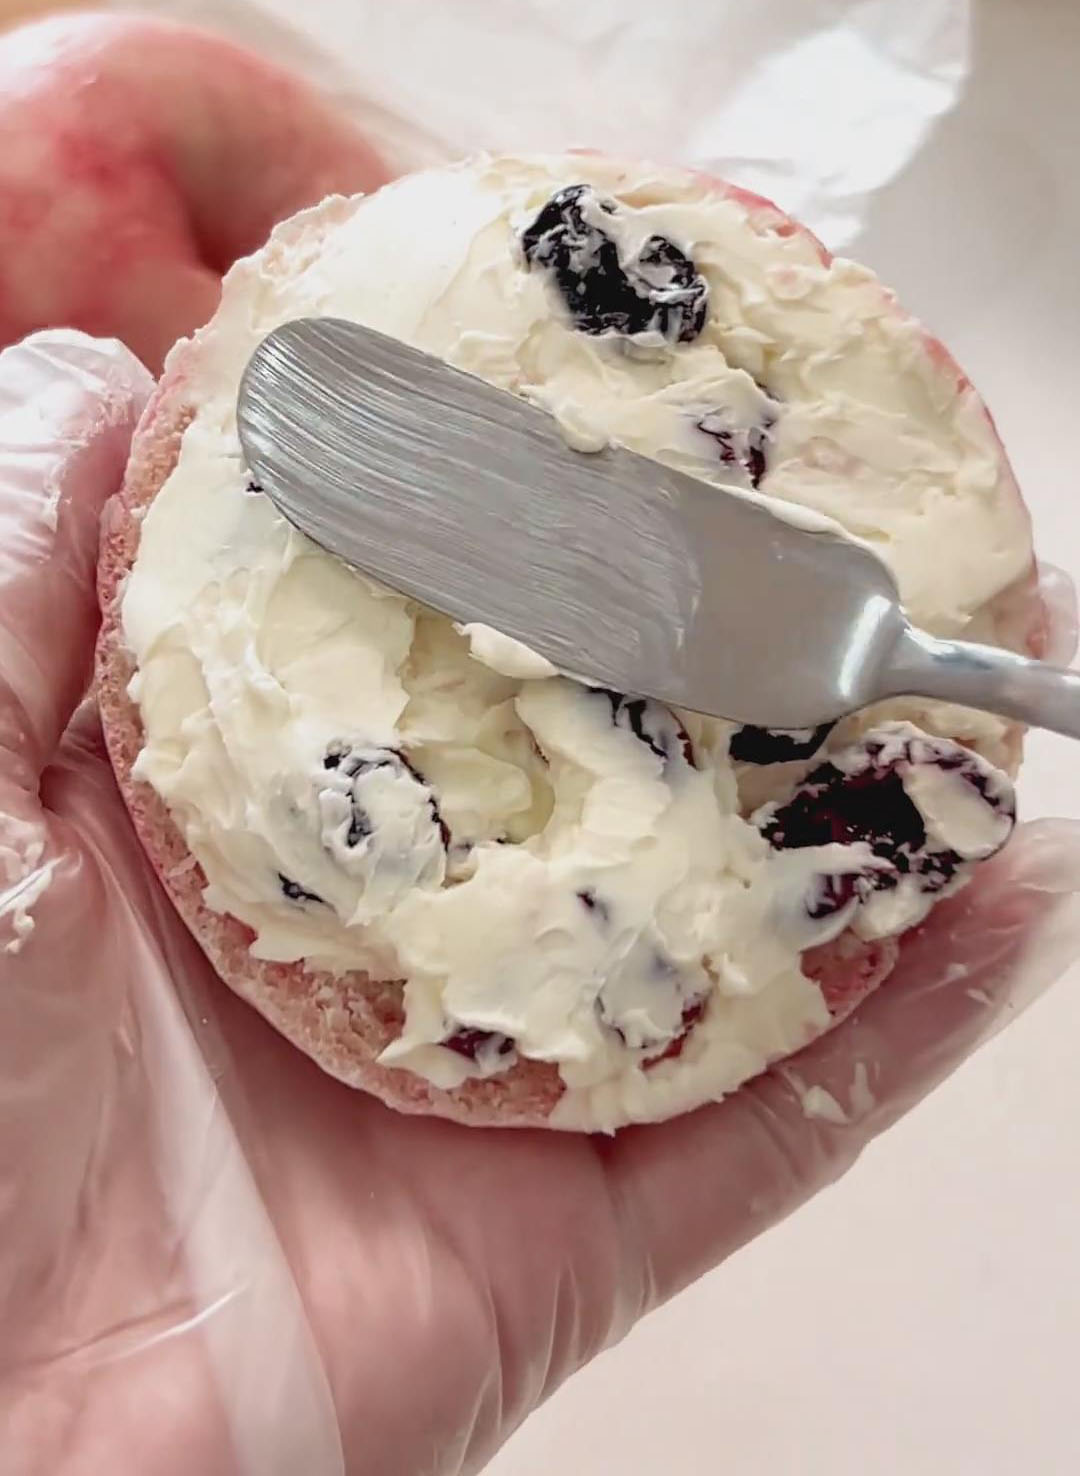
The best way to enjoy them? Slice one in half and fill it with the sweet and tangy cranberry cream cheese—it’s like a beautiful, homemade bagel sandwich!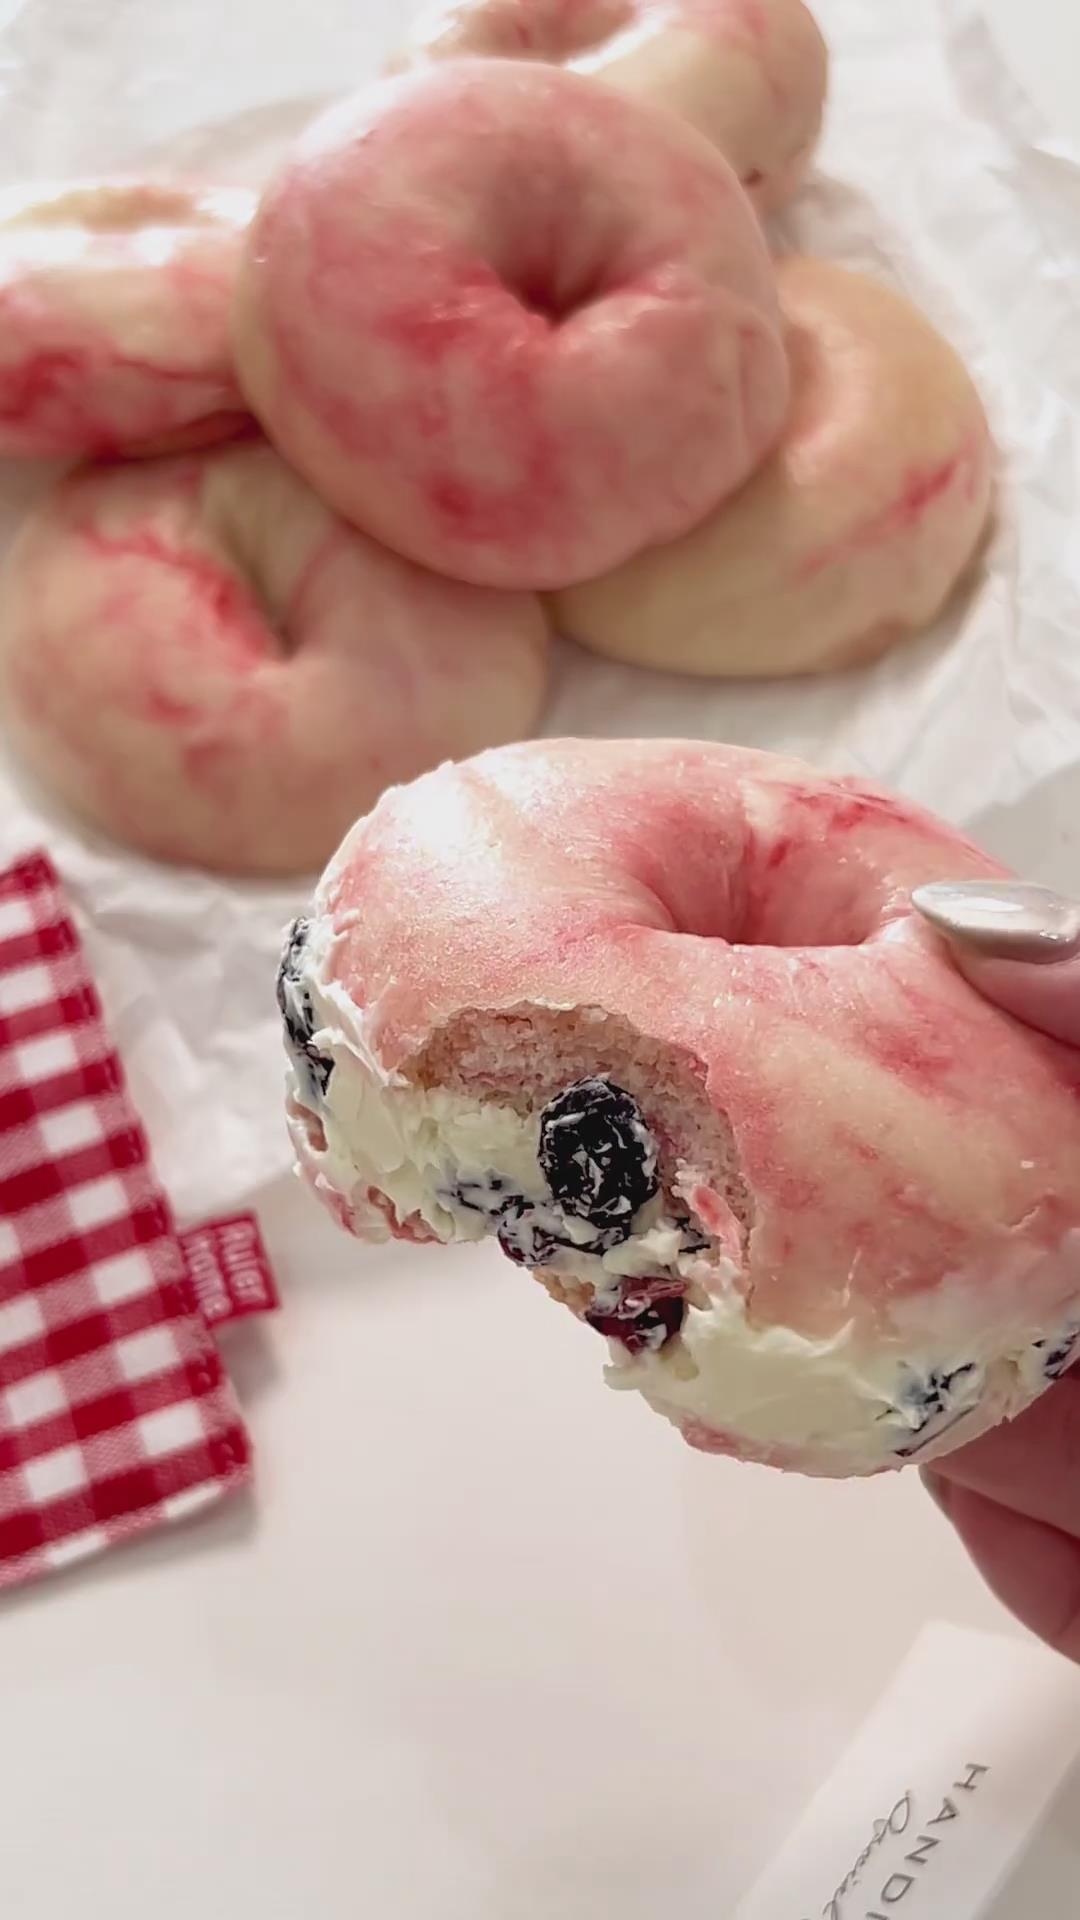
Why You’ll Love This Recipe
- Real bagel chewiness without any complicated steps — just ice water and a sugar-water boil.
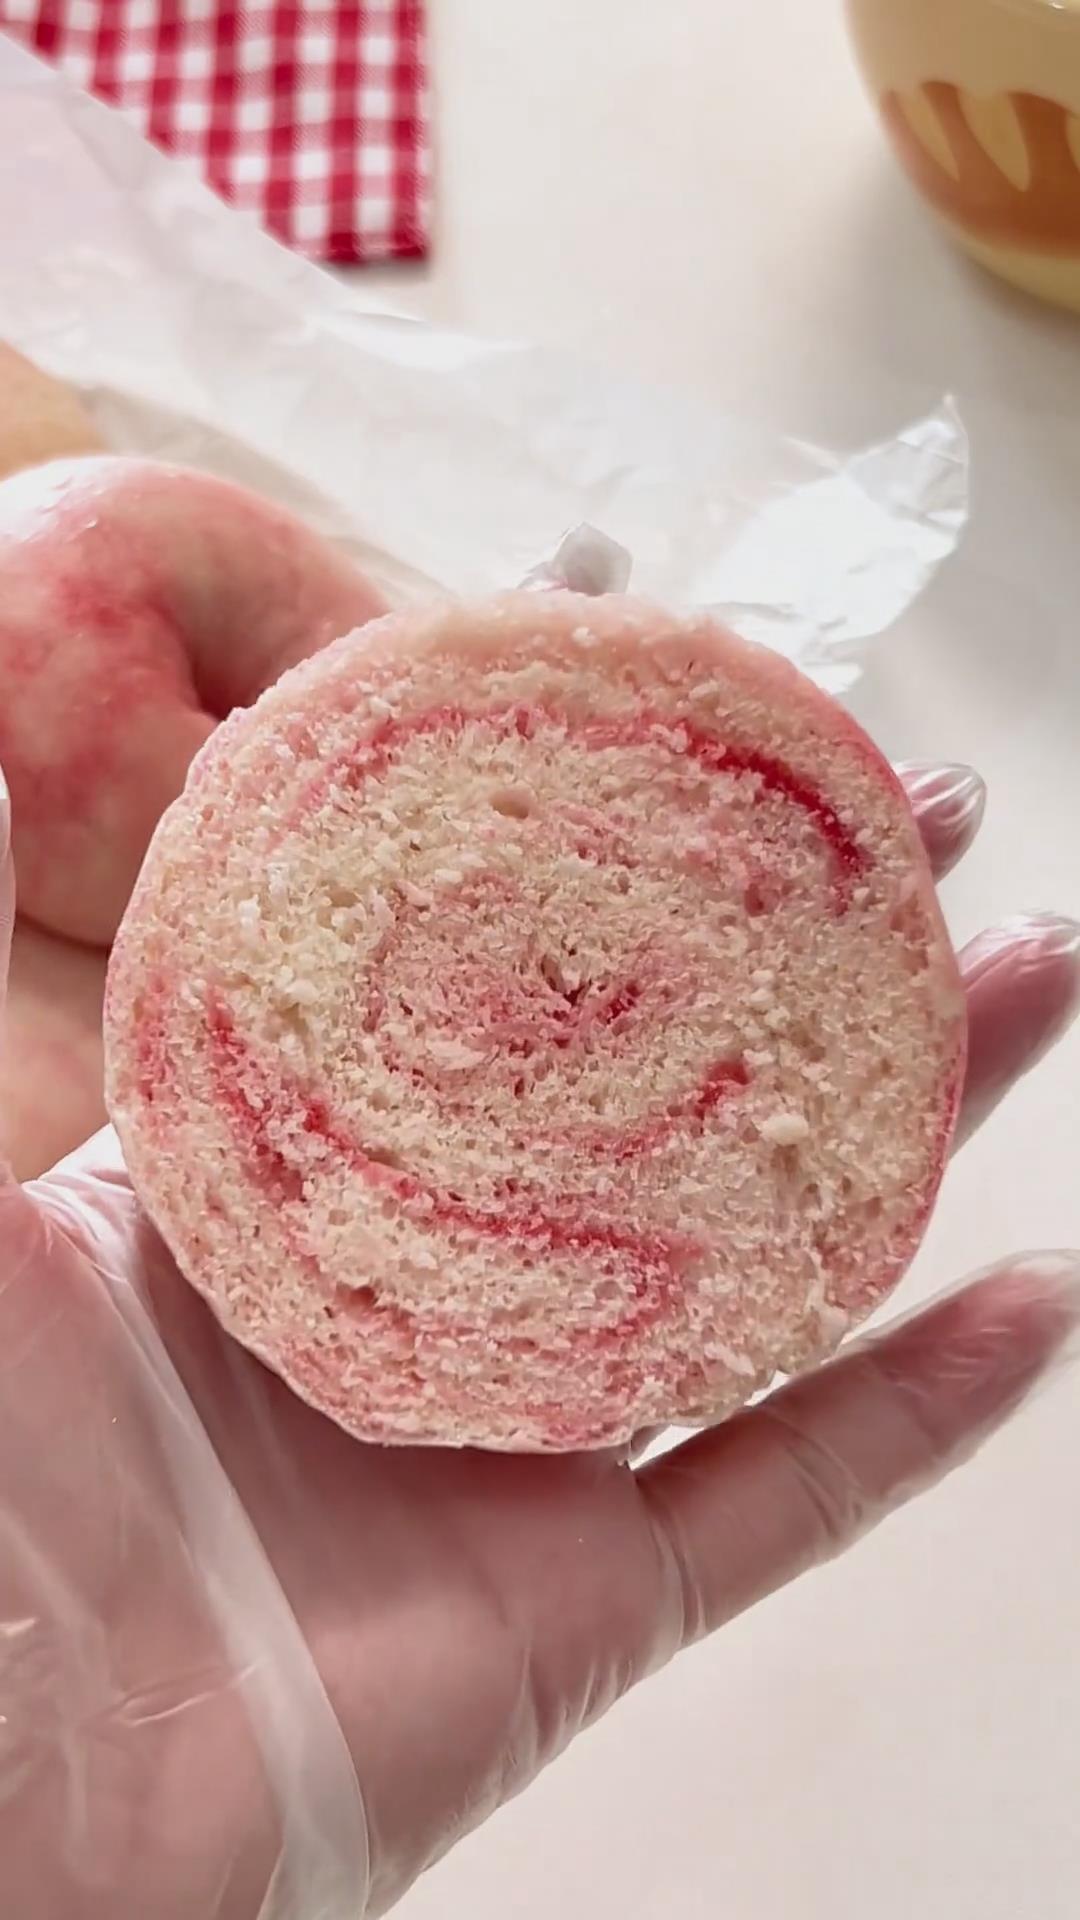
- Naturally beautiful swirl that requires zero skill; the messier the coloring, the prettier the gradient.
- Balanced flavors with chewy bagels and a sweet-tangy cranberry cream cheese that complements without overpowering.
- Perfect for meal prep — the bagels freeze well and reheat beautifully, and the cheese spread pairs with fruit, bread, or snacks.
- No extra sugar or oil in the dough, making this a lighter, bakery-style treat.
Ingredients and Substitutions
- Bread Flour – This is essential for achieving the classic, chewy bagel texture. Its high protein content creates strong gluten networks. I do not recommend substituting it with all-purpose or cake flour.
- Cake Flour – Adding a portion of cake flour helps to balance the high gluten from the bread flour, preventing the bagels from becoming too tough and giving them a more well-rounded, tender chew.
- Salt – Even in a small amount, salt is crucial for enhancing the overall flavor of the bagel and should not be omitted.
- Yeast – Standard active dry yeast works perfectly here. To ensure it’s active, you can proof it in a little warm water with a pinch of sugar before adding it to the flour.
- Ice Water – Using ice water is a key trick for keeping the dough cool, which slows down fermentation. This results in a better flavor development and, most importantly, that desirable chewy texture.
- Red Food Coloring – Just a few drops of food-grade red coloring create the lovely pink swirls. For a natural alternative, you can use a bit of beet juice or red yeast rice powder, though the color may be more subtle.
- Cream Cheese – For the filling, make sure your cream cheese is fully softened at room temperature. This is non-negotiable for achieving a perfectly smooth, lump-free filling that’s easy to spread.
- Cranberries – I recommend using dried cranberries for their concentrated sweet-tart flavor.
How to make Swirled Pink Bagels
1. Make the Bagel Dough
In the bowl of a stand mixer fitted with a dough hook, combine the bread flour, cake flour, salt, and yeast. Pour in the ice water.
Mix on medium speed for 8-10 minutes, until the dough is smooth and elastic. (To mix by hand, knead on a floured surface for 15-20 minutes). The dough does not need to pass the windowpane test; it just needs to be smooth.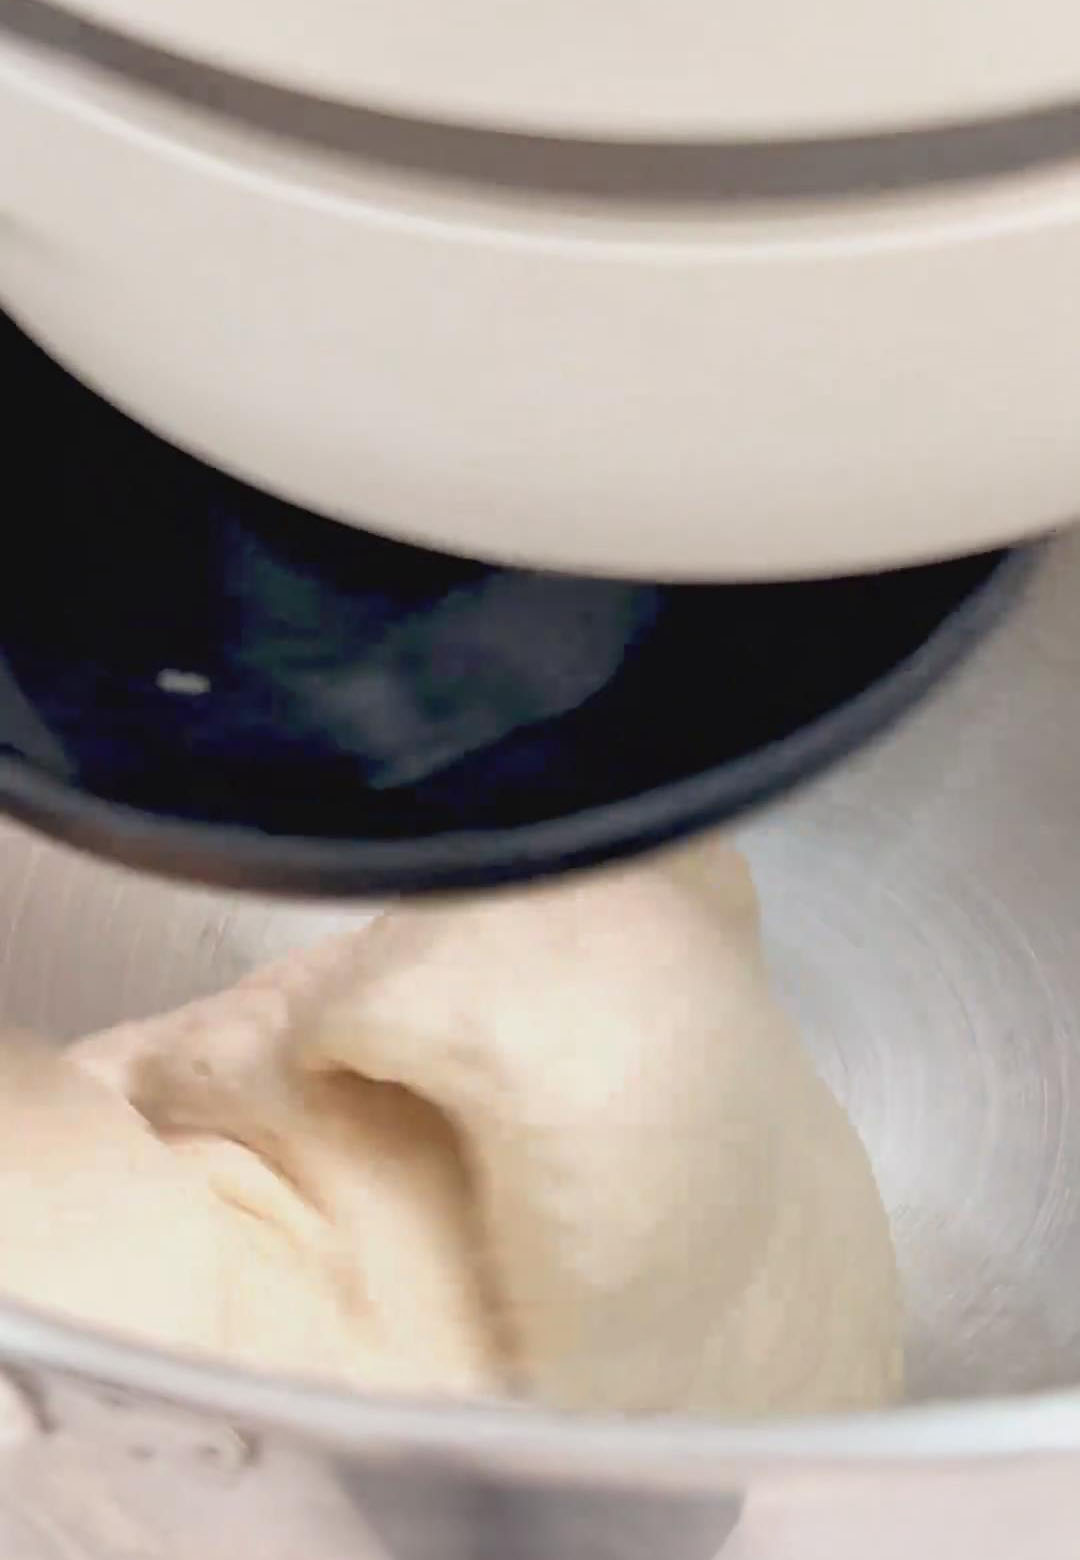
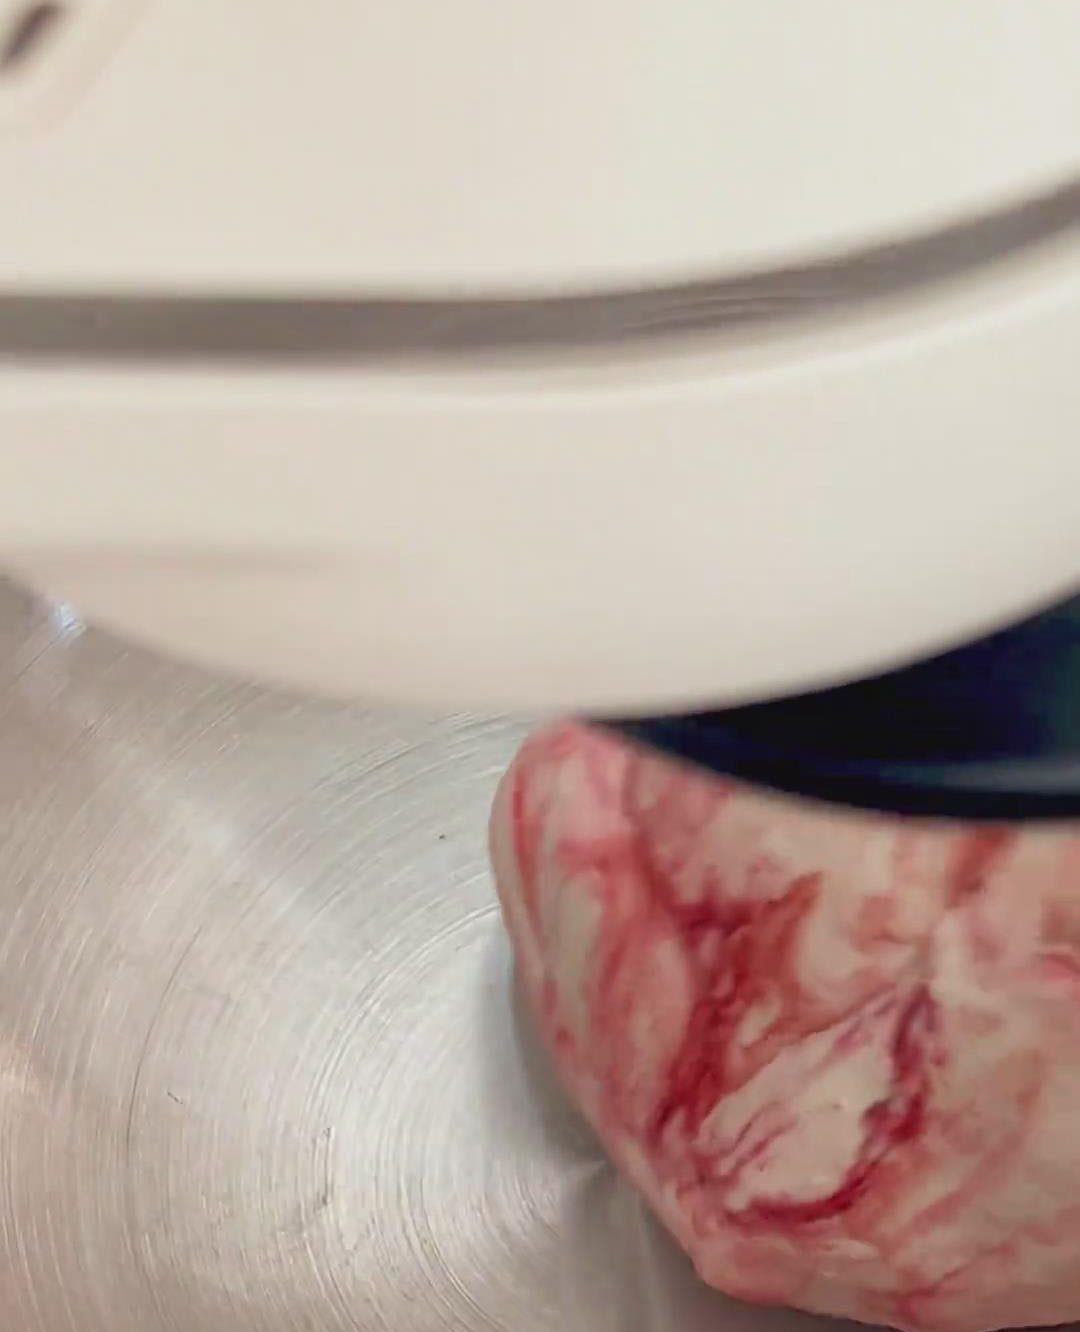
2. Create the Swirl
Add a few drops of red food coloring to the dough. Mix on low speed for just 10-15 seconds, or until the color is streaked through the dough in a marbled, swirled pattern. Do not mix until the color is uniform.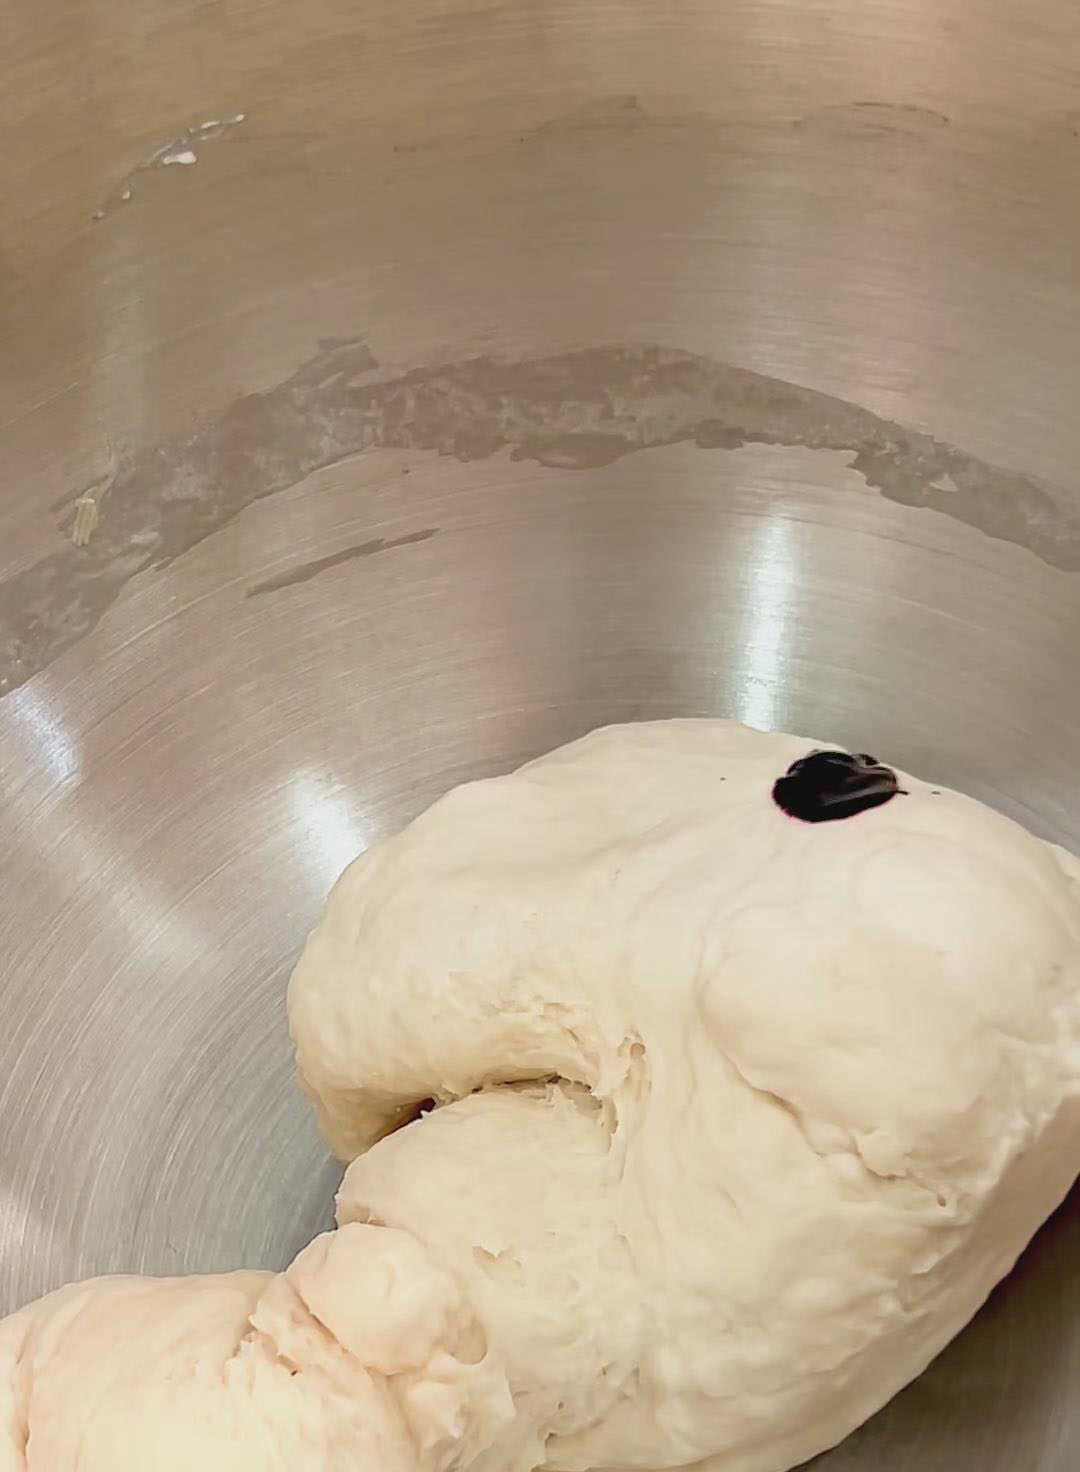
3. Rest and Shape the Dough
Divide the dough into 6 equal pieces (about 65g each). Roll each piece into a smooth ball.
Cover the balls with plastic wrap and let them rest for 30 minutes to relax the gluten.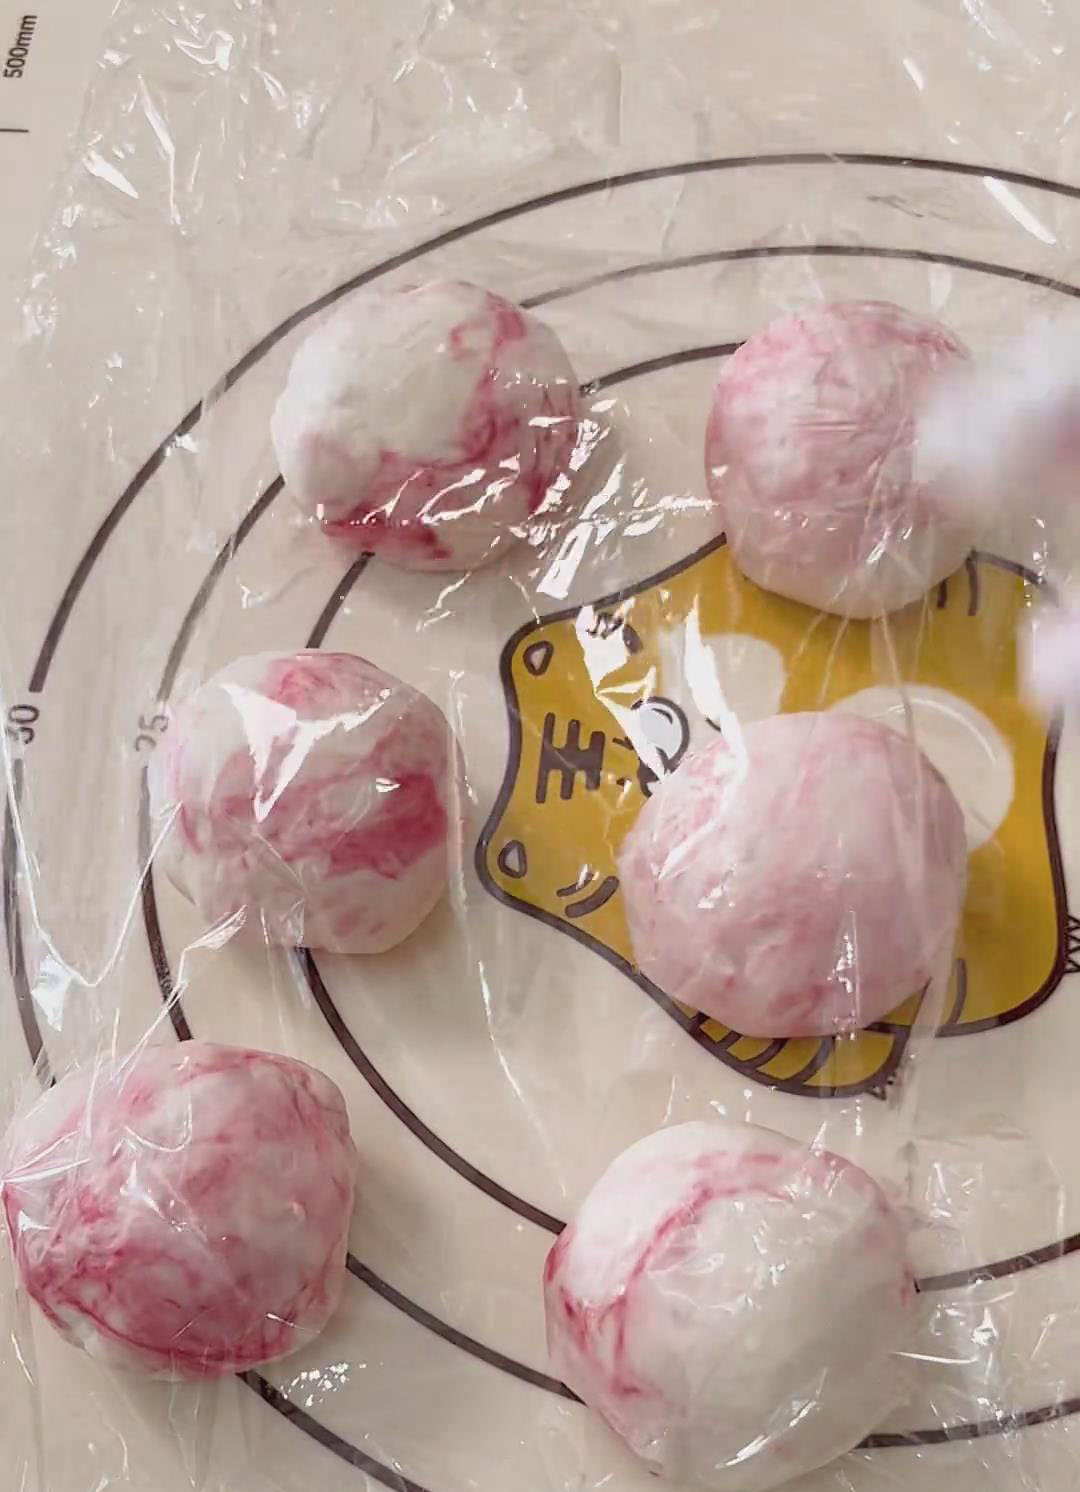
Take one proofed dough ball and use a rolling pin to roll it out into an oval shape.
Use your fingers to press and stretch one end of the oval to flatten and lengthen it. Starting from the opposite end, tightly roll up the dough. Pinch the seam firmly to seal.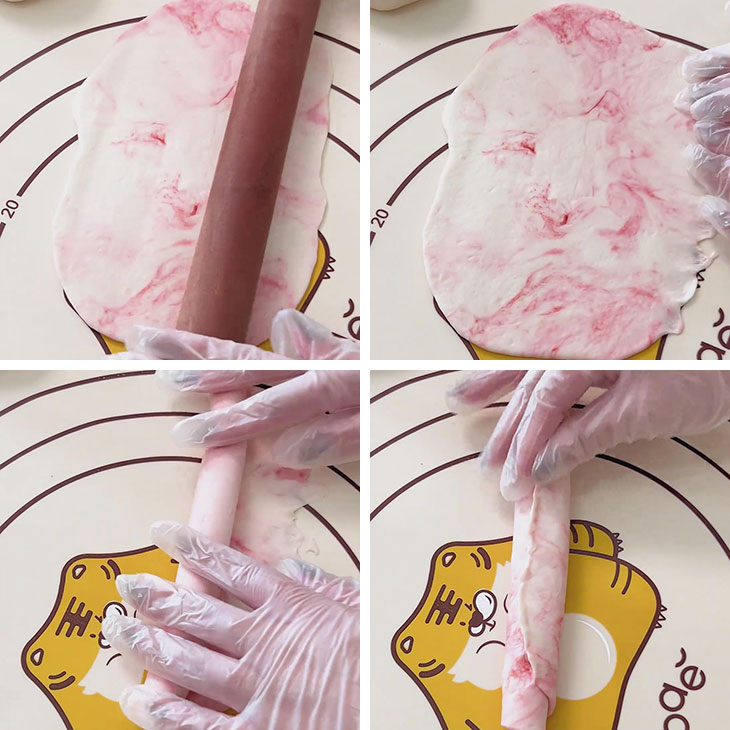
Flatten one end and wrap it around the other, pinching firmly to seal the circle completely.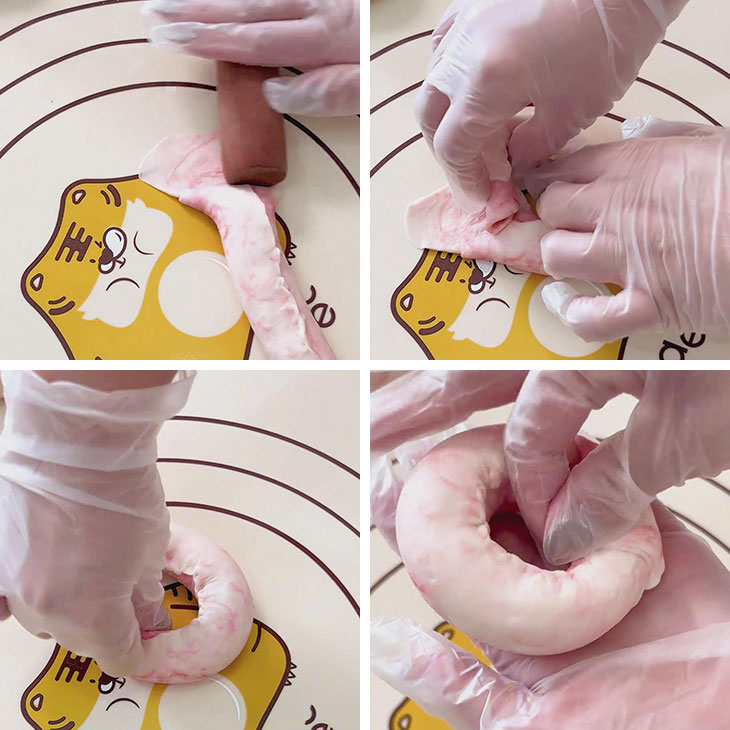
Place the shaped bagels on a parchment-lined baking sheet.
4. Second Fermentation
Cover the shaped bagels with plastic wrap. Let them rise in a warm place for about 40 minutes, or until they have puffed up by about 1.5 times. To test, gently poke a bagel; the indentation should slowly spring back.
5. Boil the Bagels
Preheat your oven to 190°C (375°F).
Bring a large pot of water to a boil. If using, add the sugar or honey to the water.
Gently lower the bagels into the boiling water, boiling only 2-3 at a time.
Boil for 20 seconds, then flip and boil for another 20 seconds. Use a slotted spoon to remove them, letting the excess water drip off, and return them to the baking sheet.
6. Bake the Bagels
Bake the bagels for 20 minutes, or until the surface is golden brown and the crust is firm. They should sound hollow when tapped on the bottom. Transfer to a wire rack to cool completely.
7. Make the Cranberry Cream Cheese Filling
While the bagels cool, prepare the filling. In a small bowl, beat the softened cream cheese with a spatula until completely smooth. Stir in the chopped, pre-soaked cranberries until well combined.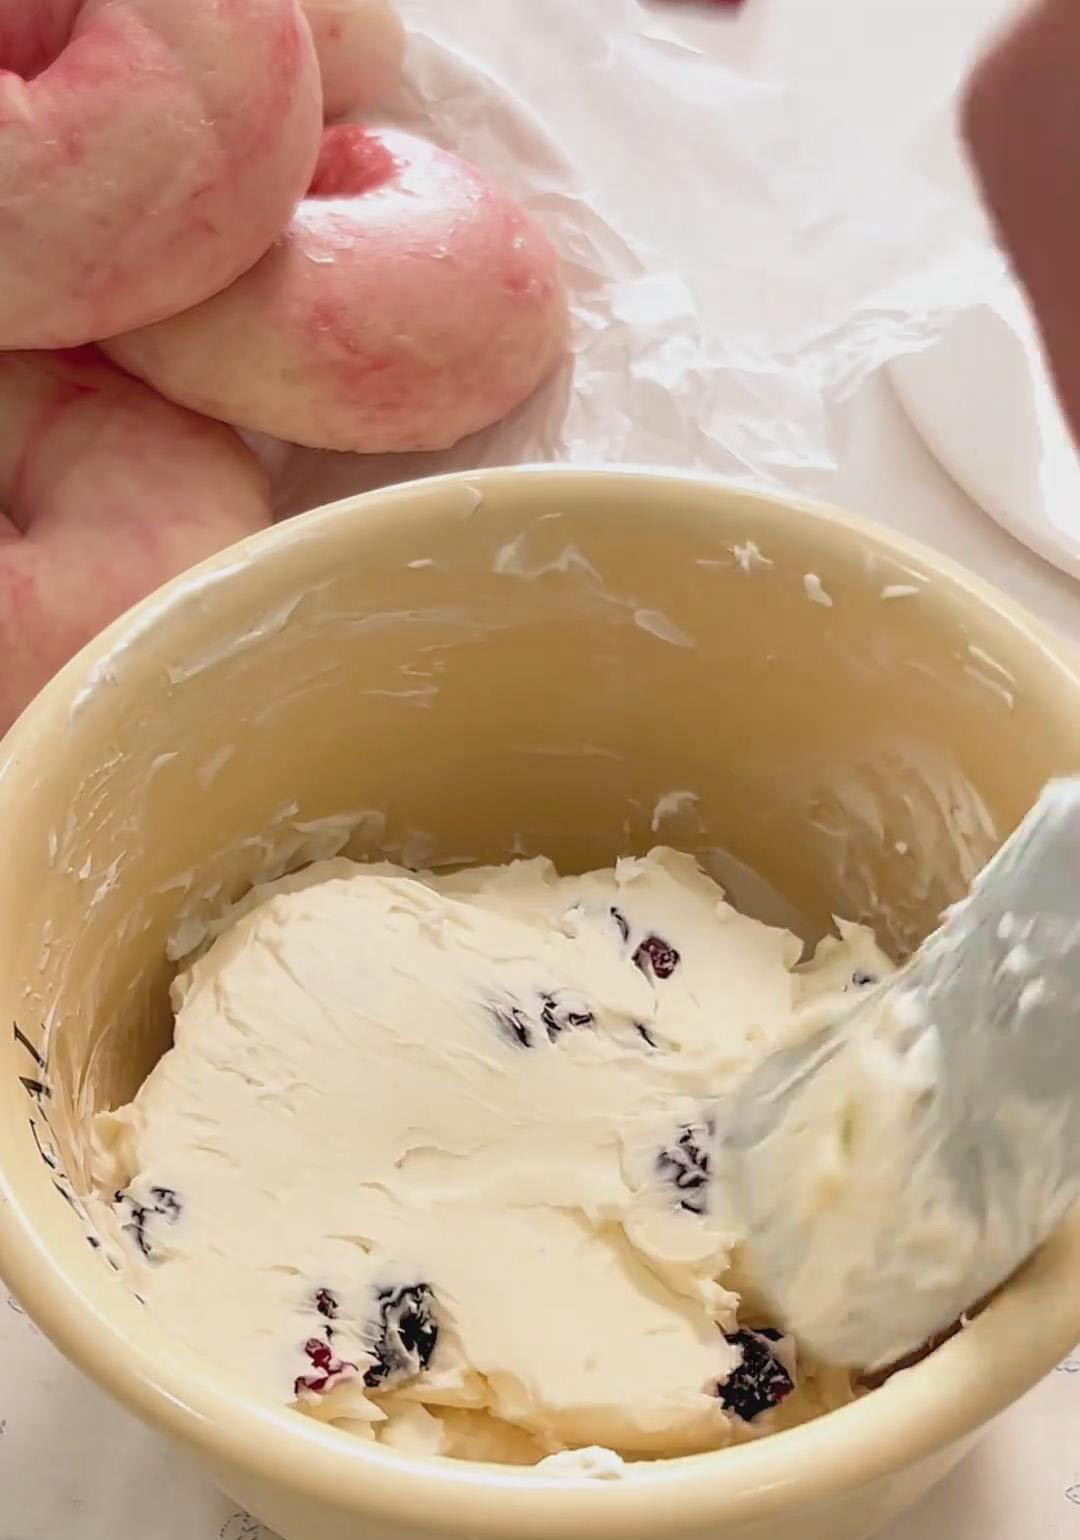
8. Assemble and Serve
Once the bagels are fully cooled, slice them in half horizontally. Generously spread the cranberry cream cheese filling on the bottom half, place the top on, and enjoy!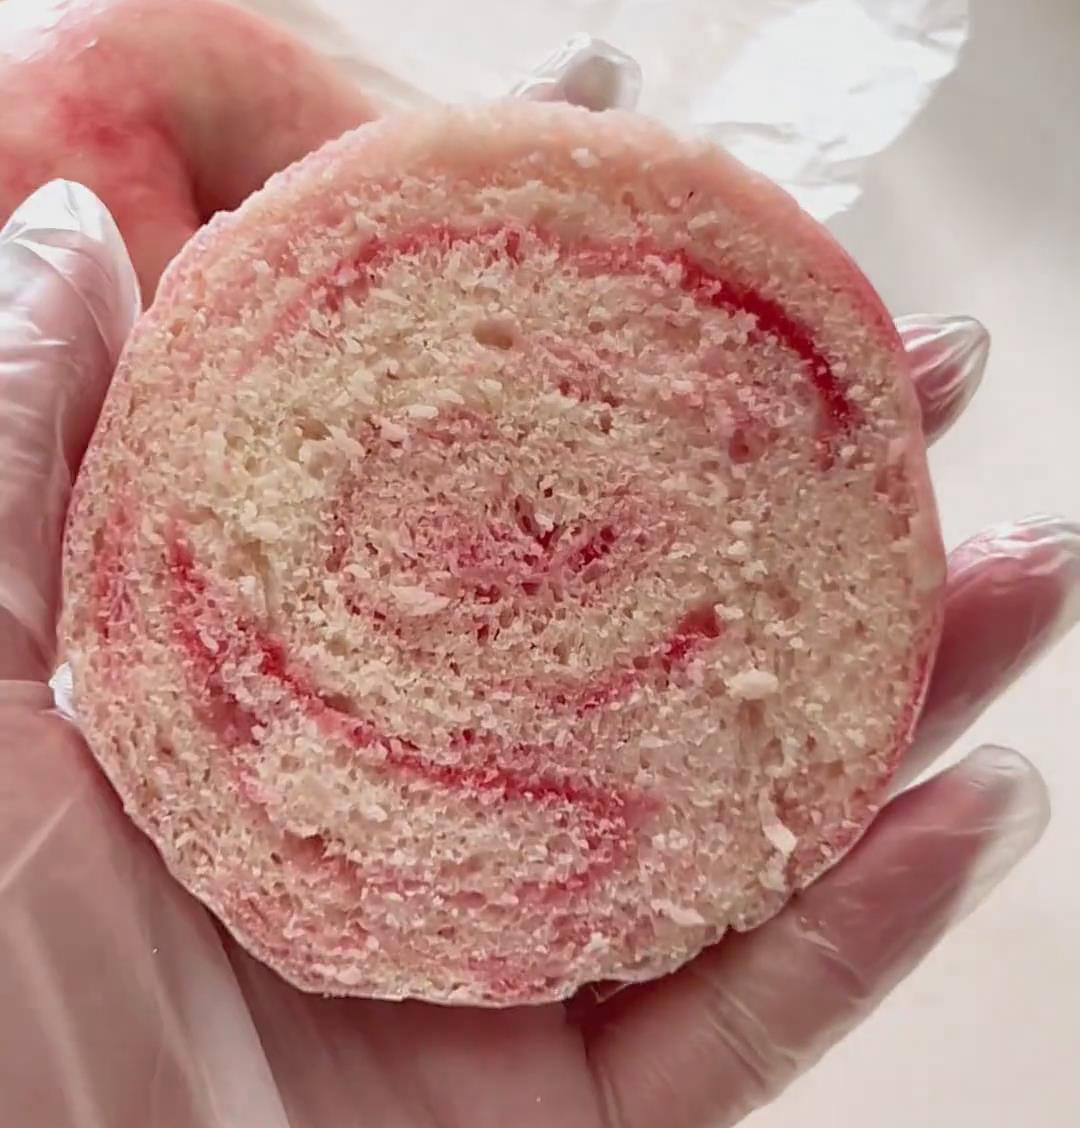
Storage
Unfilled Bagels: Store in an airtight container at room temperature for 2-3 days, or freeze for up to 1 month. Reheat in a 160°C (320°F) oven for 3-5 minutes to restore freshness.
Filling: Store separately in a sealed container in the refrigerator for 3-4 days. Assemble just before eating for the best texture.
Tips & Tricks
- Keep it Cool: Using ice water is a secret weapon for a chewy bagel. It prevents the yeast from working too fast, which is key for texture development.
- Don’t Over-Swirl: When adding the food coloring, less mixing is more! The goal is a beautiful, marbled effect, not a solid pink dough.
- Seal Tightly: The most important step in shaping is making sure the ends are pinched together very well. A loose seal can come apart during boiling or baking.
- Don’t Skip the Boil: Boiling the bagels is what gives them their iconic shiny, chewy crust. It’s a non-negotiable step for authentic bagels.
Frequently asked questions
Why are my bagels not chewy?
This is usually due to over-proofing (letting them rise too much) or not using a high-protein bread flour. Using ice water and not skipping the boiling step are also critical for chewiness.
Can I make these without a stand mixer?
Absolutely! Bagel dough is stiff, so it will be a workout, but you can definitely knead it by hand on a floured surface for 15-20 minutes until smooth.
My bagels opened up during boiling. What happened?
This means the seam wasn’t pinched tightly enough during the shaping stage. Make sure to really press and seal the ends together well.
Homemade Swirl Bagels with Cream Cheese Filling
Ingredients
Bagel Dough
- 250 g bread flour
- 50 g cake flour
- 4 g salt
- 3 g active dry yeast
- 170 g ice water
- A few drops red food coloring
Cranberry Cream Cheese Filling
- 100 g cream cheese softened
- 50 g dried cranberries
For Boiling (Optional)
- 1 tbsp sugar or honey for a glossier crust
Instructions
Make the Bagel Dough
- In the bowl of a stand mixer fitted with a dough hook, combine the bread flour, cake flour, salt, and yeast. Pour in the ice water.
- Mix on medium speed for 8-10 minutes, until the dough is smooth and elastic. (To mix by hand, knead on a floured surface for 15-20 minutes). The dough does not need to pass the windowpane test; it just needs to be smooth.
Create the Swirl
- Add a few drops of red food coloring to the dough. Mix on low speed for just 10-15 seconds, or until the color is streaked through the dough in a marbled, swirled pattern. Do not mix until the color is uniform.
Rest and Shape the Dough
- Divide the dough into 6 equal pieces (about 65g each). Roll each piece into a smooth ball.
- Cover the balls with plastic wrap and let them rest for 30 minutes to relax the gluten.
- Take one proofed dough ball and use a rolling pin to roll it out into an oval shape. Use your fingers to press and stretch one end of the oval to flatten and lengthen it. Starting from the opposite end, tightly roll up the dough. Pinch the seam firmly to seal.
- Flatten one end and wrap it around the other, pinching firmly to seal the circle completely.
- Place the shaped bagels on a parchment-lined baking sheet.
Second Fermentation
- Cover the shaped bagels with plastic wrap. Let them rise in a warm place for about 40 minutes, or until they have puffed up by about 1.5 times. To test, gently poke a bagel; the indentation should slowly spring back.
Boil the Bagels
- Preheat your oven to 190°C (375°F).
- Bring a large pot of water to a boil. If using, add the sugar or honey to the water.
- Gently lower the bagels into the boiling water, boiling only 2-3 at a time. Boil for 20 seconds, then flip and boil for another 20 seconds. Use a slotted spoon to remove them, letting the excess water drip off, and return them to the baking sheet.
Bake the Bagels
- Bake the bagels for 20 minutes, or until the surface is golden brown and the crust is firm. They should sound hollow when tapped on the bottom. Transfer to a wire rack to cool completely.
Make the Cranberry Cream Cheese Filling
- While the bagels cool, prepare the filling. In a small bowl, beat the softened cream cheese with a spatula until completely smooth. Stir in the chopped, pre-soaked cranberries until well combined.
Assemble and Serve
- Once the bagels are fully cooled, slice them in half horizontally. Generously spread the cranberry cream cheese filling on the bottom half, place the top on, and enjoy!
Leave a Reply