
This no-bake chocolate tart has three irresistible layers — crunchy Biscoff crust, silky dark chocolate filling, and a glossy cocoa top. No oven needed! Perfect for chocolate lovers.
Rich & Glossy No-Bake Chocolate Tart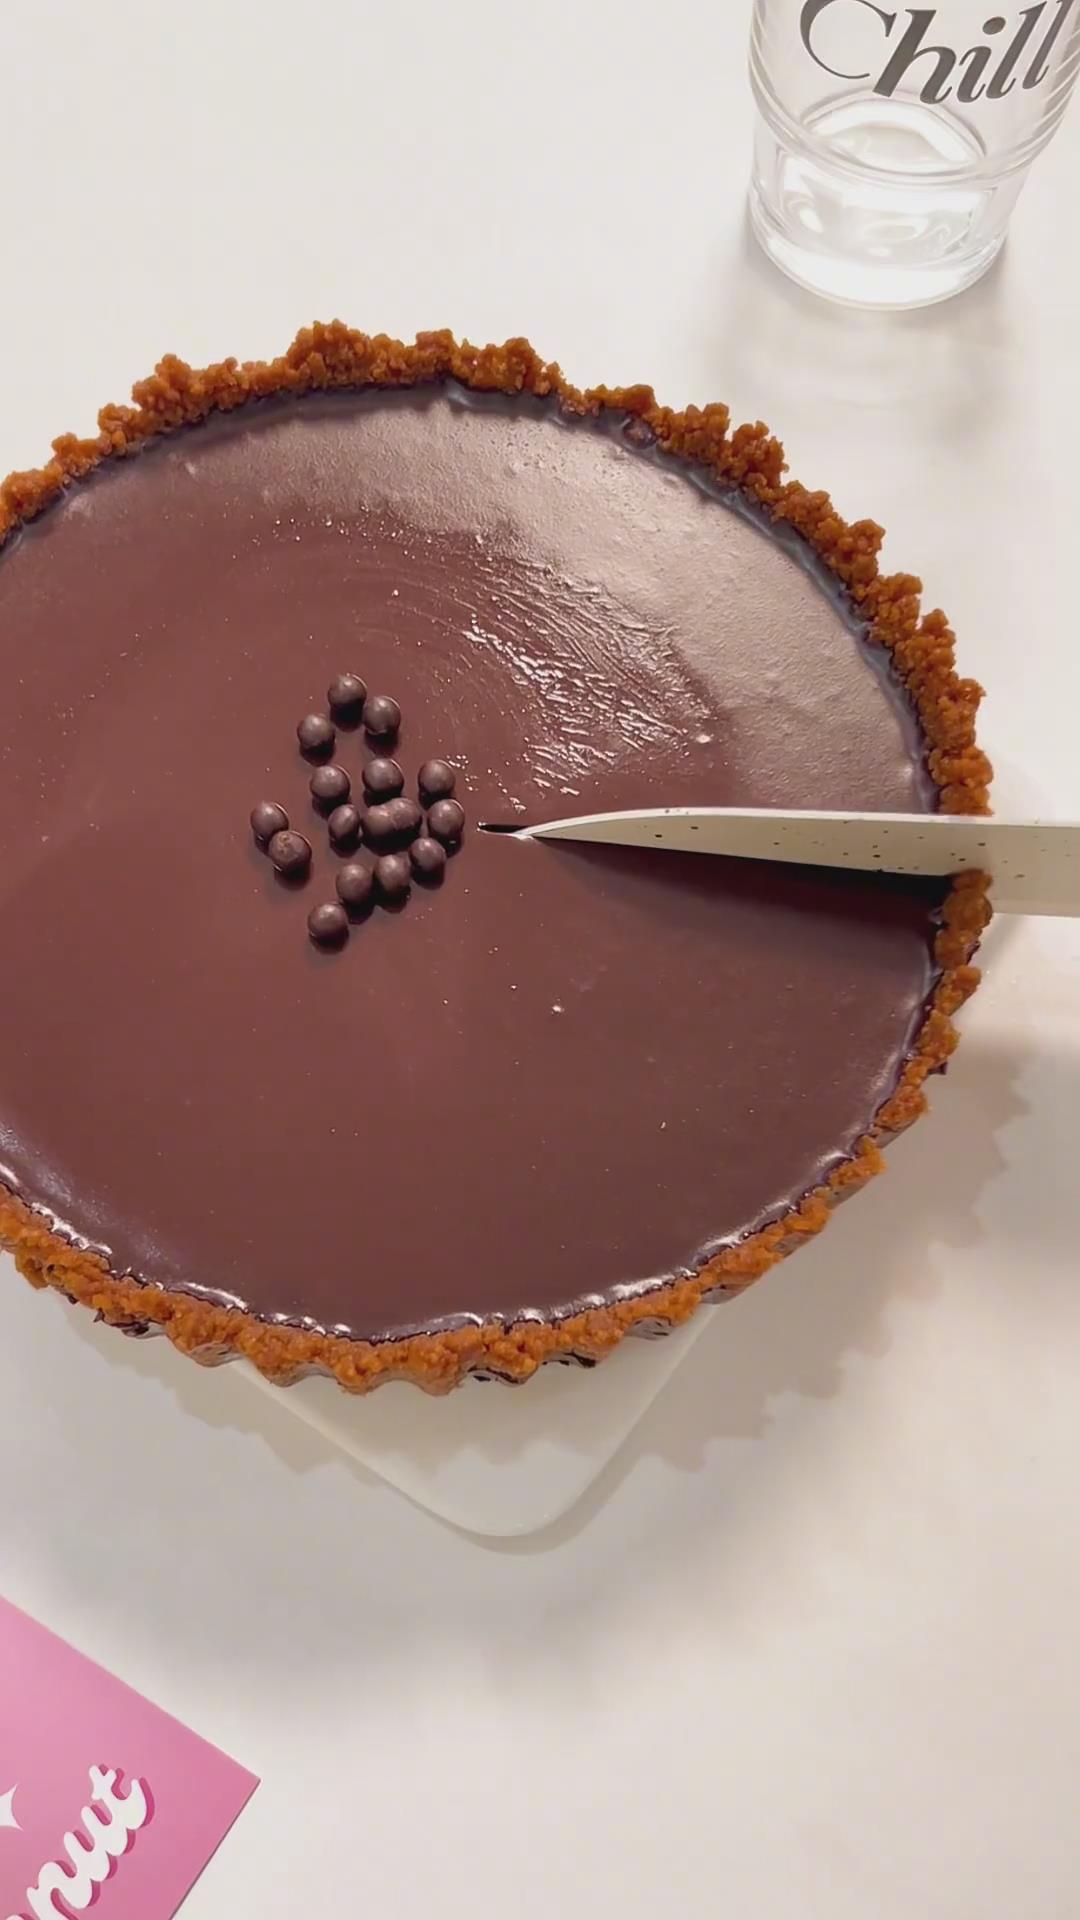
Every time my kids find out I’m planning to make something with chocolate, the whole house lights up.
They get genuinely excited — and honestly, I can’t blame them. They’ve inherited my love for chocolate in the strongest way possible.
We’ve already gone through countless batches of Chocolate Chip Cookies and Mini Chocolate Chip Muffins, and while those classics never disappoint, they’re just not enough to satisfy our chocolate cravings anymore.
We wanted something richer… something more indulgent… something that feels like a treat but doesn’t take a whole lot of effort.
I kept thinking, I want a truly amazing chocolate tart — but I absolutely do not want to turn on the oven.
So that’s how this no-bake chocolate tart was born.
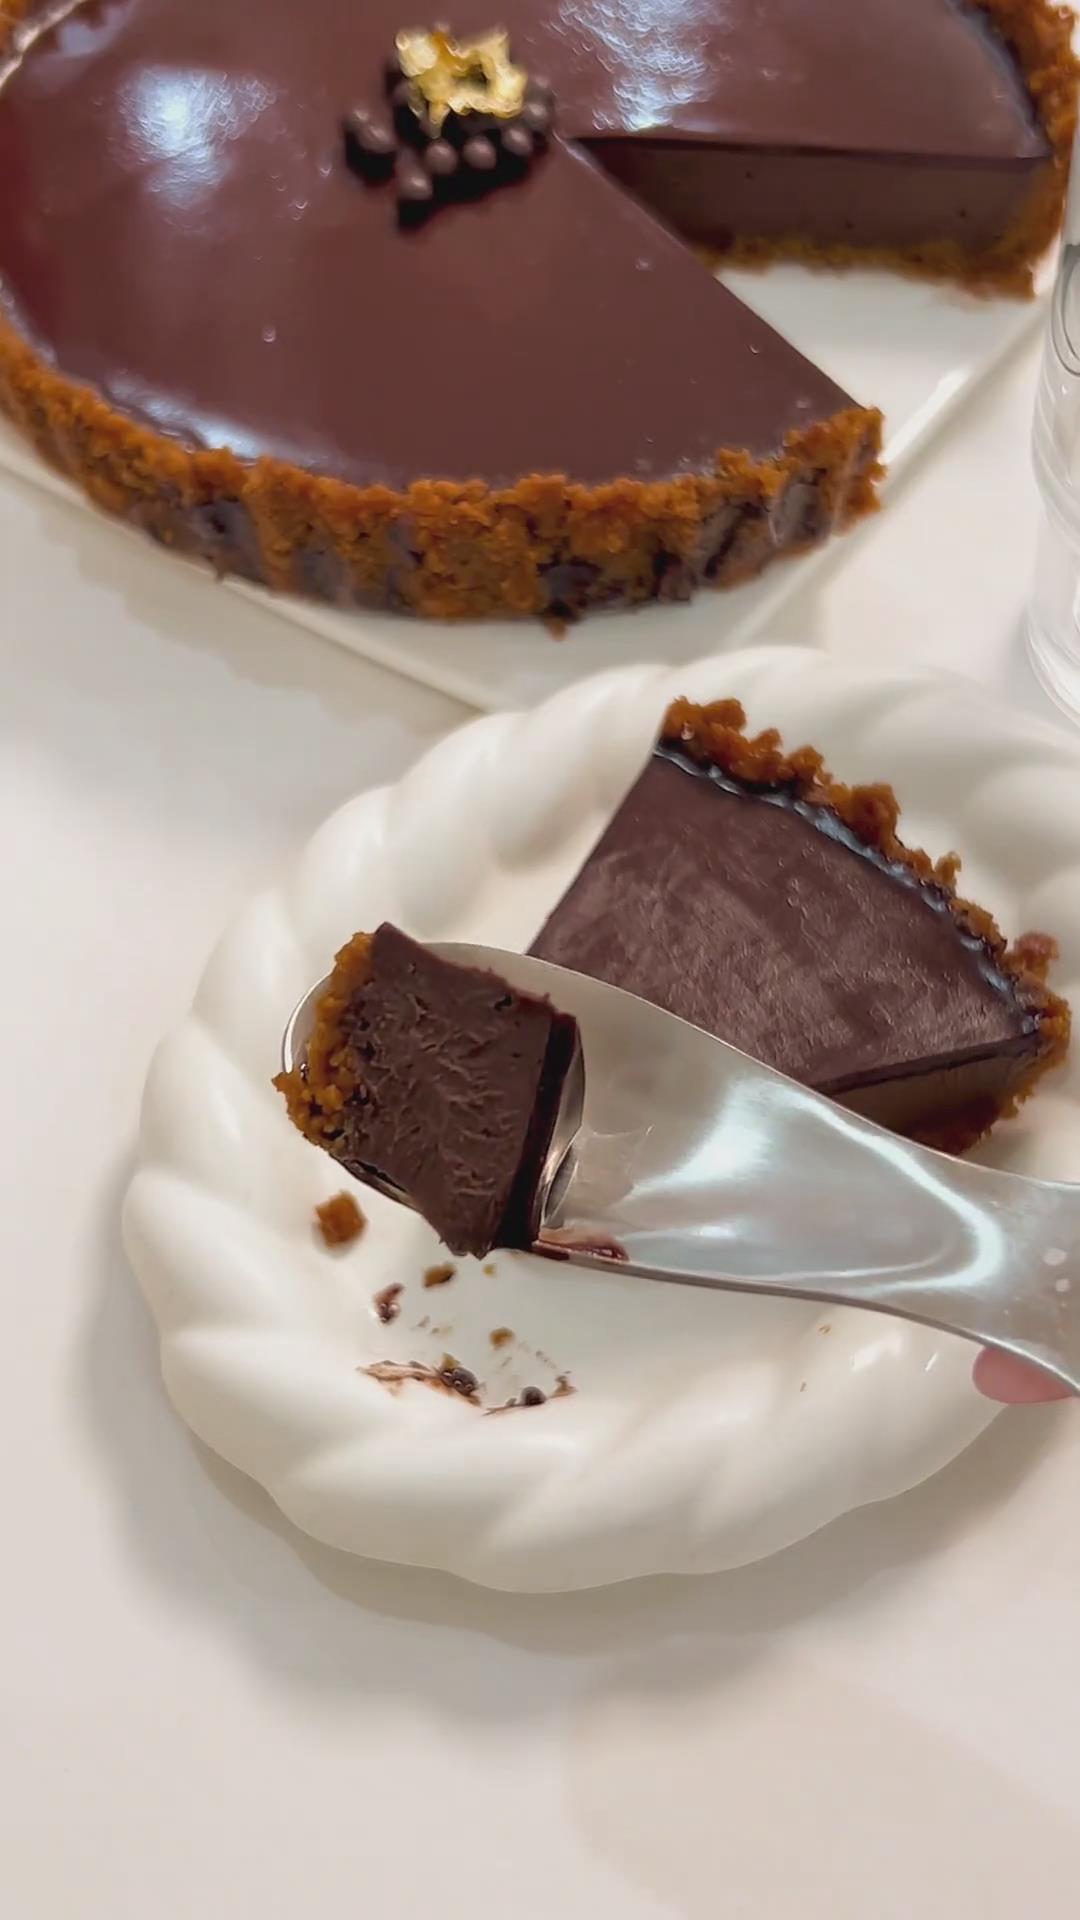
This tart is all about layers and textures that unfold perfectly with each bite:
- The bottom layer: a crunchy, caramel-y cookie crust that sets the foundation.
- The middle layer: a silky, luxuriously smooth dark chocolate filling that melts instantly on the tongue.
- The top layer: a glossy cocoa mirror that looks elegant and finishes the tart beautifully.
And the best part? Everything sets in the fridge. No baking, no complicated steps — just mix, pour, chill, and enjoy.
I also discovered a small bonus while making this: I still had some Lotus Biscoff cookies left over from my Biscoff Cookie Scones, so I crushed them up to make the crust.
Why You‘ll Love This Chocolate Tart
- No baking required — just mix, melt, pour, and chill.
- Three luxurious textures: a crisp cookie crust, a velvety chocolate center, and a glossy cocoa mirror top.
- Easy, approachable method that looks stunning and professional.
- Perfect make-ahead dessert (it needs chilling anyway!).
- Rich chocolate flavor layered in different intensities.
- Reliable results thanks to precise ratios and clear techniques.
Ingredients and Substitutions
Biscoff Cookie Crust
Biscoff cookies – Choose crisp Biscoff (or similar caramelized biscuits) because they create a firm, fragrant cookie base. If you don’t have Biscoff, digestives with a touch of brown sugar will add the sweetness and caramel note.
Unsalted butter – Melted butter binds the cookie crumbs tightly and helps the crust hold its shape after chilling.
Dark Chocolate Filling
Dark chocolate – Use around 58% cocoa for the perfect balance of sweetness and bitterness. If you prefer a deeper, richer flavor, 70% chocolate also works beautifully.
Heavy cream – A fat content between 30%–36% creates a silky, lump-free filling. I don’t recommend non-dairy whipping cream because it tends to separate or form grainy textures.
Unsalted butter – Essential for richness and a smooth, glossy finish. This ingredient shouldn’t be skipped.
Cocoa Mirror Glaze
Granulated sugar – Balances the bitterness of cocoa. You can reduce it slightly if you want a more intense chocolate taste.
Cocoa powder – Choose pure, unsweetened cocoa for a deeper flavor and a cleaner, shiny finish.
Hot milk – Around 80°C helps dissolve both the cocoa powder and sugar smoothly.
Gelatin sheet – Softened in cold water to help the glaze set into a smooth, shiny layer.
Chocolate pearls – Optional, but they add a lovely crunch and make the tart look polished and elegant.
How to Make a No-Bake Chocolate Tart
1. Prepare the Ingredients
Soak the gelatin sheet in cold water for 5 minutes until fully softened. Squeeze out excess water and set aside.
Melt 70g butter over a double boiler and let it cool slightly until warm.
2. Make the Caramel Cookie Crust
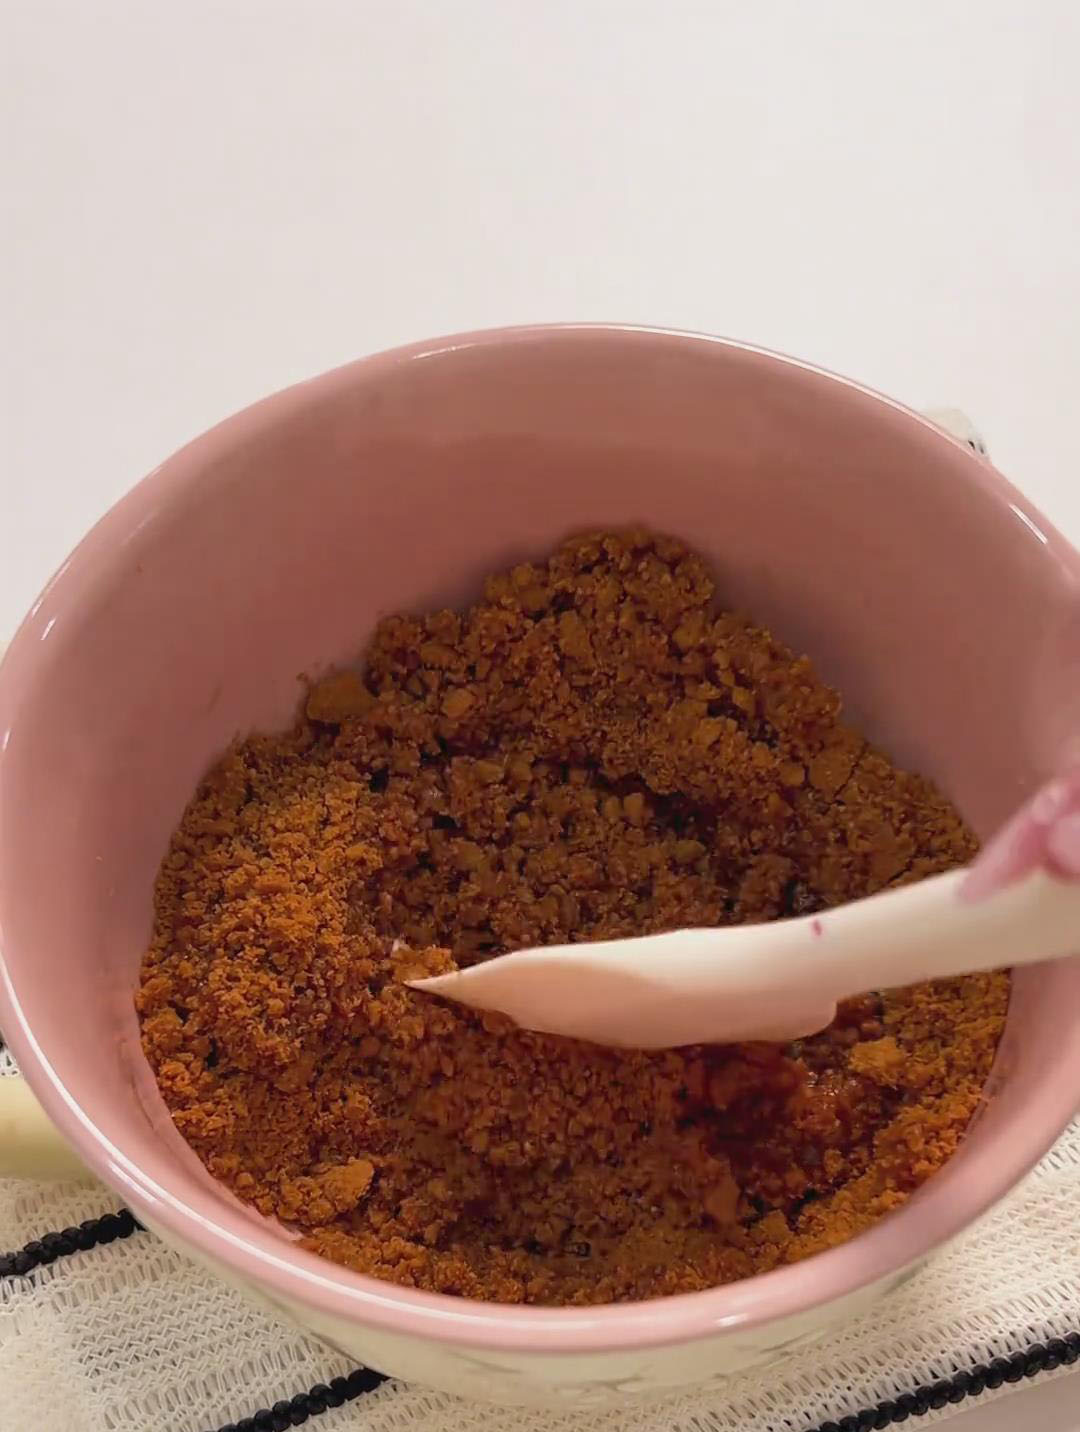
Add the Biscoff cookies to a large bowl and crush them using a smasher until very fine (large crumbs may cause the crust to crack).
Add the melted butter and stir with a silicone spatula until all crumbs are evenly coated.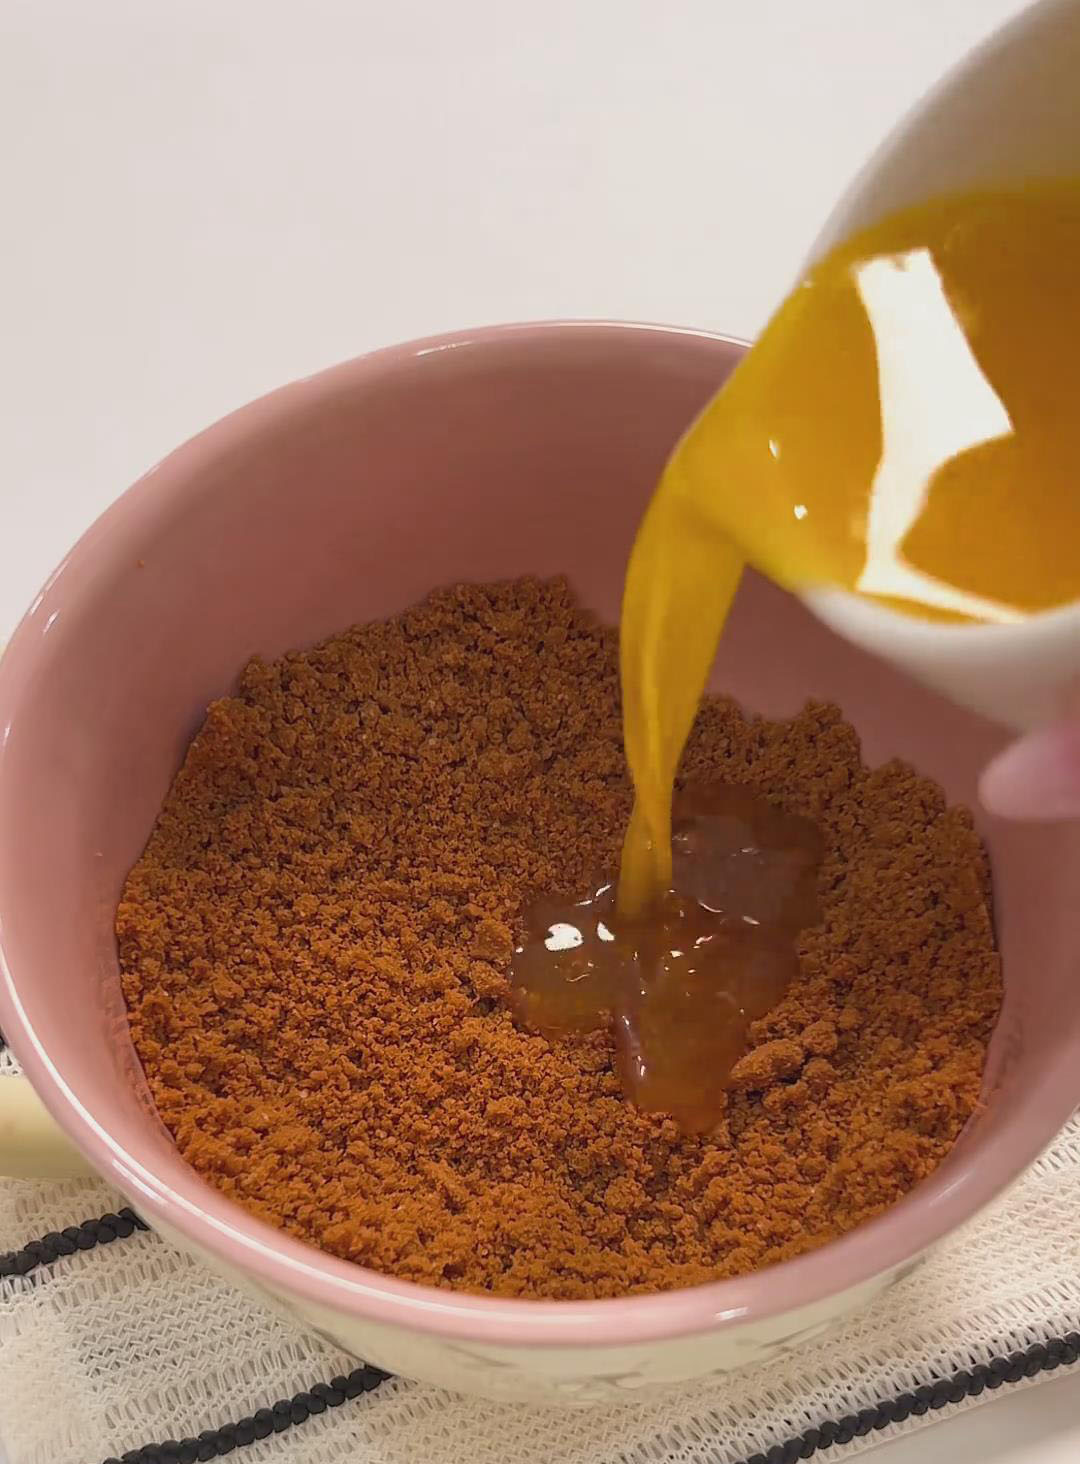
Transfer the mixture into an 8-inch tart pan and press firmly using the bottom of a glass to compact both the bottom and sides.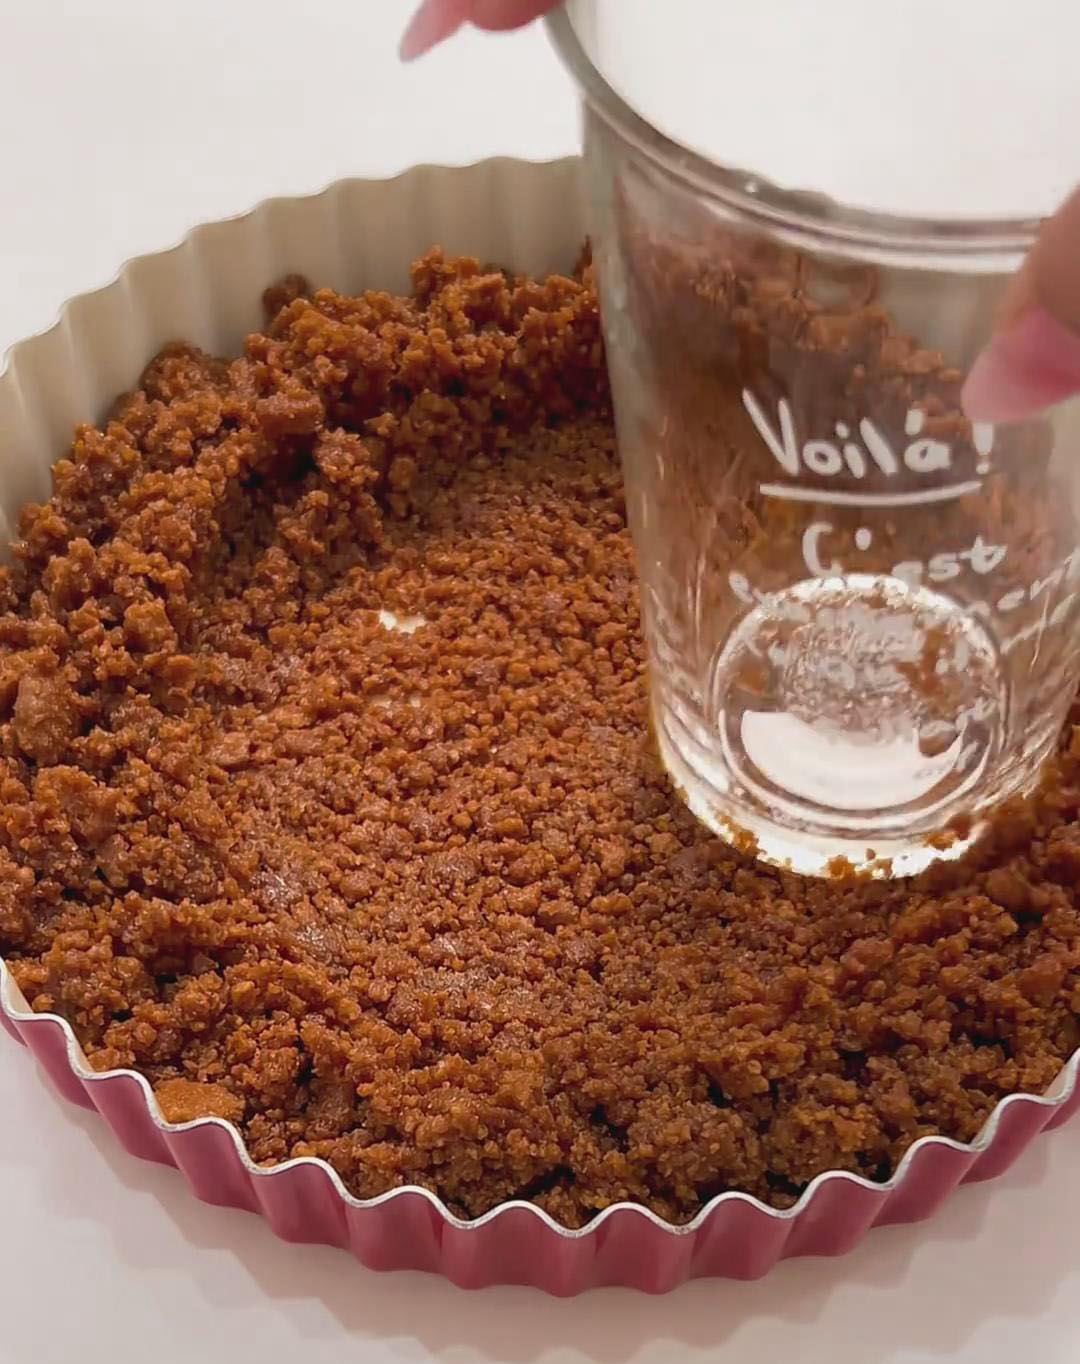
Refrigerate for 30 minutes to set.
3. Make the Dark Chocolate Filling
Add the dark chocolate pieces and heavy cream to a small pot or heatproof bowl. 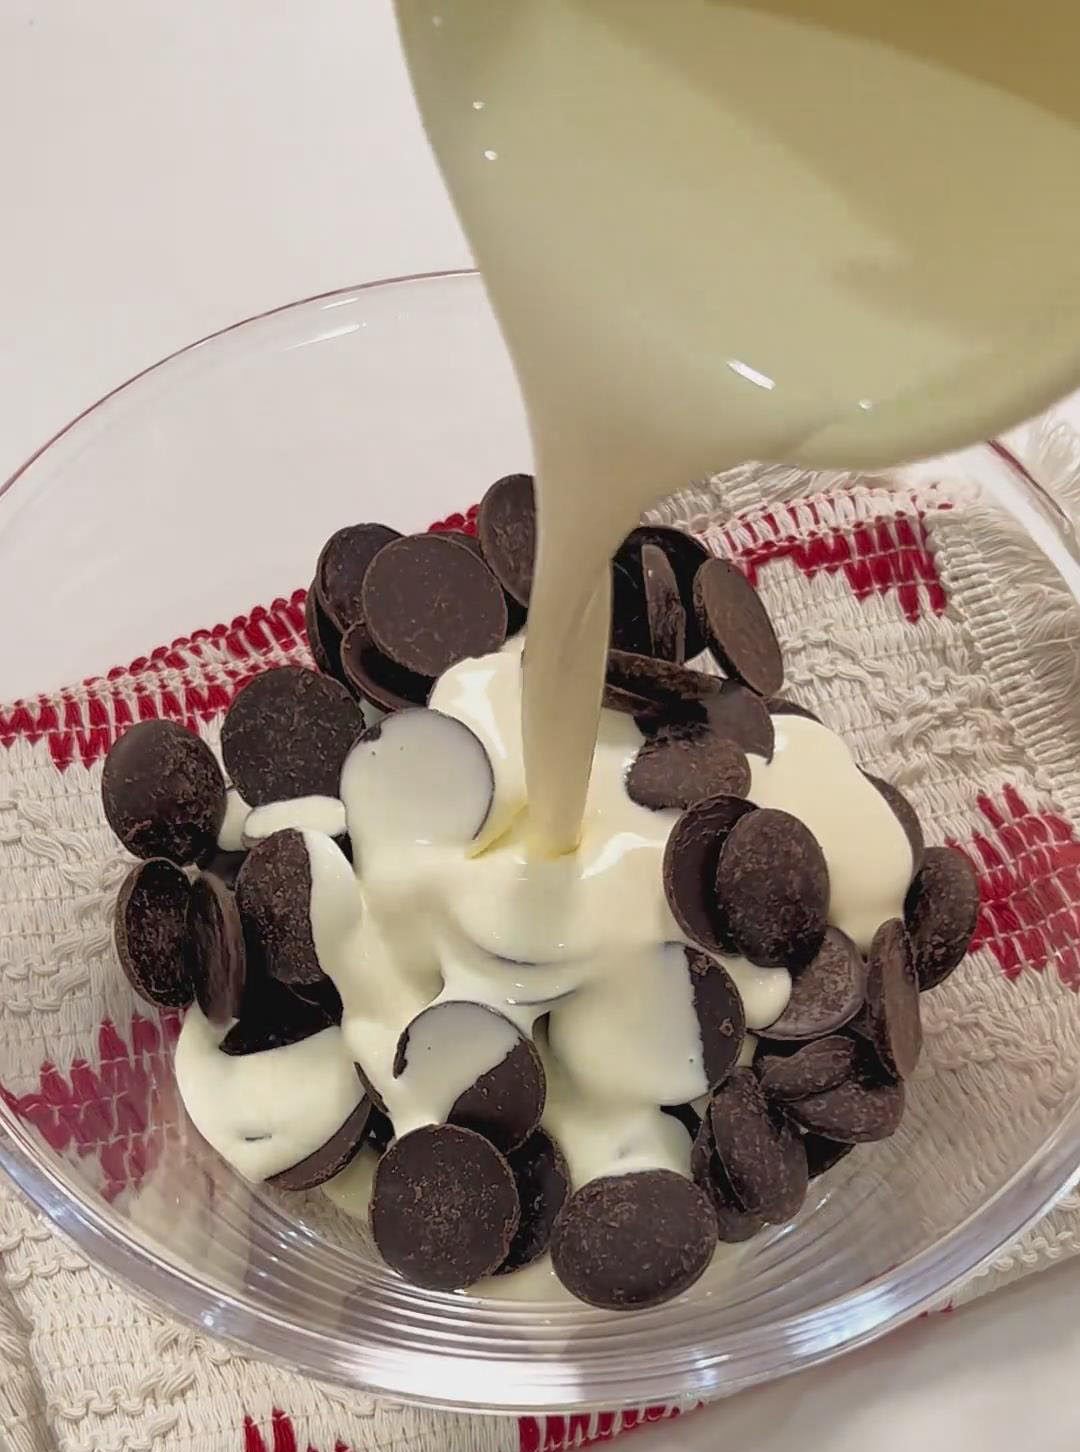
Melt over a double boiler, stirring constantly until completely smooth.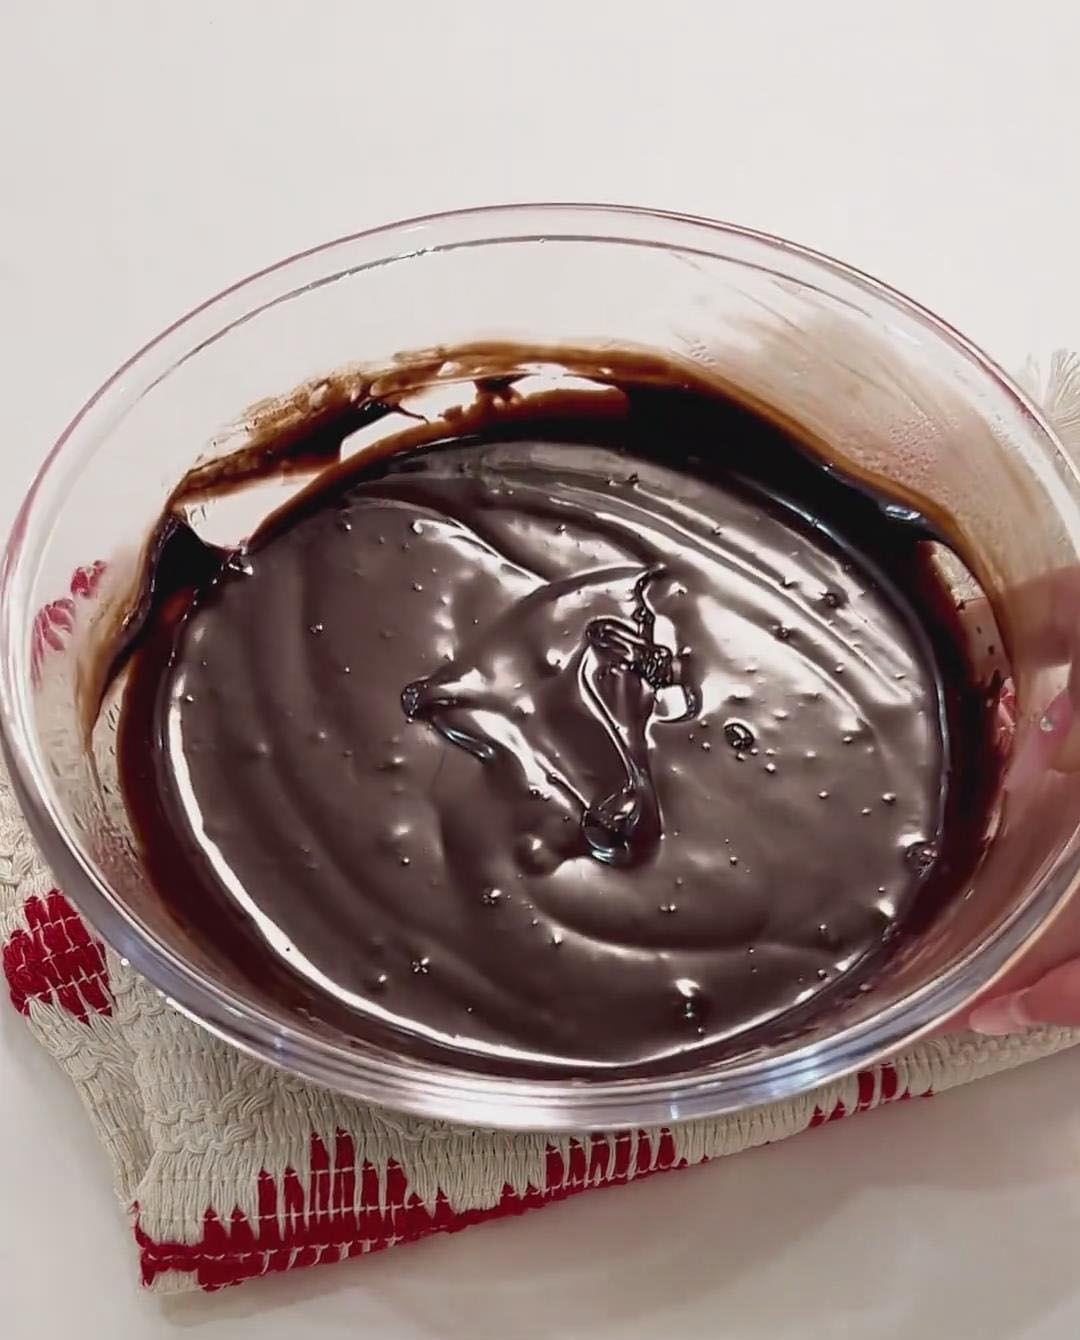
Add the butter and stir until silky and lump-free.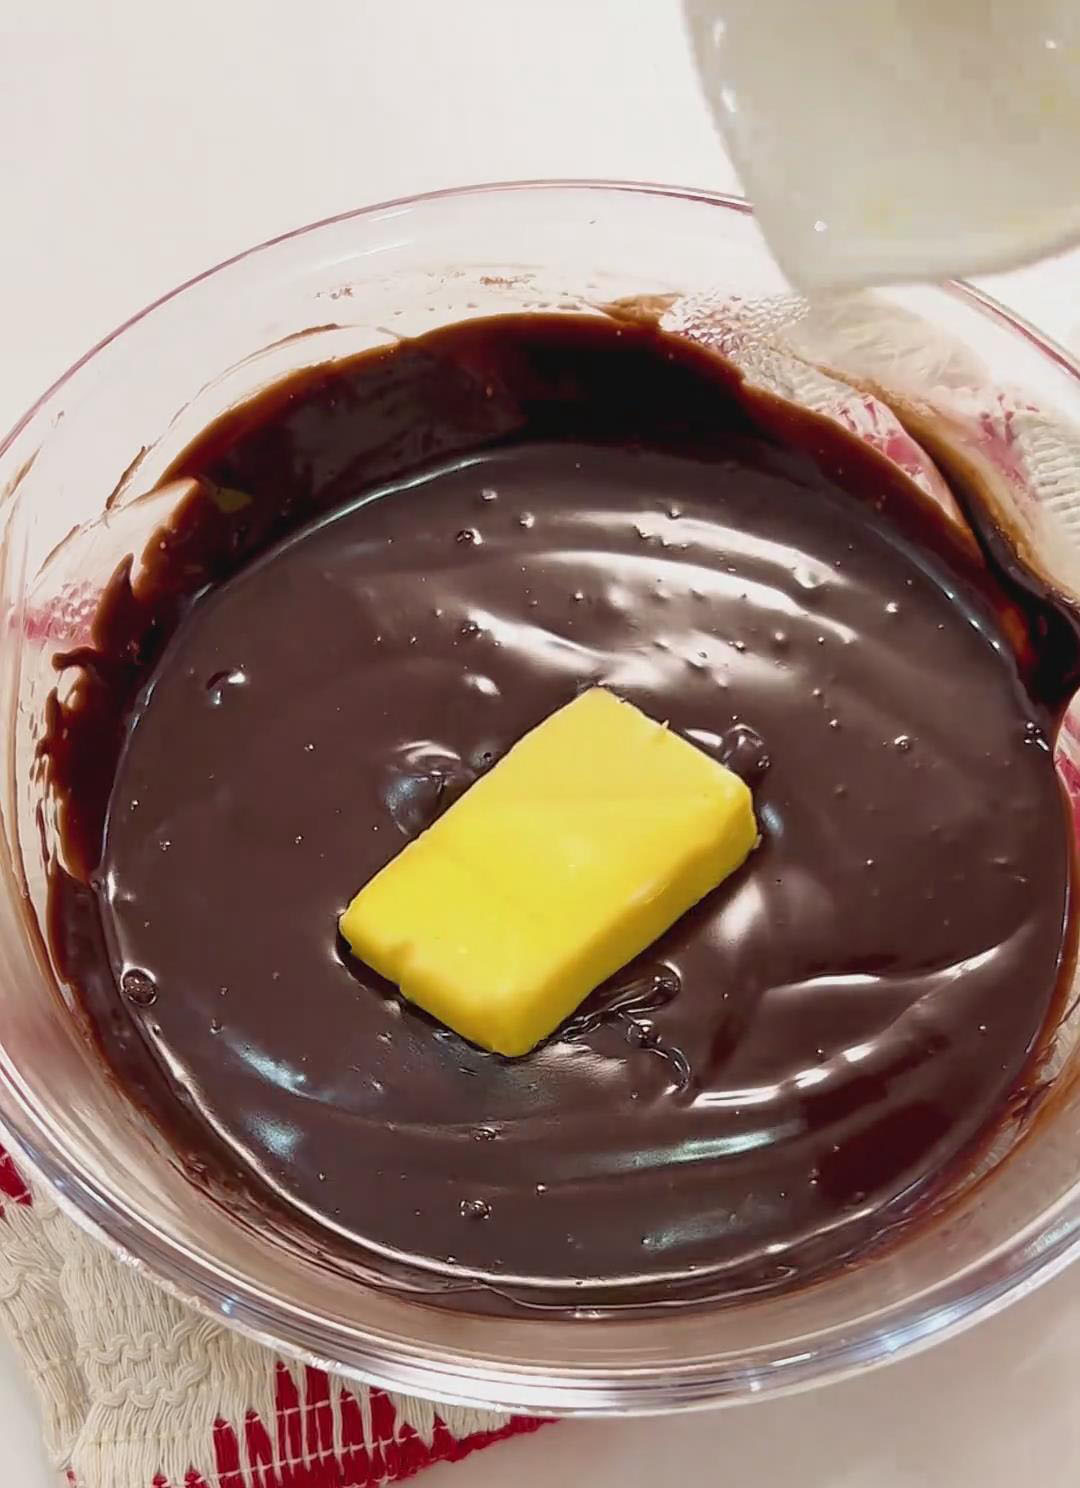
Pour the chocolate filling into the chilled cookie crust and gently tap to release air bubbles.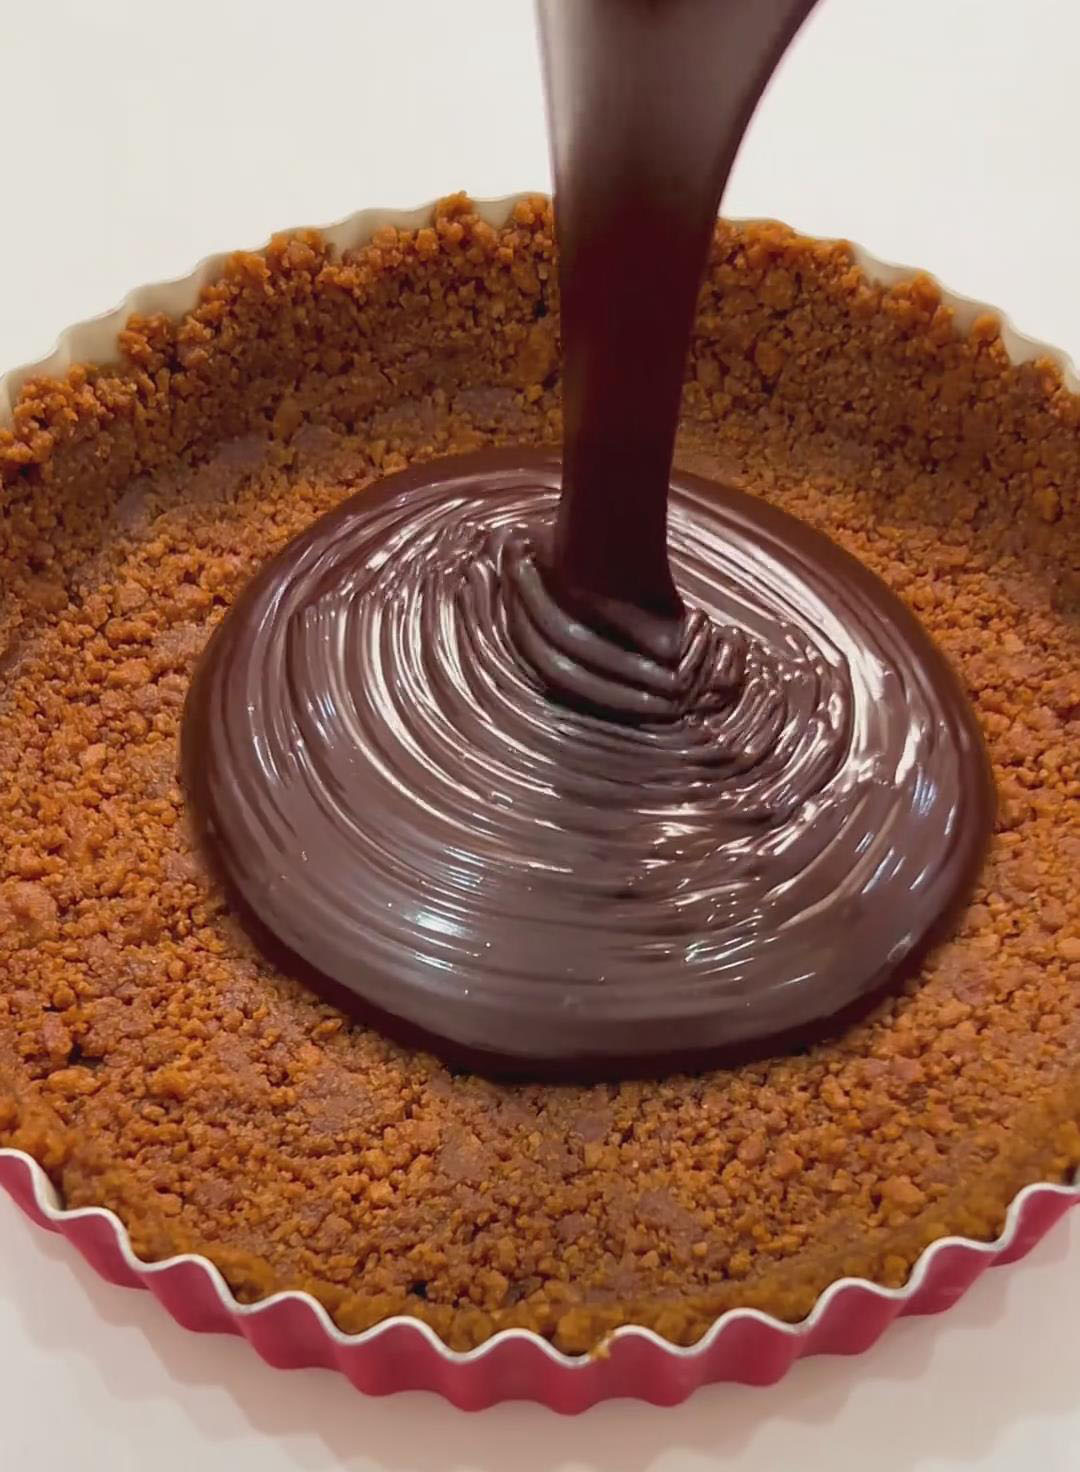
Refrigerate for 2 hours until fully set.
4. Make the Cocoa Mirror Glaze & Assemble
In a bowl, mix the sugar and cocoa powder. Add the hot milk and whisk until everything dissolves completely and the mixture is smooth.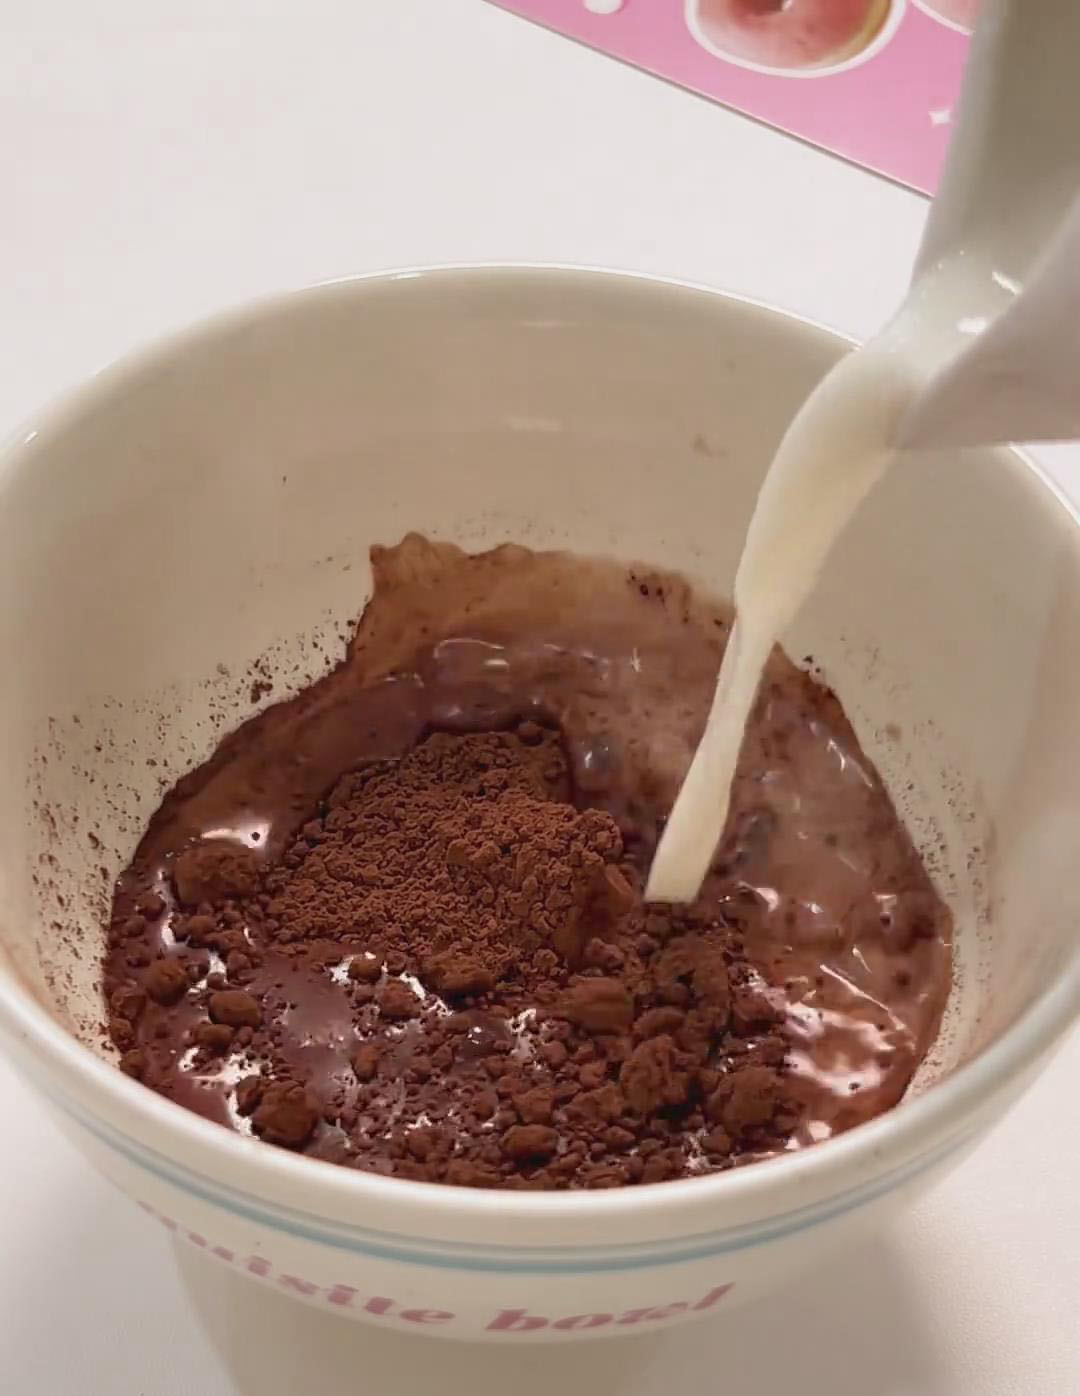
Add the softened gelatin sheet and stir quickly until fully dissolved.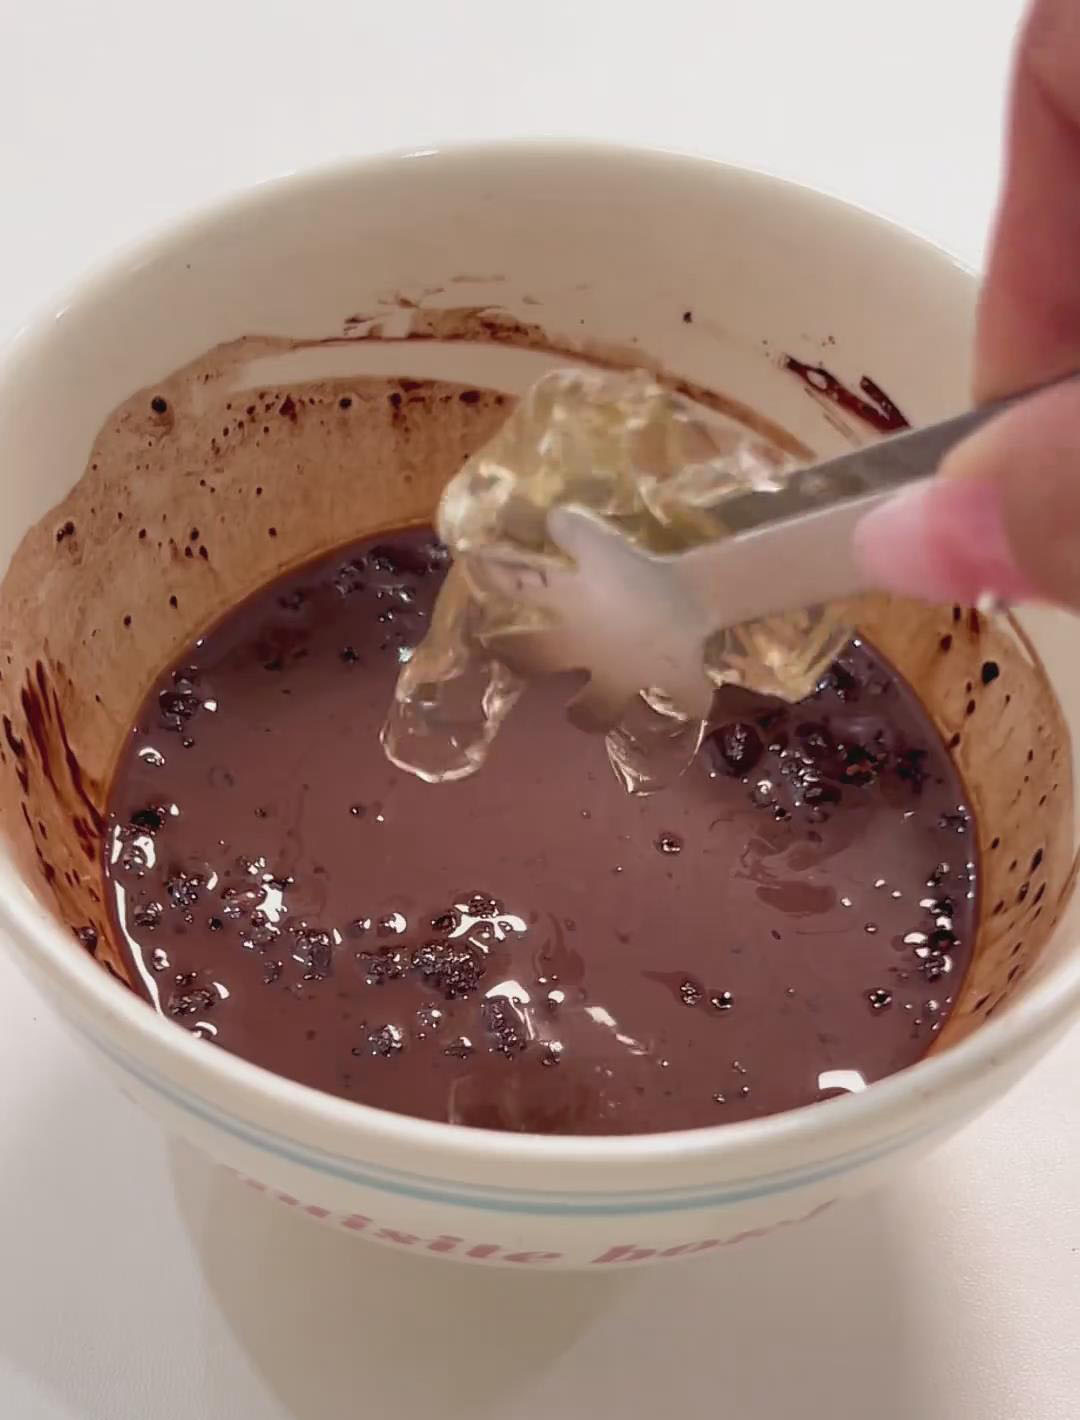
Strain the glaze through a fine sieve to remove any lumps or bubbles — this step ensures the mirror-smooth finish.
Pour the glaze gently over the fully set chocolate filling, tilting the pan slightly to help the glaze spread evenly.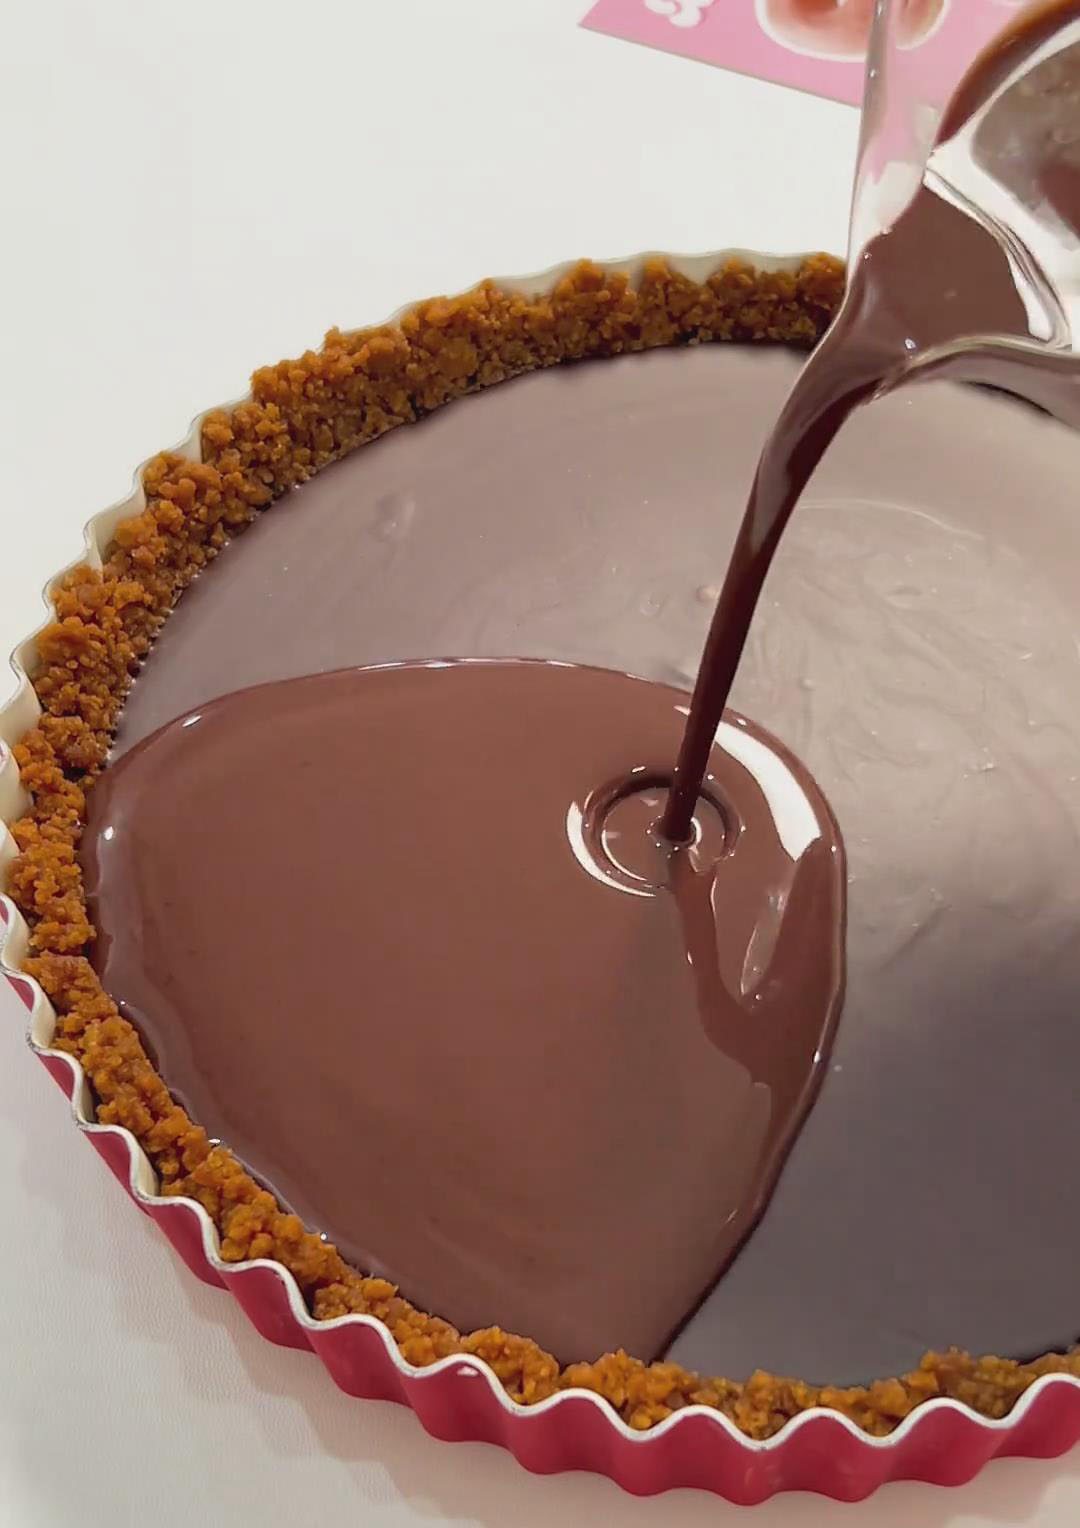
Refrigerate for another 30 minutes until the glaze is set.
Decorate with chocolate pearls if desired.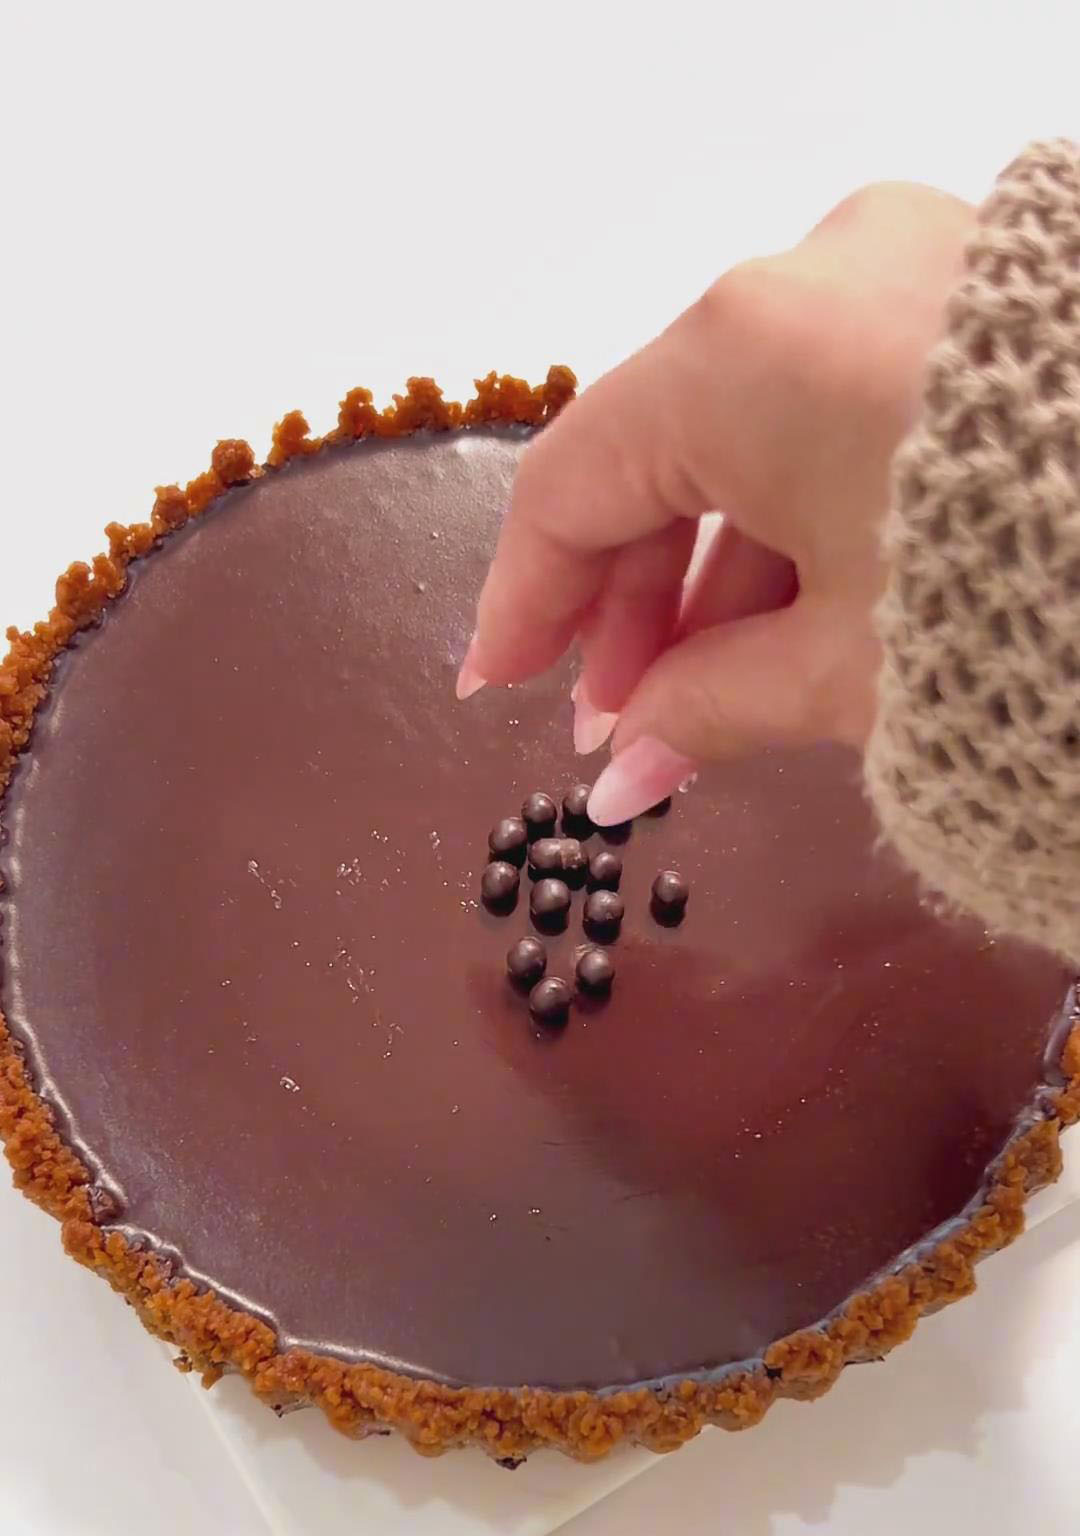
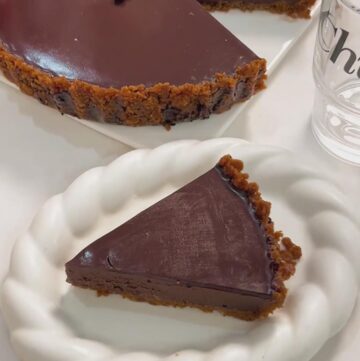
5. Unmold & Serve
Warm the sides of the tart pan using a hairdryer for 30 seconds or wrap with a warm towel to slightly loosen the edges.
Remove the ring and base, transfer the tart to a serving plate, slice, and enjoy.
Tips & Tricks
- Crush the cookies finely — large crumbs prevent the crust from sticking together and make it fragile.
- Use exactly 70g butter for the base — too much butter makes it soft; too little makes it crumbly.
- Strain the mirror glaze to ensure no grains or bubbles remain.
- Tap the tart gently after pouring the filling to release hidden air bubbles.
- Chill fully at every stage — patience = clean layers and professional results.
- Warm the tart pan before unmolding to prevent cracks and ensure clean edges.
Frequently Asked Questions
Why is my cookie crust falling apart?
Most likely the cookies weren’t finely crushed or there wasn’t enough butter to bind everything. Pressing firmly is also important.
Why isn‘t my mirror glaze smooth?
This usually happens if the glaze wasn’t fully dissolved or not strained before pouring. Cocoa powder especially needs proper whisking.
How long can I store the chocolate tart?
Refrigerate for 3–4 days or freeze for up to 7 days. Thaw slightly before serving.
Can I make this ahead?
Yes! This tart is perfect for making 1–2 days in advance because the flavors deepen and the layers set beautifully.
Love no-bake sweets? Don’t miss these:
- No-Bake Orange Bavarois
- Oreo Chocolate Mousse Cups
- Lemon Cheesecake With Yogurt(No-Bake, 6-Inch)
- Matcha Mochi Bites (No-Bake)
- Easy No-Bake Matcha Cheesecake with Oreos
- Simple No-Bake Oreo Cheesecake
- Mango Cheesecake Mousse Cups
- Strawberry Matcha Lava Cake (No-Bake)
- Layered Lemon Cheesecake Mousse (No-Bake)
- No-Bake Blueberry Cheesecake Mousse Recipe
- No-Bake Matcha Chocolate Tart for the Ultimate Dessert
- No-Bake Lemon Yogurt Cheesecake
The Easiest No-Bake Chocolate Dessert (3 Layers!)
Ingredients
For the Cookie Crust
- 170 g caramel cookies like Biscoff
- 70 g unsalted butter melted
- For the Dark Chocolate Ganache Filling
- 250 g dark chocolate 58% cocoa, finely chopped
- 190 g whipping cream heavy cream
- 30 g unsalted butter cubed
For the Cocoa Mirror Glaze
- 20 g fine granulated sugar
- 10 g unsweetened cocoa powder
- 75 g whole milk very hot (approx. 80°C/176°F)
- 3 g gelatin sheets
For Decoration (Optional)
- Chocolate crunchy pearls shaved chocolate, or fresh berries
Instructions
Prepare the Ingredients
- Soak the gelatin sheet in cold water for 5 minutes until fully softened. Squeeze out excess water and set aside.
- Melt 70g butter over a double boiler and let it cool slightly until warm.
Make the Caramel Cookie Crust
- Add the Biscoff cookies to a large bowl and crush them using a smasher until very fine (large crumbs may cause the crust to crack).
- Add the melted butter and stir with a silicone spatula until all crumbs are evenly coated.
- Transfer the mixture into an 8-inch tart pan and press firmly using the bottom of a glass to compact both the bottom and sides.
- Refrigerate for 30 minutes to set.
Make the Dark Chocolate Filling
- Add the dark chocolate pieces and heavy cream to a small pot or heatproof bowl. Melt over a double boiler, stirring constantly until completely smooth.
- Add the butter and stir until silky and lump-free.
- Pour the chocolate filling into the chilled cookie crust and gently tap to release air bubbles.
- Refrigerate for 2 hours until fully set.
Make the Cocoa Mirror Glaze & Assemble
- In a bowl, mix the sugar and cocoa powder. Add the hot milk and whisk until everything dissolves completely and the mixture is smooth.
- Add the softened gelatin sheet and stir quickly until fully dissolved.
- Strain the glaze through a fine sieve to remove any lumps or bubbles — this step ensures the mirror-smooth finish.
- Pour the glaze gently over the fully set chocolate filling, tilting the pan slightly to help the glaze spread evenly.
- Refrigerate for another 30 minutes until the glaze is set.
- Decorate with chocolate pearls if desired.
Unmold & Serve
- Warm the sides of the tart pan using a hairdryer for 30 seconds or wrap with a warm towel to slightly loosen the edges.
- Remove the ring and base, transfer the tart to a serving plate, slice, and enjoy.
Leave a Reply