
This baked blueberry cheesecake is ultra creamy with a crunchy Biscoff crust and a glossy homemade blueberry sauce that flows beautifully over each slice. Absolutely irresistible!
Baked Blueberry Cheesecake with Fresh Blueberry Sauce
As you know, I love using fresh fruits in my desserts.
And today’s star is blueberry, one of my all-time favorite fruits.
I made this Blueberry Cheesecake for my family, and it instantly became one of their top picks.
If you enjoyed my No-Bake Blueberry Cheesecake Mousse, then trust me—you don‘t want to miss this one.
For the topping, I make a fresh blueberry sauce from scratch using real blueberries.
It’s bright, glossy, tangy, and the perfect contrast to the creamy cheesecake.
Just like my no-bake chocolate tart, I use Lotus Biscoff cookies for the crust.
This cheesecake is not just delicious—it’s pretty too, with layers that look like they belong in a bakery display:
- A crisp, fragrant caramelized cookie crust
- A smooth, velvety, rich cheesecake layer
- A thick, sweet-tart blueberry sauce on top
And the moment you slice into it, the blueberry topping slowly cascades down the sides like a mini blueberry waterfall.
Beautiful, easy, and absolutely irresistible.

Why You‘ll Love This Recipe
- Beautiful “waterfall” drip topping — A glossy blueberry sauce that drips naturally down the sides like a bakery-style creation.
- Perfect creamy texture — Soft, silky, and lightly set, with a gentle wobble in the center.
- Simple ingredients, big flavor — Rich cream cheese filling, Biscoff crust, and fresh blueberries.
- Beginner-friendly — No water bath, no special techniques, and everything comes together in one bowl.
- Make-ahead perfection — Chills overnight for the best results, making it ideal for parties, birthdays, or gatherings.
Ingredients & Substitutions
Biscoff Cookie Crust
- Lotos Biscoff Cookies – I love using these spiced caramel cookies for the crust. If you can’t find Biscoff, use digestive biscuits and add about 8 g brown sugar to mimic Biscoff’s caramel flavor.
- Unsalted Butter – Melt over hot water, then let it cool to warm. This helps the crumbs bind firmly without becoming greasy.
Cheesecake Filling
- Cream Cheese – Soften until a finger can press in easily. A high-quality brand like Kraft or Elle & Vire gives the smoothest, lump-free filling.
- Granulated Sugar – Adjust to your preference. Add more if you like a sweeter cheesecake, or reduce slightly for a lighter sweetness.
- Eggs – Use room-temperature eggs to help everything emulsify smoothly and prevent curdling.
- Cornstarch – Provides structure and prevents the cheesecake from sinking. Avoid omitting it.
- Heavy Cream – Choose cream that’s at least 30–36% fat. It gives your cheesecake that luxuriously silky and creamy texture.
Blueberry Sauce
- Fresh Blueberries – Use plump, sweet-tart berries. You can reserve some whole berries for decoration.
- Granulated Sugar – Adjust depending on the tartness of your blueberries.
- Lemon Juice – Adds brightness and balances the sweetness while cutting through the richness.
How to Make Blueberry Waterfall Cheesecake
1. Prep Work
Remove the cream cheese from the fridge 1 hour before baking so it softens completely—your finger should press in easily.
Place the butter in a small bowl and heat it in the microwave on medium-low for 30 seconds, or melt it over a double boiler until completely liquid.
Line the bottom of a 6-inch springform pan with a circle of parchment paper.
Preheat your oven to 180°C (356°F) and allow it to stabilize for 10 minutes.
Wash the blueberries and pat them thoroughly dry.
2. Make the Cookie Crust
Add the Biscoff cookies to a bowl and crush them with a rolling pin until very fine with no big chunks left.
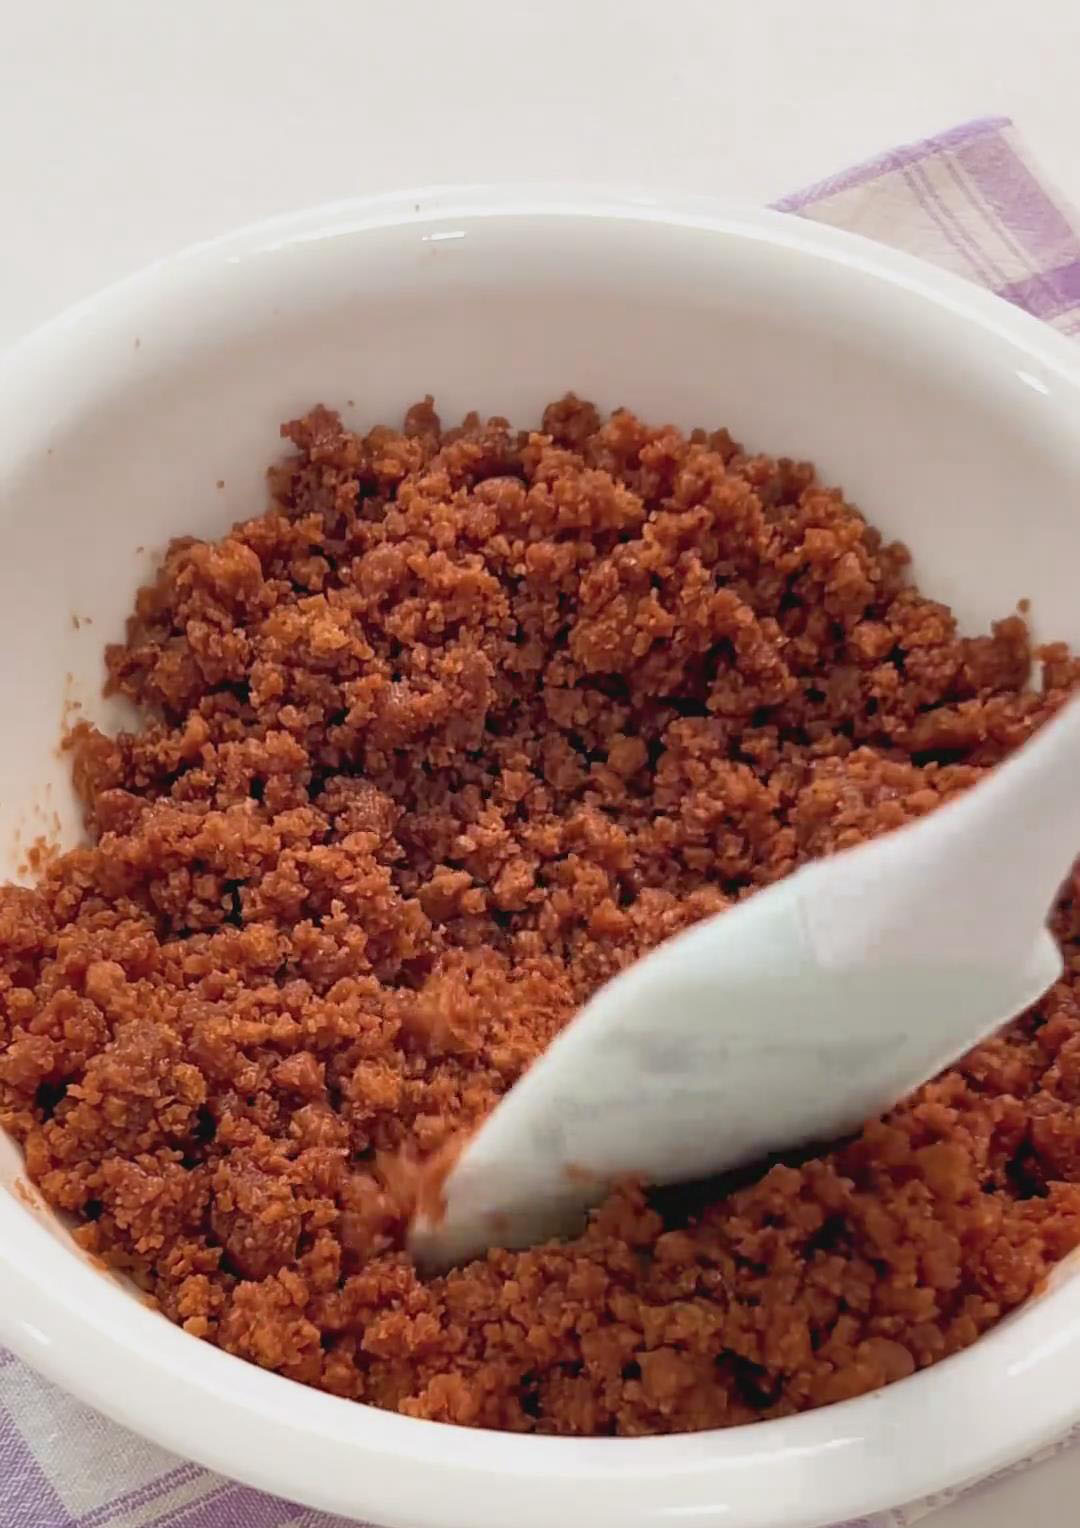
Pour in the melted butter and mix until every crumb is evenly coated.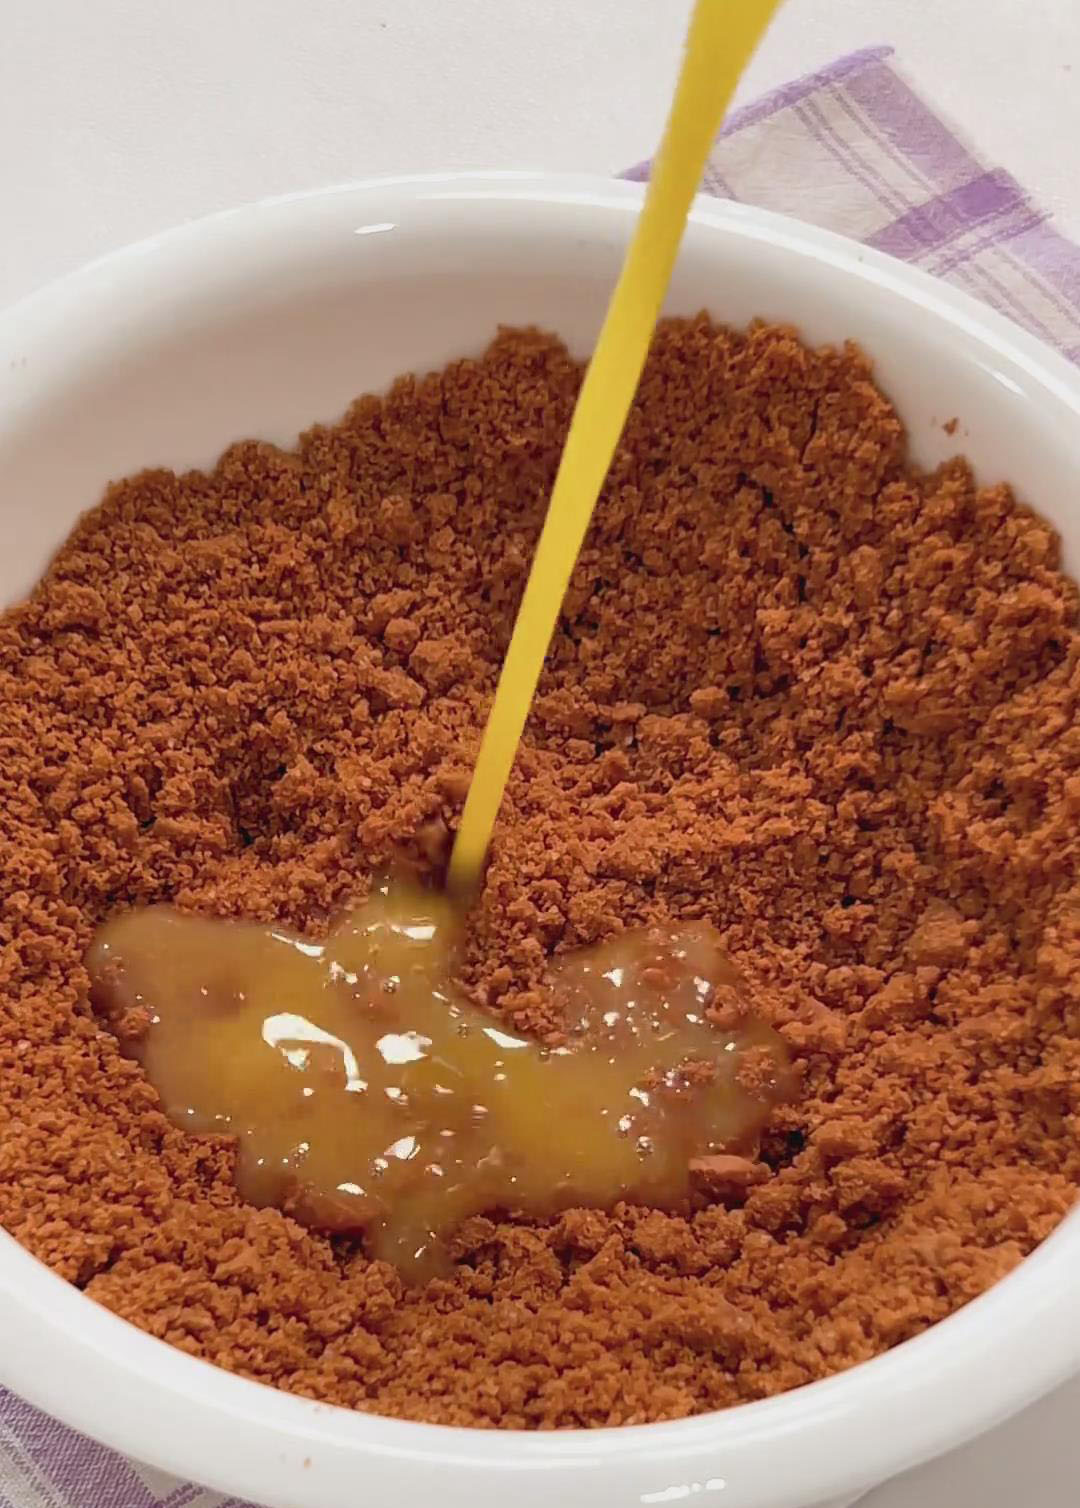
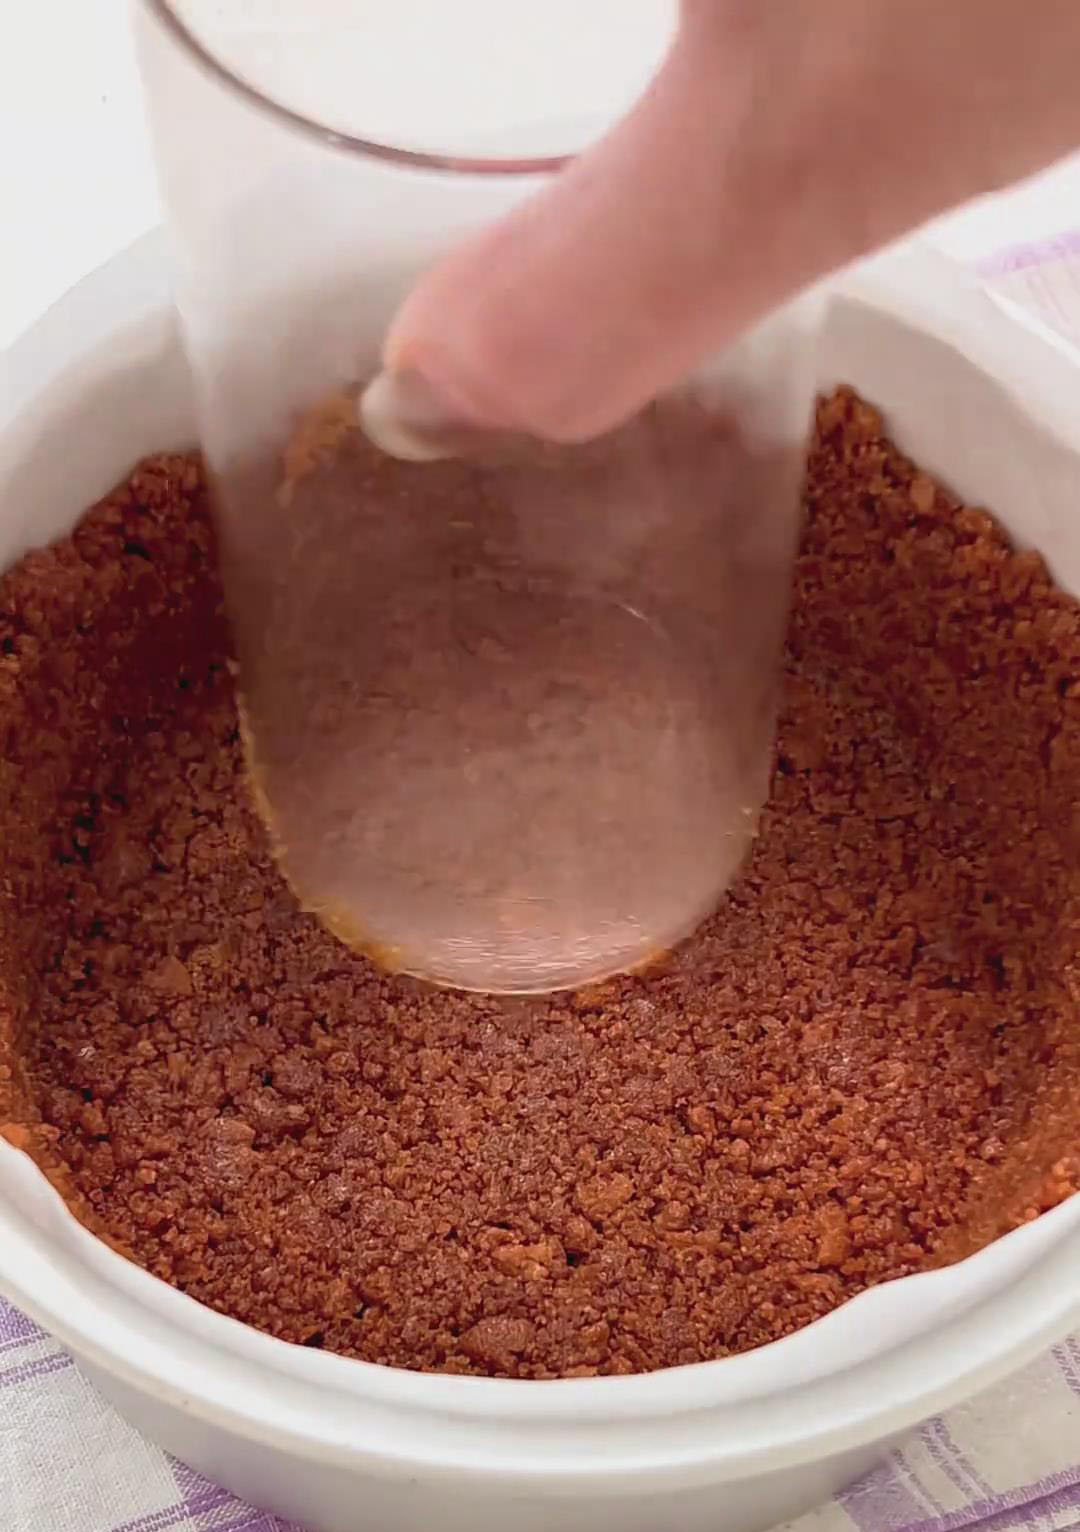
Transfer the mixture into a 6-inch pan lined with parchment paper.
Press firmly using the bottom of a glass to compact the crust and build clean edges.
Freeze for 10 minutes to help the crust firm up quickly.
3. Make the Cheesecake Filling
In a mixing bowl, combine the softened cream cheese and sugar.
Use a spatula to mix until smooth and lump-free.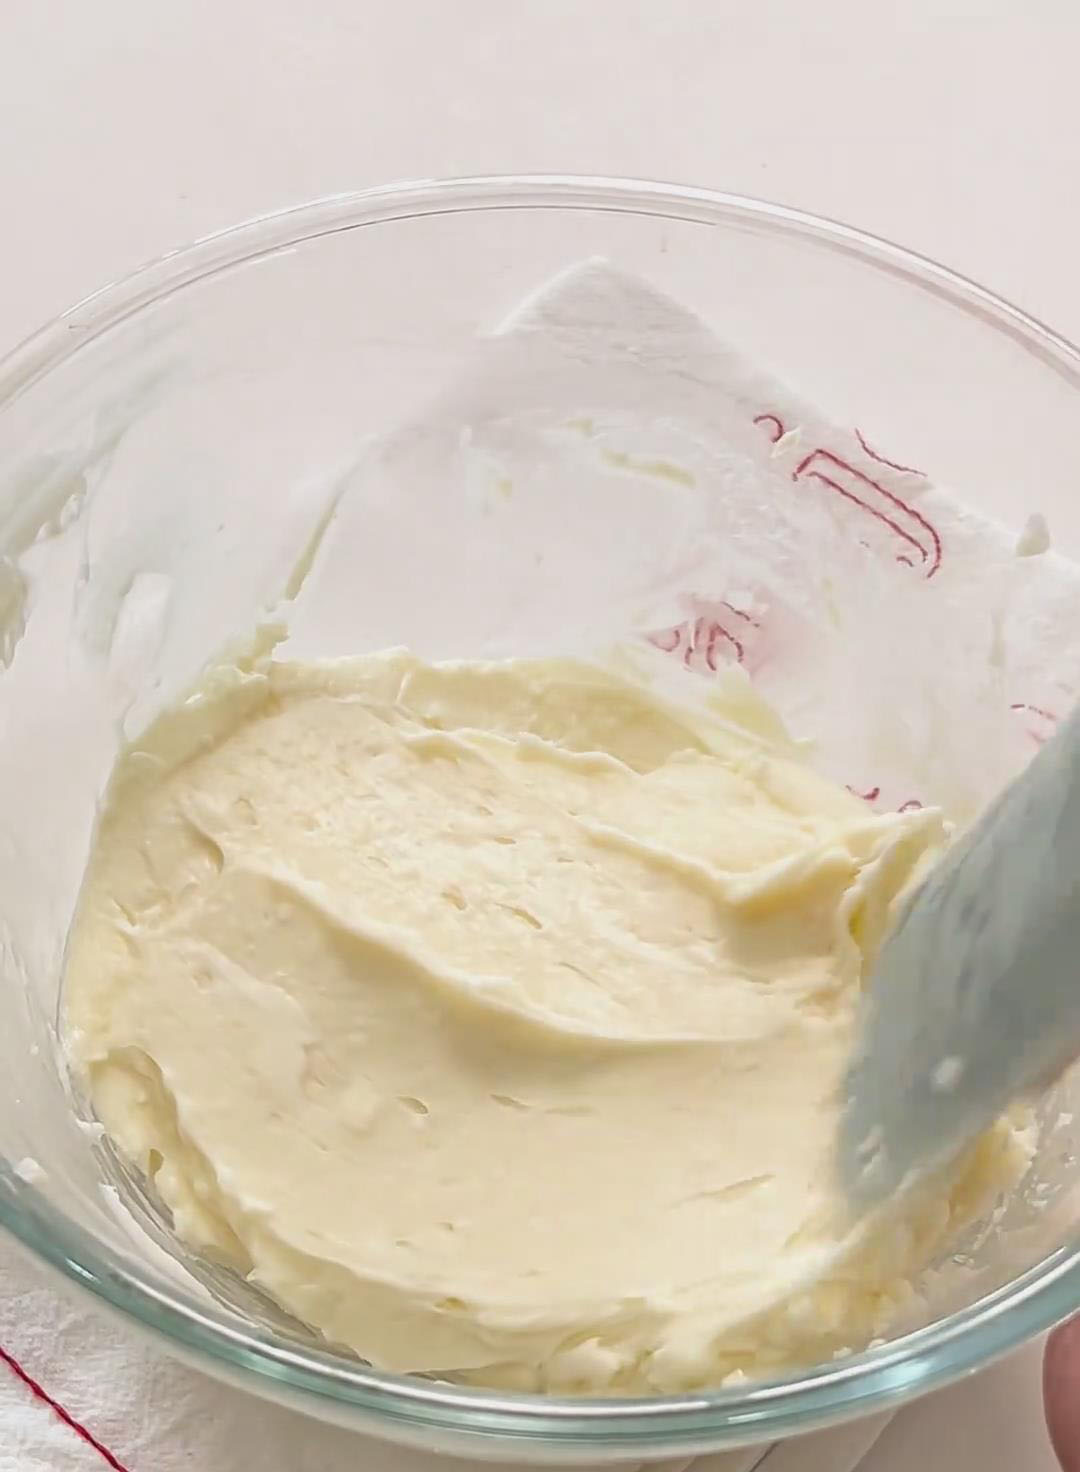
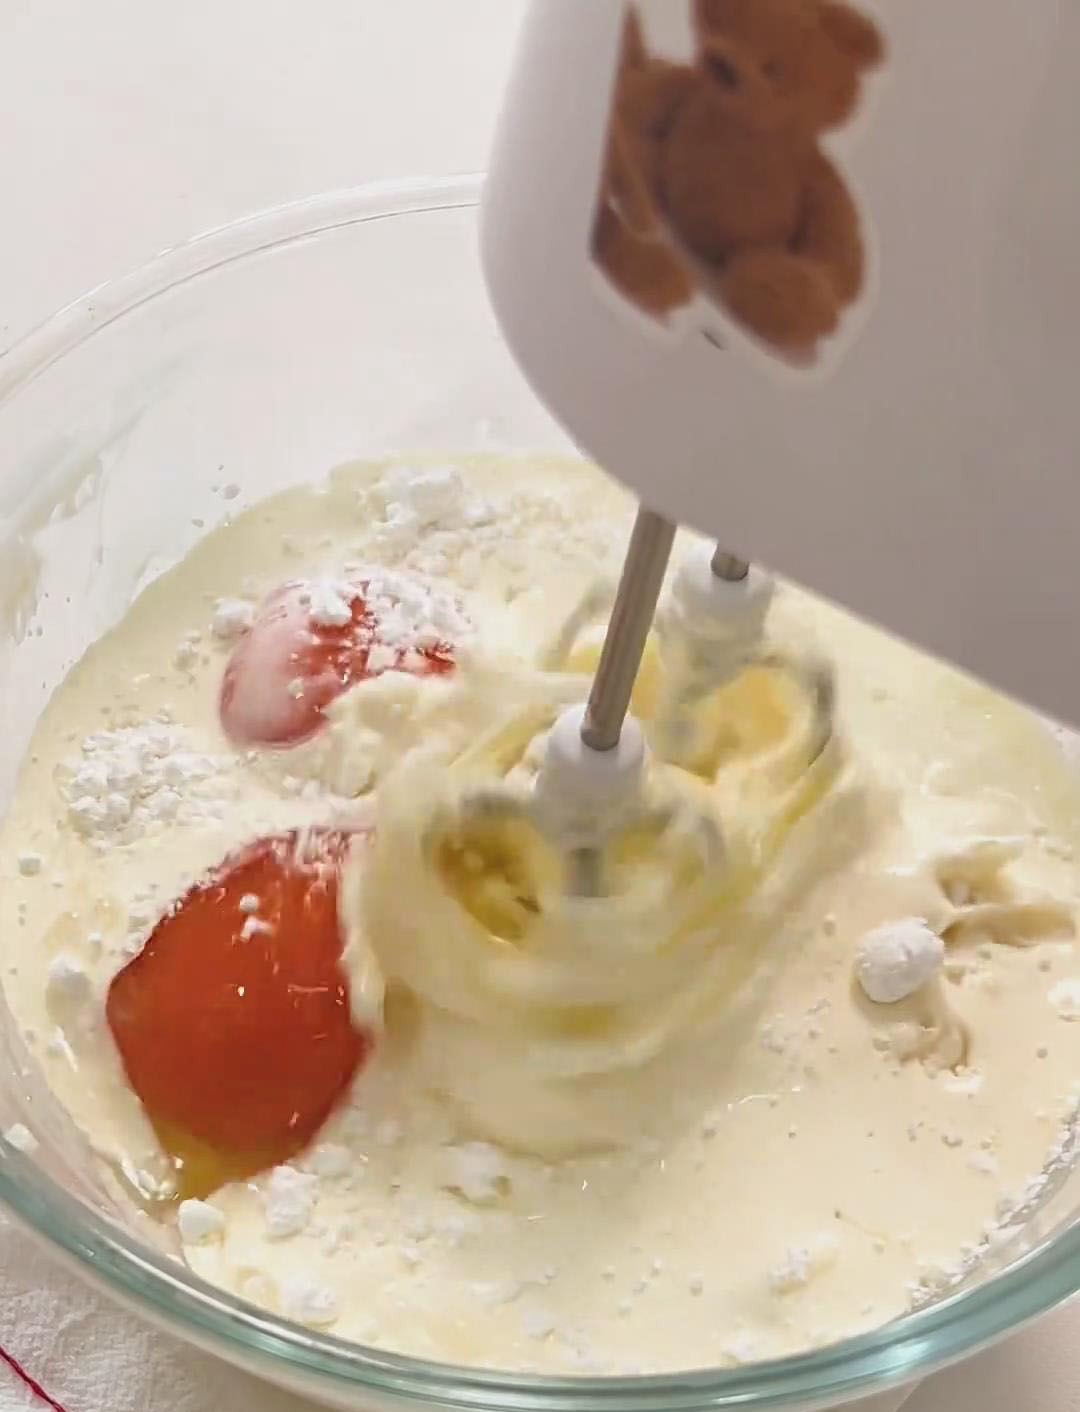
Add the eggs, sift in the cornstarch, pour in the heavy cream, and mix on low speed with an electric mixer until fully combined and silky.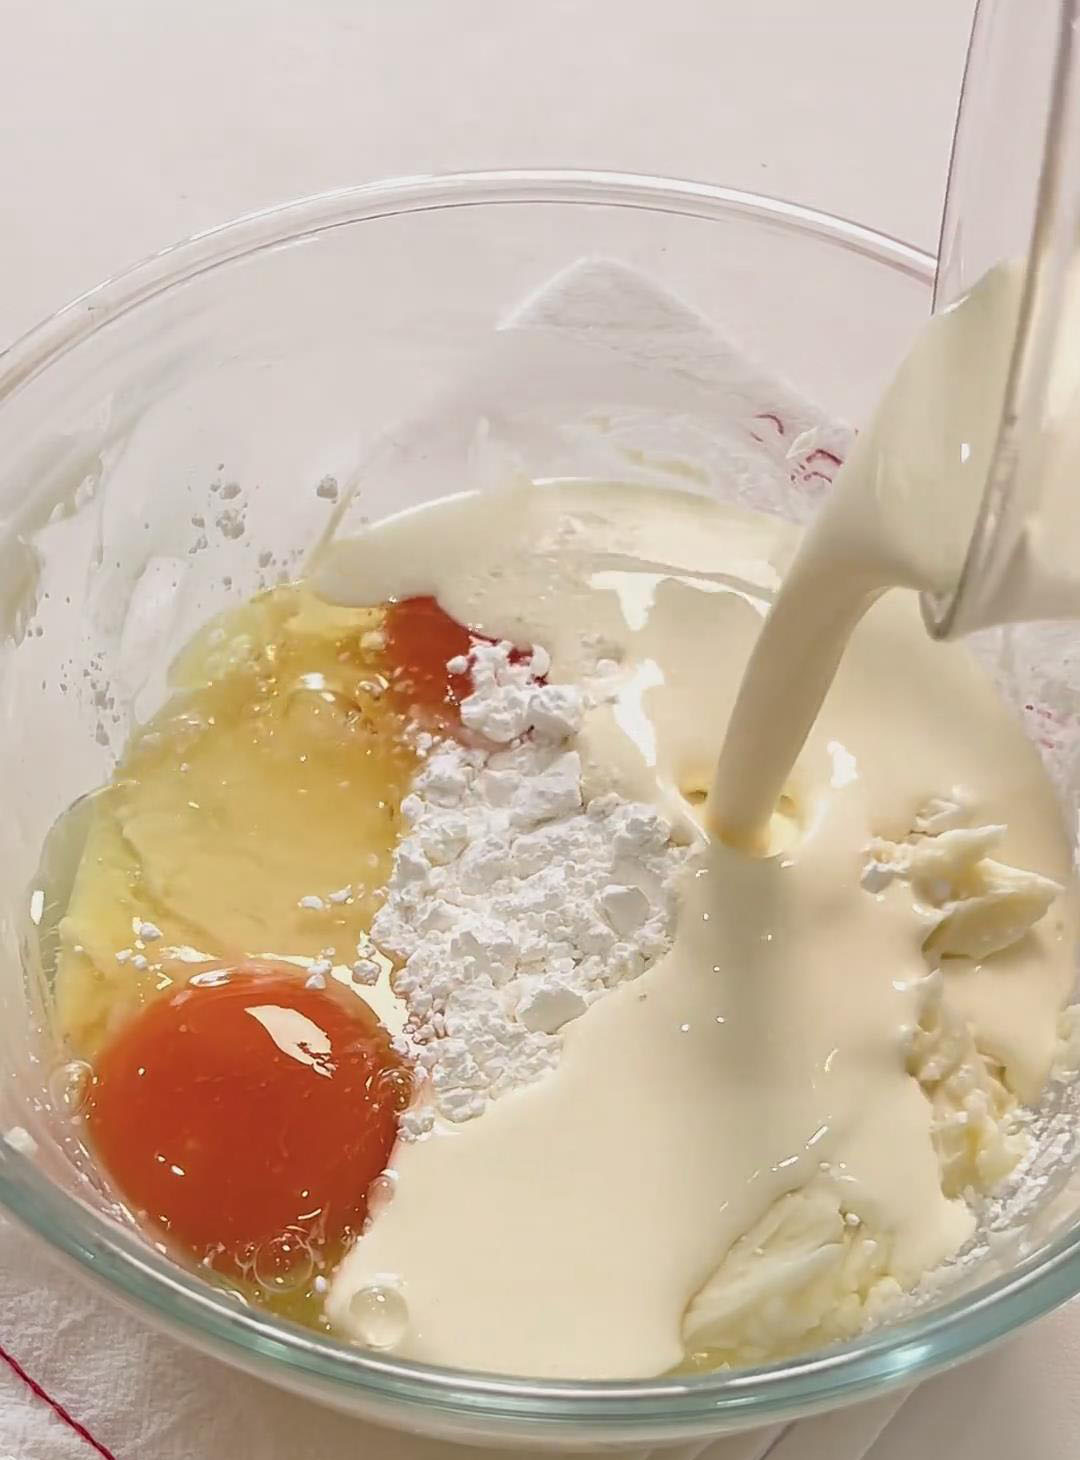

Remove the crust from the freezer and pour the batter in.
Tap the pan on the counter 3–5 times to release large air bubbles. Pop any visible bubbles on the surface using a toothpick.
Bake at 180°C for 30 minutes on the middle rack, until the edges are set and the surface is lightly golden while the center still jiggles.
4. Make the Blueberry Sauce
Add the blueberries, sugar, and lemon juice to a small pot.
Cook over low heat, stirring constantly, until the berries soften, release their juices, and the sauce thickens slightly (about 5 minutes).
Remove from heat and transfer the blueberry sauce to a bowl. Let it cool to room temperature.
Never pour hot sauce onto your cheesecake.
5. Assemble & Chill
Let the cheesecake cool fully to room temperature.
Unmold it, then pour the cooled blueberry sauce over the center of the cheesecake.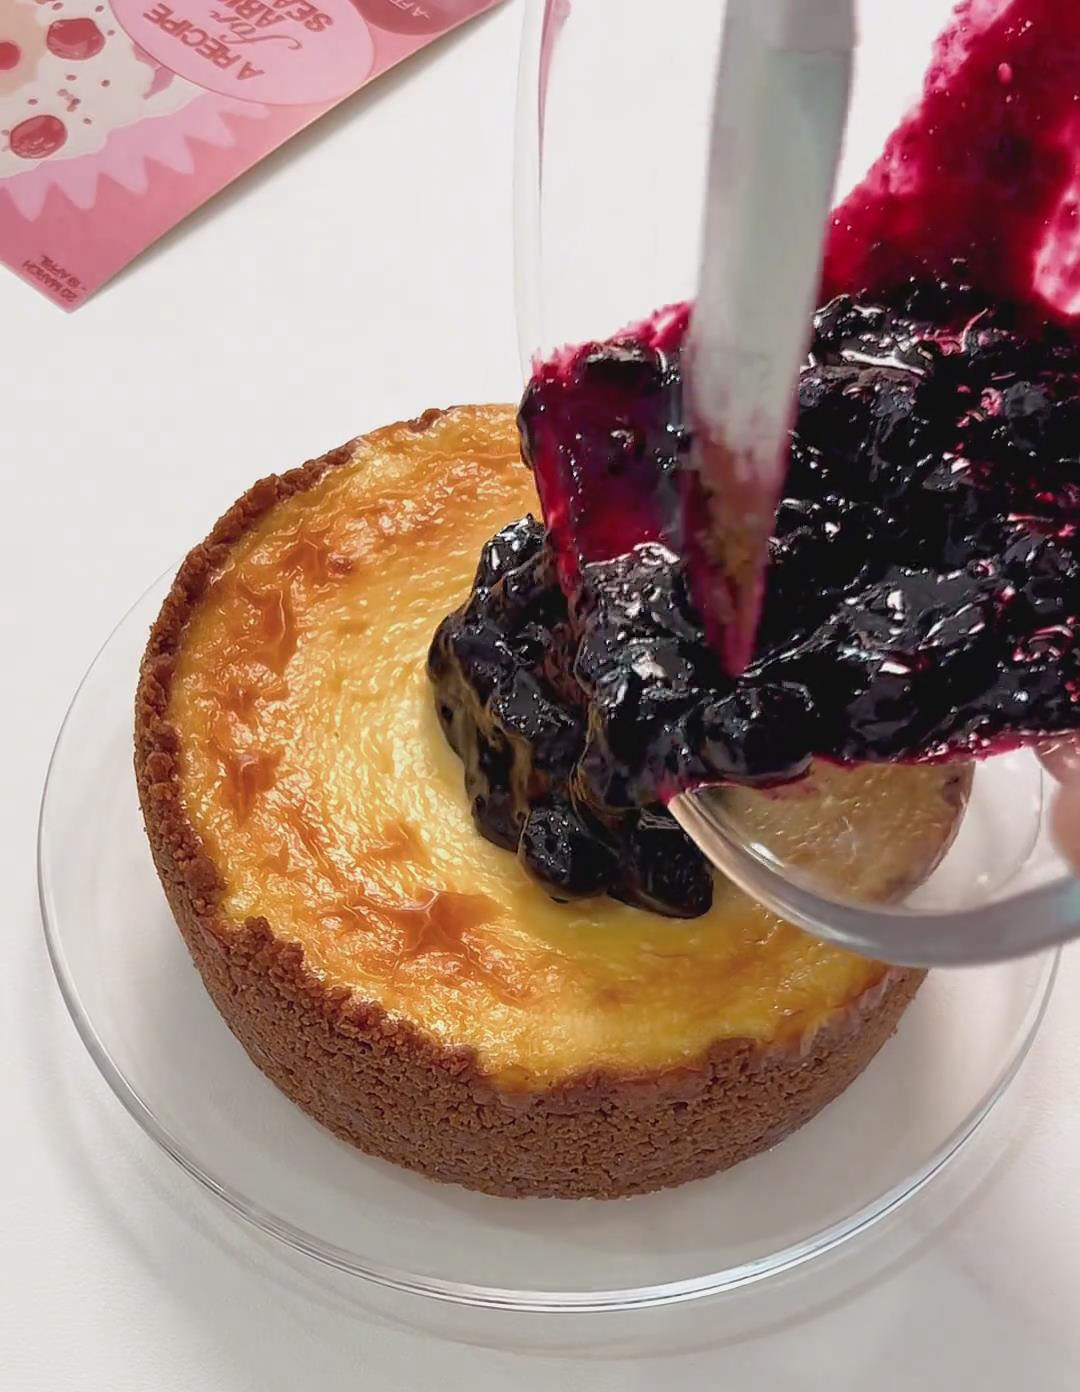
Spread gently with a spatula.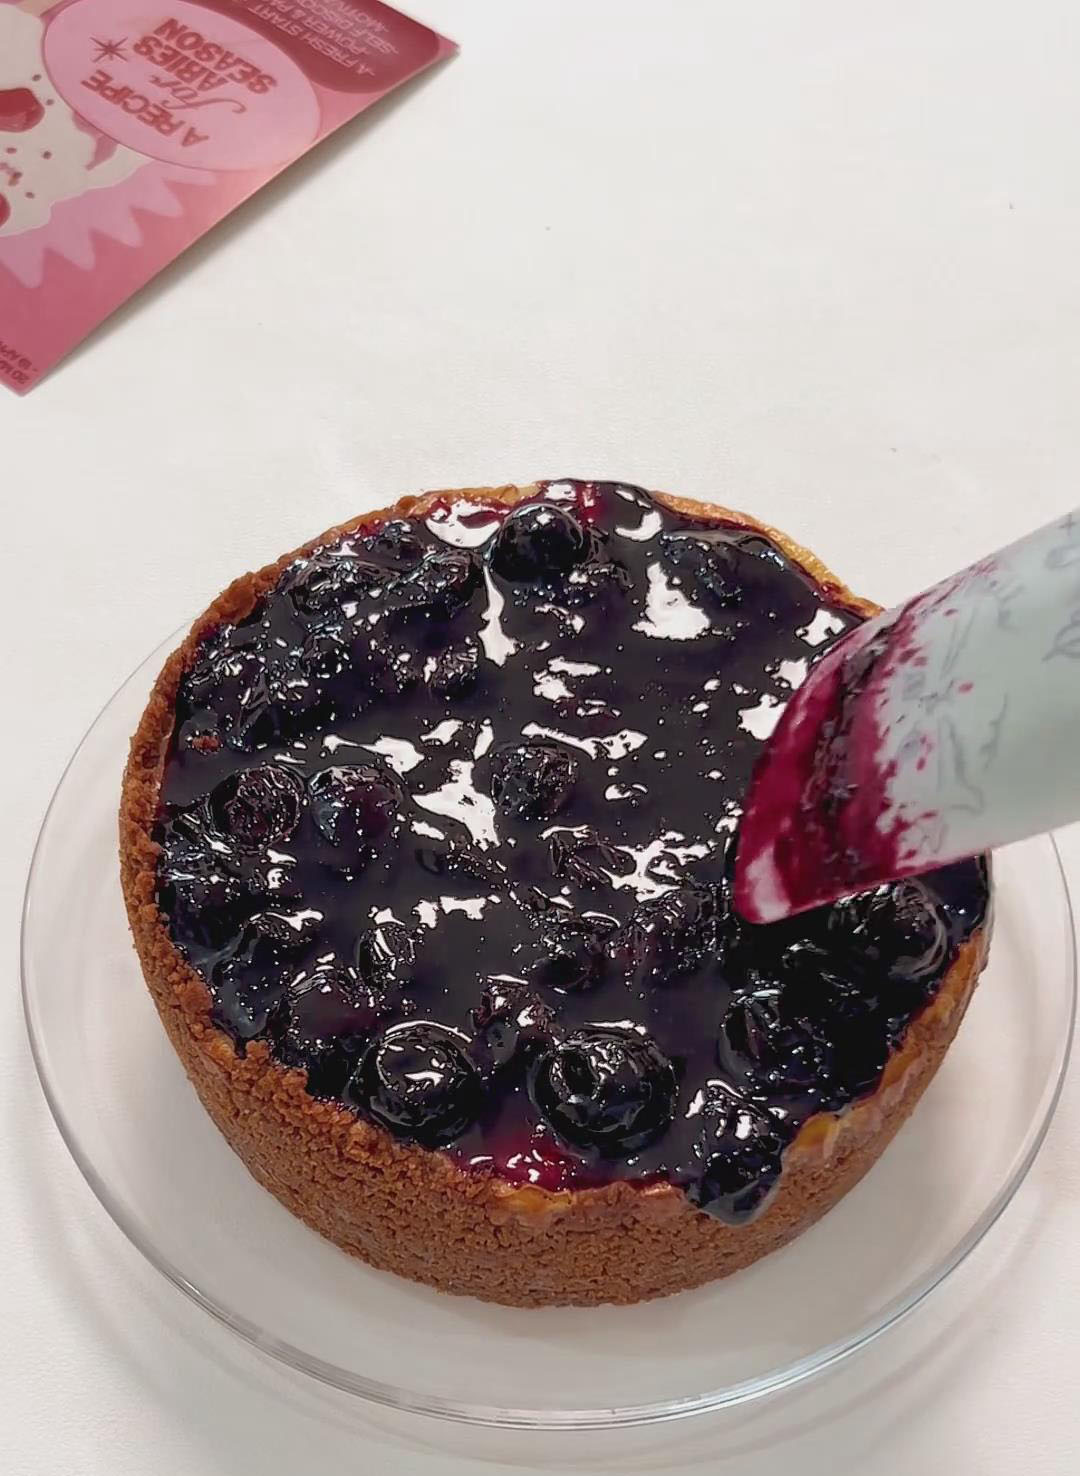
Refrigerate for at least 6 hours, preferably overnight, for optimal texture and flavor.
Tips & Troubleshooting
1. Preventing a Crumbly Crust
Crush the cookies very finely so they bind properly.
Use exactly 50 g butter—too much turns the crust greasy, too little makes it crumble.
Press the crust very firmly, especially along the sides.
Freezing helps the crust stay compact once the filling is added.
2. Achieving a Smooth, Air-Free Filling
Cream cheese must be completely softened before mixing.
Always tap the pan to release air bubbles.
Pop surface bubbles to avoid cracks and crater-like holes.
3. Perfect Blueberry Waterfall Texture
Cook the sauce only until it lightly thickens enough to coat a spatula.
Overcooking makes it too thick; undercooking makes it runny.
Make sure it cools fully before pouring onto the cheesecake.
4. Storage & Serving
Storage:
Refrigerate at 0–4°C for 3–4 days.
Freeze up to 7 days; thaw for 15 minutes before serving.
Serving:
Let the cheesecake sit at room temperature for 5 minutes for extra creaminess.
Unmold gently so the sauce doesn’t spill.
Frequently Asked Questions
Why is my cheesecake filling cracked or airy?
This usually happens when cream cheese isn’t softened enough or when air bubbles weren’t tapped out. Be sure to mix gently and tap the pan before baking.
Why did my cookie crust fall apart?
The crumbs may have been too coarse or the butter ratio was incorrect. Always crush very finely and measure butter accurately.
Can I use frozen blueberries?
Yes! Thaw them first and drain excess liquid so the sauce thickens properly.
Is the cheesecake supposed to jiggle after baking?
Yes! The center should jiggle slightly—that’s the sign of a moist, creamy cheesecake. It firms up completely after chilling.
Can I use a different fruit for the topping?
Absolutely! This method works beautifully with raspberries, blackberries, or a mix of berries. Adjust the sugar in the sauce based on the tartness of the fruit you choose.
More Blueberry Desserts to Try
- NO-BAKE BLUEBERRY CHEESECAKE MOUSSE
- BLUEBERRY CHEESE FILLING CRISPY POPSICLES
- BLUEBERRY CHEESECAKE MOCHI BITES
- BLUEBERRY BROWNIE CHEESECAKE
- BLUEBERRY MUFFINS

Blueberry Biscoff Cheesecake – Stunning & Easy to Slice
Ingredients
For the Cookie Crust
- 120 g Lotus Biscoff cookies
- 50 g unsalted butter melted
For the Cheesecake Filling
- 300 g cream cheese room temperature
- 88 g fine granulated sugar
- 2 large eggs room temperature
- 15 g cornstarch
- 150 g whipping cream heavy cream, 30-36% fat
For the Blueberry Cascade Topping
- 150 g fresh blueberries
- 15 g fine granulated sugar
- 5 ml 1 teaspoon fresh lemon juice
Instructions
Prep Work
- Remove the cream cheese from the fridge 1 hour before baking so it softens completely—your finger should press in easily.
- Place the butter in a small bowl and heat it in the microwave on medium-low for 30 seconds, or melt it over a double boiler until completely liquid.
- Line the bottom of a 6-inch springform pan with a circle of parchment paper.
- Preheat your oven to 180°C (356°F) and allow it to stabilize for 10 minutes.
- Wash the blueberries and pat them thoroughly dry.
Make the Cookie Crust
- Add the Biscoff cookies to a bowl and crush them with a rolling pin until very fine with no big chunks left.
- Pour in the melted butter and mix until every crumb is evenly coated.
- Transfer the mixture into a 6-inch pan lined with parchment paper.
- Press firmly using the bottom of a glass to compact the crust and build clean edges.
- Freeze for 10 minutes to help the crust firm up quickly.
Make the Cheesecake Filling
- In a mixing bowl, combine the softened cream cheese and sugar.
- Use a spatula to mix until smooth and lump-free.
- Add the eggs, sift in the cornstarch, pour in the heavy cream, and mix on low speed with an electric mixer until fully combined and silky.
- Remove the crust from the freezer and pour the batter in.
- Tap the pan on the counter 3–5 times to release large air bubbles. Pop any visible bubbles on the surface using a toothpick.
- Bake at 180°C for 30 minutes on the middle rack, until the edges are set and the surface is lightly golden while the center still jiggles.
Make the Blueberry Sauce
- Add the blueberries, sugar, and lemon juice to a small pot.
- Cook over low heat, stirring constantly, until the berries soften, release their juices, and the sauce thickens slightly (about 5 minutes).
- Remove from heat and transfer the blueberry sauce to a bowl. Let it cool to room temperature.
- Never pour hot sauce onto your cheesecake.
Assemble & Chill
- Let the cheesecake cool fully to room temperature.
- Unmold it, then pour the cooled blueberry sauce over the center of the cheesecake.
- Spread gently with a spatula.
- Refrigerate for at least 6 hours, preferably overnight, for optimal texture and flavor.
Leave a Reply