
This Chocolate Naked Cake is everything I love in one bite: soft, moist chocolate layers, a creamy chocolate filling, and my favorite twist — crushed Oreos and crispy chocolate pearls folded right into the middle. The result is a cake that looks rustic and effortless on the outside, yet surprises you with rich flavor and fun texture inside.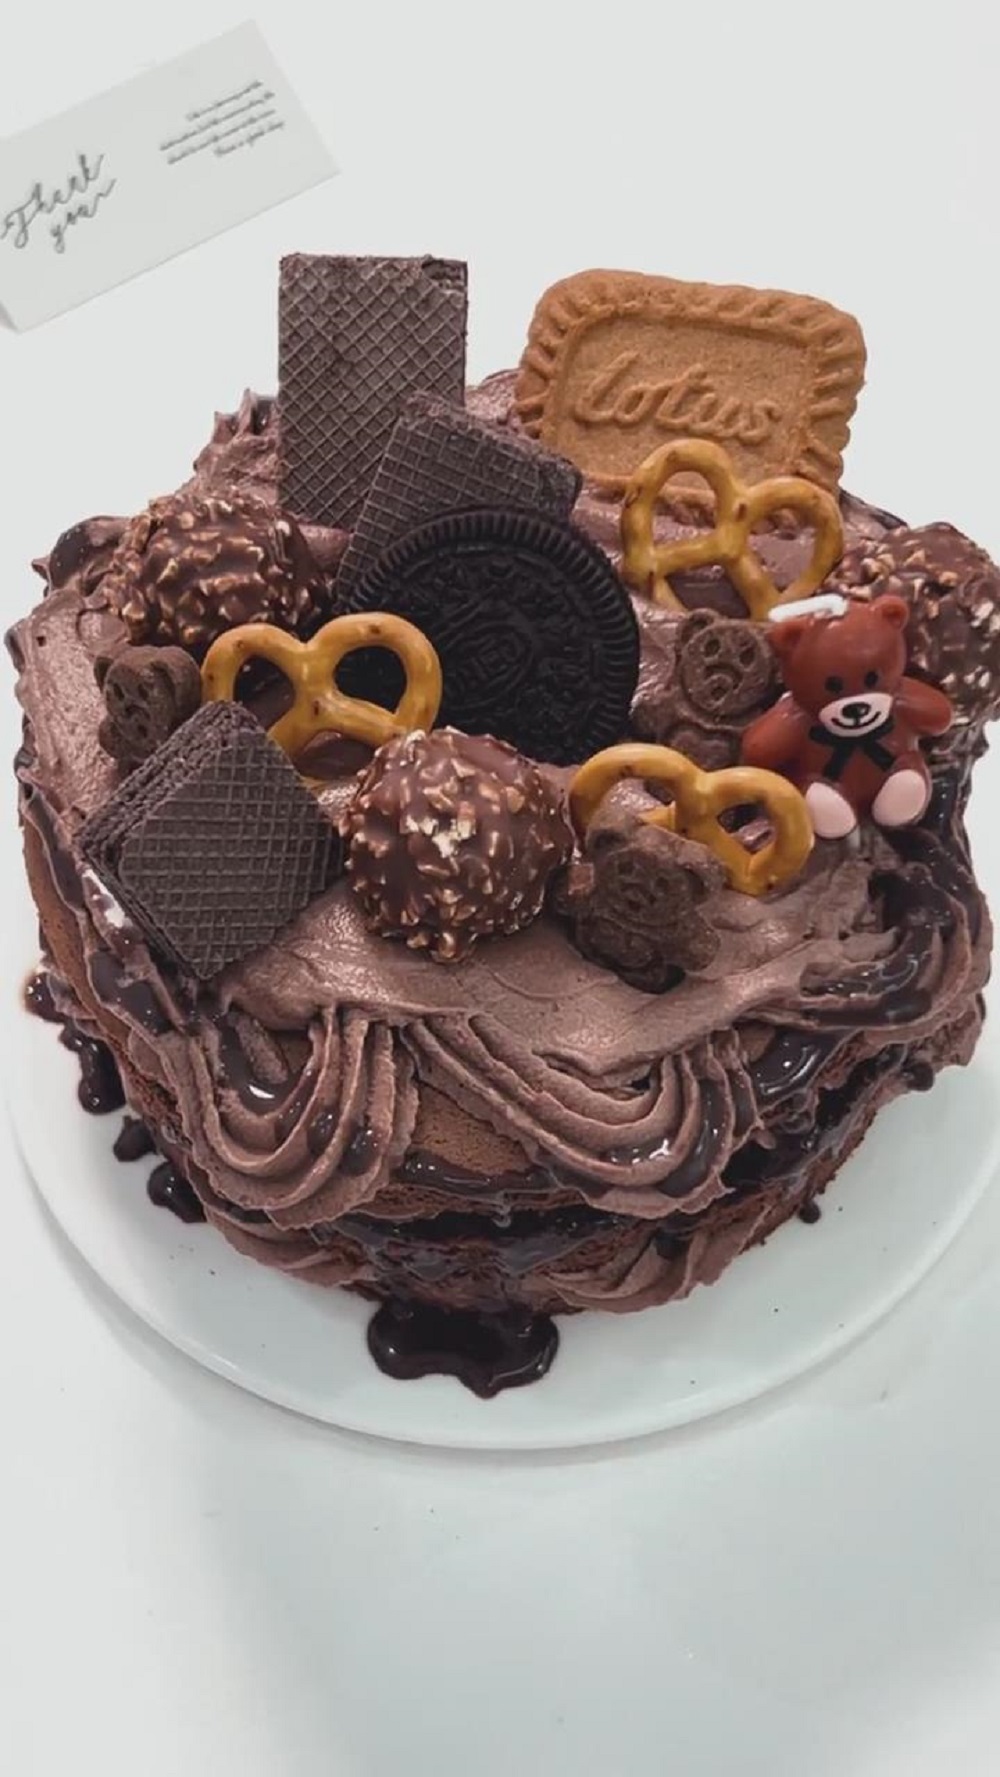
After making the Strawberry Cream Naked Cake for my girl’s birthday, I kept thinking… as a true chocolate enthusiast, how could I not create a Chocolate Naked Cake version too?
It almost felt like a must — the kind of cake every chocolate lover needs in their life.
This cake starts with a classic, soft chiffon base.
And for the filling, I went all in with two of my favorites: crushed Oreos and chocolate crispy pearls. Trust me — this combo is pure magic.
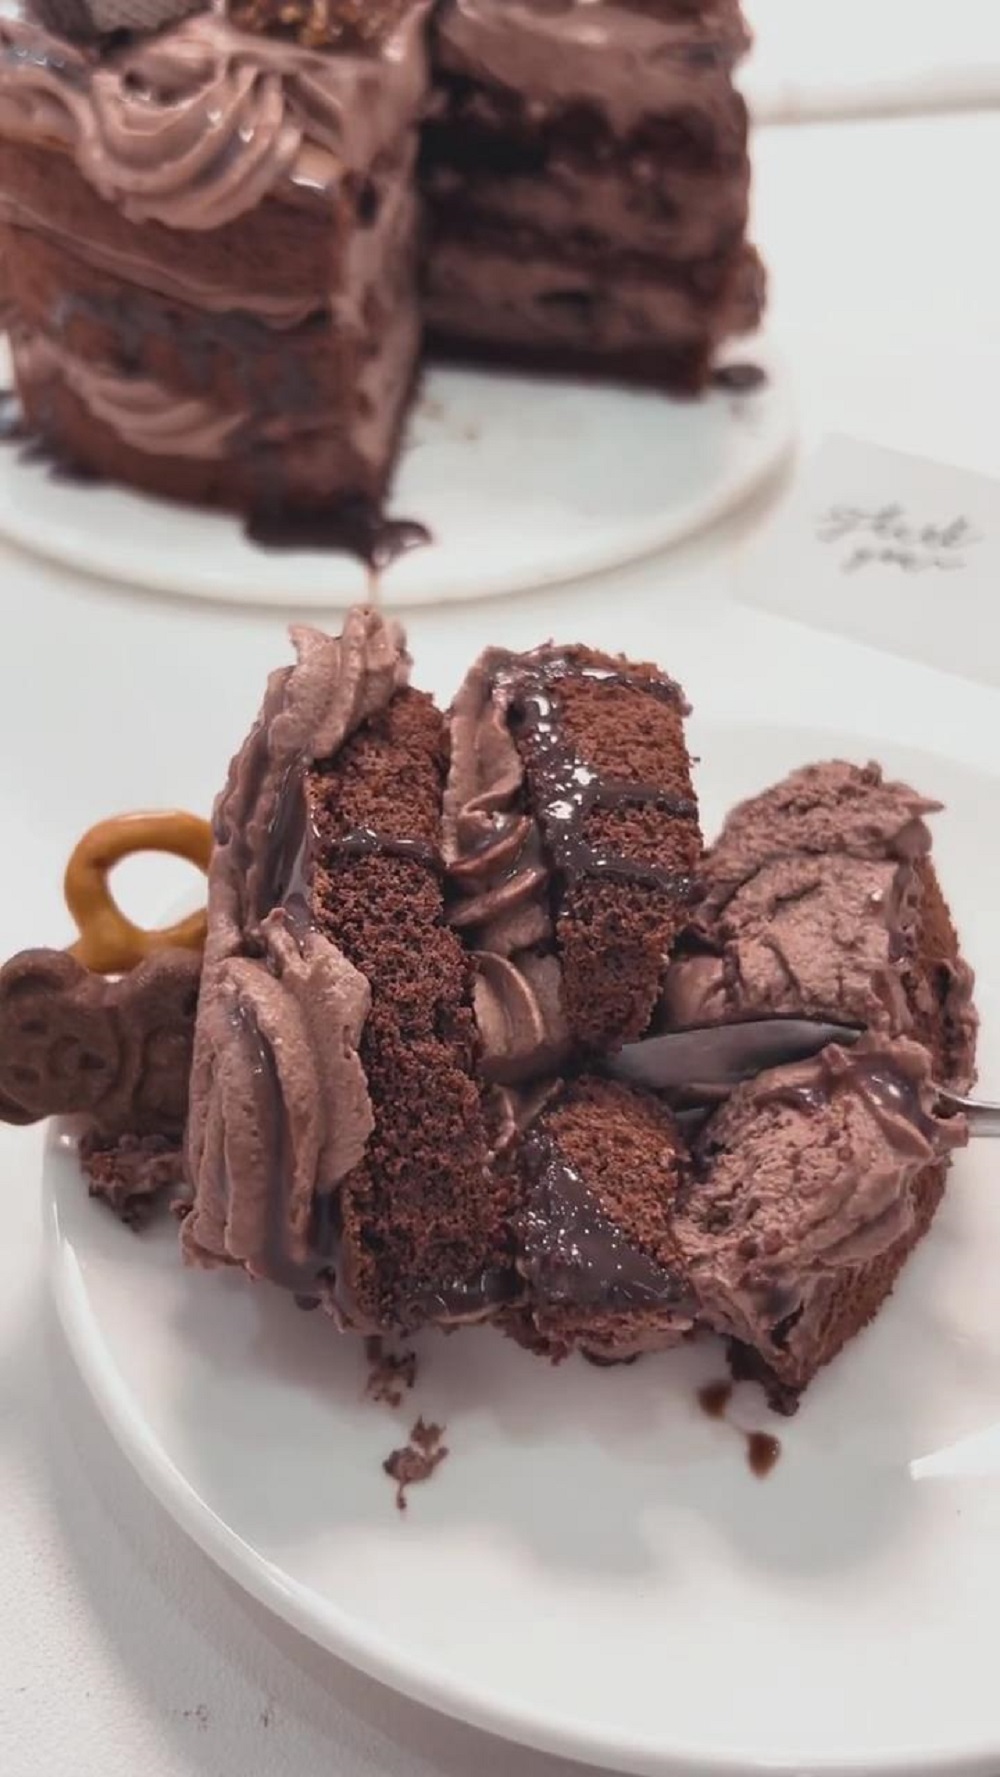
The soft, fluffy chocolate cake layers meet the creamy chocolate filling, then you get those little surprises — the Oreo bits adding a bold cocoa flavor, and the crispy pearls bringing that fun, delicate crunch.
Every bite has layers of texture: soft + creamy + crunchy — sweet but never too heavy.
If you love chocolate desserts that feel indulgent yet still balanced, this Chocolate Naked Cake might become your new go-to.
Ingredients and Substitutions
- Unsweetened Cocoa Powder – I recommend using a natural, unsweetened cocoa powder for both the cake and the cream. It provides a deep, robust chocolate flavor. Dutch-processed cocoa will work but will yield a slightly different, milder taste and darker color.
- Low-Gluten (Cake) Flour – This is essential for the signature tender, delicate crumb of a chiffon cake. Its low protein content prevents the formation of too much gluten, which would make the cake tough. Do not substitute with all-purpose flour if you want the lightest texture.
- Corn Oil – A neutral-tasting oil is crucial for keeping the cake moist without adding flavor. Avoid strong-tasting oils like olive or peanut oil. Any neutral vegetable oil will work.
- Whipping Cream – For the frosting, use a heavy whipping cream or double cream with a fat content of 30-36%. This higher fat content is necessary for the cream to whip up stiff and stable enough to hold the weight of the cake layers. Ensure both the cream and your mixing bowl are very cold.
- Oreo Cookies (for crushing) – Using the actual cookies (with the filling scraped out) provides the best flavor and texture. Pre-crushed cookie crumbs often lack the right consistency. You can use any similar chocolate sandwich cookie.
How to Make Chocolate Naked Cake
1. Prepare the ingredients
Separate the egg whites from the yolks. The bowl for the egg whites must be completely clean — no oil, no water, and absolutely no egg yolk.
Place the bowl of egg whites in the freezer for 5 minutes to make whipping easier.
Remove the cream filling from the Oreos and crush them into fine crumbs.
Preheat the oven to 130°C (top and bottom heat) for 10 minutes.
2. Make the egg yolk batter
In a large bowl, whisk together the corn oil and milk until fully emulsified — the mixture should be smooth with no visible oil.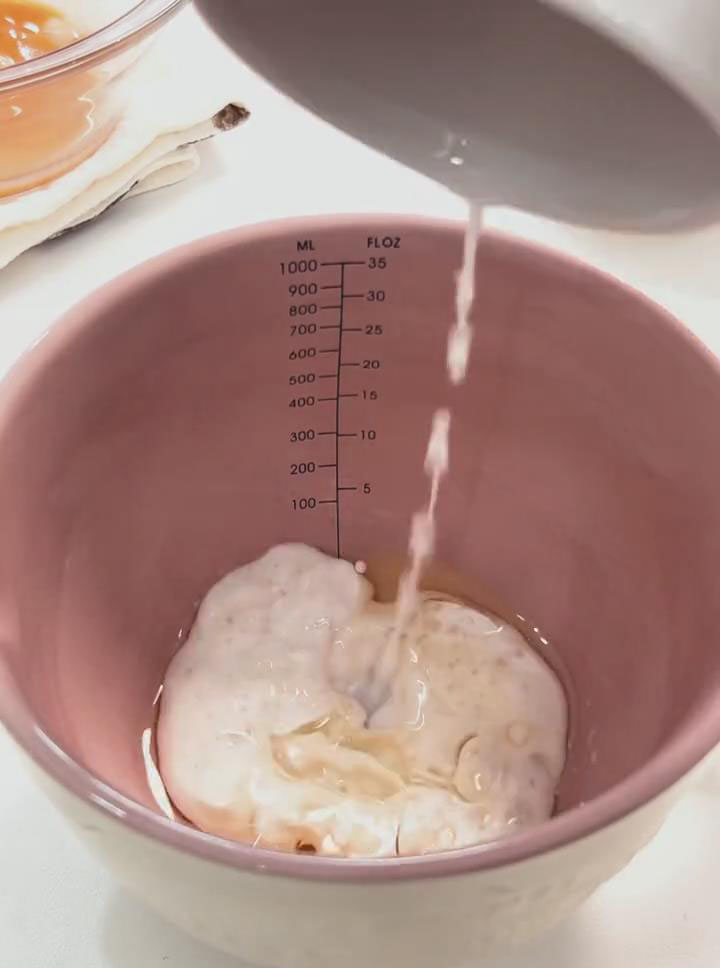
Sift the flour-cocoa mixture directly into the bowl. Using a whisk, mix in a gentle Z-shaped motion until no dry flour remains.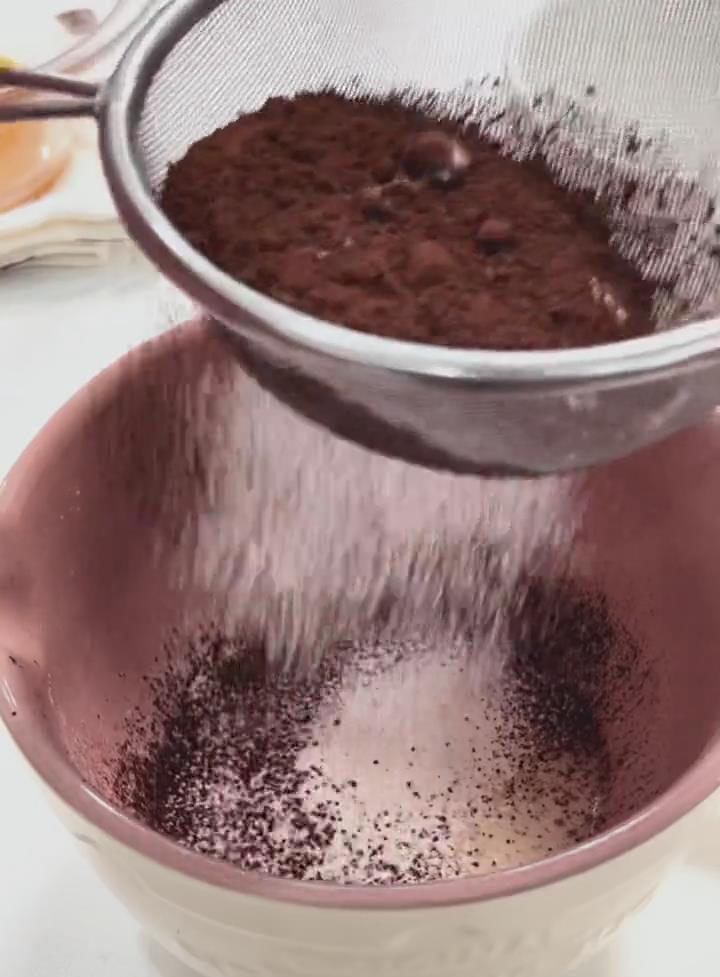
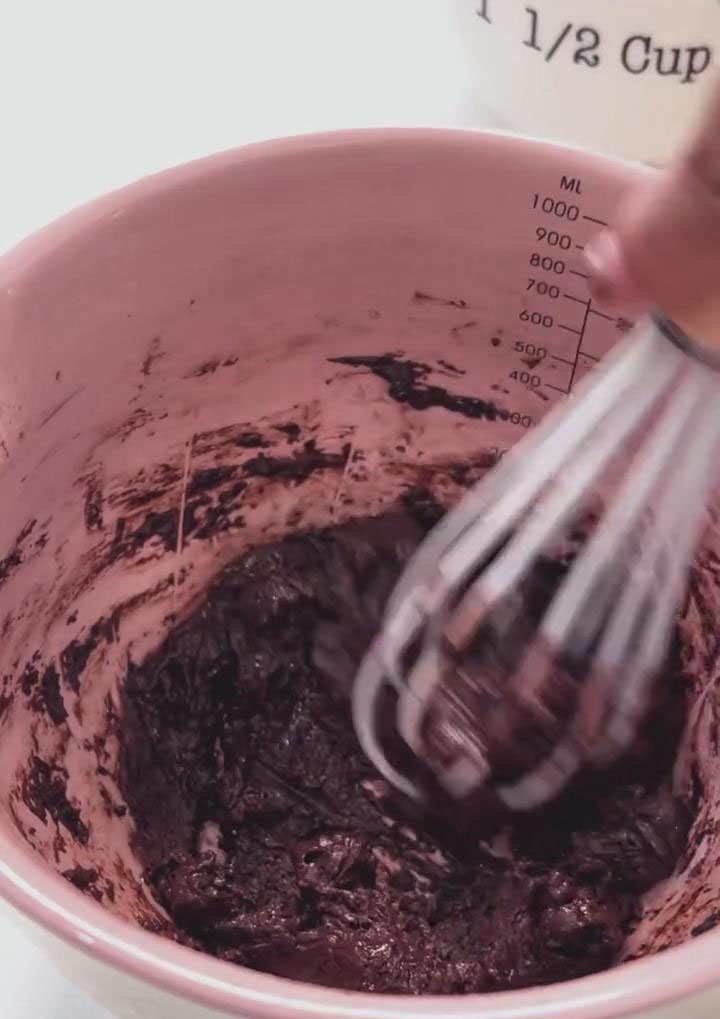
Add the egg yolks and continue mixing in a Z-pattern until you get a smooth, glossy batter.

3. Whip the meringue
Add a few drops of lemon juice to the cold egg whites.
Using an electric mixer on medium-high speed, beat until large bubbles form, then add the first third of the sugar.
When the bubbles become finer, add the second portion of sugar.
Once lines appear in the meringue, add the final portion of sugar and continue beating on low speed until stiff peaks form — the peak should stand straight without drooping. Avoid under- or over-whipping.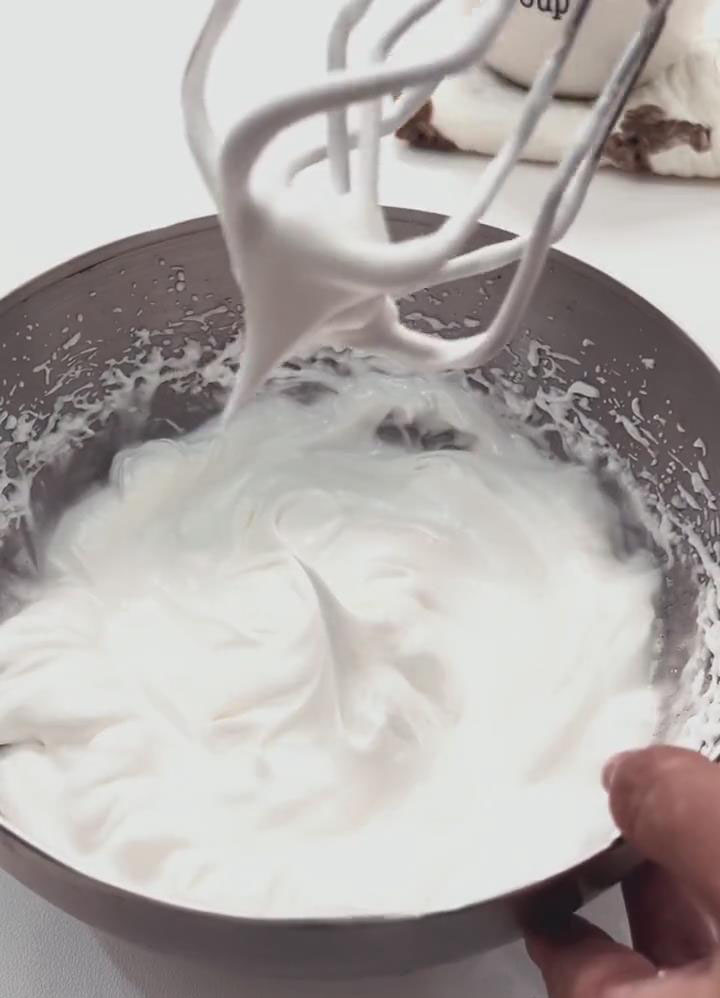
4. Combine the batter and bake
Add one-third of the meringue to the yolk batter and fold gently from bottom to top.
Pour the mixture back into the remaining meringue and fold until evenly combined and fluffy.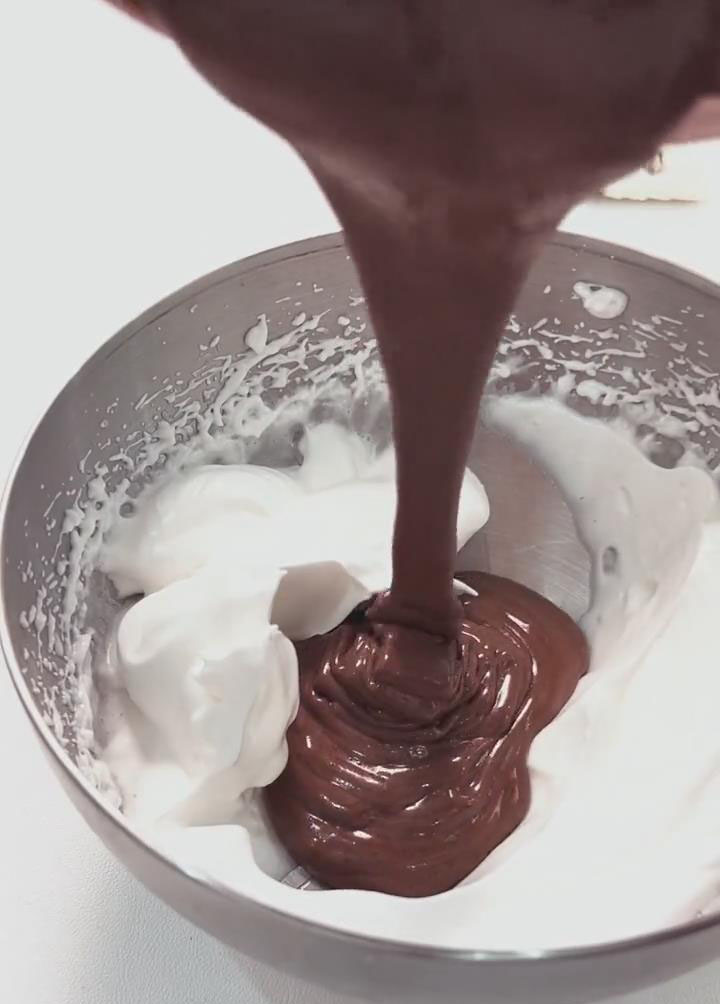
Transfer the batter into a 6-inch cake pan. Tap the pan 3–5 times to release large air bubbles, and pop any surface bubbles with a toothpick.
Bake at 130°C for 60 minutes, then increase the temperature to 150°C and bake for 10 minutes.
Immediately remove the cake from the oven and invert it onto a cooling rack. Let it cool completely, about 30 minutes.
5. Make the chocolate cream & assemble the cake
Add the heavy cream, sugar, and sifted cocoa powder into a bowl. Whip on medium speed until the cream forms soft peaks with visible lines. Stop as soon as it reaches this stage so it doesn’t become grainy.
Transfer to a piping bag.
Slice the cooled cake horizontally into 3 even layers.
Place the first layer on a plate, pipe a layer of chocolate cream, and sprinkle with Oreo crumbs and chocolate pearls.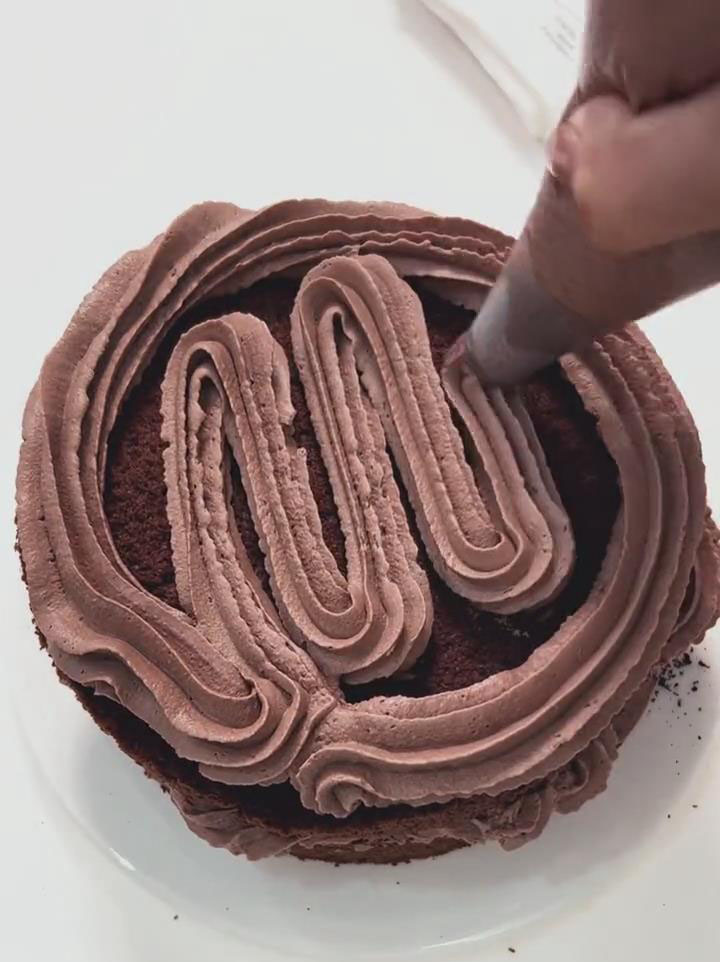
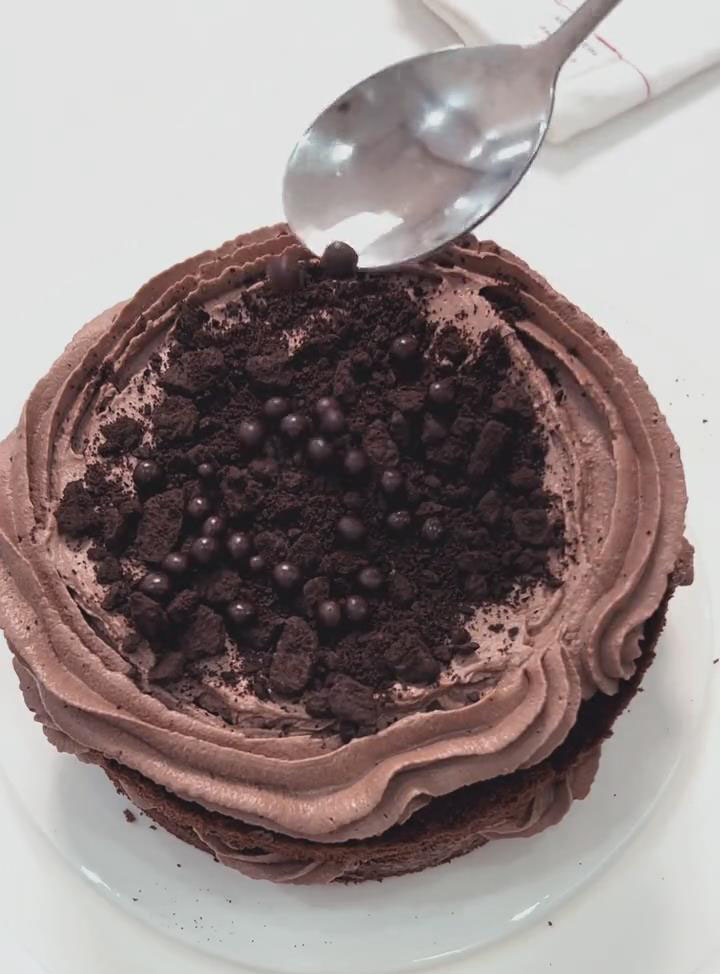
Add the second layer and repeat.
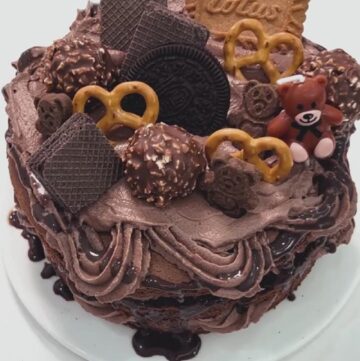
Place the final cake layer on top, pipe cream over the surface, and decorate with anything you like — cookies, chocolate wafers, pretzels, or nut-coated chocolate balls all work beautifully.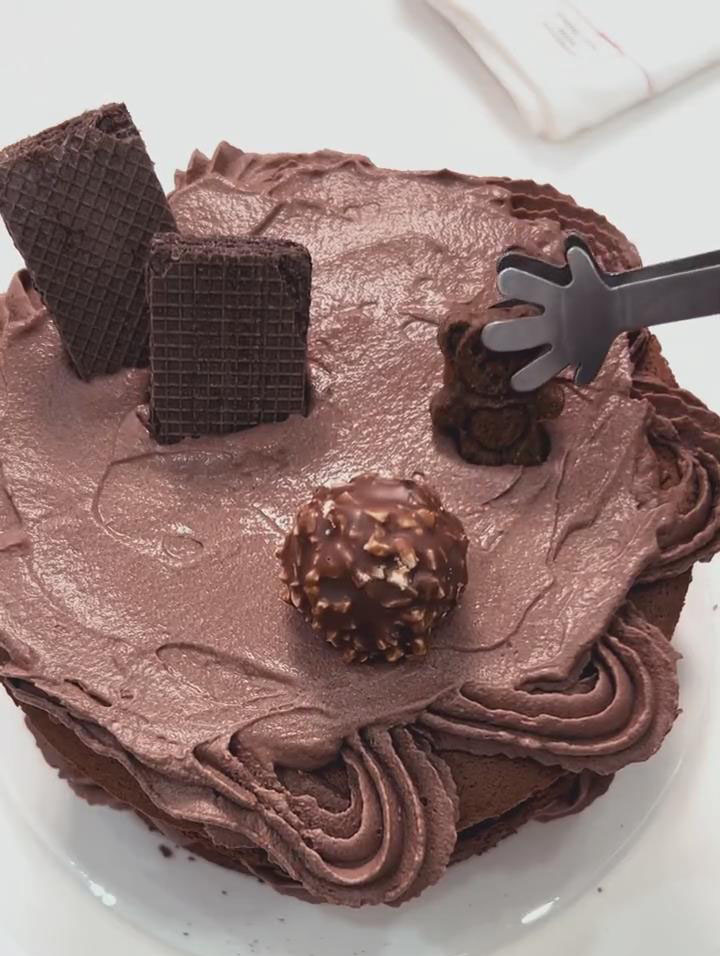
Tips & Tricks
1. For a fluffy chiffon cake
Whip the meringue to stiff peaks that stand upright.
Fold gently to avoid deflating the batter.
Bake low then high (130°C → 150°C) to prevent cracking.
Always invert the cake immediately after baking.
2. For smooth, silky chocolate cream
Always sift the cocoa powder before adding it to the cream.
Stop whipping once soft peaks form — over-whipped cream becomes rough and grainy.
3. For clean layering that won‘t collapse
Use a serrated knife and gently saw back and forth rather than pressing down.
Add only a modest layer of Oreo crumbs and pearls — too many will weigh down the cake.
Assemble the cake soon after whipping the cream to prevent softening.
4. For richer flavour
Add a drop of vanilla extract to the cream if desired.
Add chocolate chips to the cake batter for a deeper chocolate profile.
Increase the cocoa powder to 20g if you prefer a stronger chocolate taste.
5. Storage
Store the cake in an airtight container in the fridge for 1–2 days.
Let the cake sit at room temperature for 10 minutes before serving for the creamiest texture.
Keep it chilled — the chocolate cream softens quickly at room temperature.
Frequently Asked Questions
Why did my chiffon cake collapse?
This usually happens when the meringue wasn’t whipped to stiff peaks or was over-mixed into the batter. Using a too-hot oven or not inverting the cake immediately can also cause collapse.
Why is my chocolate cream grainy?
It was likely over-whipped. Once cream passes the soft-peak stage, it quickly separates and becomes rough.
Why is my cake leaning or sliding?
Too much filling between the layers can make the cake unstable. Use a thin, even layer of Oreo crumbs and crunchy pearls.
Can I make this cake ahead of time?
Yes! The cake layers can be baked a day ahead and stored airtight. The fully assembled cake can be refrigerated for 1–2 days.
Can I freeze this cake?
I don’t recommend freezing because whipped cream can separate once thawed, affecting the texture.
The Ultimate Chocolate Naked Cake (with Oreo & Crunchy Filling!)
Ingredients
For the Cocoa Chiffon Cake
- 3 large eggs separated and at room temperature
- 30 g corn oil or neutral vegetable oil
- 50 g whole milk at room temperature
- 40 g low-gluten cake flour
- 15 g unsweetened cocoa powder
- 45 g fine granulated sugar
- A few drops of lemon juice
For the Chocolate Cream & Filling
- 400 g cold whipping cream heavy cream, 30-36% fat
- 40 g fine granulated sugar
- 15 g unsweetened cocoa powder sifted
- 50 g Oreo cookie crumbs from about 8-10 cookies, cream filling removed
- 30 g chocolate crunchy pearls or chocolate chips
For Decoration (Optional)
- Additional Oreo cookies Lotus biscuits, chocolate shards, pretzels, or chocolate truffles
Instructions
Prepare the ingredients
- Separate the egg whites from the yolks. The bowl for the egg whites must be completely clean — no oil, no water, and absolutely no egg yolk.
- Place the bowl of egg whites in the freezer for 5 minutes to make whipping easier.
- Remove the cream filling from the Oreos and crush them into fine crumbs.
- Preheat the oven to 130°C (top and bottom heat) for 10 minutes.
Make the egg yolk batter
- In a large bowl, whisk together the corn oil and milk until fully emulsified — the mixture should be smooth with no visible oil.
- Sift the flour-cocoa mixture directly into the bowl. Using a whisk, mix in a gentle Z-shaped motion until no dry flour remains.
- Add the egg yolks and continue mixing in a Z-pattern until you get a smooth, glossy batter.
Whip the meringue
- Add a few drops of lemon juice to the cold egg whites.
- Using an electric mixer on medium-high speed, beat until large bubbles form, then add the first third of the sugar.
- When the bubbles become finer, add the second portion of sugar.
- Once lines appear in the meringue, add the final portion of sugar and continue beating on low speed until stiff peaks form — the peak should stand straight without drooping. Avoid under- or over-whipping.
Combine the batter and bake
- Add one-third of the meringue to the yolk batter and fold gently from bottom to top.
- Pour the mixture back into the remaining meringue and fold until evenly combined and fluffy.
- Transfer the batter into a 6-inch cake pan. Tap the pan 3–5 times to release large air bubbles, and pop any surface bubbles with a toothpick.
- Bake at 130°C for 60 minutes, then increase the temperature to 150°C and bake for 10 minutes.
- Immediately remove the cake from the oven and invert it onto a cooling rack. Let it cool completely, about 30 minutes.
Make the chocolate cream & assemble the cake
- Add the heavy cream, sugar, and sifted cocoa powder into a bowl. Whip on medium speed until the cream forms soft peaks with visible lines. Stop as soon as it reaches this stage so it doesn't become grainy.
- Transfer to a piping bag.
- Slice the cooled cake horizontally into 3 even layers.
- Place the first layer on a plate, pipe a layer of chocolate cream, and sprinkle with Oreo crumbs and chocolate pearls.
- Add the second layer and repeat.
- Place the final cake layer on top, pipe cream over the surface, and decorate with anything you like — cookies, chocolate wafers, pretzels, or nut-coated chocolate balls all work beautifully.
Leave a Reply