
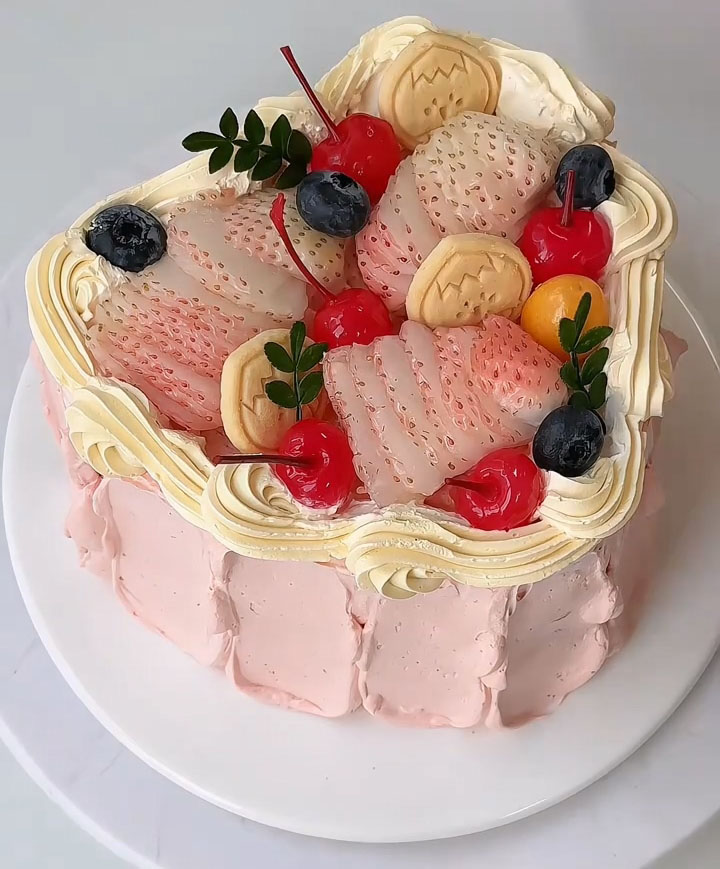
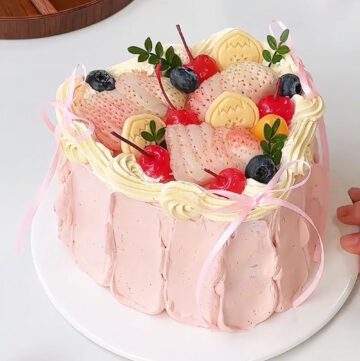
This heart-shaped strawberry cake is one of those desserts that instantly makes people smile the moment they see it. Soft pink layers, fluffy sponge, strawberry cream, juicy fruit, and a playful crunch hidden inside — it’s romantic without being over-the-top and sweet without being overwhelming.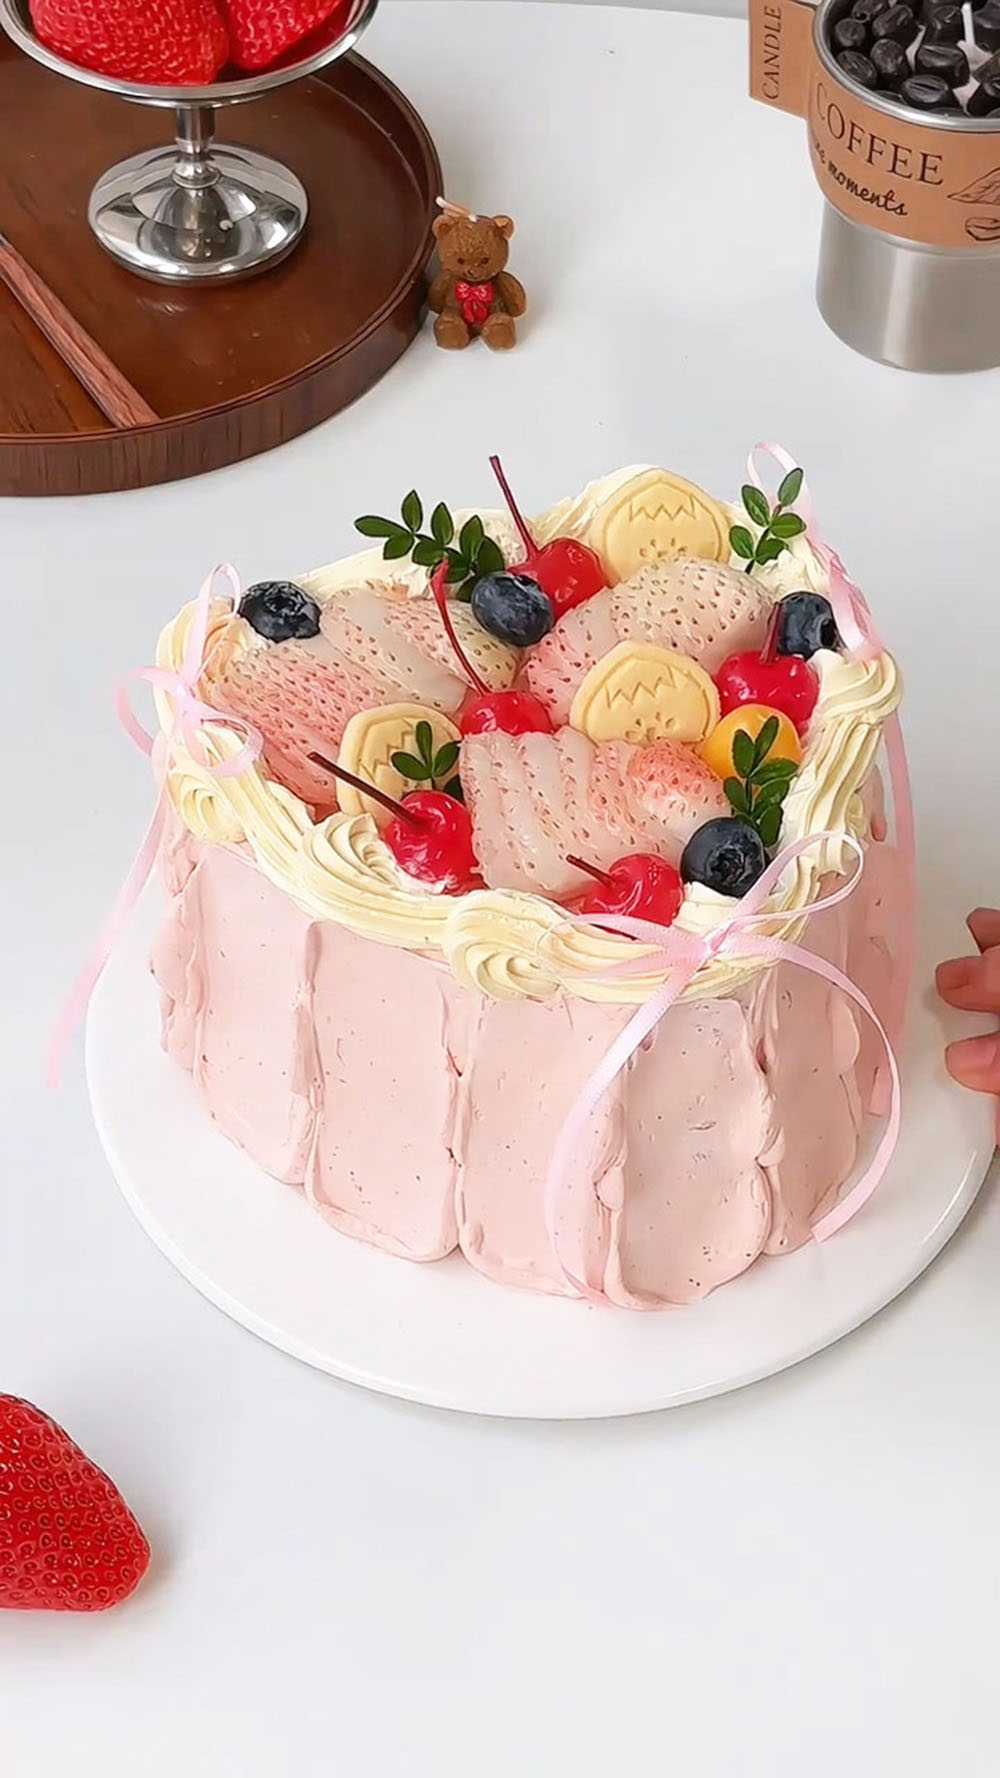
This cake involves a few more steps than a simple one-bowl recipe, but the process is structured and much easier than you might think.
To help guide you, I’ve created a short video (link below) that walks through the key techniques. This visual guide makes it almost fail-proof and shows just how manageable each step is.
The extra effort is truly worthwhile, resulting in a stunning and memorable dessert perfect for making Valentine’s Day special.
I use one heart-shaped mold or cutter to shape the sponge layers so the cake looks neat and symmetrical.
If you don’t have a heart mold, you can easily make one yourself — just draw a heart shape on a piece of cardboard or paper, place it on top of the cake, and carefully cut around it. It works just as well and doesn’t require any special tools.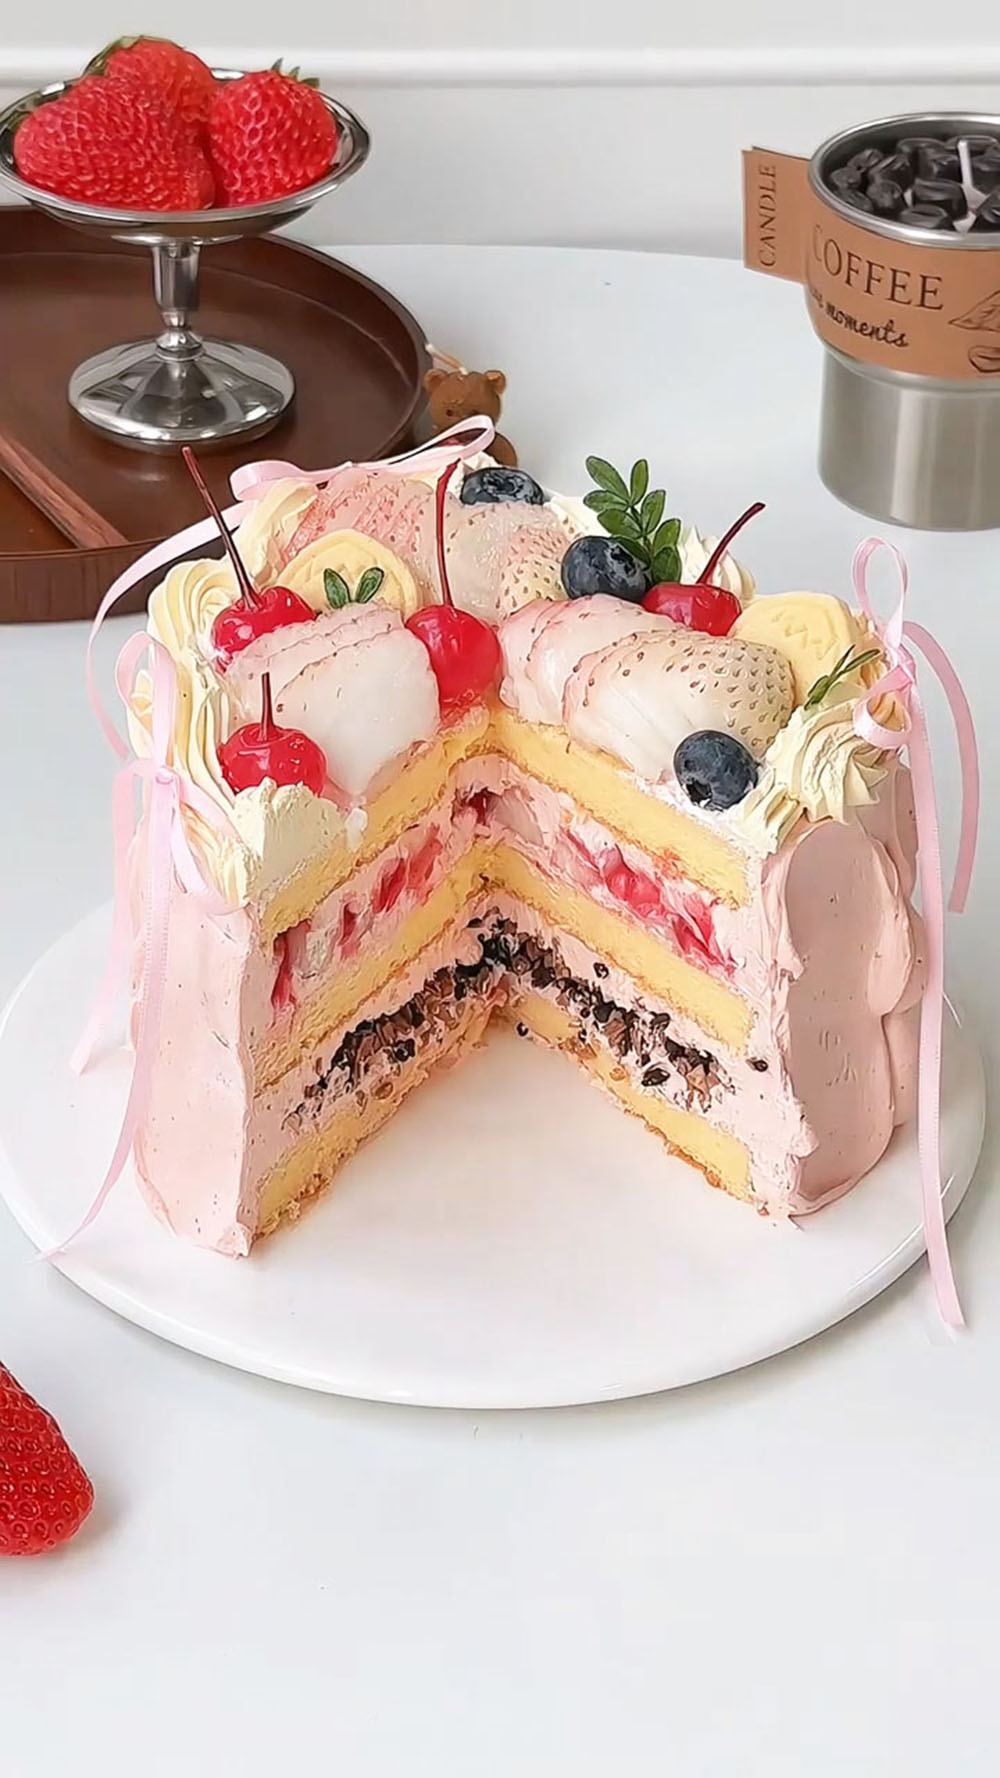
Why You’ll Love This Recipe
- This cake has soft, airy heart-shaped sponge layers that stay moist and tender.
- The strawberry cream is light, fruity, and not overly sweet, paired with real fruit for freshness.
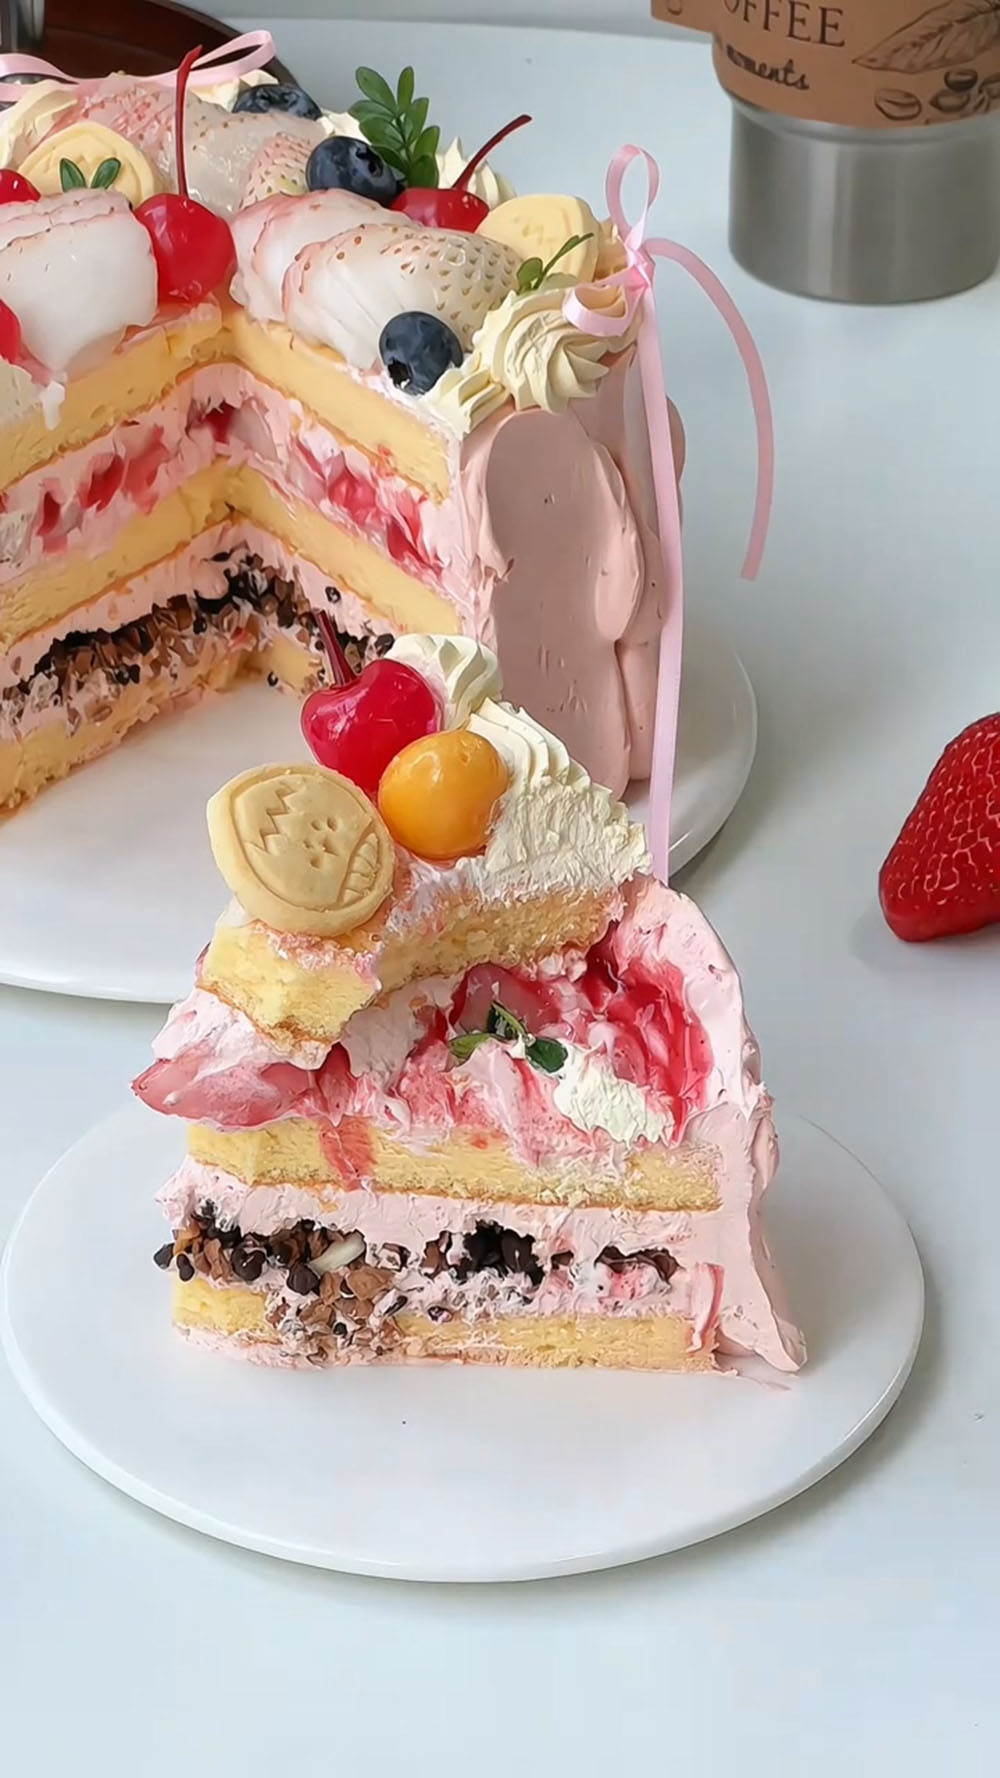
- The addition of popping candy crunch adds a fun, unexpected texture that makes every bite interesting.
- No advanced cake decorating skills are needed — the assembly is forgiving and beginner-friendly.
- It’s perfect for Valentine’s Day, anniversaries, gifting, or best-friend celebrations, with a high “wow” factor and beautiful presentation.
Ingredients and Substitutions
Ingredients and substitutions
- Milk – I use milk to adjust the moisture of the cake batter. Whole milk gives the best flavour, and you can slightly adjust the amount depending on how absorbent your flour is.
- Corn oil – This keeps the sponge cake soft and moist even after chilling. If needed, melted butter can be used instead for a richer aroma.
- Cake flour – Low-gluten cake flour is essential for a light and delicate crumb. I always recommend sifting it to ensure a smooth batter.
- Eggs – The eggs are separated into yolks and whites. Room-temperature eggs combine more easily, and clean, oil-free egg whites are key to achieving a fluffy sponge.
- Granulated sugar – This is used to whip the egg whites and control sweetness. You can slightly reduce it if you prefer a less sweet cake.
- Whipping cream – I recommend using dairy whipping cream. It should be well chilled so it whips smoothly and holds its shape.
- Strawberry jam – This flavours the cream and adds fruity sweetness between the layers. You can also drizzle extra between layers for more strawberry flavour.
- Toffee-flavoured popping candy crunch – This adds a playful crunch and surprise texture. If unavailable, regular popping candy with chopped nuts works well. You can also substitute with strawberries if you prefer.
- White strawberries – These are used in the filling for a fresh, lightly tart contrast. Regular strawberries are a great substitute.
- Fresh fruits – Strawberries, blueberries, cherries, or any fresh fruit you enjoy for decorating the top of the cake.
- Ribbon – A simple ribbon wrapped around the cake instantly elevates the presentation and makes it feel festive.
- Plain whipped cream (for topping) – Used for decorative piping on the top of the cake.
Heart-Shaped Strawberry Cake
For the Cake Base
- 55 g milk
- 40 g corn oil
- 65 g cake flour, sifted
- 5 large eggs, separated
- 50 g granulated sugar
For the Strawberry Cream & Filling
- 500 g heavy cream, chilled
- 150 g strawberry jam
- Additional strawberry jam, for drizzling
- Toffee-flavored popping candy crisp, to taste
- White strawberries, sliced
For Decoration
- Additional plain whipped cream
- Assorted fresh fruits (strawberries, blueberries, cherries)
- 1 decorative ribbon
How to Make a Heart-Shaped Strawberry Cake
1. Make the Cake Base
Preheat your oven to 150°C (302°F). Line a rectangular baking sheet (approx. 28x28cm or 11×11 inch) with parchment paper.
In a medium bowl, whisk together the milk and corn oil until completely combined and slightly thickened (emulsified).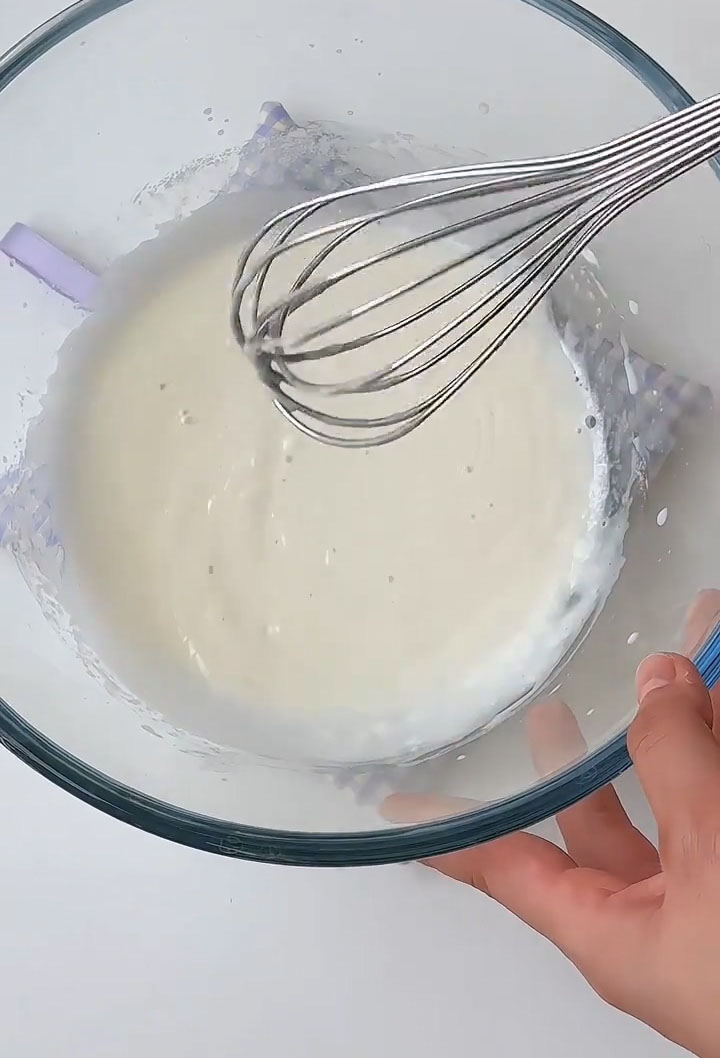
Sift the cake flour directly into the liquid mixture. Whisk gently until just combined and no dry flour remains.
Add the 5 egg yolks and whisk until you have a smooth, lump-free batter. Set aside.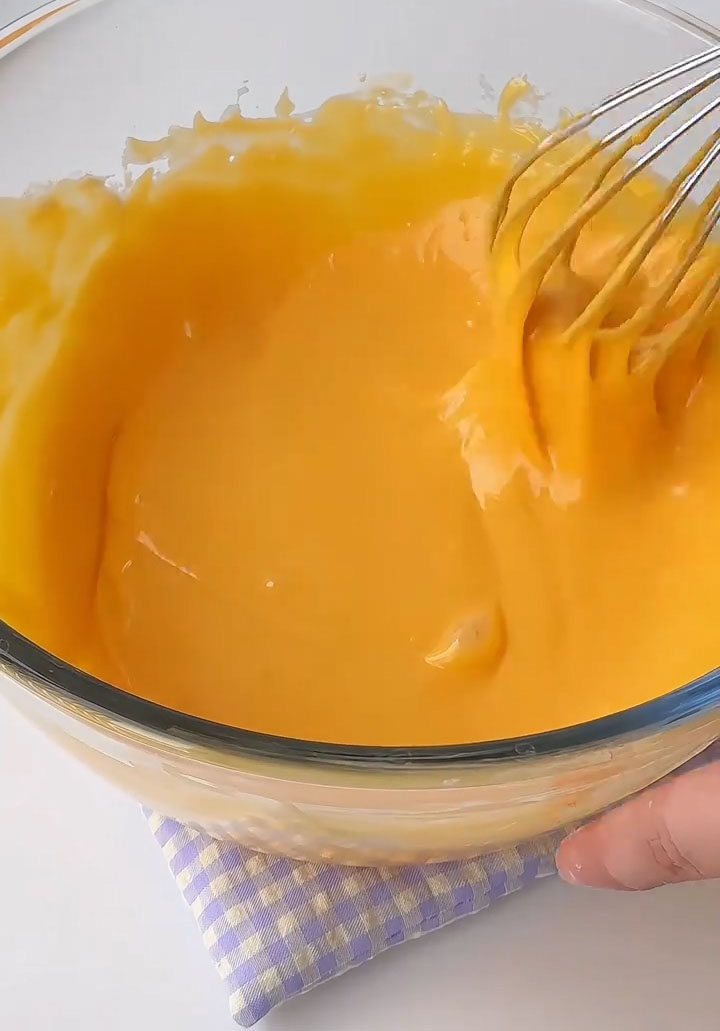
In a clean, dry bowl, add the egg whites and granulated sugar. Using an electric mixer, whip on high speed until soft peaks form — the meringue should hold its shape with a small hook when lifted.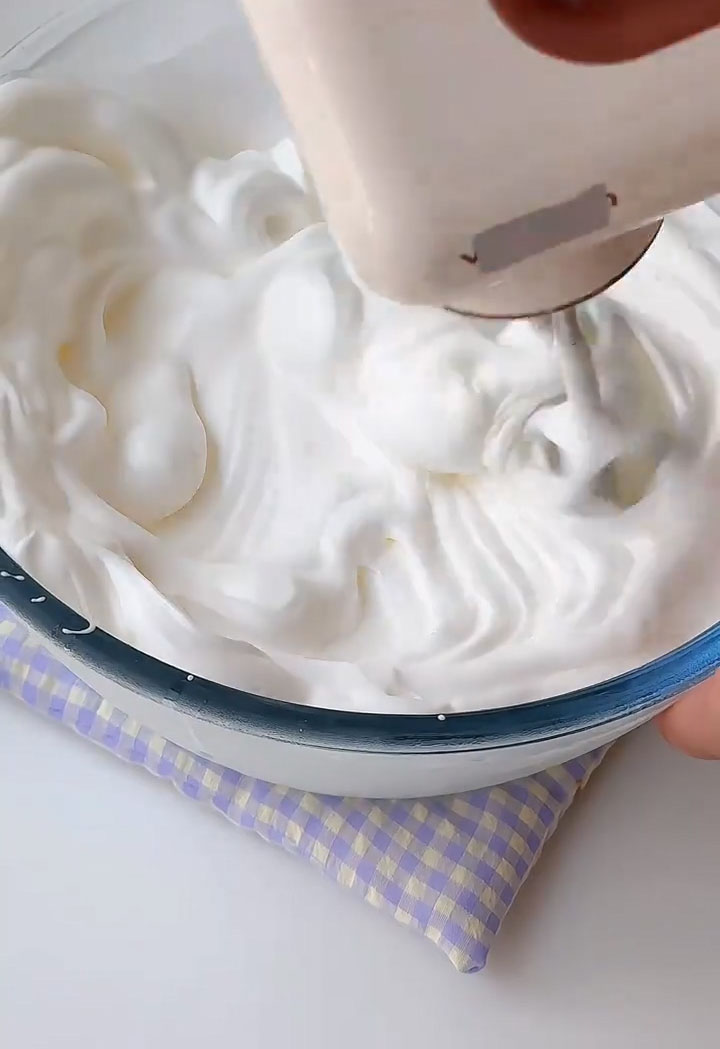
Fold one-third of the meringue into the egg yolk batter using a gentle bottom-to-top motion.
Pour the combined batter back into the remaining meringue and fold until fully incorporated with no white streaks.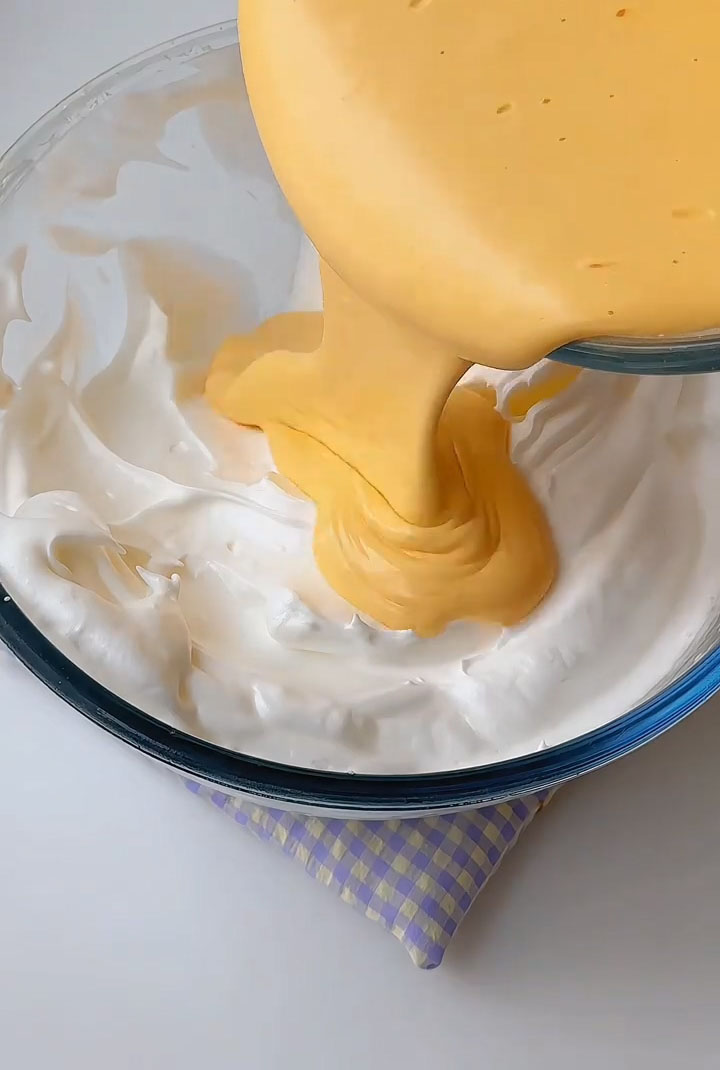
2. Bake and Shape the Cake
Pour the batter onto the prepared baking sheet and spread it evenly into a smooth layer. Gently tap the pan on the counter a few times to release any large air bubbles.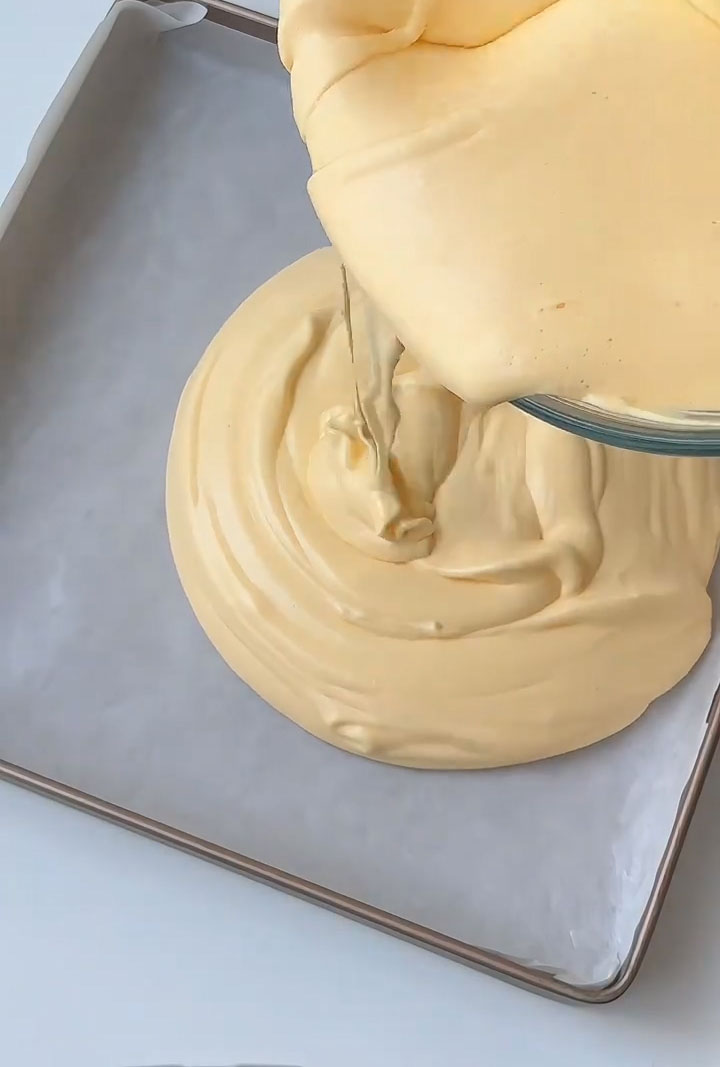
Bake in the preheated oven for about 20-25 minutes, or until the top is lightly golden and springs back when touched. Do not overbake.
Remove the cake from the oven and let it cool in the pan for 5 minutes. Then, transfer it to a wire rack by lifting the parchment paper. Allow it to cool completely to room temperature.
Once cool, use a heart-shaped cake stencil or cookie cutter to cut out three identical heart-shaped layers from the sheet cake.
3. Prepare the Strawberry Cream
Pour the chilled heavy cream into a large bowl. Using an electric mixer, whip the cream on medium speed until it thickens and soft peaks form.
Add the 150g of strawberry jam. Continue whipping on medium-high speed until the cream is stiff and holds its shape well. Be careful not to over-whip. Place the cream in the refrigerator until you are ready to assemble.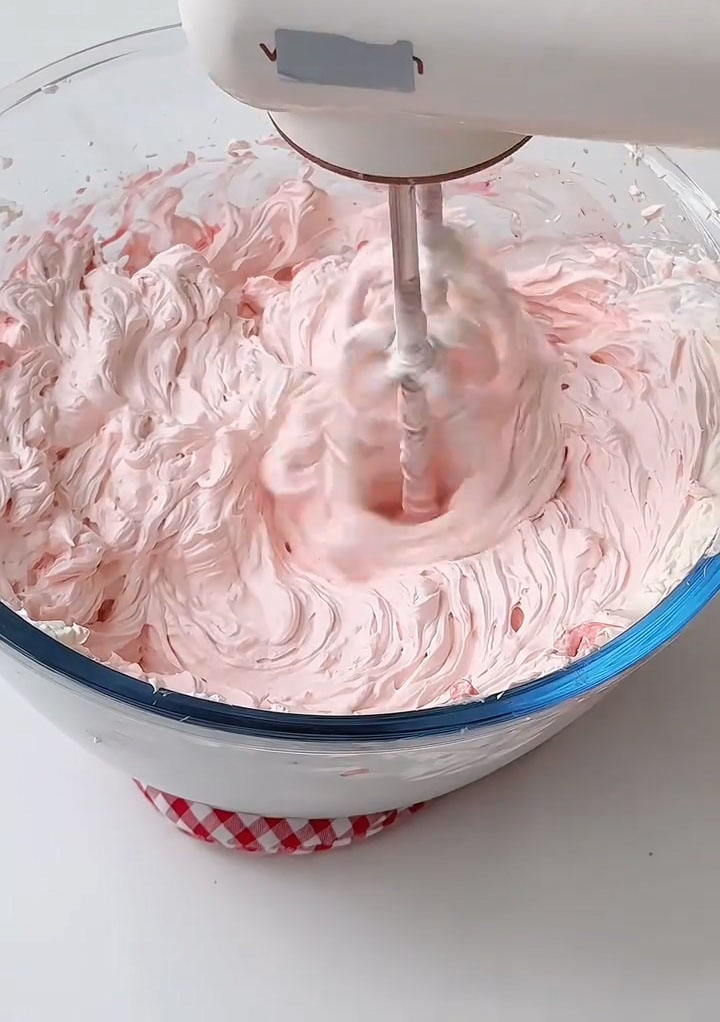
4. Assemble and Decorate the Cake
Place the first heart-shaped cake layer on your serving plate. Spread a layer of strawberry cream evenly over the top. Pipe a border of cream around the outer edge to create a dam.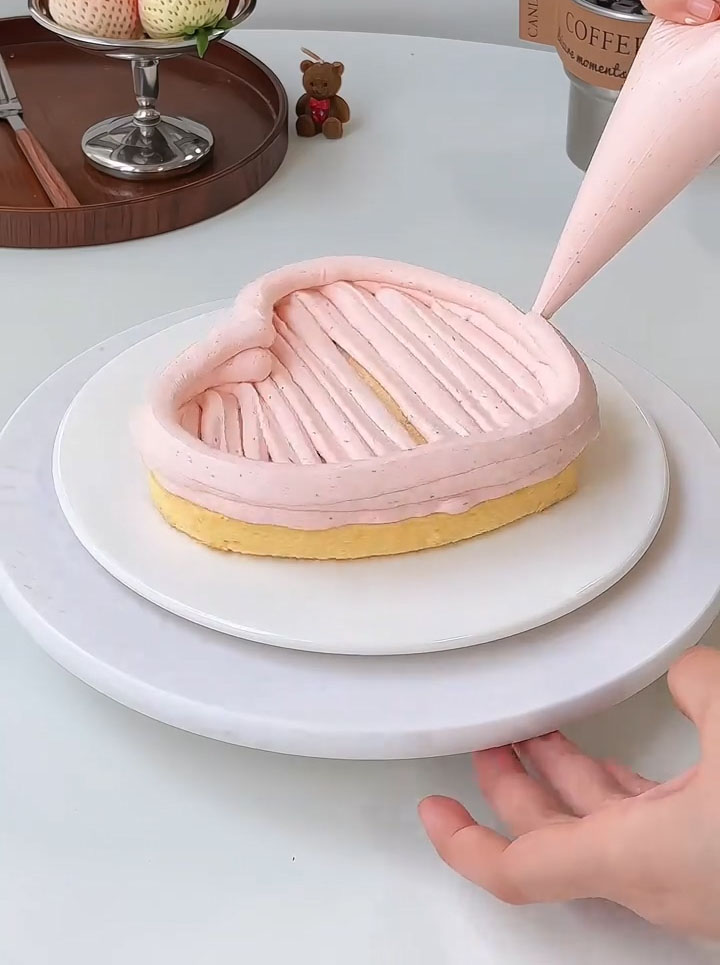
Sprinkle a generous amount of popping candy crisp in the center area. Cover the candy with a thin layer of more cream to seal it in.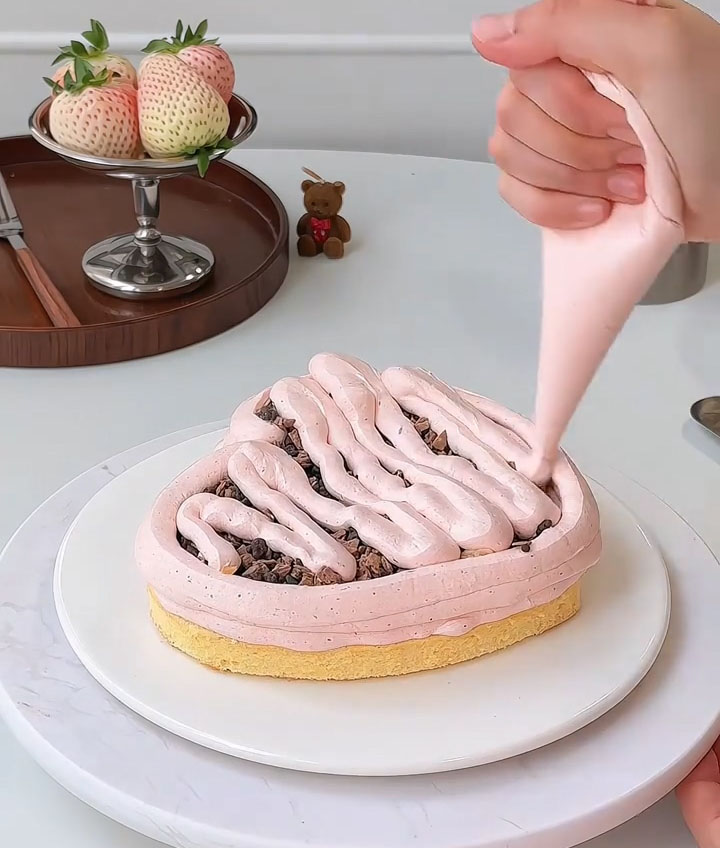
Place the second cake layer on top. Spread another layer of strawberry cream. Pipe another cream dam around the edge. Arrange slices of white strawberries in the center, drizzle them with a little extra strawberry jam, and then cover them with a smooth layer of cream.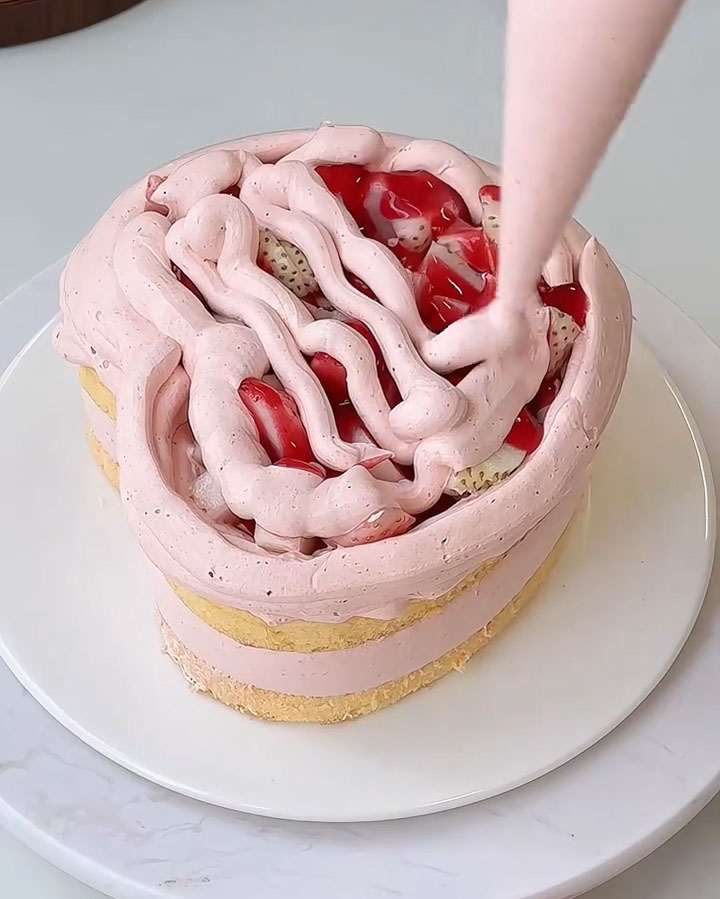
Top with the final cake layer.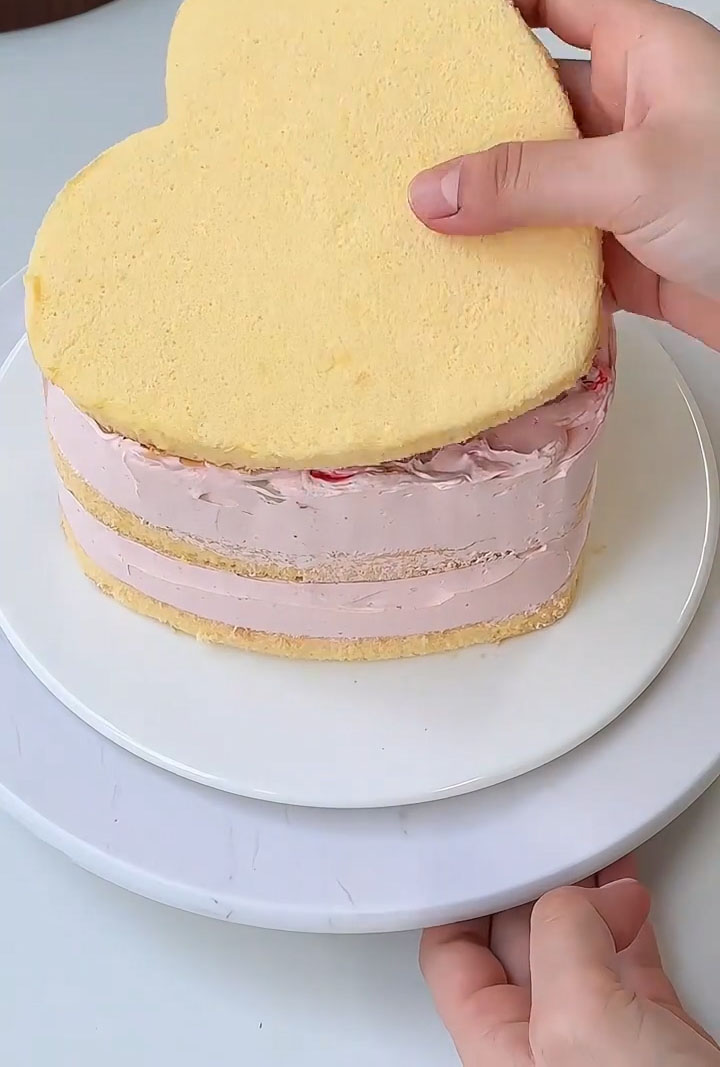
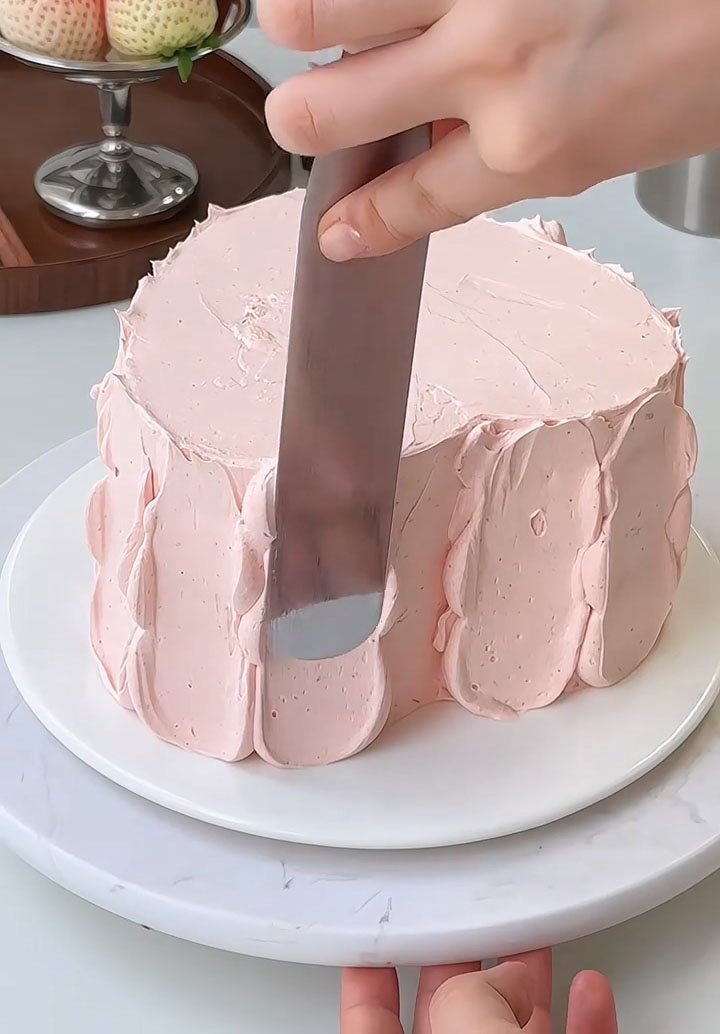
Apply a thin layer of strawberry cream over the entire cake to seal in the crumbs (a crumb coat). You can leave the sides semi-naked or fully frost them with the remaining cream, as desired. Use a spatula to smooth the cream evenly.
Pipe a central swirl of cream on top and arrange fresh strawberries, blueberries, and cherries. Just before serving, tie a pretty ribbon around the base of the cake.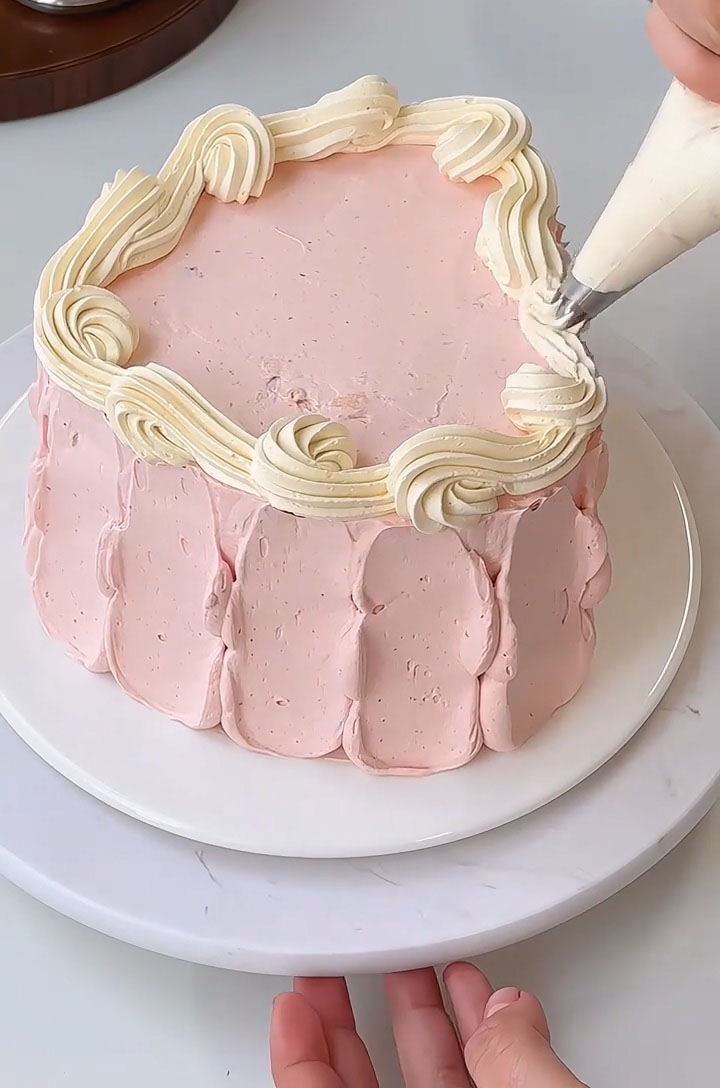
 Storage
Store the assembled cake, covered, in the refrigerator for up to 2 days. For best texture, add fresh fruit decoration on the day of serving.
Tips & Tricks
- Room Temperature Eggs are Key: Taking the time to bring your eggs to room temperature makes the whites whip up much higher and more stable, and helps the yolks blend seamlessly into the batter.
- Don’t Over-mix the Batter: When folding the meringue into the yolk mixture, use a gentle, sweeping “J” motion with your spatula. Over-mixing will deflate the precious air bubbles and result in a dense cake.
- Chill Your Bowl and Cream: For the strawberry cream, ensure your mixing bowl and beaters are cold. Starting with cream that has been chilled for at least 12 hours is the secret to quick, stable whipping.
- The “Dam” is Your Friend: Piping a border of cream around the edge of each layer before adding the runnier fillings (like jam and juicy berries) creates a wall that prevents the fillings from leaking out the sides.
- Have Fun with Decor: This cake is meant to be charming, not perfect! Don’t stress over flawless frosting. The fresh fruit and ribbon will make it look beautiful and intentional.
Frequently Asked Questions
Can I make this cake ahead of time?
Yes, you can bake the cake layers a day in advance. Let them cool completely, wrap them tightly in plastic wrap, and store at room temperature. Prepare the strawberry cream and assemble the cake on the day you plan to serve it for the freshest taste and texture.
My cream won’t whip up stiff. What happened?
This usually happens if the cream, bowl, or beaters were not cold enough, or if the cream’s fat content is too low. Always use heavy whipping cream (at least 36% fat) and chill everything thoroughly.
I don’t have a heart-shaped cutter. Can I still make this?
Absolutely! You can assemble it as a small rectangular or round layer cake using the sheet cake layers, or you can carefully cut heart shapes out of the cooled cake using a knife and a paper template.
Is the popping candy necessary?
No, it’s a fun addition but not essential. The cake will still be delicious without it. You can omit it or replace it with something like chopped toasted nuts or even mini chocolate chips for a different texture.
Soft & Fluffy Heart Strawberry Cake – Perfect for Valentine’s Day
Ingredients
For the Cake Base
- 55 g milk
- 40 g corn oil
- 65 g cake flour sifted
- 5 large eggs separated
- 50 g granulated sugar
For the Strawberry Cream & Filling
- 500 g heavy cream chilled
- 150 g strawberry jam
- Additional strawberry jam for drizzling
- Toffee-flavored popping candy crisp to taste
- White strawberries sliced
For Decoration
- Additional plain whipped cream
- Assorted fresh fruits strawberries, blueberries, cherries
- 1 decorative ribbon
Instructions
Make the Cake Base
- Preheat your oven to 150°C (302°F). Line a rectangular baking sheet (approx. 28x28cm or 11x11 inch) with parchment paper.
- In a medium bowl, whisk together the milk and corn oil until completely combined and slightly thickened (emulsified).
- Sift the cake flour directly into the liquid mixture. Whisk gently until just combined and no dry flour remains.
- Add the 5 egg yolks and whisk until you have a smooth, lump-free batter. Set aside.
- In a clean, dry bowl, add the egg whites and granulated sugar.
- Using an electric mixer, whip on high speed until soft peaks form — the meringue should hold its shape with a small hook when lifted.
- Fold one-third of the meringue into the egg yolk batter using a gentle bottom-to-top motion.
- Pour the combined batter back into the remaining meringue and fold until fully incorporated with no white streaks.
Bake and Shape the Cake
- Pour the batter onto the prepared baking sheet and spread it evenly into a smooth layer. Gently tap the pan on the counter a few times to release any large air bubbles.
- Bake in the preheated oven for about 20-25 minutes, or until the top is lightly golden and springs back when touched. Do not overbake.
- Remove the cake from the oven and let it cool in the pan for 5 minutes. Then, transfer it to a wire rack by lifting the parchment paper. Allow it to cool completely to room temperature.
- Once cool, use a heart-shaped cake stencil or cookie cutter to cut out three identical heart-shaped layers from the sheet cake.
Prepare the Strawberry Cream
- Pour the chilled heavy cream into a large bowl. Using an electric mixer, whip the cream on medium speed until it thickens and soft peaks form. Add the 150g of strawberry jam. Continue whipping on medium-high speed until the cream is stiff and holds its shape well. Be careful not to over-whip. Place the cream in the refrigerator until you are ready to assemble.
Assemble and Decorate the Cake
- Place the first heart-shaped cake layer on your serving plate. Spread a layer of strawberry cream evenly over the top. Pipe a border of cream around the outer edge to create a dam.
- Sprinkle a generous amount of popping candy crisp in the center area. Cover the candy with a thin layer of more cream to seal it in.
- Place the second cake layer on top. Spread another layer of strawberry cream. Pipe another cream dam around the edge. Arrange slices of white strawberries in the center, drizzle them with a little extra strawberry jam, and then cover them with a smooth layer of cream.
Top with the final cake layer.
- Apply a thin layer of strawberry cream over the entire cake to seal in the crumbs (a crumb coat). You can leave the sides semi-naked or fully frost them with the remaining cream, as desired. Use a spatula to smooth the cream evenly.
- Pipe a central swirl of cream on top and arrange fresh strawberries, blueberries, and cherries. Just before serving, tie a pretty ribbon around the base of the cake.
Leave a Reply