
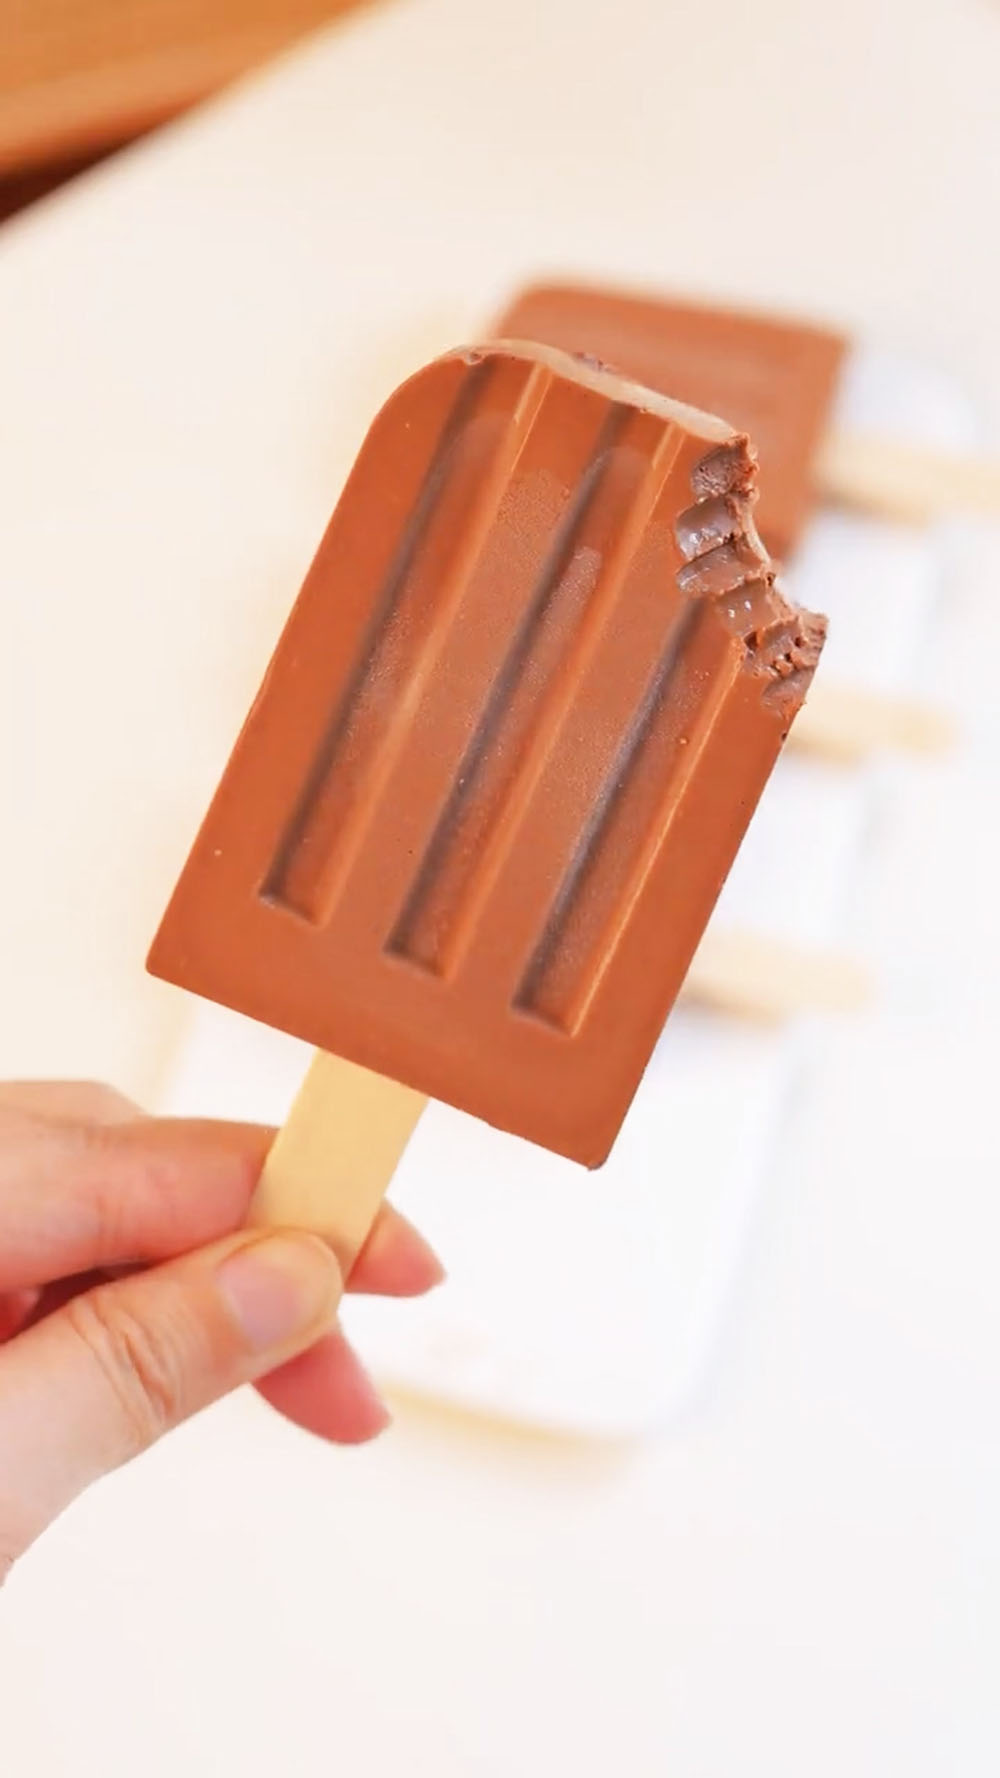
Looking for the ultimate chocolate popsicles? These homemade fudge pops are smooth, creamy, and deeply chocolatey with only 10 minutes of prep. A perfect easy dessert to keep in your freezer for hot days!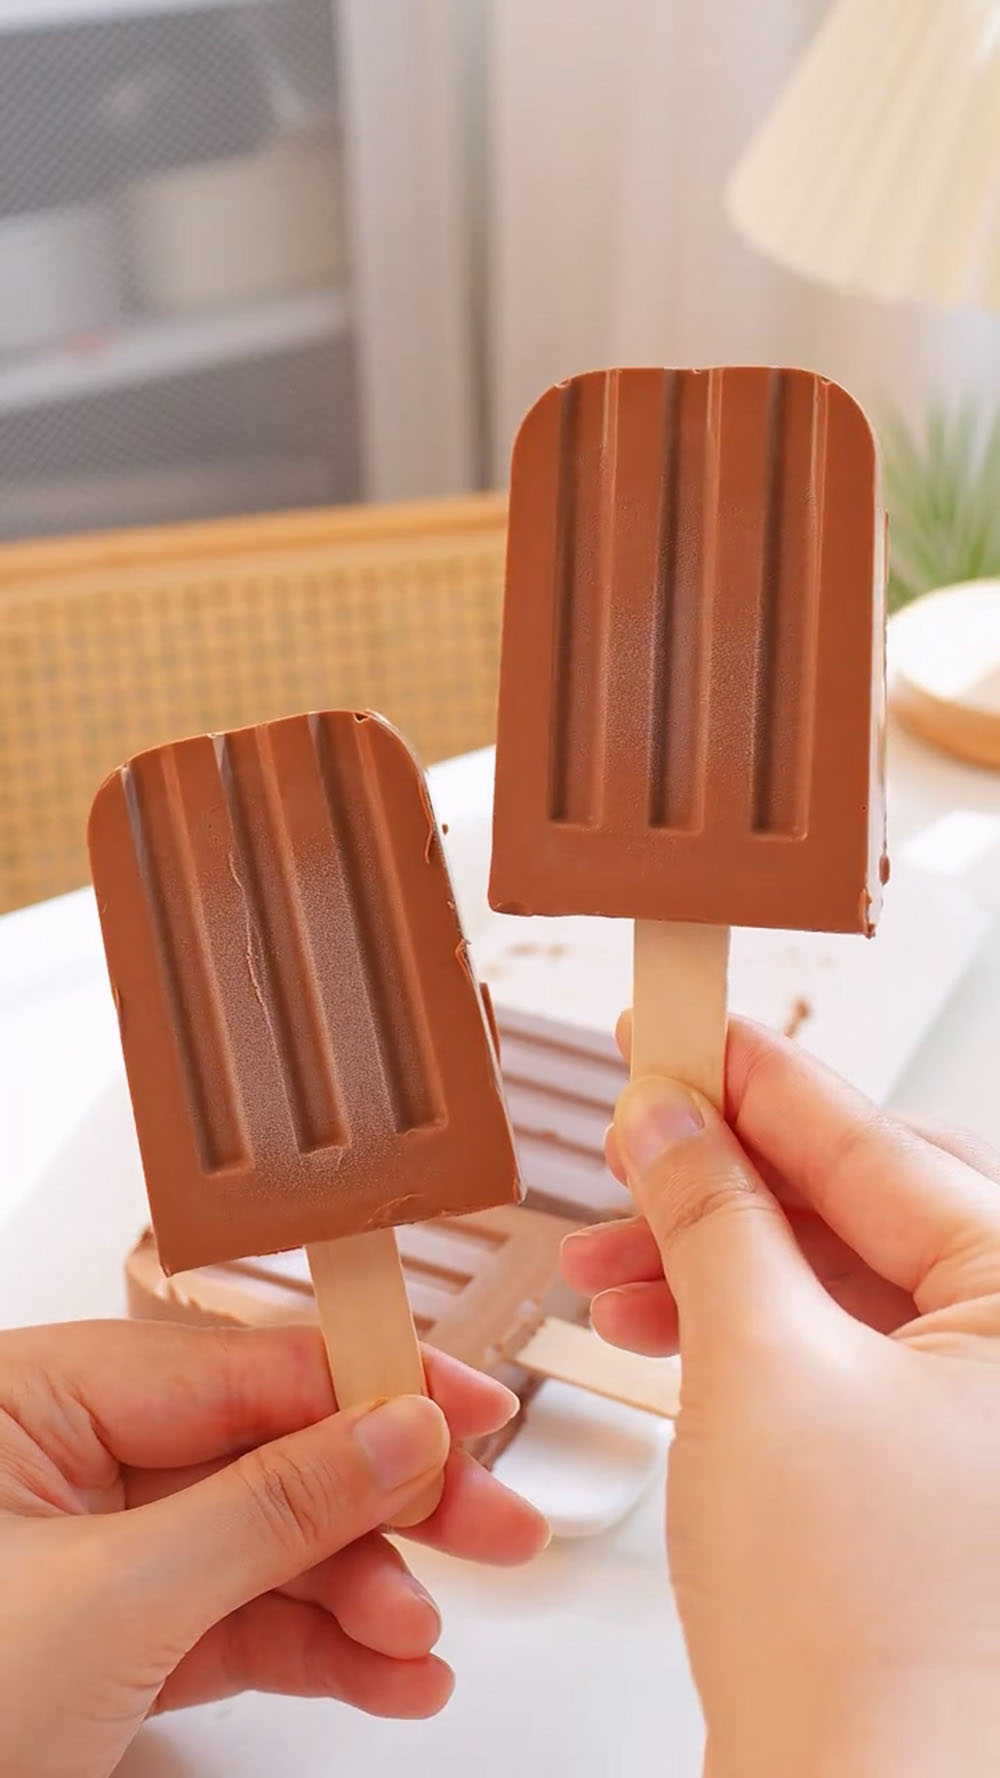
Summer is here, which means popsicles are officially back on the menu! My kids absolutely love them—every time the weather starts to heat up, they immediately ask me to make all kinds of popsicles.
From strawberry popsicles to mango popsicles, easy matcha popsicles, and even blueberry cheesecake crispy popsicles, we’ve tried so many fun flavours.
But out of all the popsicles I’ve tried, this one is hands down the easiest. It only uses 4 simple ingredients, takes just a few minutes to prepare, and yet the result is incredibly rich, creamy, and satisfying.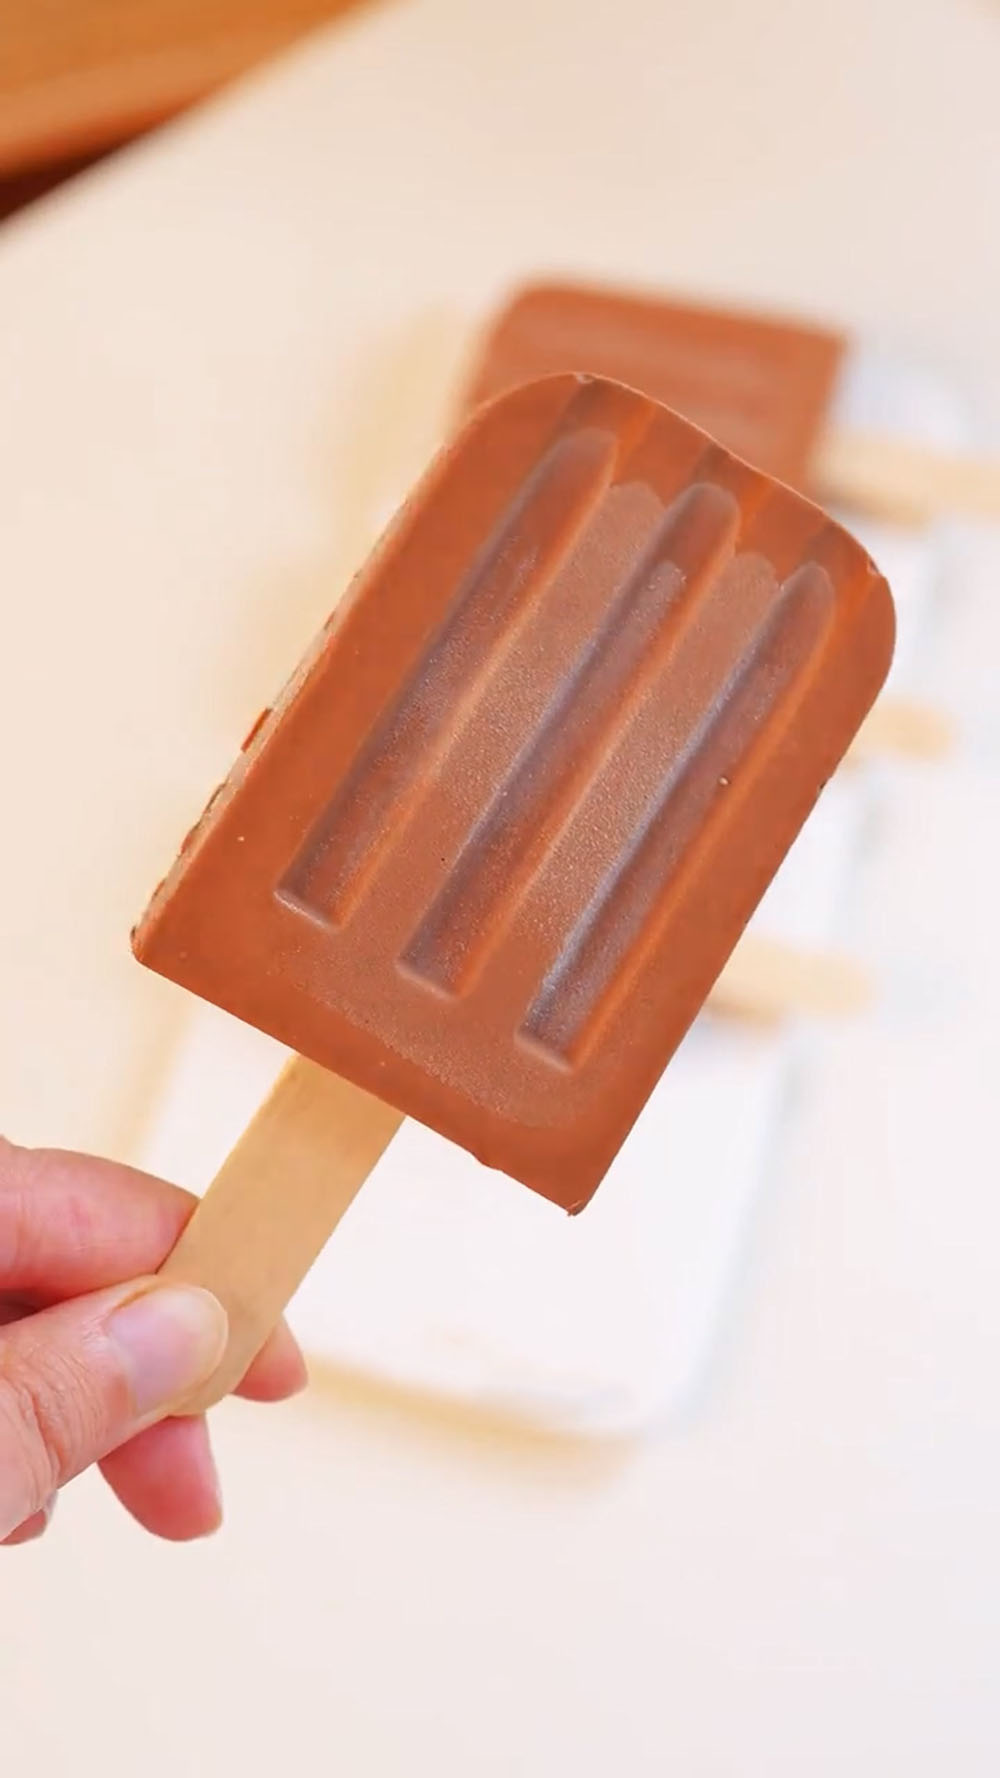
Why You’ll Love This Recipe
- Incredibly fudgy texture – Thanks to the high cocoa content chocolate and whipping cream, these popsicles are dense, creamy, and never icy.
- No ice cream maker required – Just a bowl, a spatula, and your freezer. This recipe couldn’t be simpler.
- Only 10 minutes of active time – Mix, pour, freeze, and walk away. The freezer does the hard work.
- Real ingredients, no weird additives – You can pronounce everything on the ingredient list. Just chocolate, cream, butter, and a touch of sugar.
- Perfectly balanced sweetness – With only 13g of sugar for the entire batch, the rich dark chocolate shines without being overpoweringly sweet.
Ingredients and Substitutions
- Dark chocolate (54% cocoa) – I recommend using a good quality dark chocolate around 54% cocoa for the perfect balance of richness and sweetness. Higher percentages will make it more intense, while lower ones will be sweeter and milder.
- Heavy cream – This is what gives the popsicles their creamy, smooth texture. I always suggest using full-fat heavy cream for the best results—lighter creams won’t give the same richness.
- Butter – Adds extra silkiness and a luxurious mouthfeel. It also helps the popsicles set with that smooth, melt-in-your-mouth texture.
- Granulated sugar – Just a small amount is enough to enhance the chocolate flavour without making the popsicles overly sweet.
Ingredients for Recipe Format
Chocolate Fudge Base
- 100g dark chocolate (54% cocoa content)
- 250g whipping cream
- 25g butter
- 13g granulated sugar
How to Make Chocolate Fudge Popsicles
Prepare the water bath
Fill a medium pot with about 2 inches of water and bring it to a gentle simmer over low to medium heat. Find a heatproof bowl that fits snugly over the pot without touching the water.
Melt the ingredients together
Place all ingredients—dark chocolate, whipping cream, butter, and granulated sugar—into the heatproof bowl. Set the bowl over the simmering water. Stir continuously with a spatula or whisk as the ingredients begin to melt.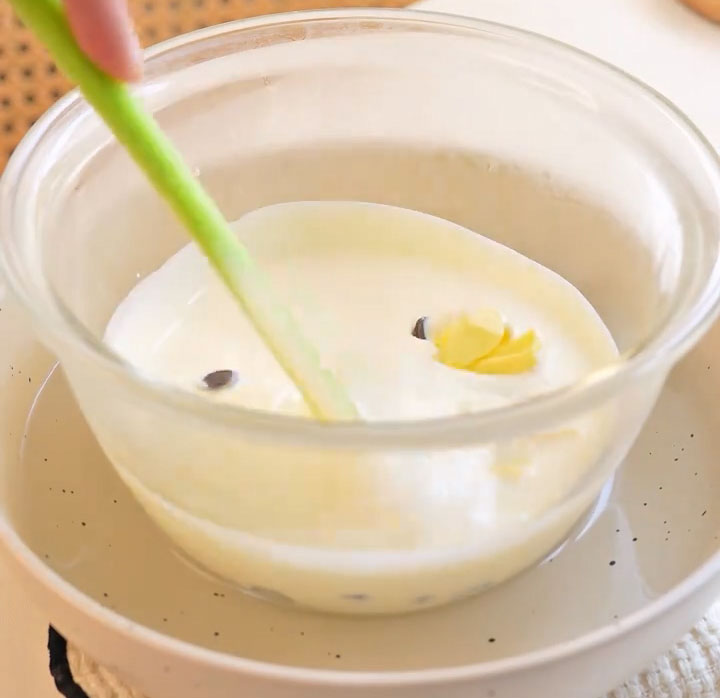
Achieve a smooth, glossy mixture
Continue stirring until everything is completely melted, fully combined, and silky smooth. This should take about 5-7 minutes. The mixture will look like thick chocolate pudding. Make sure no lumps of chocolate or streaks of butter remain.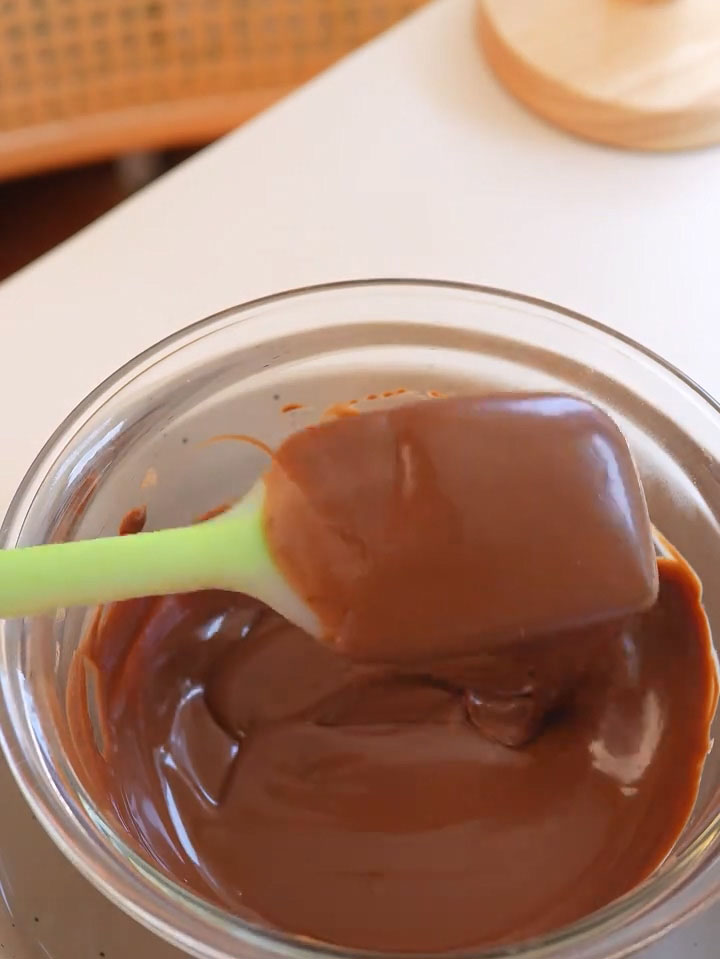
Remove from heat and cool slightly
Take the bowl off the water bath and let the mixture cool for about 5 minutes at room temperature. You want it warm but not hot before pouring into molds.
Pour into popsicle molds
Carefully pour the chocolate mixture into your popsicle molds. If using traditional popsicle molds with sticks, insert the sticks according to your mold’s instructions (usually after 30-60 minutes of partial freezing, or immediately if your mold has a built-in lid).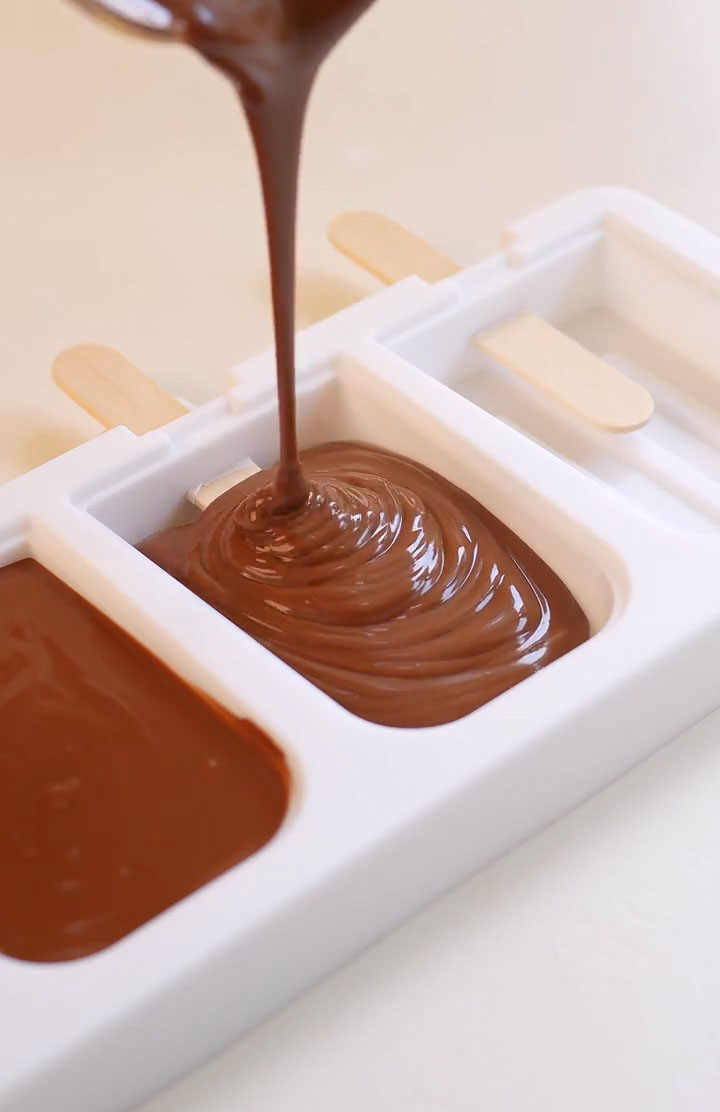
Freeze until completely solid
Place the molds in the freezer and freeze for at least 6 hours. For best results, freeze overnight. The popsicles need to be completely firm to hold their shape when unmolded.
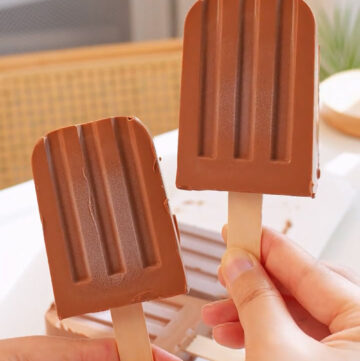
Unmold and serve
To remove the popsicles, run the outside of the mold under warm water for 10-15 seconds to gently loosen them. Pull the popsicles out by the stick. Serve immediately.
Storage
These chocolate fudge popsicles can be stored in their molds, covered tightly with plastic wrap or a lid, in the freezer for up to 2 months. Once unmolded, you can wrap each popsicle individually in plastic wrap or parchment paper and place them in an airtight freezer bag for the same duration.
Tips & Tricks
- Use a water bath, not direct heat – Melting chocolate directly in a saucepan can cause it to seize or burn. The gentle, indirect heat of a water bath ensures your chocolate melts slowly and stays smooth and glossy.
- Stir continuously – Don’t walk away while the ingredients are melting. Constant stirring prevents the chocolate from scorching on the bottom of the bowl and helps emulsify the cream and butter into the chocolate for a fudgy, uniform texture.
- Cool slightly before pouring – Letting the mixture cool for about 5 minutes prevents it from being so hot that it creates condensation inside your popsicle molds, which can lead to ice crystals.
- Freeze for a full 6 hours minimum – I know it’s tempting to check on them early, but pulling the popsicles out before they’re completely solid will result in a mushy mess. Overnight freezing is ideal.
- Run molds under warm water to unmold – Never yank on the stick. A quick 10-15 second bath under warm running water loosens the popsicles just enough to slide out easily while keeping their shape.
Frequently Asked Questions
Why are my popsicles icy instead of creamy?
If your popsicles have an icy texture, the mixture may not have been fully emulsified before freezing, or the popsicles were frozen too slowly. Be sure to stir continuously until the mixture is completely smooth and glossy. Also, set your freezer to its coldest setting before pouring the mixture in to help it freeze faster, which creates smaller ice crystals and a creamier texture.
Can I use milk chocolate or white chocolate instead?
You can, but the texture and sweetness will change significantly. Milk chocolate has less cocoa solids and more sugar, so your popsicles will be much sweeter and less fudgy. White chocolate contains cocoa butter but no cocoa solids, so the popsicles will taste like vanilla fudge rather than chocolate. If substituting, keep the same weight (100g) but consider reducing the granulated sugar.
Can I make these dairy-free?
Yes. Substitute the whipping cream with full-fat coconut cream (the thick part from a can of coconut milk) and use a dairy-free butter alternative or coconut oil. The texture will be slightly different—more coconut-forward and a little softer—but still deliciously fudgy. Use a dairy-free dark chocolate as well.
My chocolate mixture seized and became grainy. What went wrong?
Chocolate seizes when it comes into contact with even a small amount of water. Make sure your bowl and spatula are completely dry before you start. Also, don’t let any steam from the water bath drip into the chocolate mixture. If seizing happens, try whisking in 1 teaspoon of warm cream at a time until it smooths out.
How long do these take to freeze solid?
At minimum, 6 hours. However, freezer temperatures vary. A standard home freezer set to -18°C (0°F) will fully solidify these popsicles in 6-8 hours. If you have a deep freezer or a very cold setting, 4-5 hours might be enough, but I always recommend overnight freezing for guaranteed results.
Homemade Chocolate Fudge Popsicles (Better Than Store-Bought!)
Ingredients
- 100 g dark chocolate 54% cocoa content
- 250 g whipping cream
- 25 g butter
- 13 g granulated sugar
Instructions
Prepare the water bath
- Fill a medium pot with about 2 inches of water and bring it to a gentle simmer over low to medium heat. Find a heatproof bowl that fits snugly over the pot without touching the water.
Melt the ingredients together
- Place all ingredients—dark chocolate, whipping cream, butter, and granulated sugar—into the heatproof bowl. Set the bowl over the simmering water. Stir continuously with a spatula or whisk as the ingredients begin to melt.
Achieve a smooth, glossy mixture
- Continue stirring until everything is completely melted, fully combined, and silky smooth. This should take about 5-7 minutes. The mixture will look like thick chocolate pudding. Make sure no lumps of chocolate or streaks of butter remain.
Remove from heat and cool slightly
- Take the bowl off the water bath and let the mixture cool for about 5 minutes at room temperature. You want it warm but not hot before pouring into molds.
Pour into popsicle molds
- Carefully pour the chocolate mixture into your popsicle molds. If using traditional popsicle molds with sticks, insert the sticks according to your mold's instructions (usually after 30-60 minutes of partial freezing, or immediately if your mold has a built-in lid).
Freeze until completely solid
- Place the molds in the freezer and freeze for at least 6 hours. For best results, freeze overnight. The popsicles need to be completely firm to hold their shape when unmolded.
Unmold and serve
- To remove the popsicles, run the outside of the mold under warm water for 10-15 seconds to gently loosen them. Pull the popsicles out by the stick. Serve immediately.
Leave a Reply