
Matcha Chocolate Lava Tart
This no-bake dessert combines the earthy elegance of matcha with the luxurious richness of chocolate in a stunning, silky-smooth filling that melts instantly on your tongue. The contrast between the crisp shell and creamy center creates pure magic in every bite!
Why You‘ll Love This Recipe
I’m always amazed at how easy it is to create something so decadent without using an oven! The matcha chocolate filling is so silky and flavorful, combining the earthy freshness of matcha with the deep richness of white chocolate. Plus, the tart shell adds a lovely crunch, making this dessert a delightful treat for any occasion. No complicated steps, just pure dessert magic that’s perfect for impressing guests or treating yourself!
Ingredients:
Main Ingredients:
- 120g white chocolate (used as the base for the matcha chocolate filling)
- 8g matcha powder (adds that signature matcha flavor, make sure to sift it before use for the best texture)
- 180g heavy cream (helps blend the filling, giving it a creamy and smooth texture)
- Tart shells (as needed, you can use store-bought tart shells for convenience)
- Black chocolate (for decoration, adding a touch of richness to the tart)
Instructions:
Step 1: Make the Matcha Chocolate Mixture
Melt 120g white chocolate over double boiler.
Make sure the water isn’t too hot, as this can cause the chocolate to separate. Stir until completely melted.
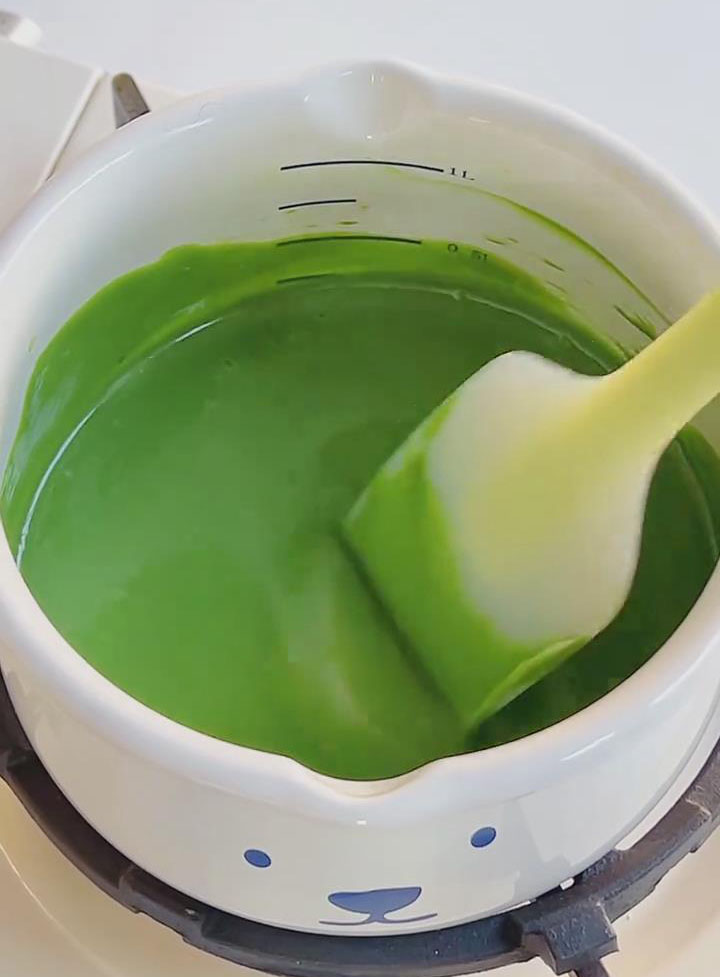
Add 8g of matcha powder to the melted white chocolate. Stir well with a spatula or whisk until the matcha and chocolate are fully blended, making sure the mixture is smooth and free from lumps. Set aside.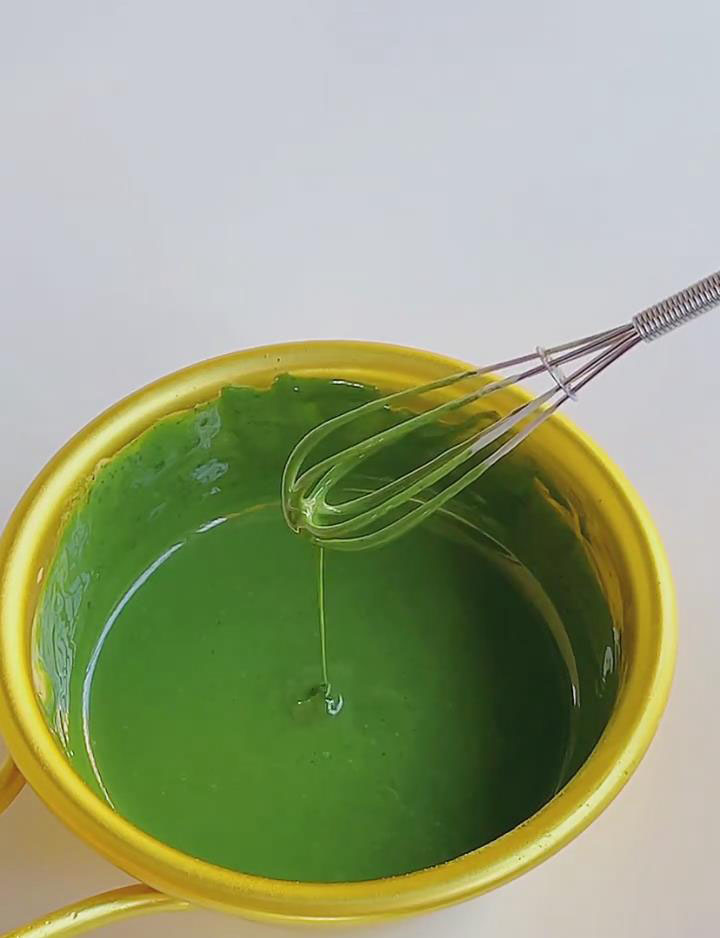
Step 2: Prepare the Filling
Pour 180g of heavy cream into a small saucepan. Heat it gently over low heat, stirring constantly until the cream is just warmed through (you should feel it warm but not hot).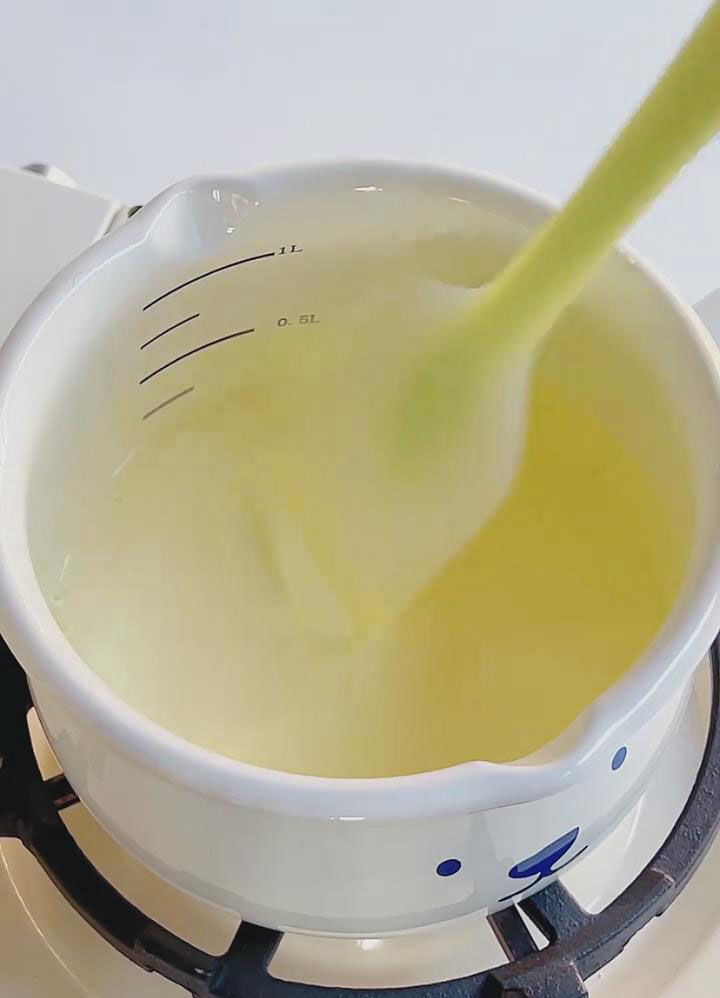
Slowly pour the matcha chocolate mixture into the warm cream while stirring continuously. Keep mixing until both ingredients are fully incorporated and you get a smooth, silky filling.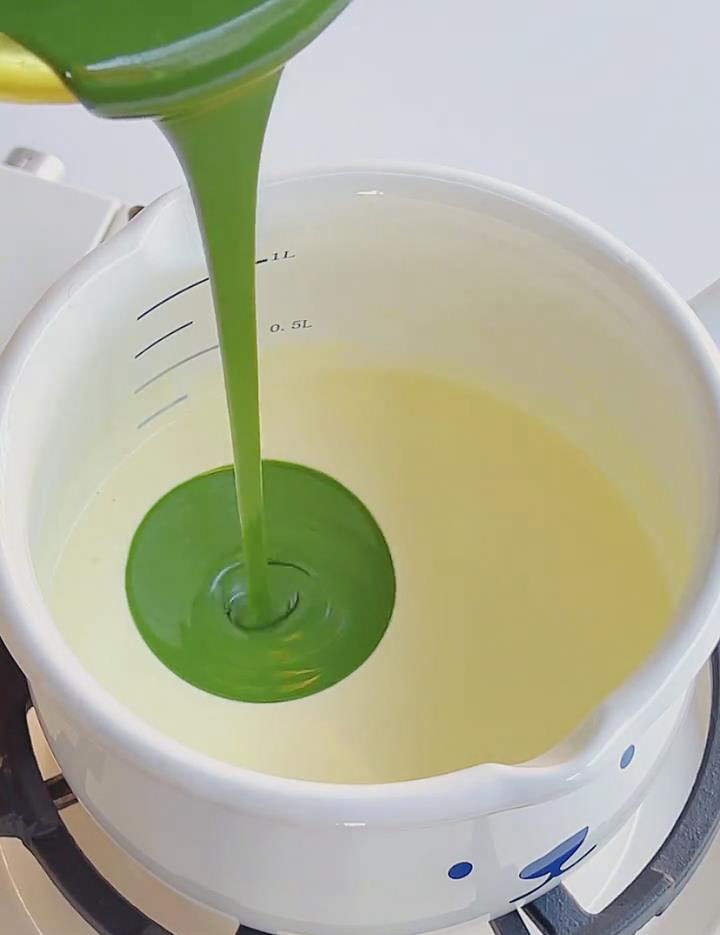
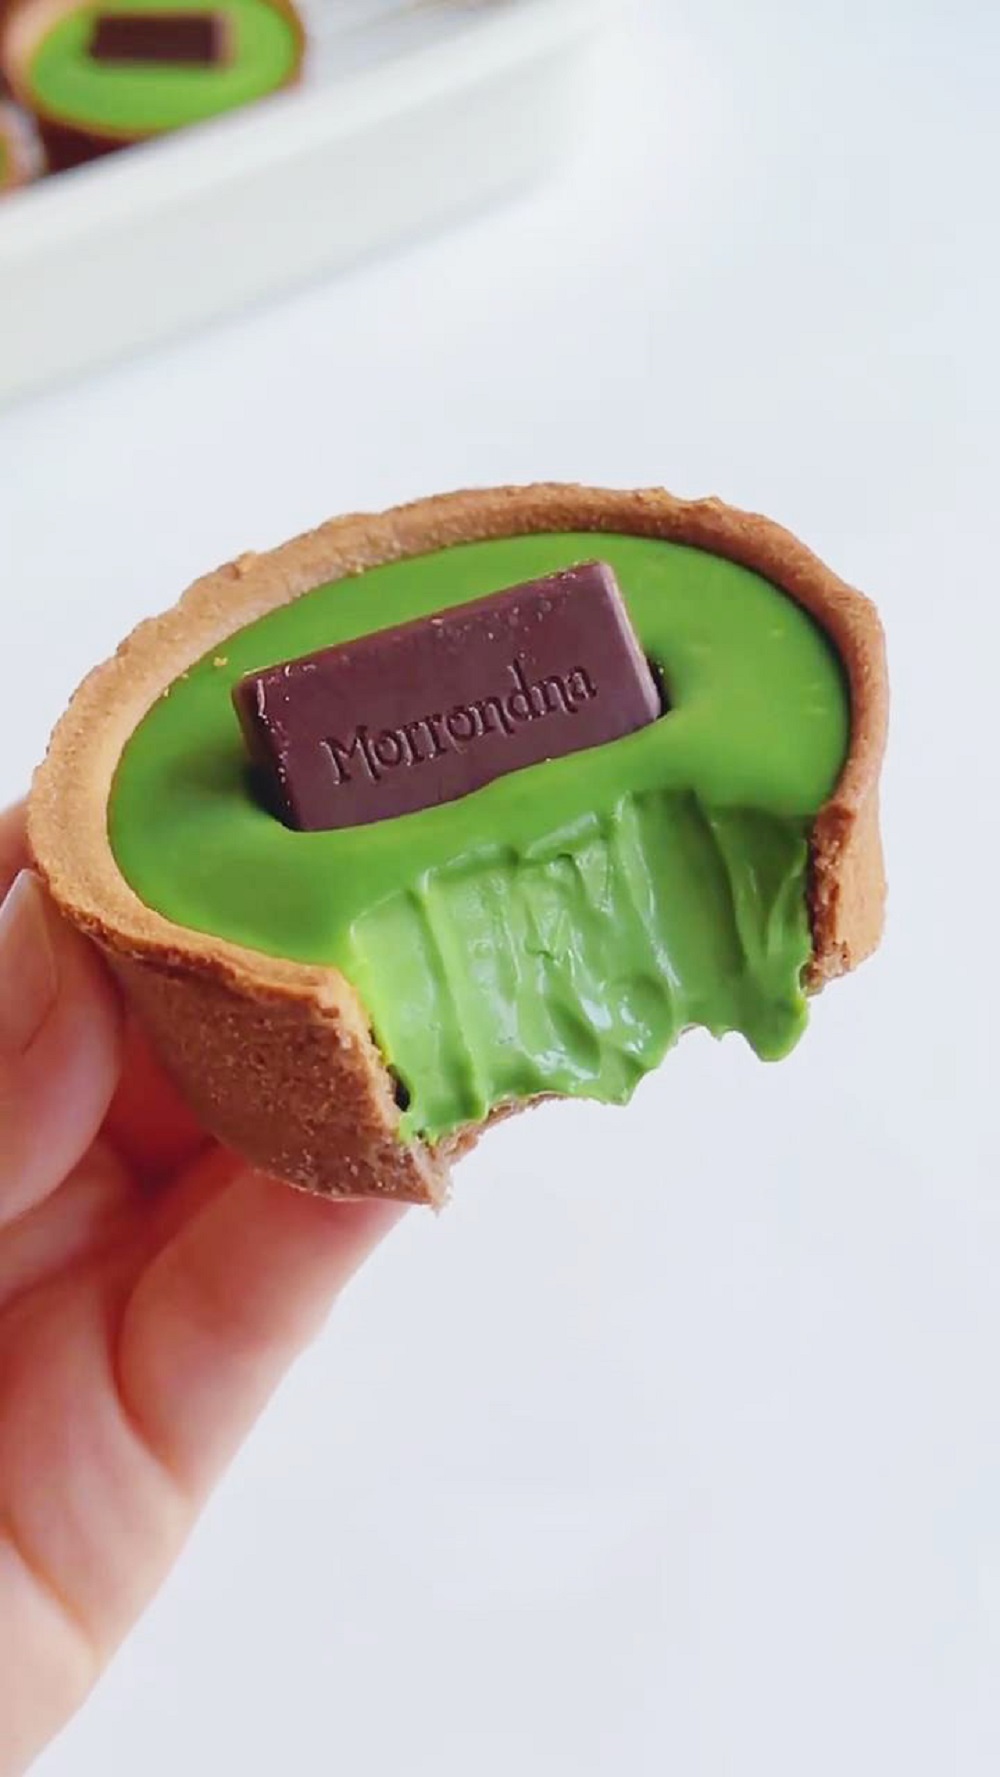
Step 3: Shape and Refrigerate
Pour the prepared filling evenly into the tart shells. Tap the shells lightly on the counter to remove any air bubbles.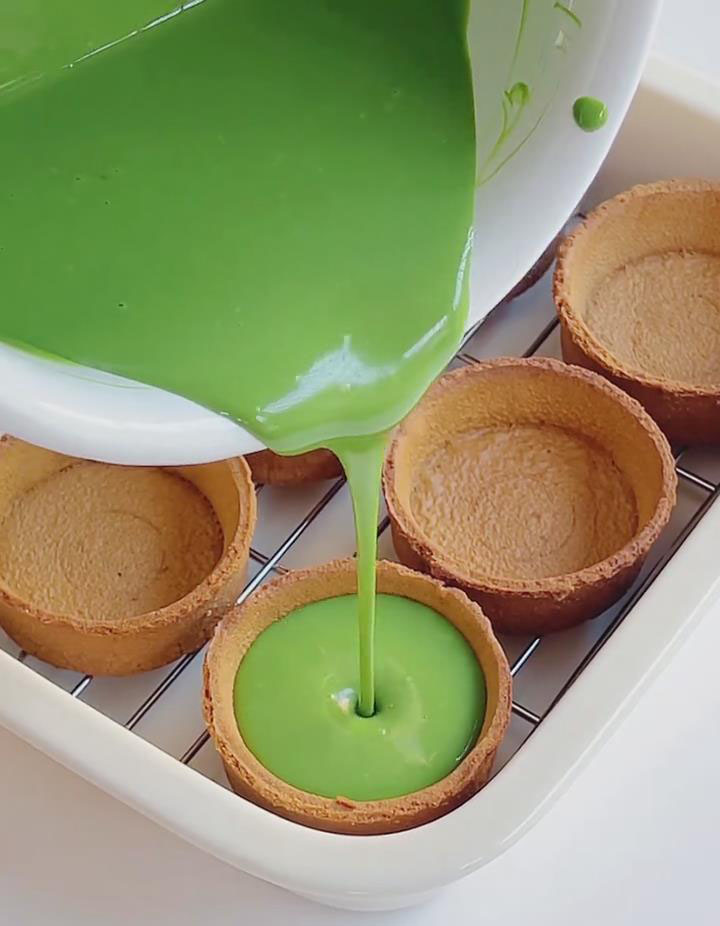
Place the tarts into the refrigerator for about 30 minutes, allowing the filling to firm up and set.
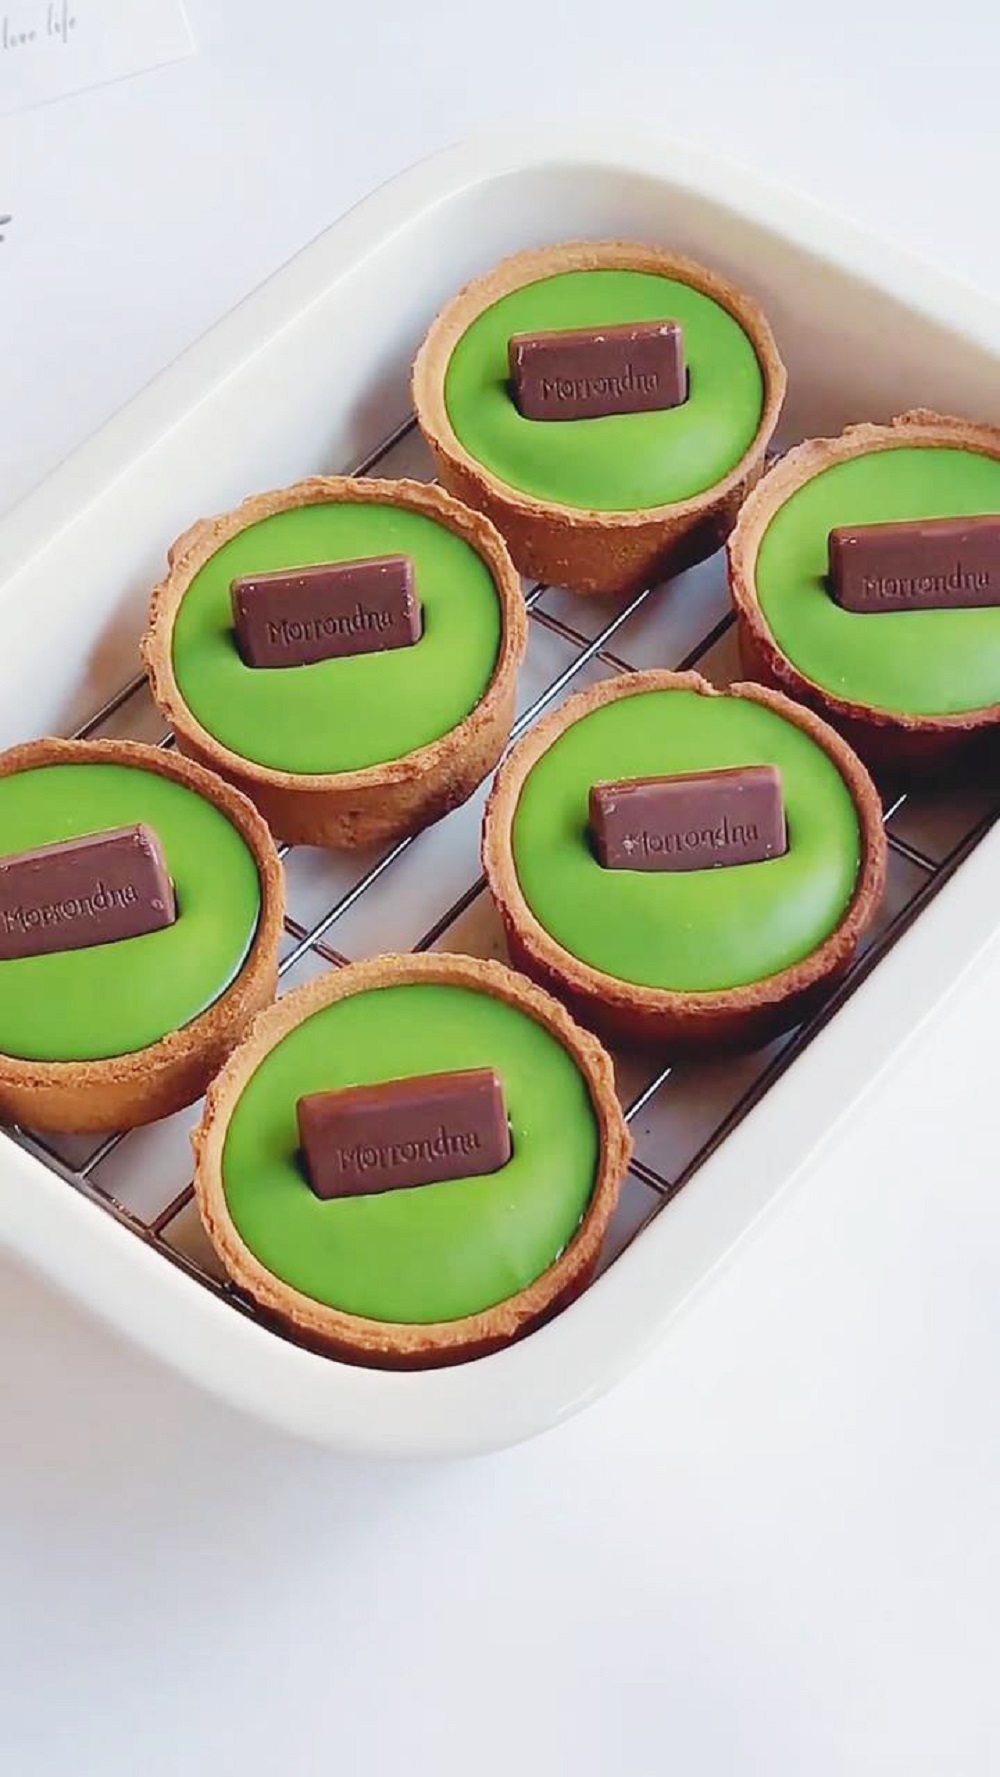
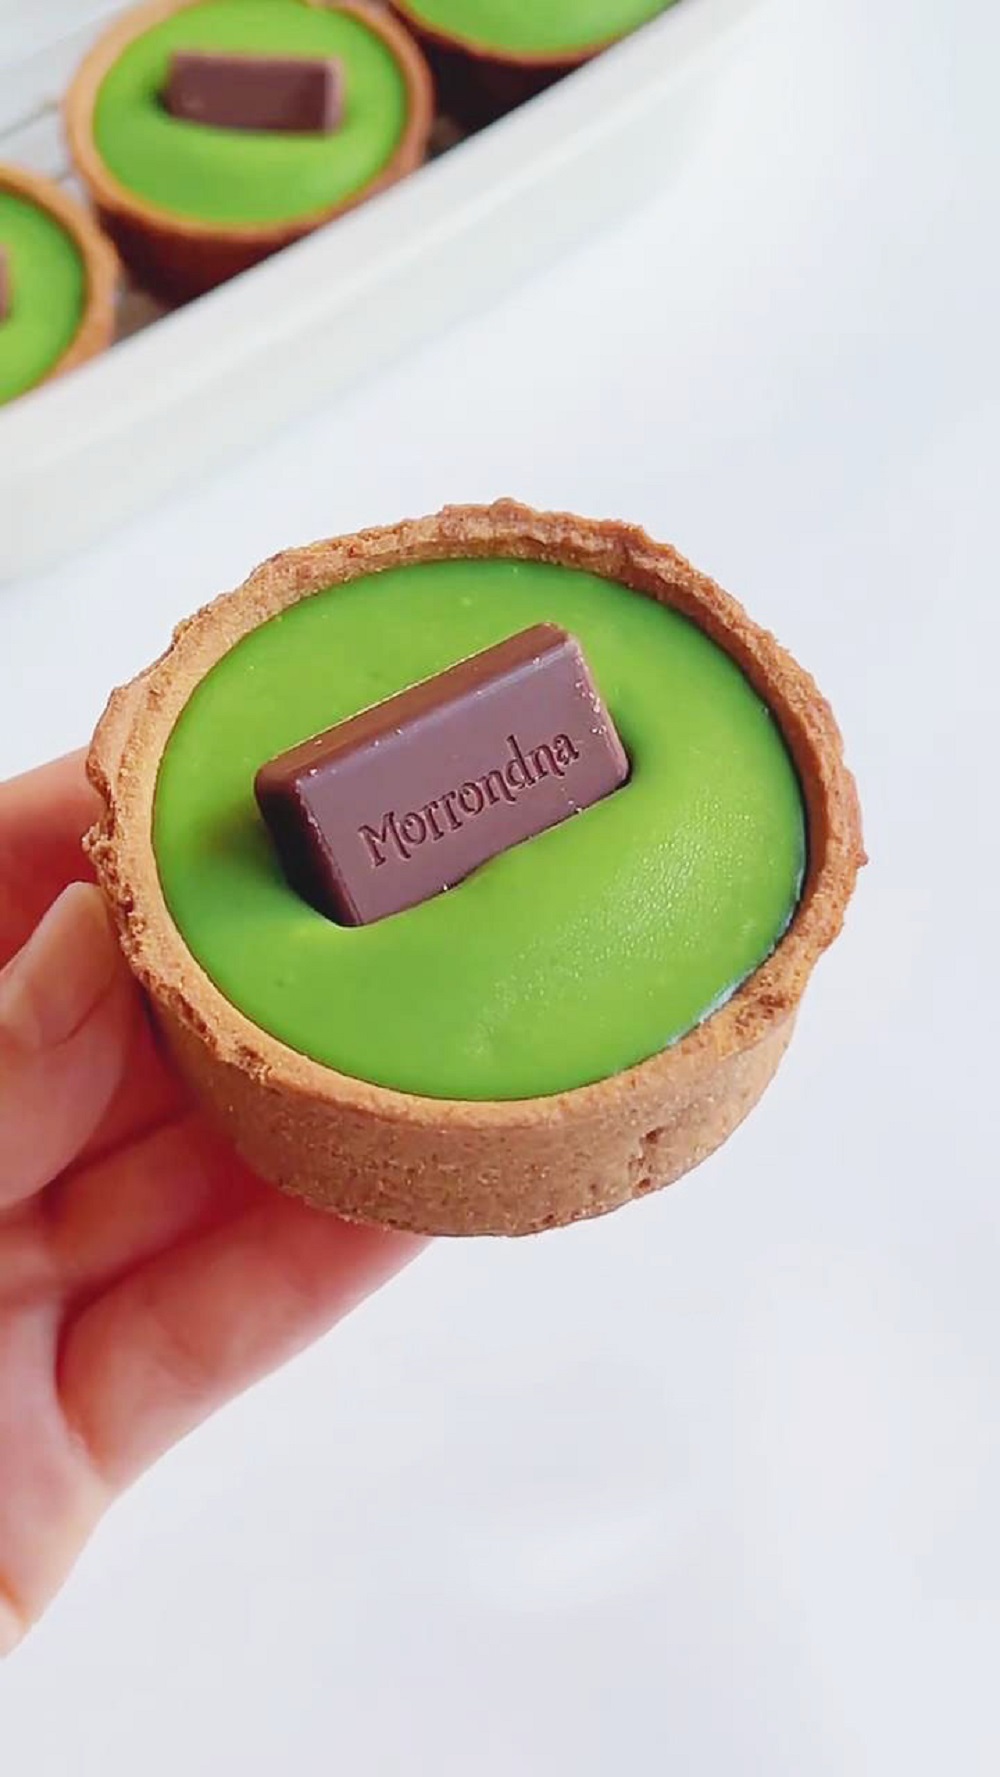
Step 4: Final Decoration
Once the tarts are set, remove them from the fridge and top each with a small piece of black chocolate for decoration. You can melt the chocolate slightly before adding it for a more elegant look. Serve and enjoy!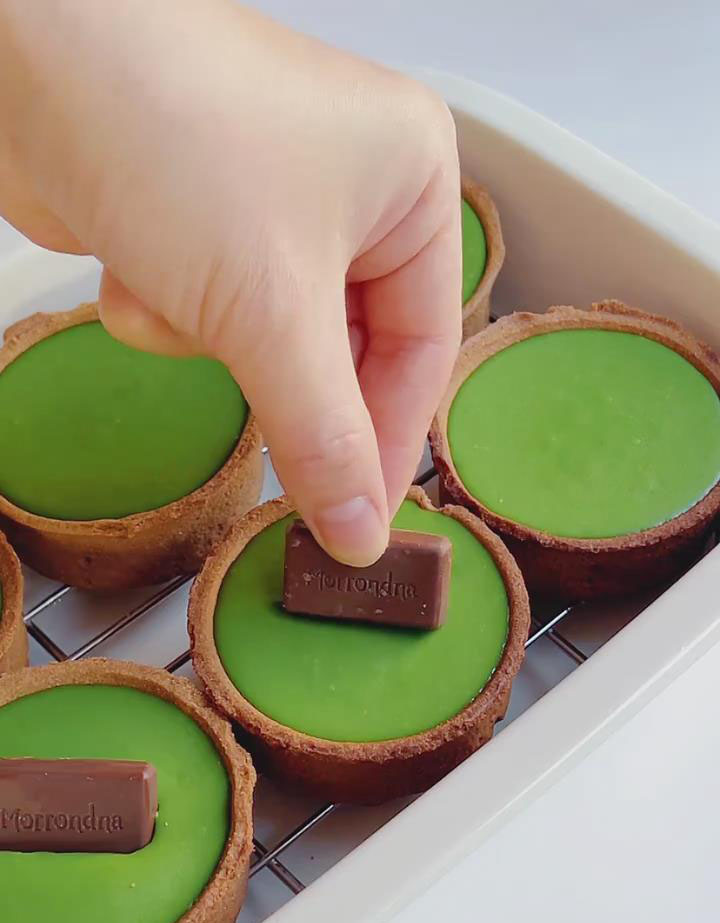
Frequently Asked Questions
Can I use other types of chocolate?
While white chocolate is key for the creamy base, you can experiment with dark chocolate or milk chocolate if you prefer a different flavor profile. Just note that it will change the overall taste of the tart.
Can I make the filling ahead of time?
Yes! You can prepare the matcha chocolate filling a day ahead and store it in the refrigerator. Just make sure it’s well-covered to avoid any fridge odors affecting the flavor.
How can I ensure my tart shell is crispy?
If you’re using a pre-made tart shell, make sure to bake it according to the package instructions to ensure it’s nice and crispy before adding the filling. If making from scratch, blind bake it for about 10 minutes before filling.
Matcha Chocolate Lava Tart – A Melting, Heavenly Treat
Ingredients
- 120 g white chocolate used as the base for the matcha chocolate filling
- 8 g matcha powder adds that signature matcha flavor, make sure to sift it before use for the best texture
- 180 g heavy cream helps blend the filling, giving it a creamy and smooth texture
- Tart shells as needed, you can use store-bought tart shells for convenience
- Black chocolate for decoration, adding a touch of richness to the tart
Instructions
Step 1: Make the Matcha Chocolate Mixture
- Melt 120g white chocolate over double boiler.
- Make sure the water isn't too hot, as this can cause the chocolate to separate. Stir until completely melted.
- Add 8g of matcha powder to the melted white chocolate. Stir well with a spatula or whisk until the matcha and chocolate are fully blended, making sure the mixture is smooth and free from lumps. Set aside.
Step 2: Prepare the Filling
- Pour 180g of heavy cream into a small saucepan. Heat it gently over low heat, stirring constantly until the cream is just warmed through (you should feel it warm but not hot).
- Slowly pour the matcha chocolate mixture into the warm cream while stirring continuously. Keep mixing until both ingredients are fully incorporated and you get a smooth, silky filling.
Step 3: Shape and Refrigerate
- Pour the prepared filling evenly into the tart shells. Tap the shells lightly on the counter to remove any air bubbles.
- Place the tarts into the refrigerator for about 30 minutes, allowing the filling to firm up and set.
Step 4: Final Decoration
- Once the tarts are set, remove them from the fridge and top each with a small piece of black chocolate for decoration. You can melt the chocolate slightly before adding it for a more elegant look. Serve and enjoy!
Leave a Reply