
If you ask me what the easiest baked dessert is, I’d probably say muffins. They’re simple, forgiving, and always deliver that freshly baked comfort everyone loves. No mixer, no complicated techniques — just a whisk, a bowl, and a warm oven.
After making my Chocolate Chip & Oreo Cream Cheese Scones the other day, I found myself staring at a half bag of leftover chocolate chips.
Instead of letting them sit in the pantry (and risk me snacking on them one handful at a time), I knew exactly what to do — bake a batch of Chocolate Chip Muffins.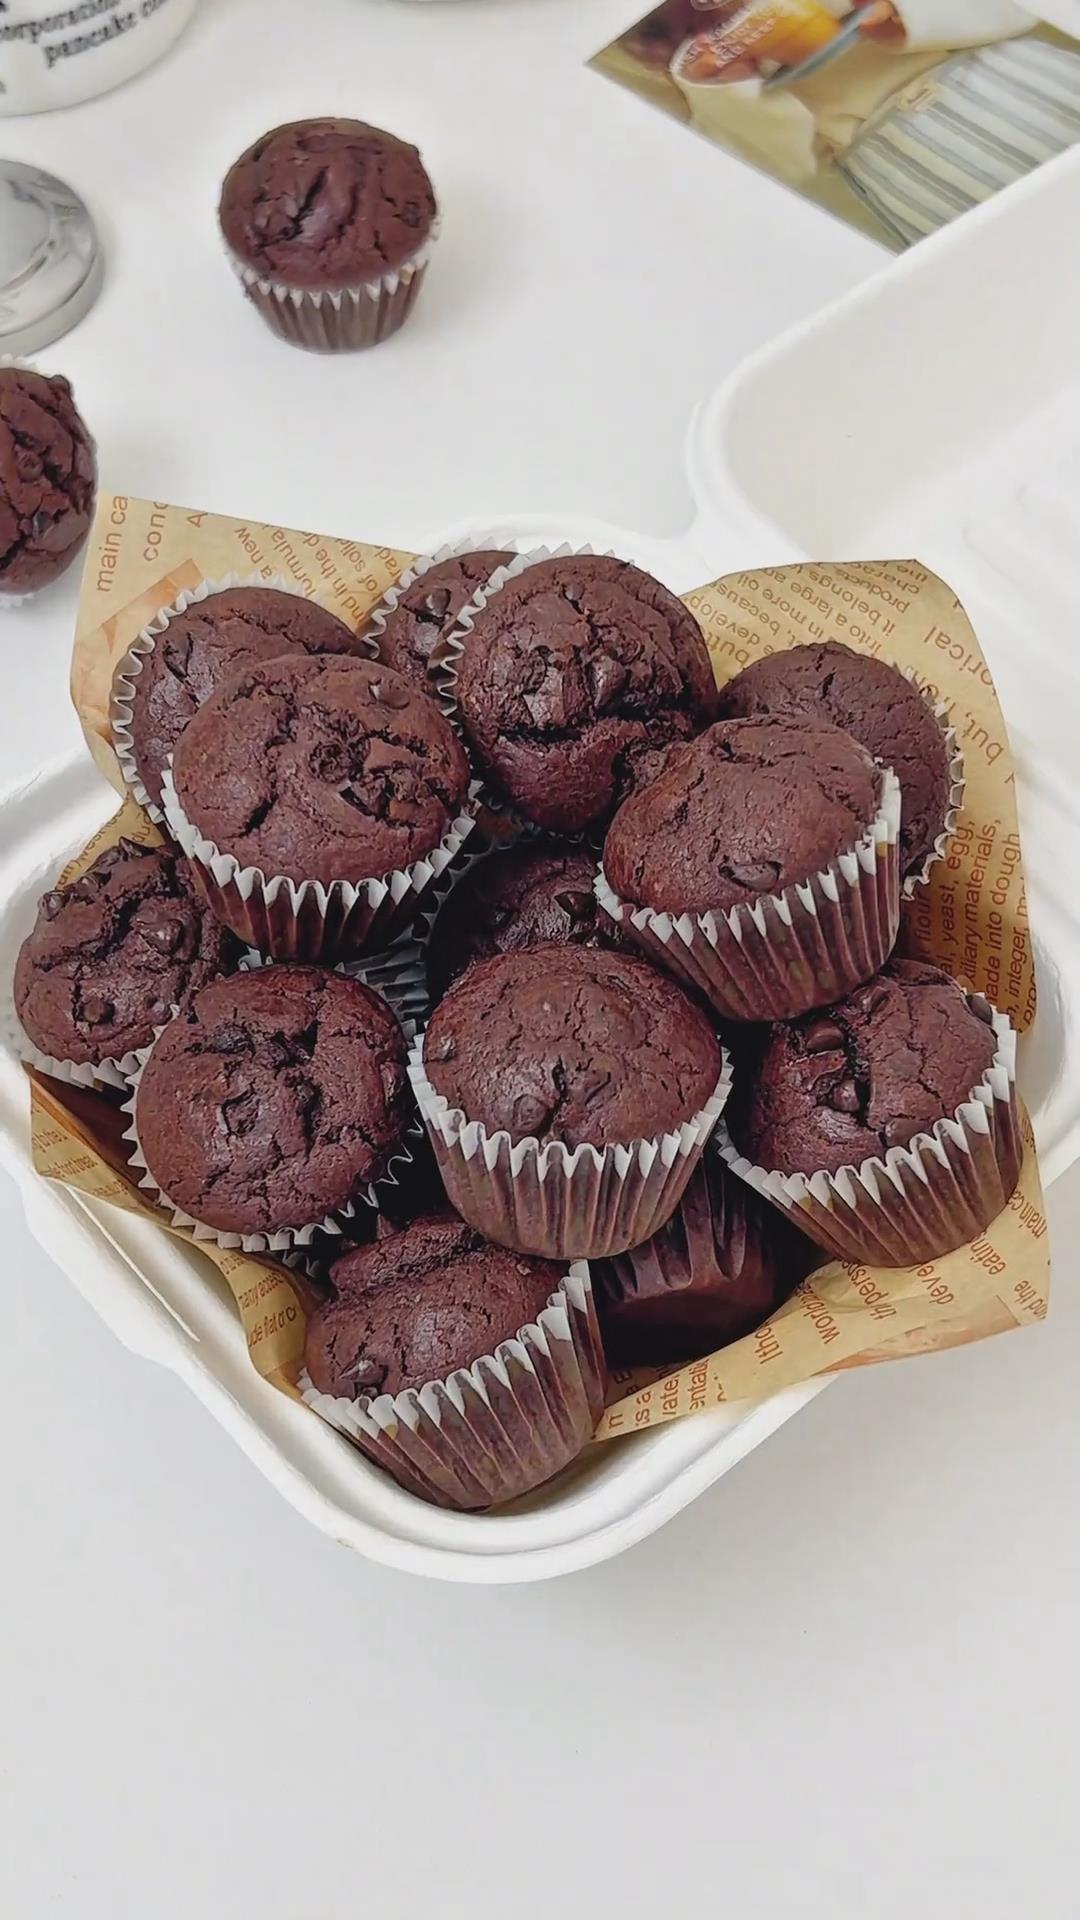
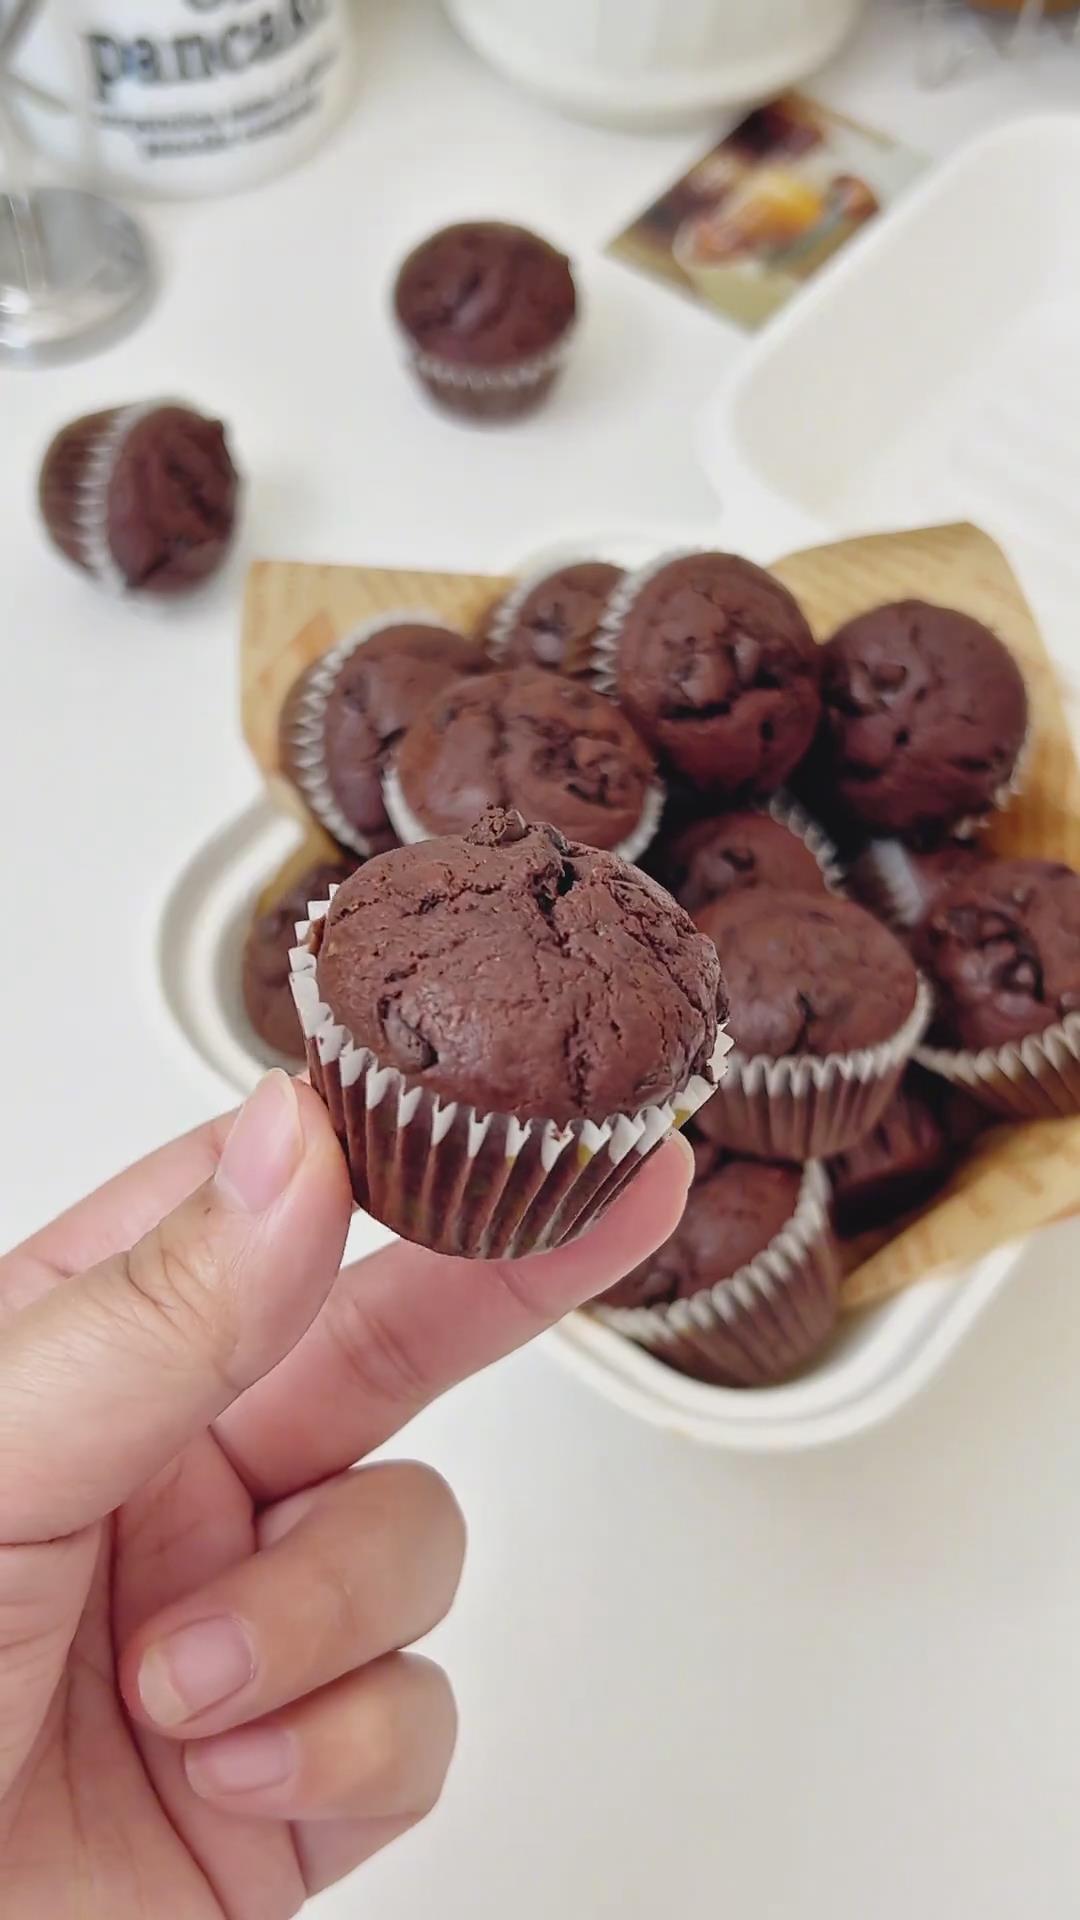
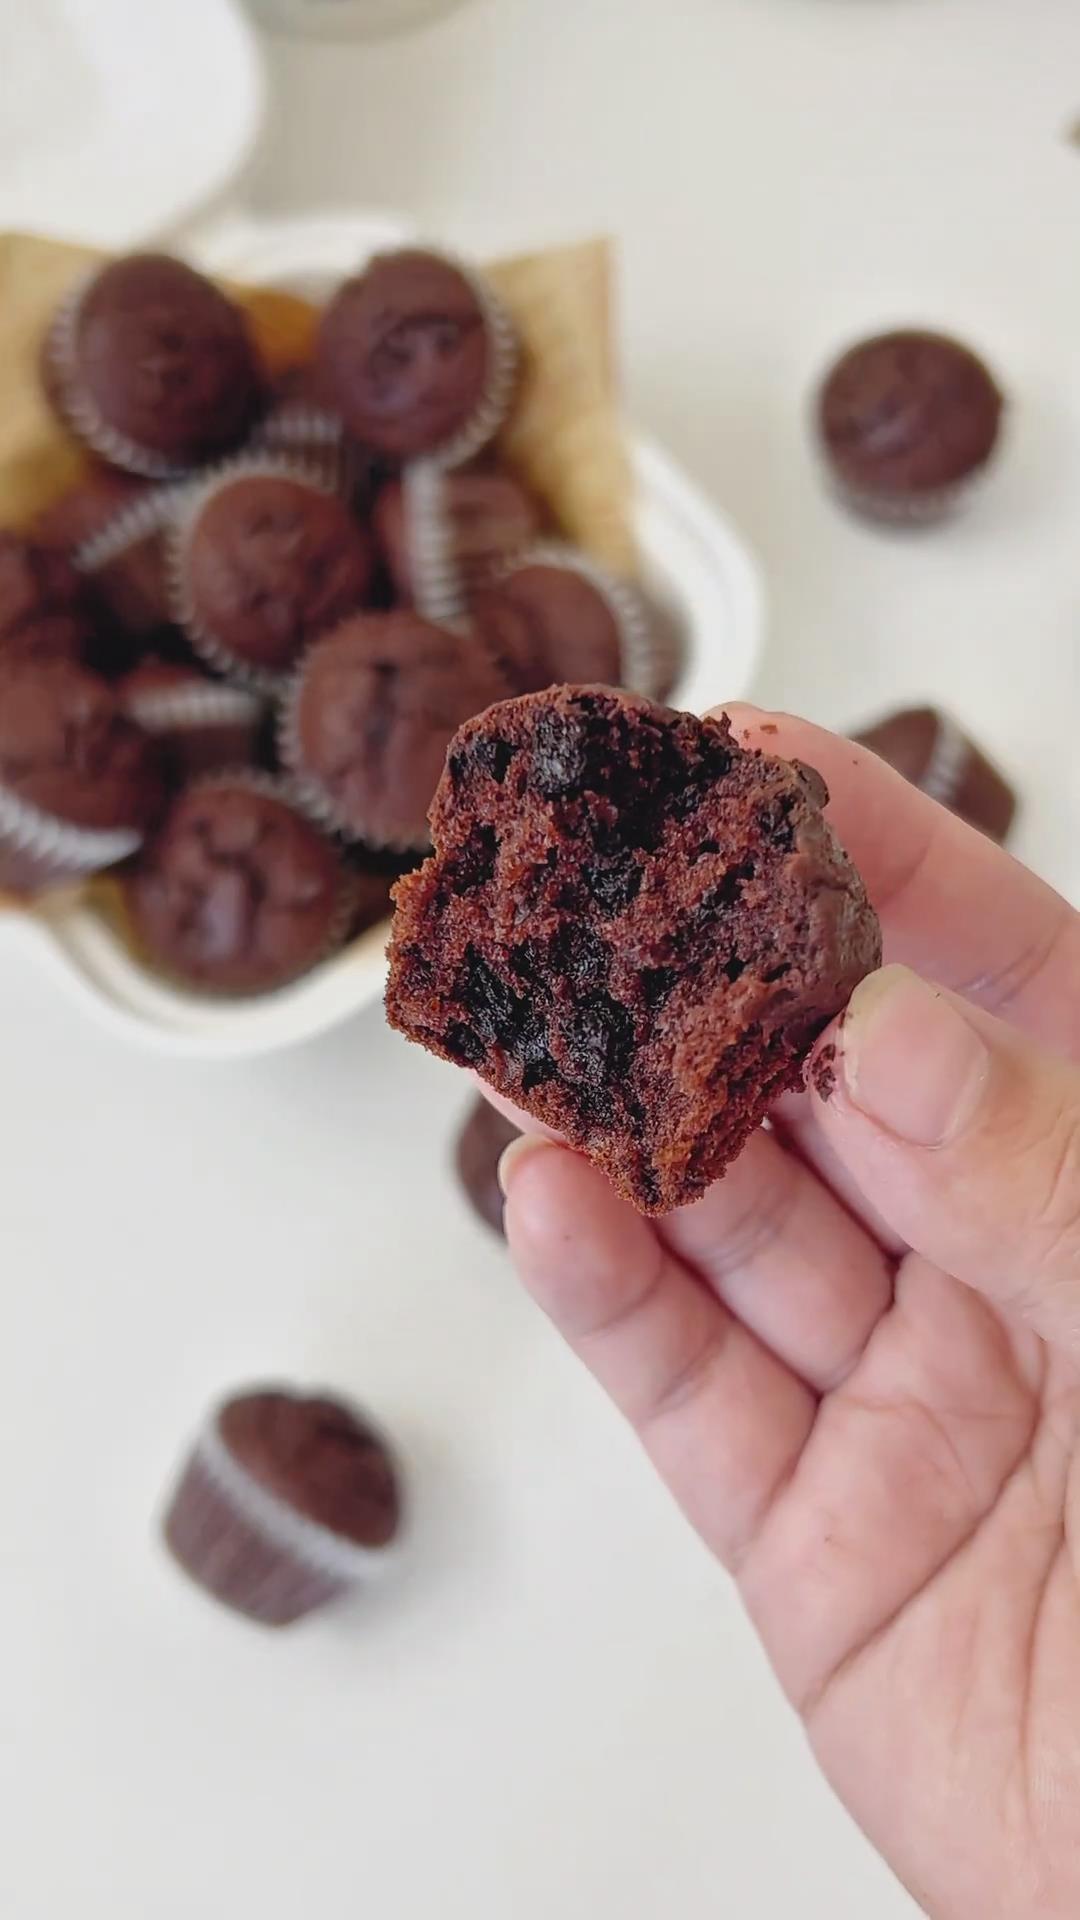
These Chocolate Chip Muffins are soft on the inside, rich with cocoa flavor, and filled with just the right amount of chocolate in every bite. Perfect with a cup of coffee in the morning or a cozy afternoon treat — this is one recipe that always brings me joy to make.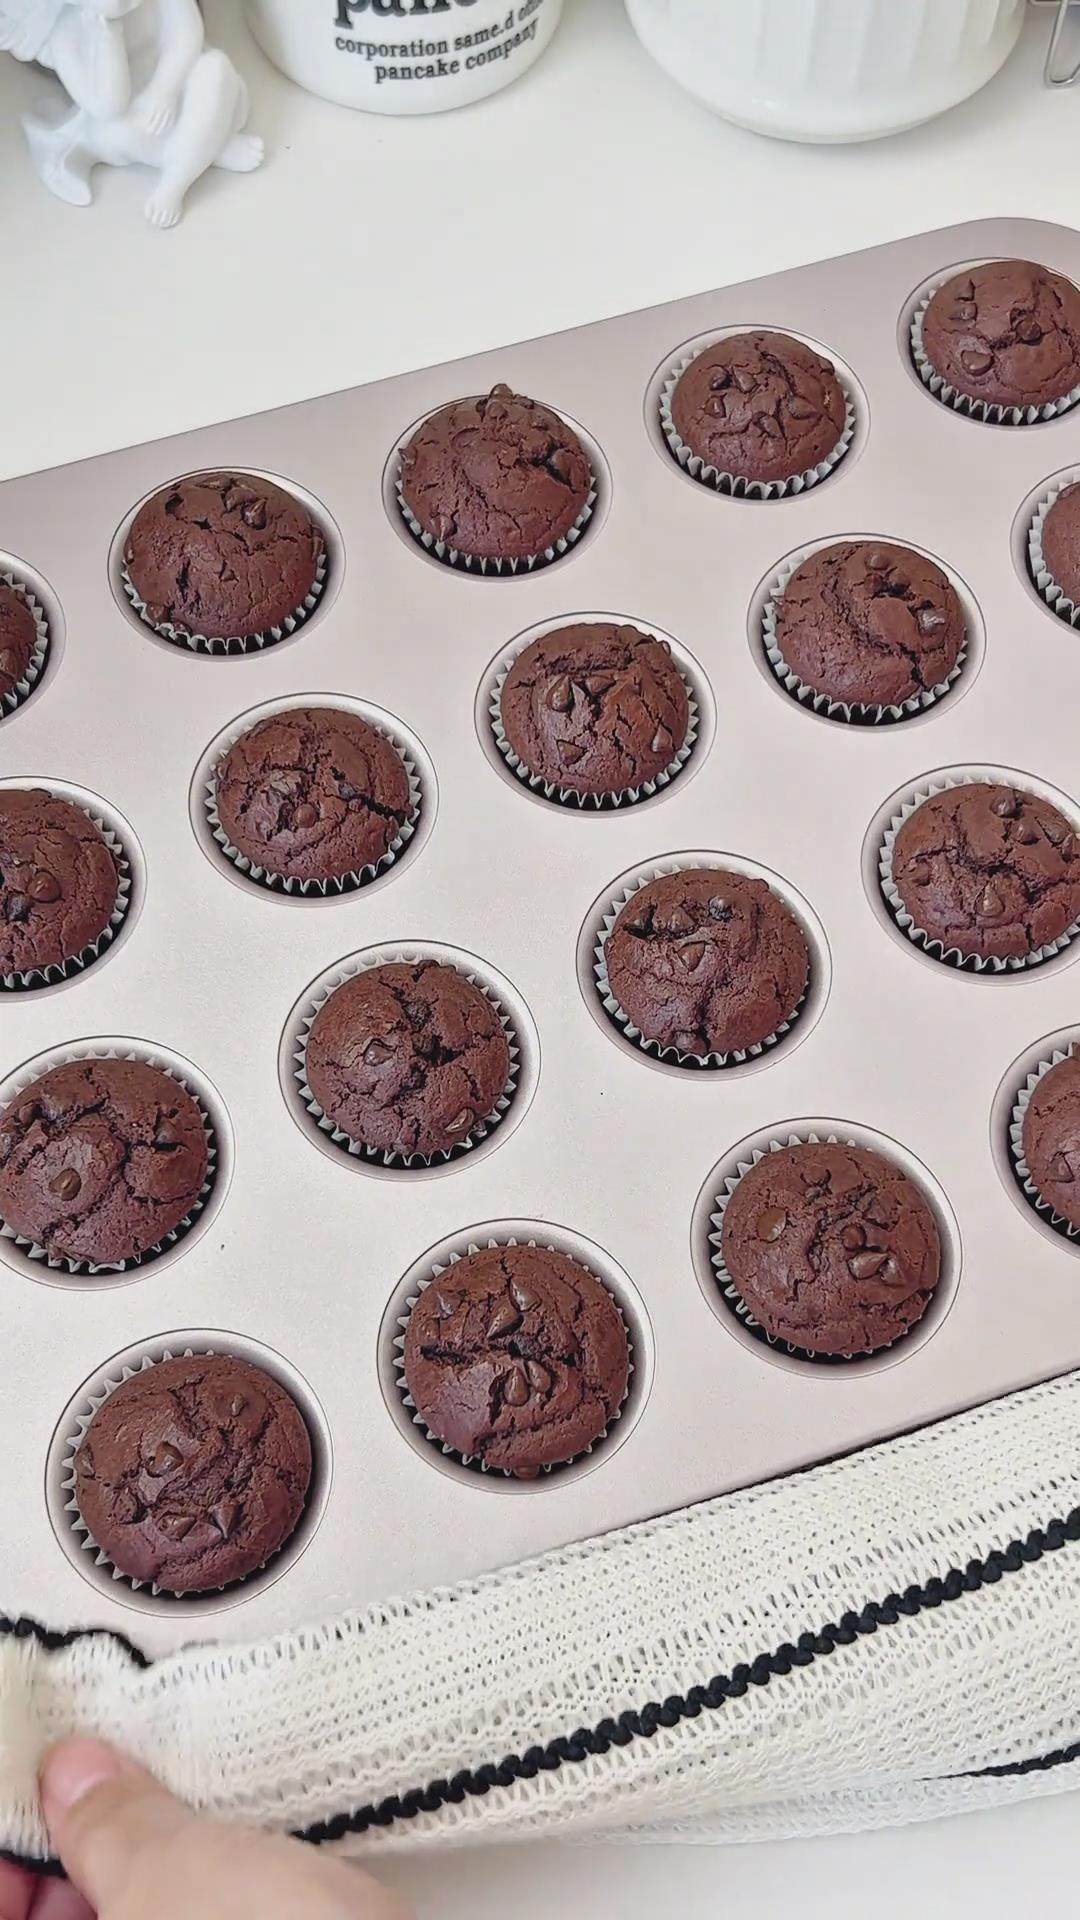
Why You‘ll Love This Recipe
- Quick and easy to make — just one bowl and a whisk!
- Perfectly moist and soft texture thanks to the balance of butter, milk, and eggs.
- Chocolate in every bite — using both chocolate chips in the batter and a few more on top makes them extra indulgent.
- Small-batch friendly — ideal for breakfast, lunchboxes, or a cozy afternoon snack.
- Beautifully golden with melty chocolate tops — they look as good as they taste!
Ingredients and Substitutions
You’ll find the complete recipe with precise measurements just below.
I’ve also added a few of my own notes – perfect if you’d like to adjust the recipe slightly to match what you have on hand or tailor it to your personal taste.
- Butter – Use unsalted butter and melt it before mixing. It adds richness and a tender crumb to the muffins. Be careful not to overheat it to prevent separation.
- Milk – The base liquid that keeps the muffins soft and moist. Whole milk works best, but any milk you have on hand will do.
- Granulated Sugar – Sweetens the batter just enough to balance the cocoa’s slight bitterness.
- Egg – Use one room-temperature egg to help the batter rise and add structure. Let it sit out for 15–20 minutes before baking.
- Cake Flour – This low-protein flour gives the muffins their light, fluffy texture.
- Cornstarch – Helps soften the crumb and adds a slightly delicate bite.
- Cocoa Powder – Adds a deep chocolate flavor and rich color. Use a good-quality unsweetened cocoa for the best result.
- Milk Powder – Enhances the creamy, milky flavor and gives the muffins a subtle sweetness.
- Baking Powder – Provides lift and ensures the muffins rise evenly in the oven.
- Chocolate Chips – I recommend using heat-resistant or baking chocolate chips so they hold their shape while baking. Add some inside the batter and a few more on top for decoration and extra flavor.
How to Make Chocolate Chip Muffins
Step 1: Preparation
Melt the butter in advance — either over a water bath or in the microwave on low heat until it turns liquid. Bring the egg to room temperature. Prepare and weigh all the ingredients ahead of time.
Line your muffin tray with baking paper or muffin liners.
Preheat the oven to 170°C (340°F), top and bottom heat, for 10 minutes.
Step 2: Combine Wet Ingredients
In a mixing bowl, add the melted butter, milk, room-temperature egg, and sugar.
Whisk until everything is well combined and smooth.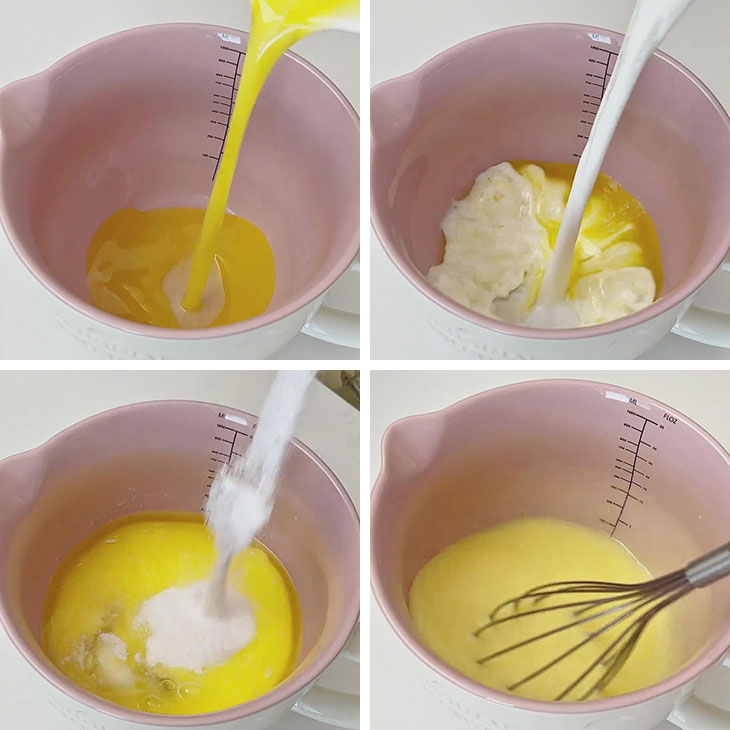
Step 3: Add Dry Ingredients
Sift together the cake flour, cornstarch, cocoa powder, milk powder, and baking powder.
Add them to the wet mixture and gently whisk until there’s no visible dry flour. The batter should be smooth and even.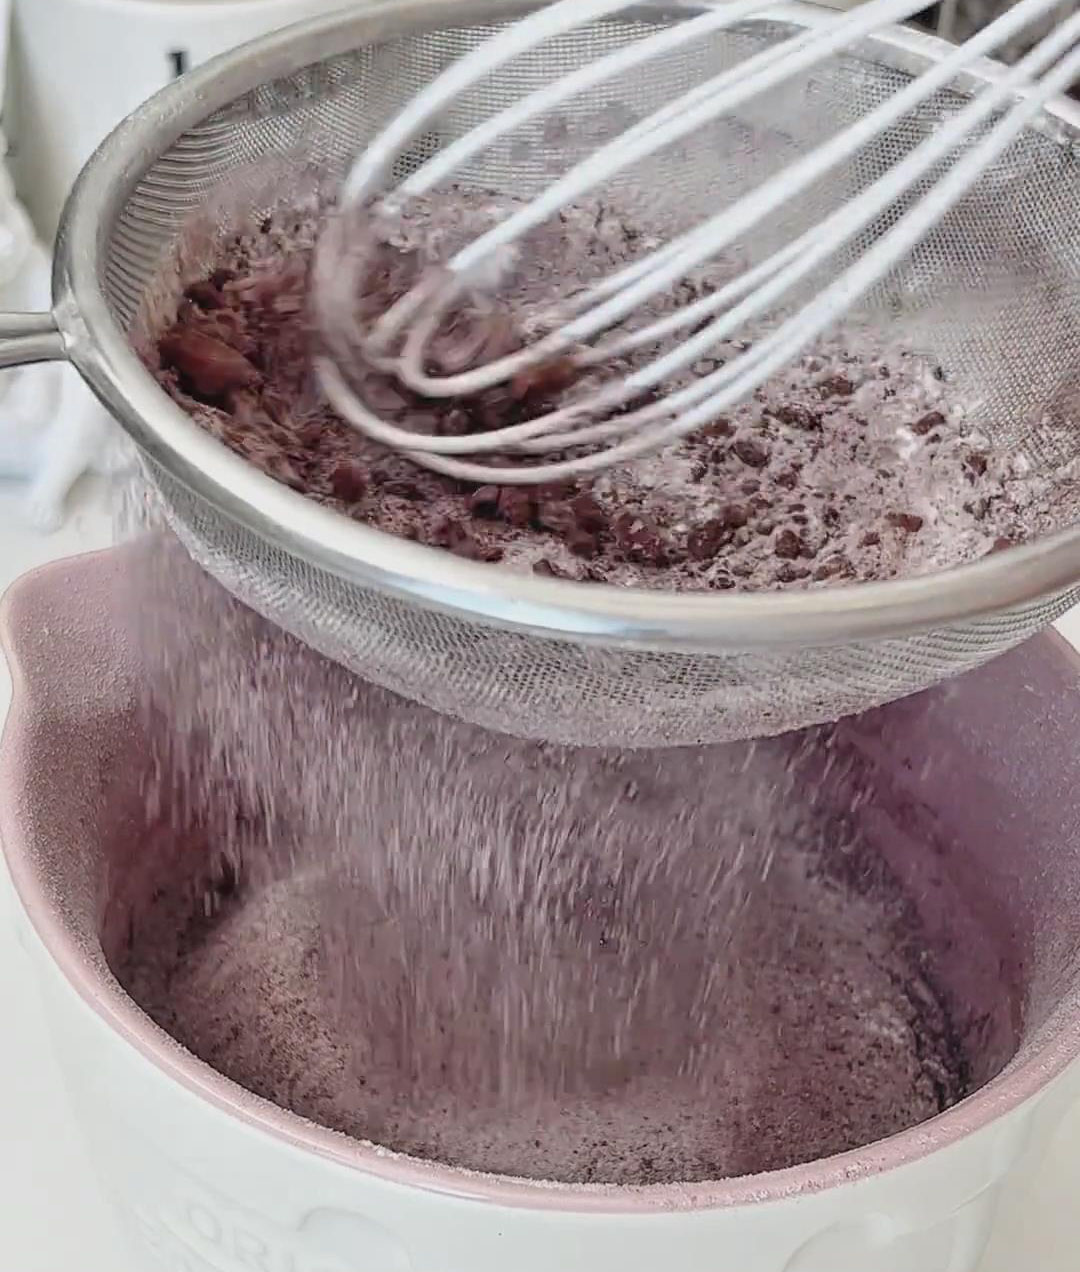
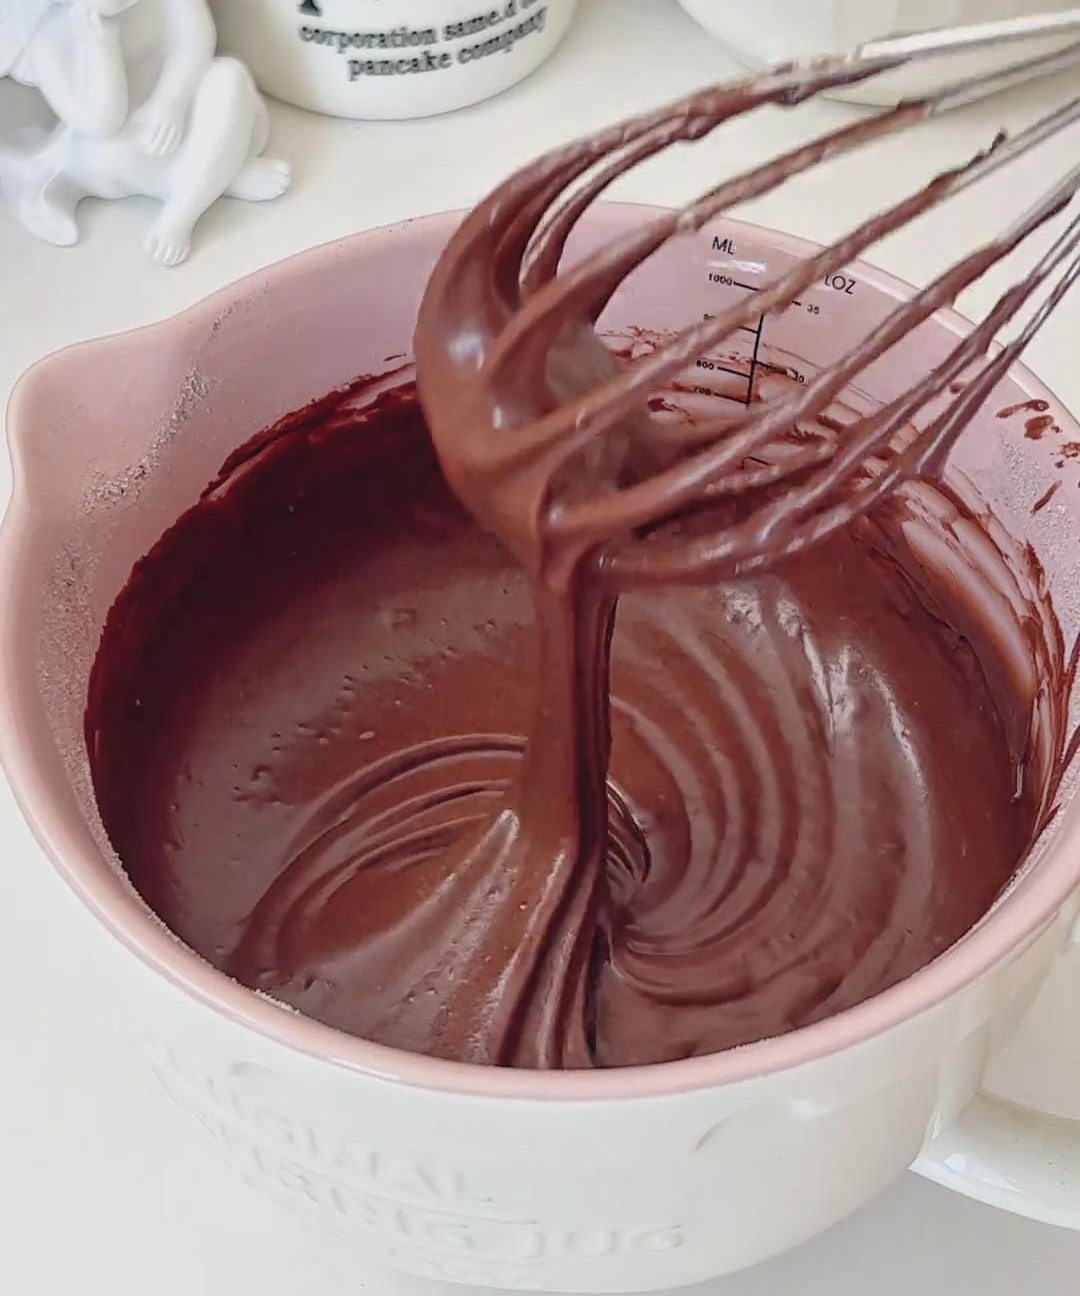
Avoid overmixing, as it can make the muffins dense.
Step 4: Add Chocolate Chips & Fill the Bag
Fold in 50 g of heat-resistant chocolate chips until evenly distributed throughout the batter.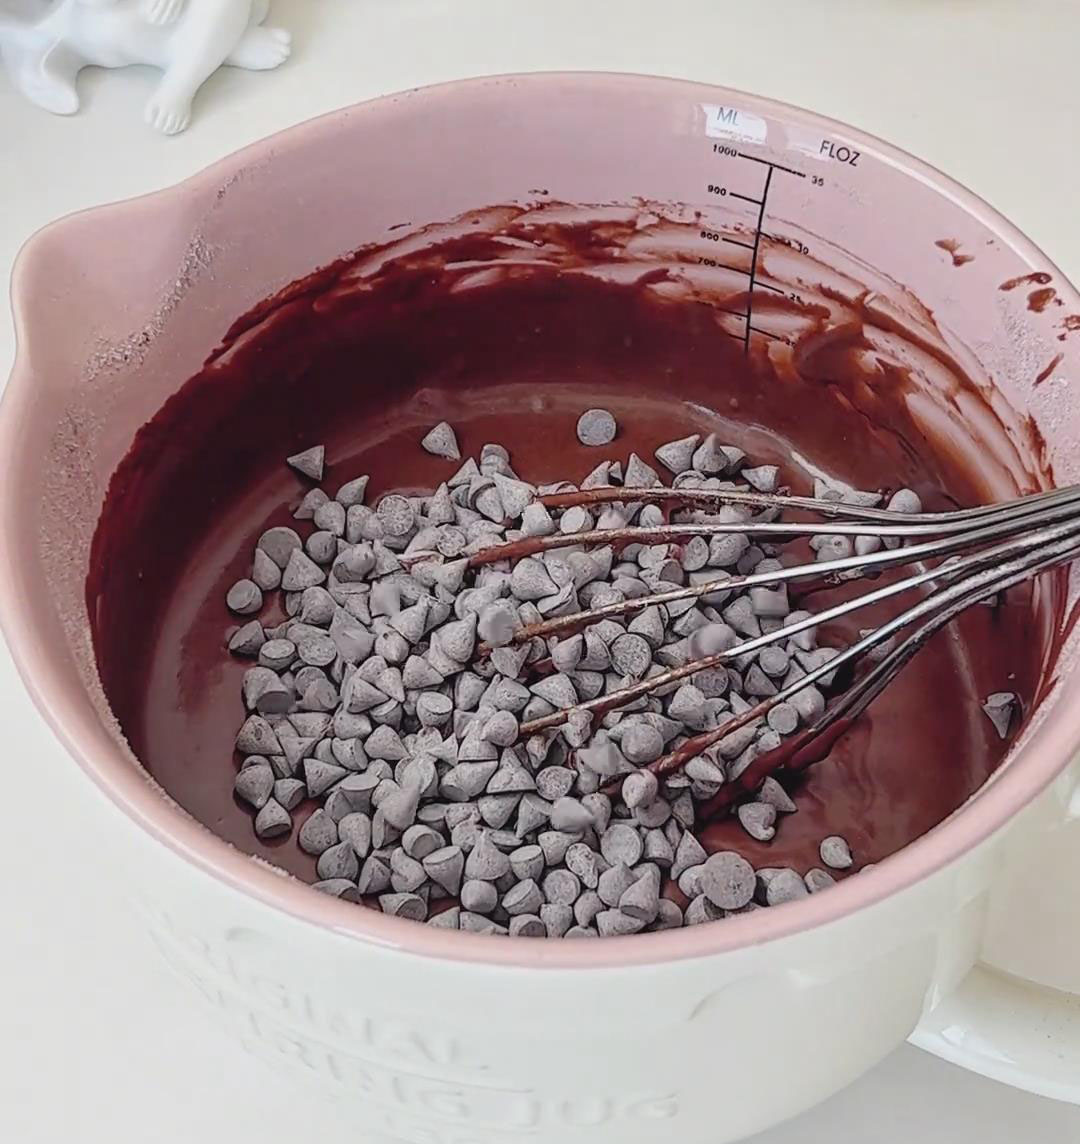

Transfer the batter into a piping bag for easier portioning.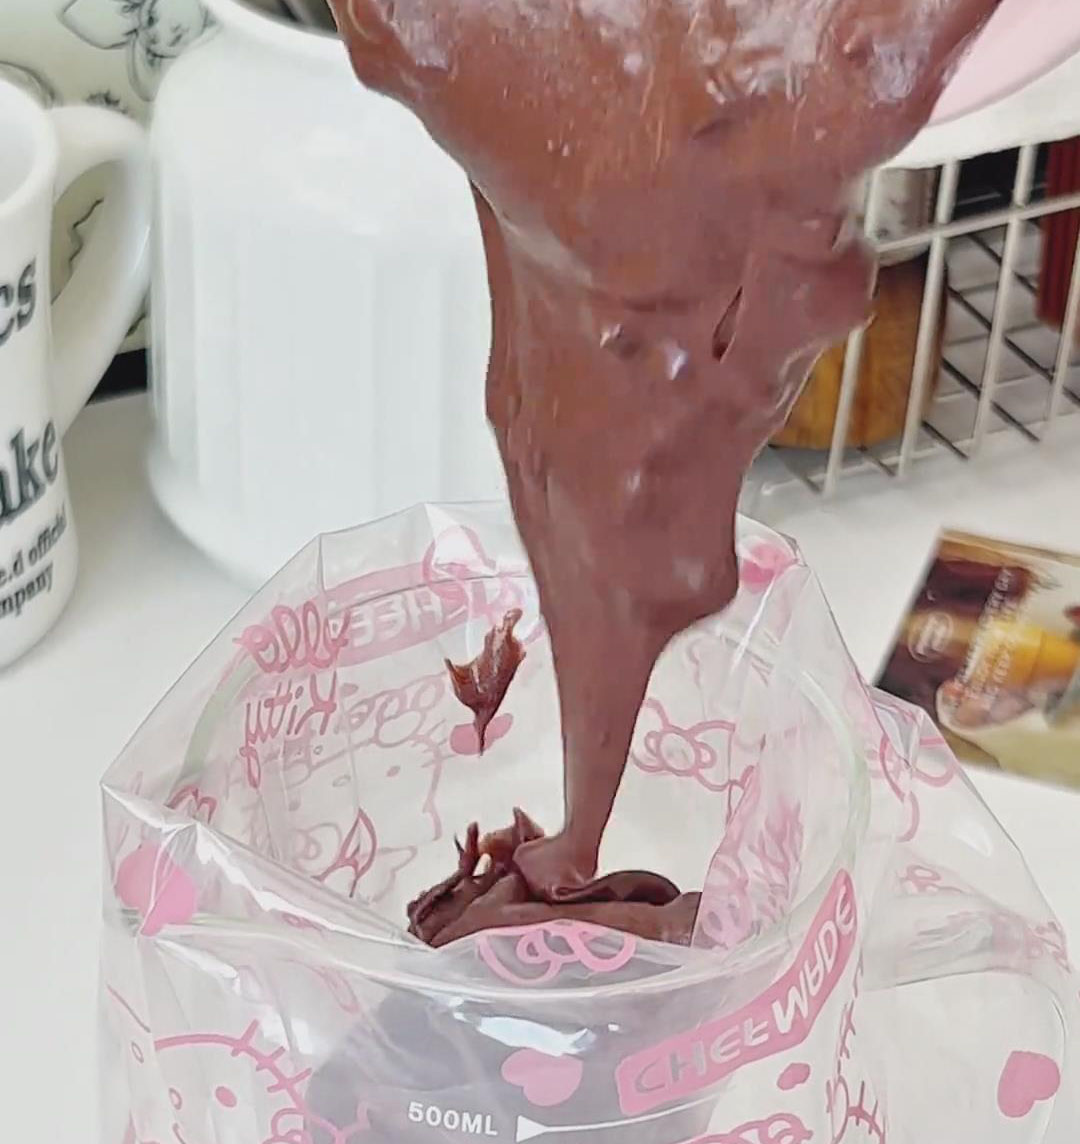
Step 5: Pipe & Decorate
Pipe the batter into the prepared muffin molds, filling each about 80% full.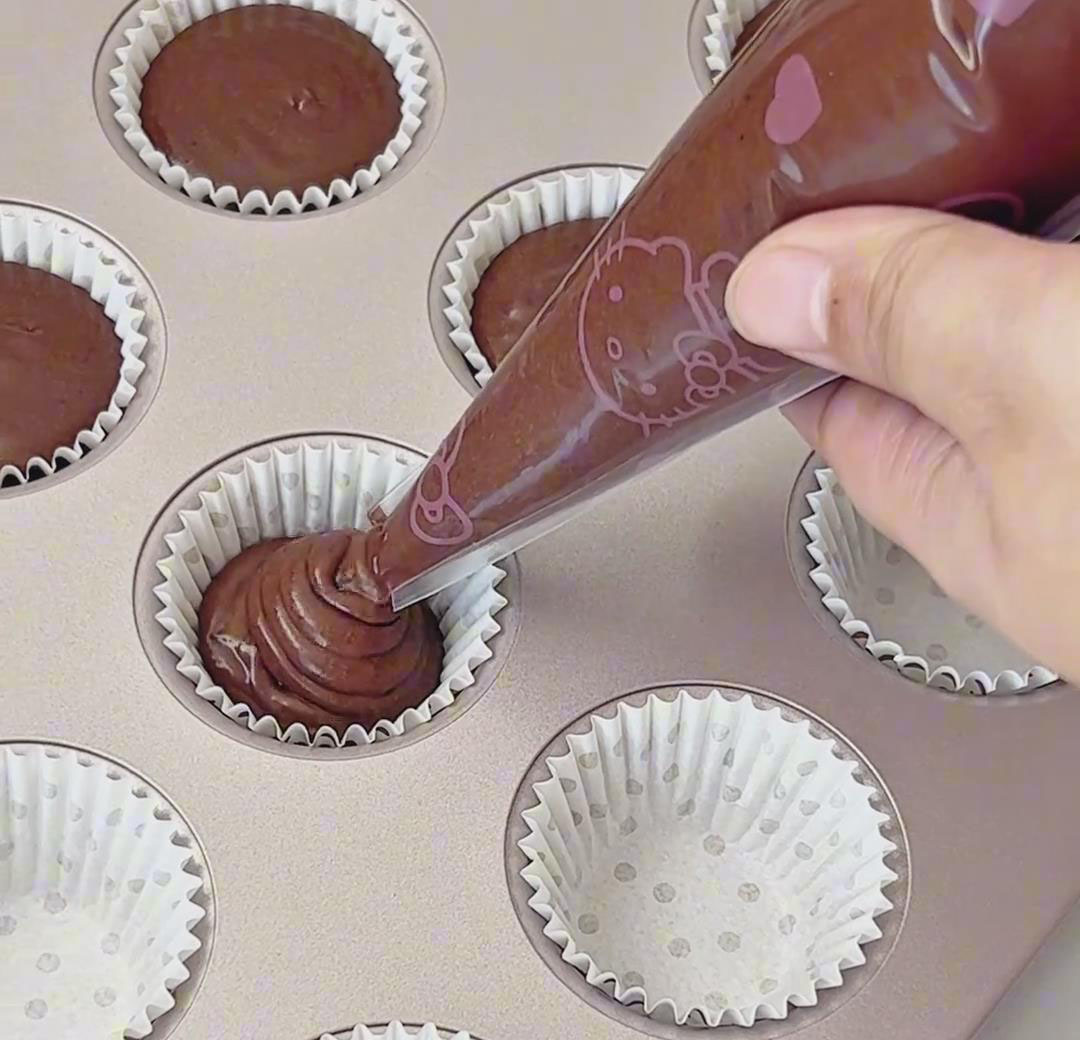
Top each with a few extra chocolate chips for decoration.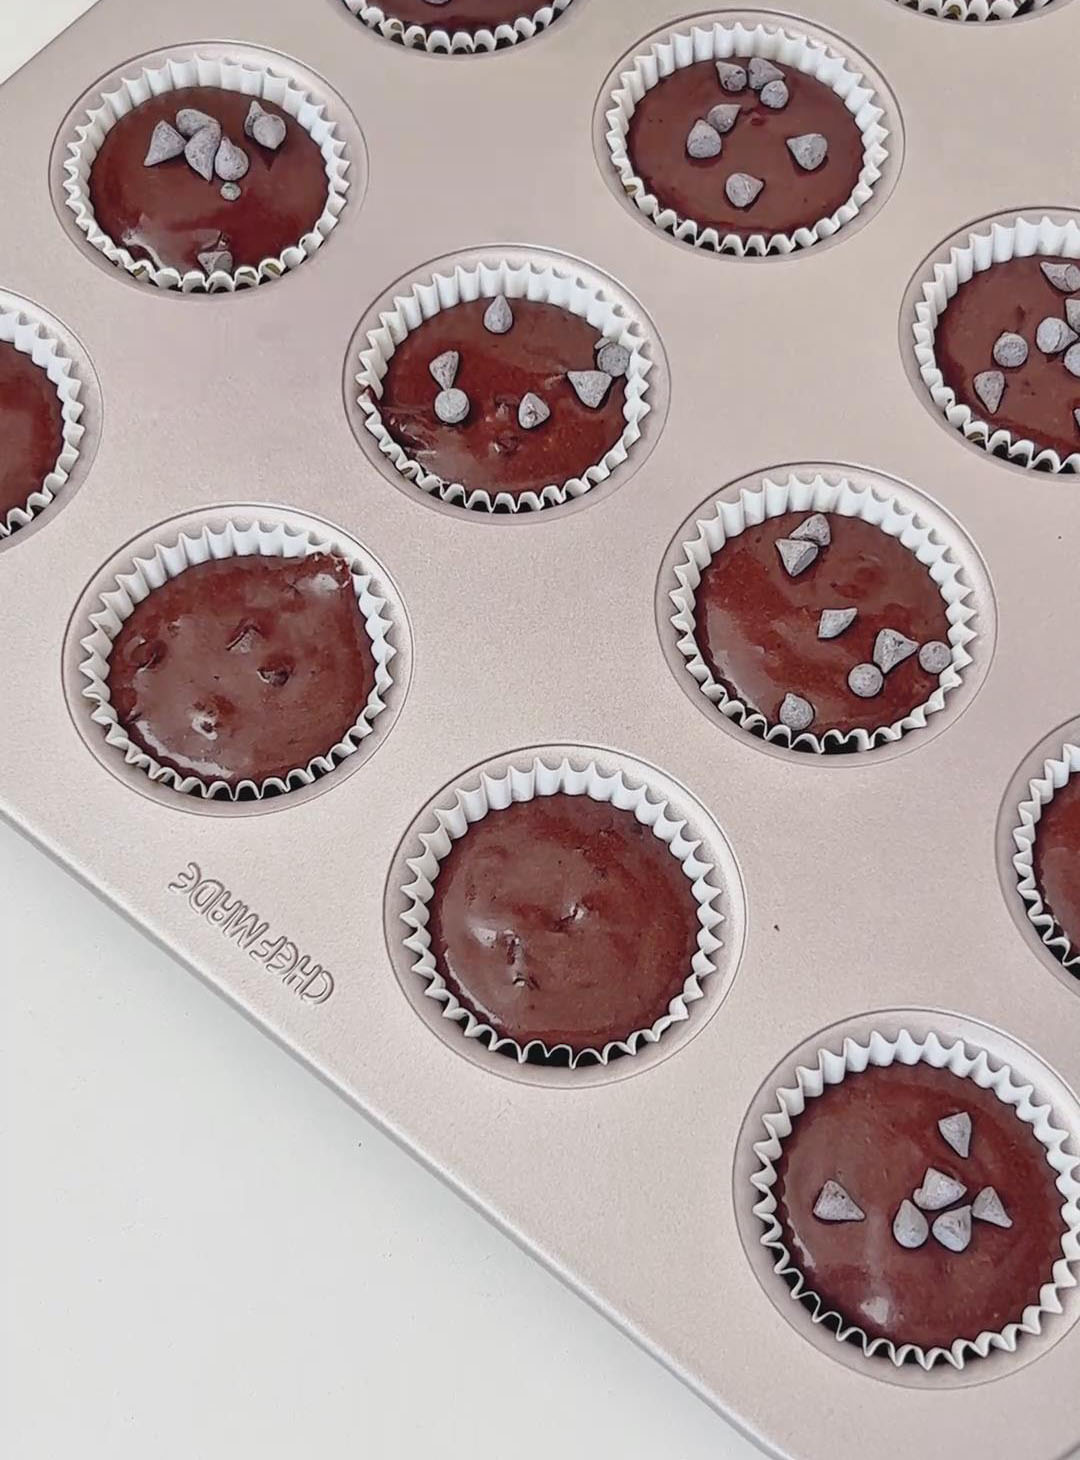
Step 6: Bake
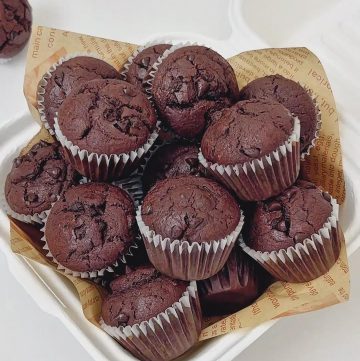
Place the muffin tray in the middle rack of the preheated oven.
Bake at 170°C (340°F) for 22 minutes.
Once baked, remove from the oven and allow them to cool before serving.
Tips & Tricks
- Don’t overheat your butter — warm and melted is enough.
- Mix the batter only until smooth; overmixing develops gluten and makes muffins tough.
- Adding chocolate chips on top creates that signature “bakery-style” look.
- Let muffins cool completely before storing to avoid condensation and sogginess.
Frequently Asked Questions
Can I use regular chocolate chips instead of heat-resistant ones?
Yes! Regular chocolate chips work too, but they may melt more during baking. It gives a gooier texture, which some people actually prefer.
How do I store these muffins?
Once completely cooled, store them in an airtight container at room temperature for up to 2 days, or refrigerate for up to 5 days. You can also freeze them for up to a month.
Can I make these muffins without cocoa powder?
If you prefer a classic vanilla version, you can omit the cocoa powder and replace it with the same amount of cake flour — but you’ll lose the chocolatey richness.
How do I make them extra moist?
Avoid overbaking — check doneness at the 20-minute mark. A toothpick inserted into the center should come out mostly clean with a few moist crumbs.
Easy Chocolate Muffins That Taste Like a Bakery Treat
Ingredients
Wet Ingredients
- 45 g butter melted
- 90 g milk
- 50 g fine granulated sugar
- 1 large room temperature egg approx. 60g with shell
Dry Ingredients
- 80 g cake flour / low-protein flour
- 15 g cornstarch
- 20 g cocoa powder
- 15 g milk powder
- 5 g baking powder
Add-in & Topping
- 50 g heat-resistant chocolate chips for batter
- Extra heat-resistant chocolate chips for topping
Instructions
Step 1: Preparation
- Melt the butter in advance — either over a water bath or in the microwave on low heat until it turns liquid. Bring the egg to room temperature. Prepare and weigh all the ingredients ahead of time.
- Line your muffin tray with baking paper or muffin liners.
- Preheat the oven to 170°C (340°F), top and bottom heat, for 10 minutes.
Step 2: Combine Wet Ingredients
- In a mixing bowl, add the melted butter, milk, room-temperature egg, and sugar.
- Whisk until everything is well combined and smooth.
Step 3: Add Dry Ingredients
- Sift together the cake flour, cornstarch, cocoa powder, milk powder, and baking powder.
- Add them to the wet mixture and gently whisk until there's no visible dry flour. The batter should be smooth and even.
- Avoid overmixing, as it can make the muffins dense.
Step 4: Add Chocolate Chips & Fill the Bag
- Fold in 50 g of heat-resistant chocolate chips until evenly distributed throughout the batter.
- Transfer the batter into a piping bag for easier portioning.
Step 5: Pipe & Decorate
- Pipe the batter into the prepared muffin molds, filling each about 80% full.
- Top each with a few extra chocolate chips for decoration.
Step 6: Bake
- Place the muffin tray in the middle rack of the preheated oven.
- Bake at 170°C (340°F) for 22 minutes.
- Once baked, remove from the oven and allow them to cool before serving.
Leave a Reply