
Tartlets, or mini tarts, are one of my kids’ all-time favorite treats. I always make sure to keep some tart shells frozen in the fridge so that whenever a sweet craving strikes, I can quickly assemble a batch of mini tarts without too much fuss.
Some of my absolute favorites to make include Lemon Curd Tartlets, German Egg Custard Tarts, Matcha Tiramisu Egg Tarts, Chocolate Matcha Tart, and Chocolate Custard Tarts.
No matter which one I make, the kids always come running, and the tarts disappear in minutes!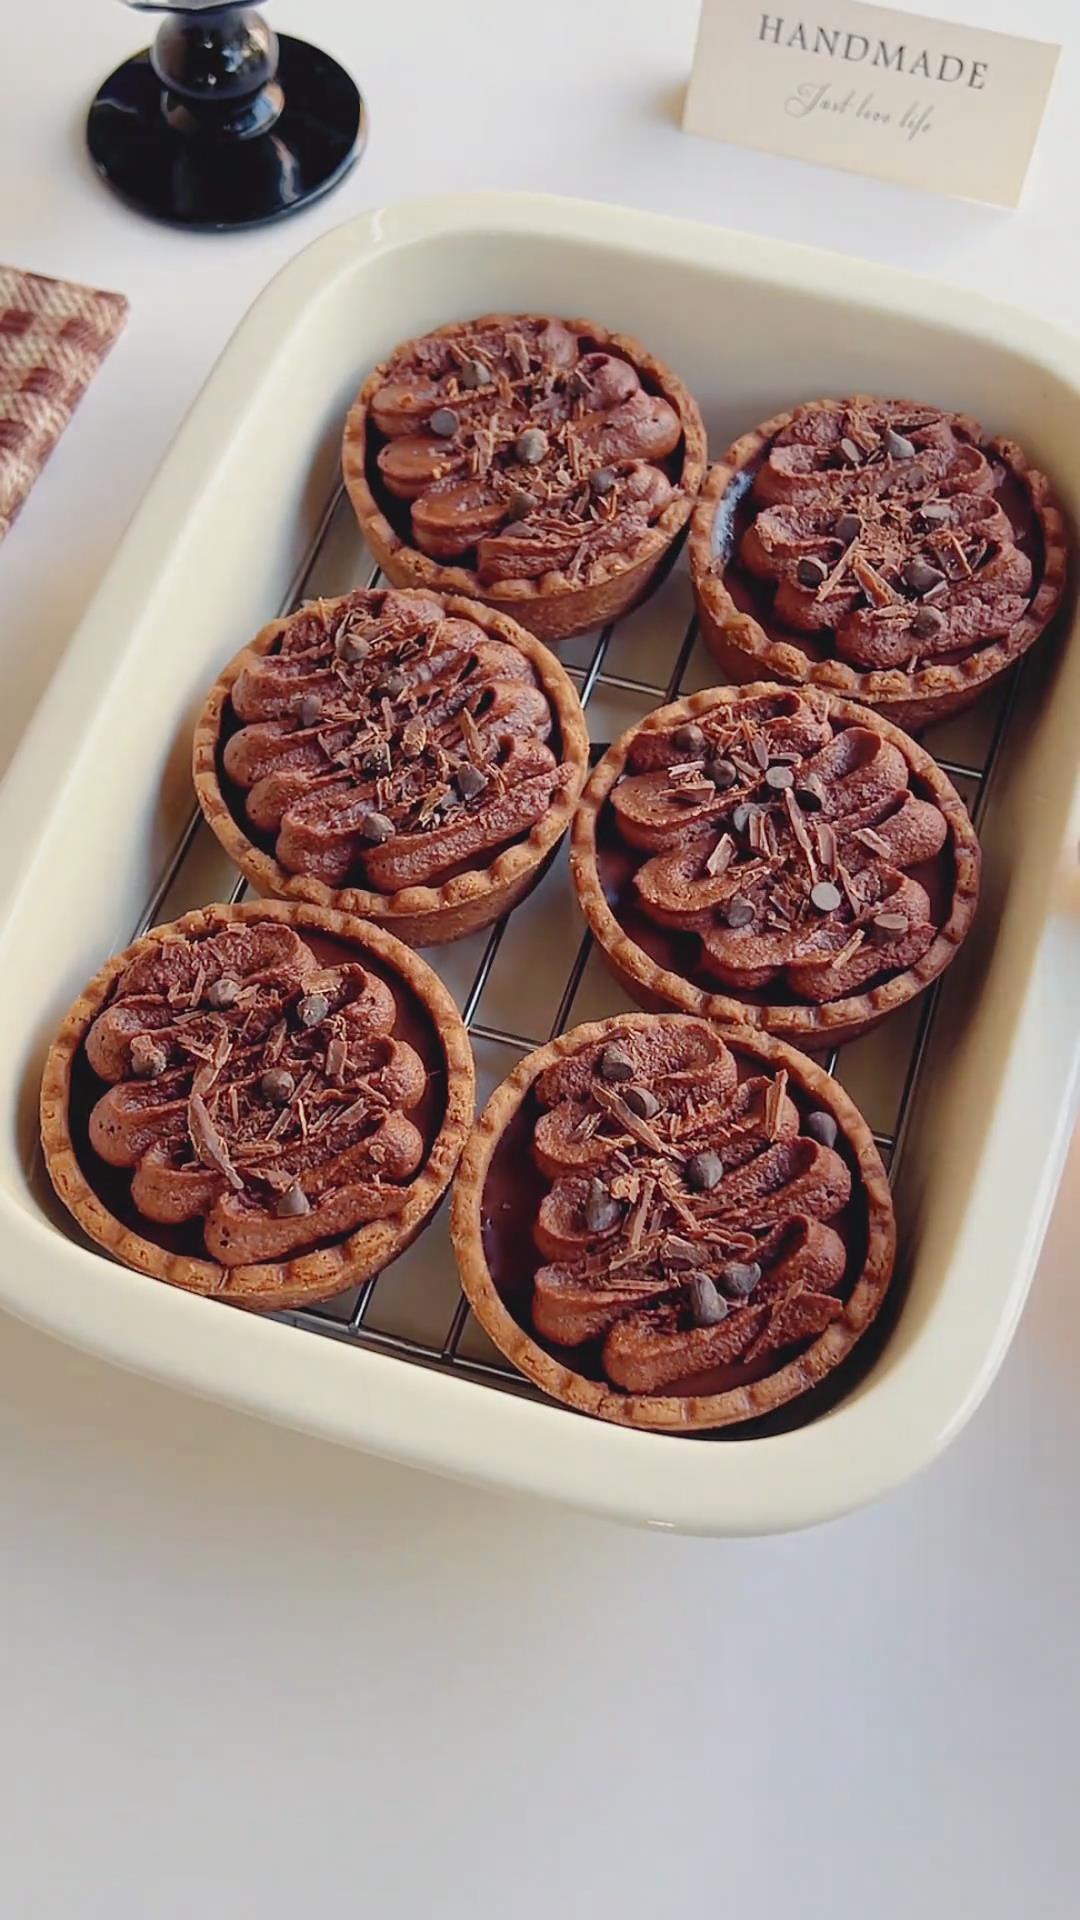
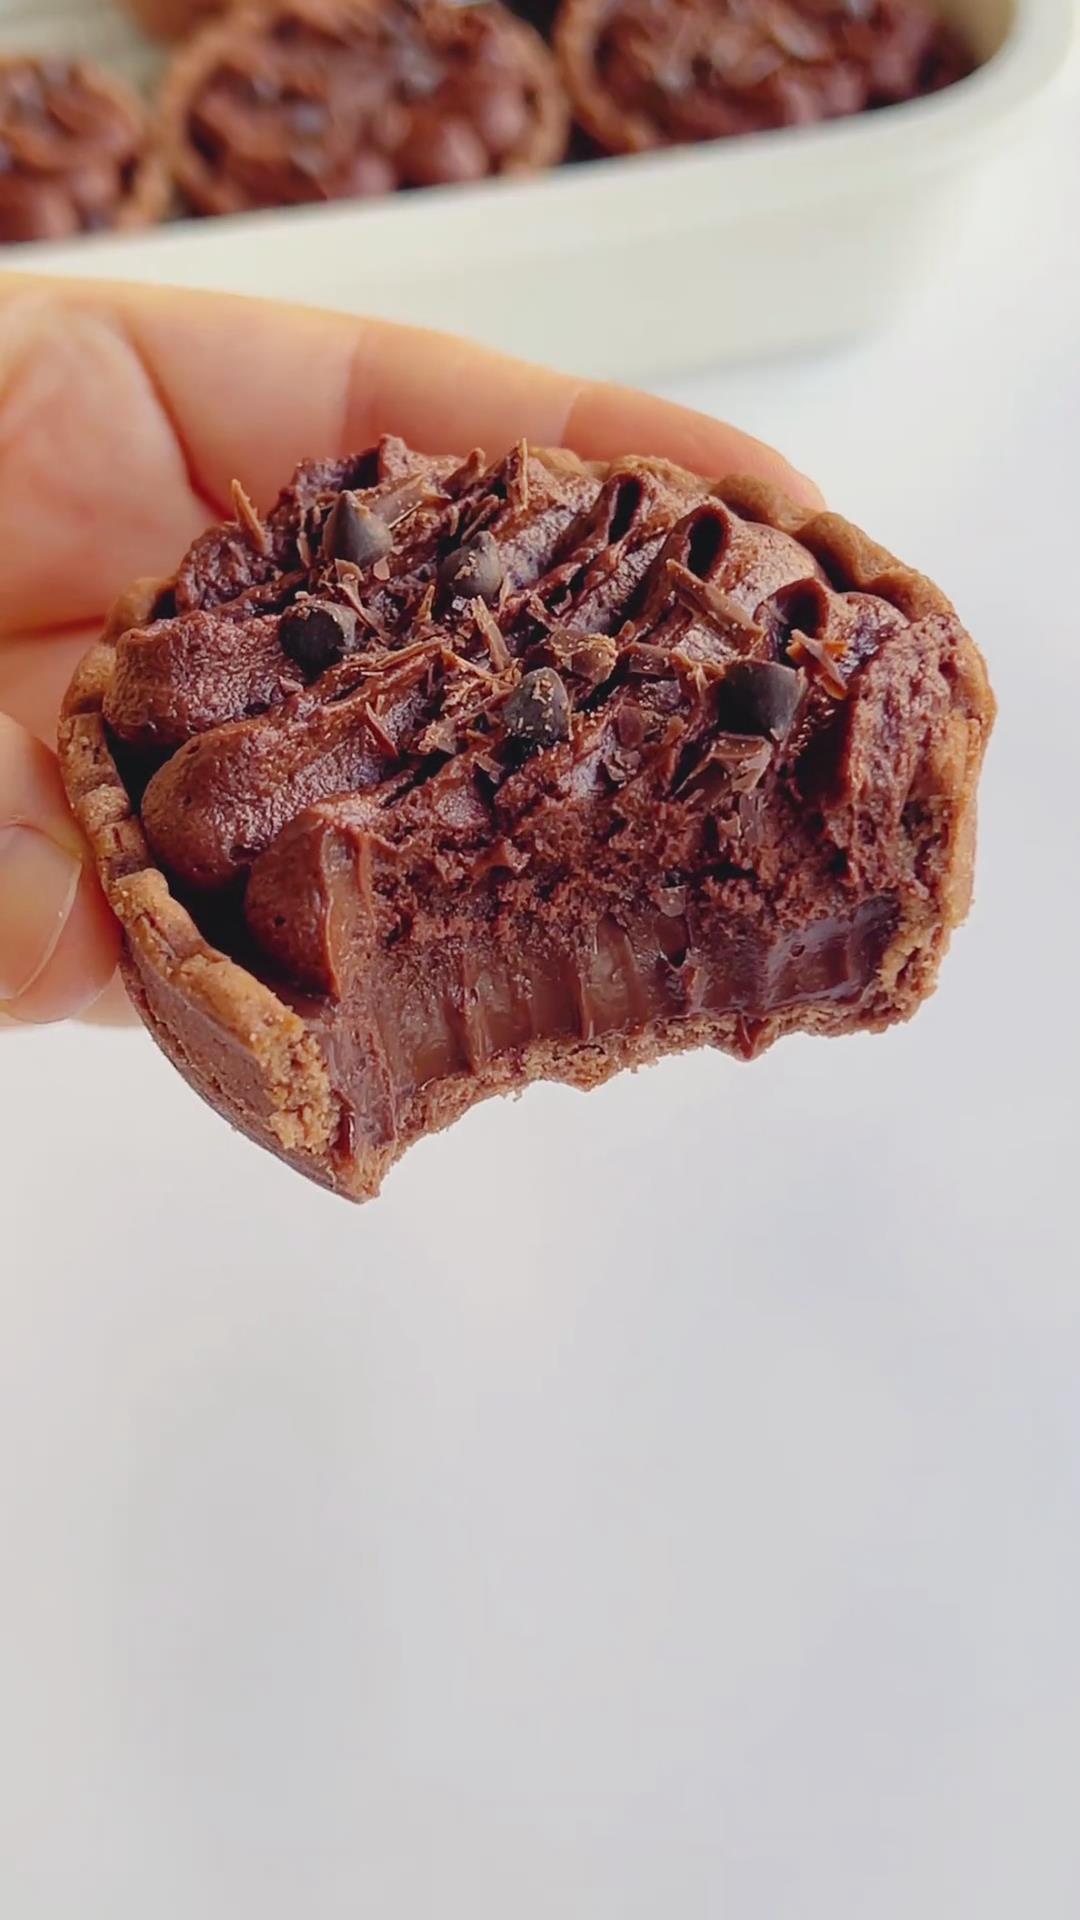
This Chocolate Tartlets recipe is a real winner on its own — the filling is rich, silky, and perfectly balanced in sweetness.
I love adding a topping for extra flair and texture, but if you’re short on time or just want to keep it simple, you can absolutely skip the decoration and enjoy the tartlets as they are.
For convenience, I usually use store-bought tart shells, which save a lot of time without sacrificing taste. But if you enjoy baking from scratch, you can also make your own tart shells at home following my German Egg Custard Tarts recipe.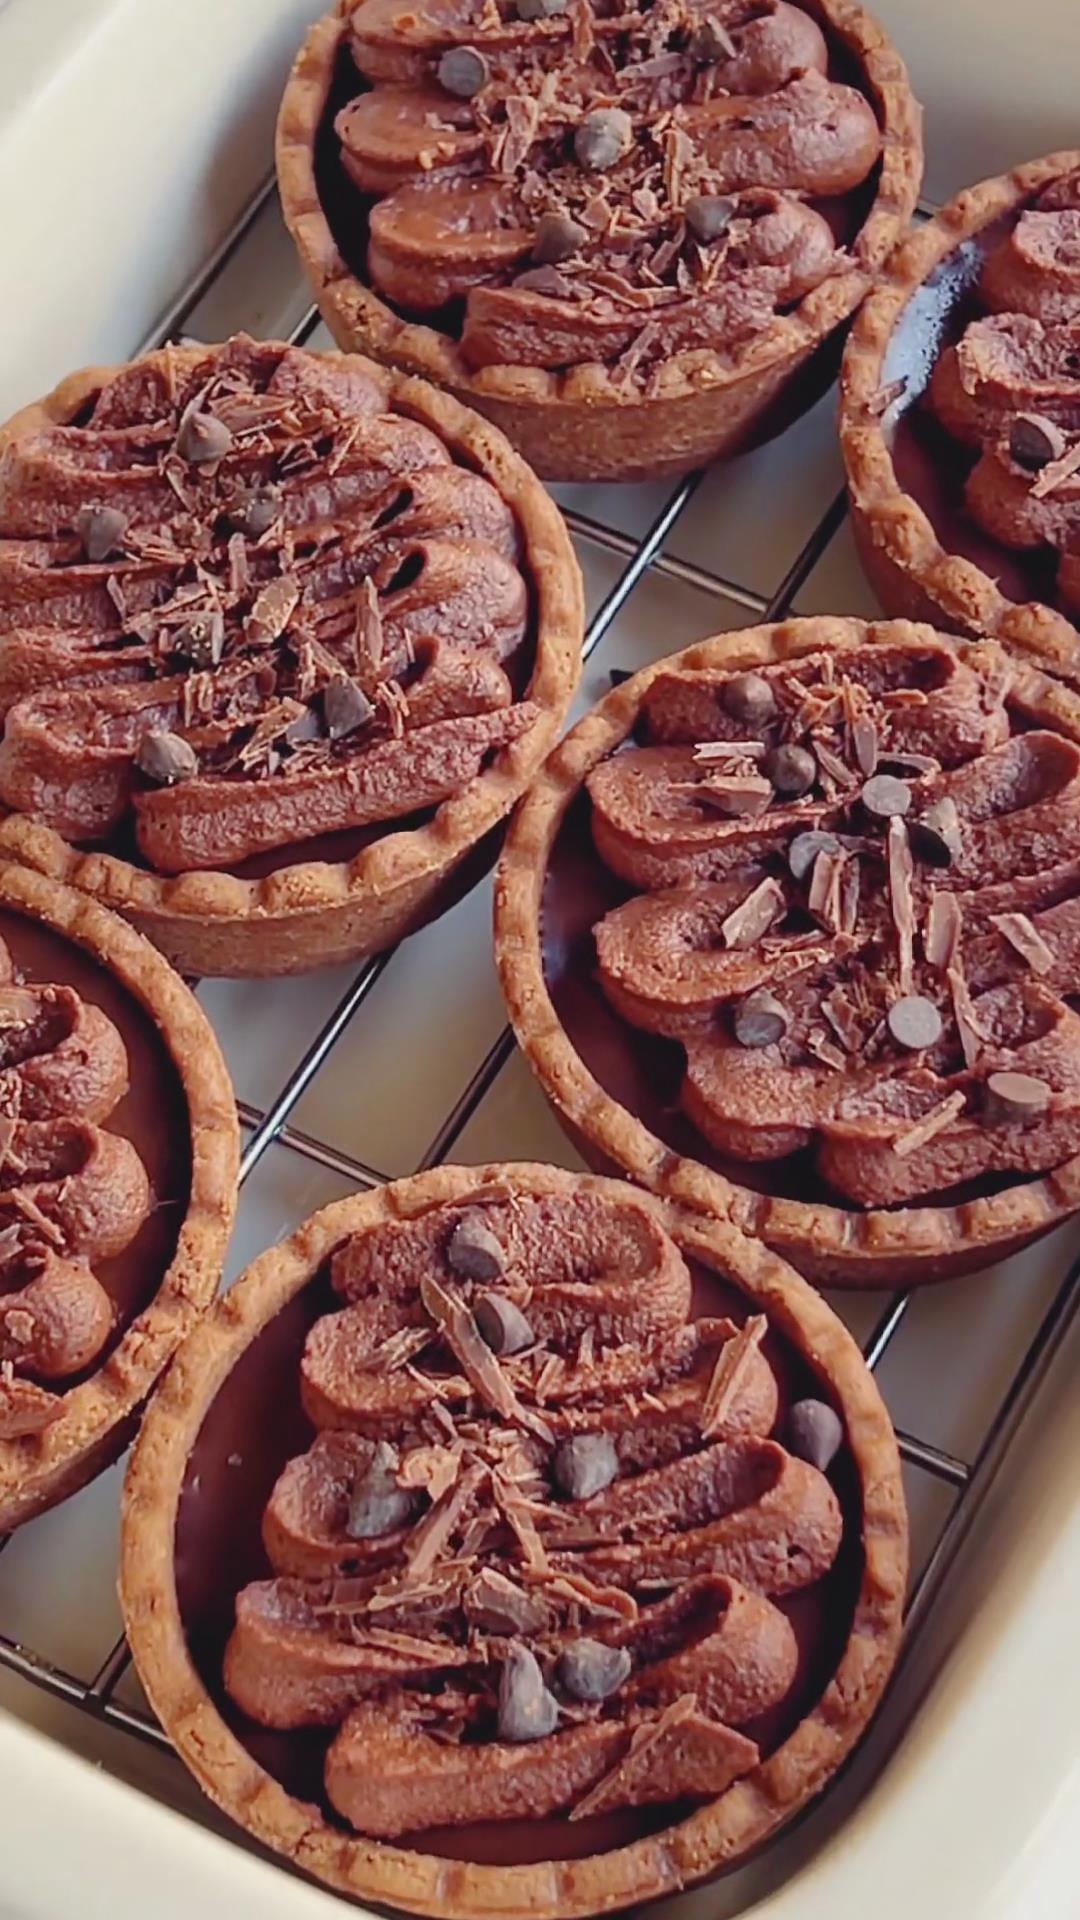
Why You‘ll Love This Recipe
- Deep, rich chocolate flavor — thanks to a blend of dark chocolate and a touch of sugar for perfect balance.
- Elegant presentation — ideal for parties, afternoon tea, or special occasions.
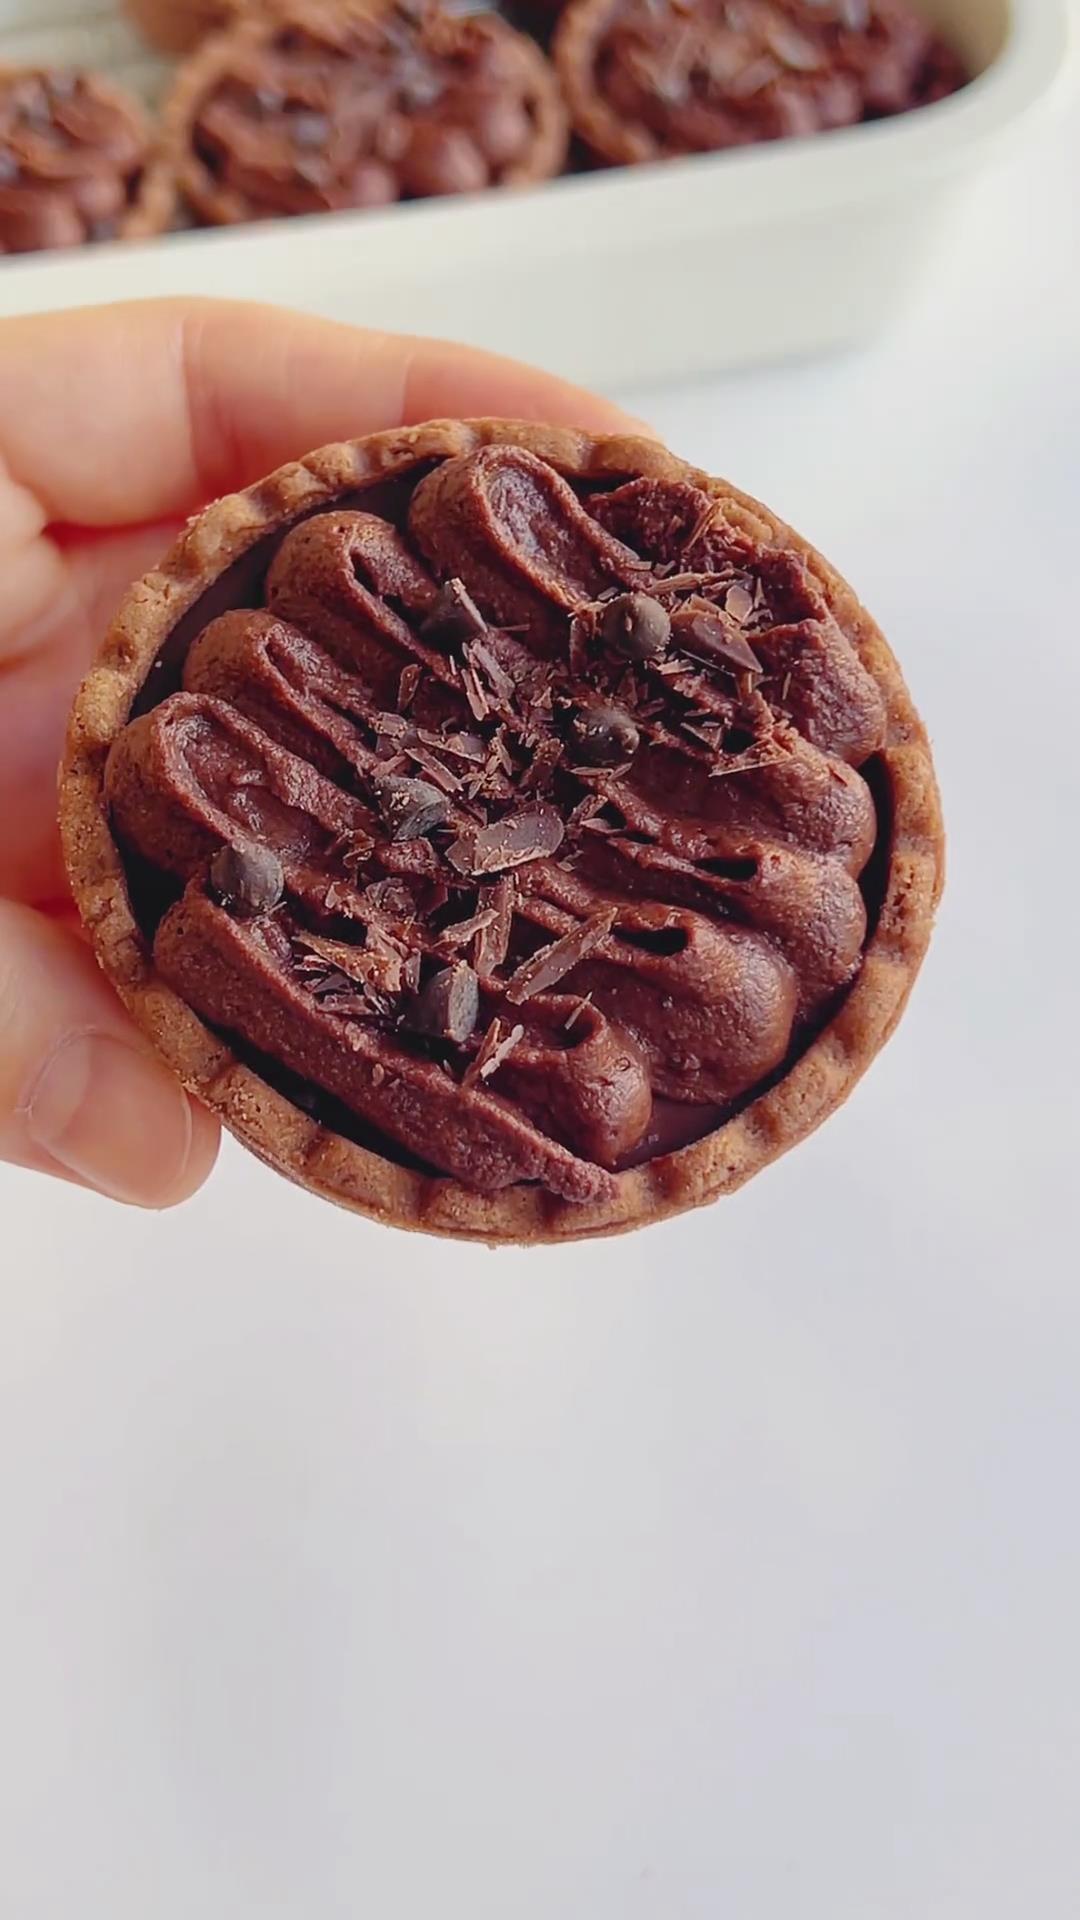
- Perfectly smooth texture — the filling is silky and creamy, while the tart shell adds a gentle crunch.
- Customizable toppings — add whipped cream, chocolate shavings, or fresh berries for a personalized touch.
Ingredients and Substitutions
Cocoa Tart Shells
I like using ready-made cocoa tart shells about 6–7 cm in diameter — they’re convenient and hold the filling perfectly. If cocoa shells aren’t available, plain butter tart shells work too, though the chocolate flavor will be slightly lighter.
Heavy Cream
Choose cream with 30–36% fat for both the filling and topping. This gives a smooth, stable texture. I don’t recommend non-dairy or plant-based alternatives — they tend to curdle or turn grainy when heated or whipped.
Pasteurized Egg Yolk
The yolk adds a rich, velvety smoothness to the filling. Pasteurized eggs are ideal for safety, but if using regular eggs, ensure they’re fully cooked in the mixture.
Granulated Sugar
Just enough to balance the bitterness of the dark chocolate. You can adjust the sweetness slightly depending on your chocolate’s cocoa percentage — higher cocoa means you might want a little more sugar.
Dark Chocolate
Go for around 70% cocoa for the best flavor — deep and rich but not too bitter. Lower percentages can make the tartlets overly sweet, while higher ones can be too intense.
Chocolate Sauce
Use a thick, pure chocolate sauce without glucose syrup for the best taste.
Chocolate Shavings or Chips
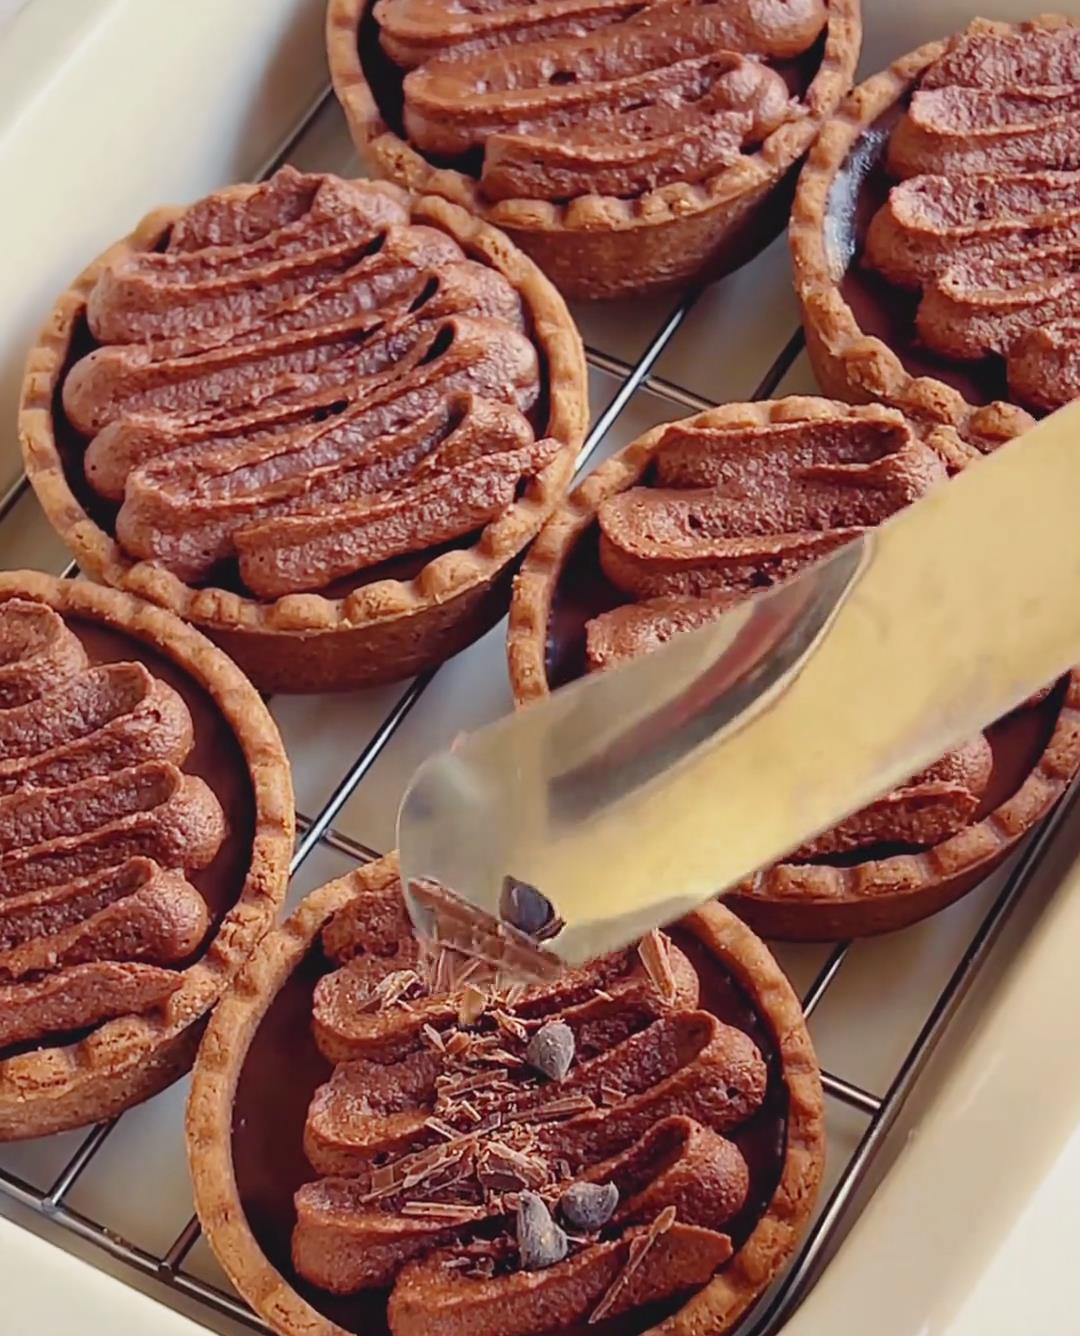
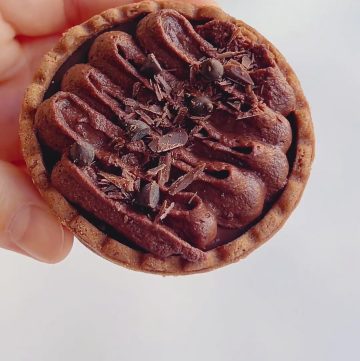
Optional, but they make a beautiful garnish! I love the added crunch and the way they enhance the overall chocolate experience.
How to Make Chocolate Tartlets
1. Make the Chocolate Lava Filling
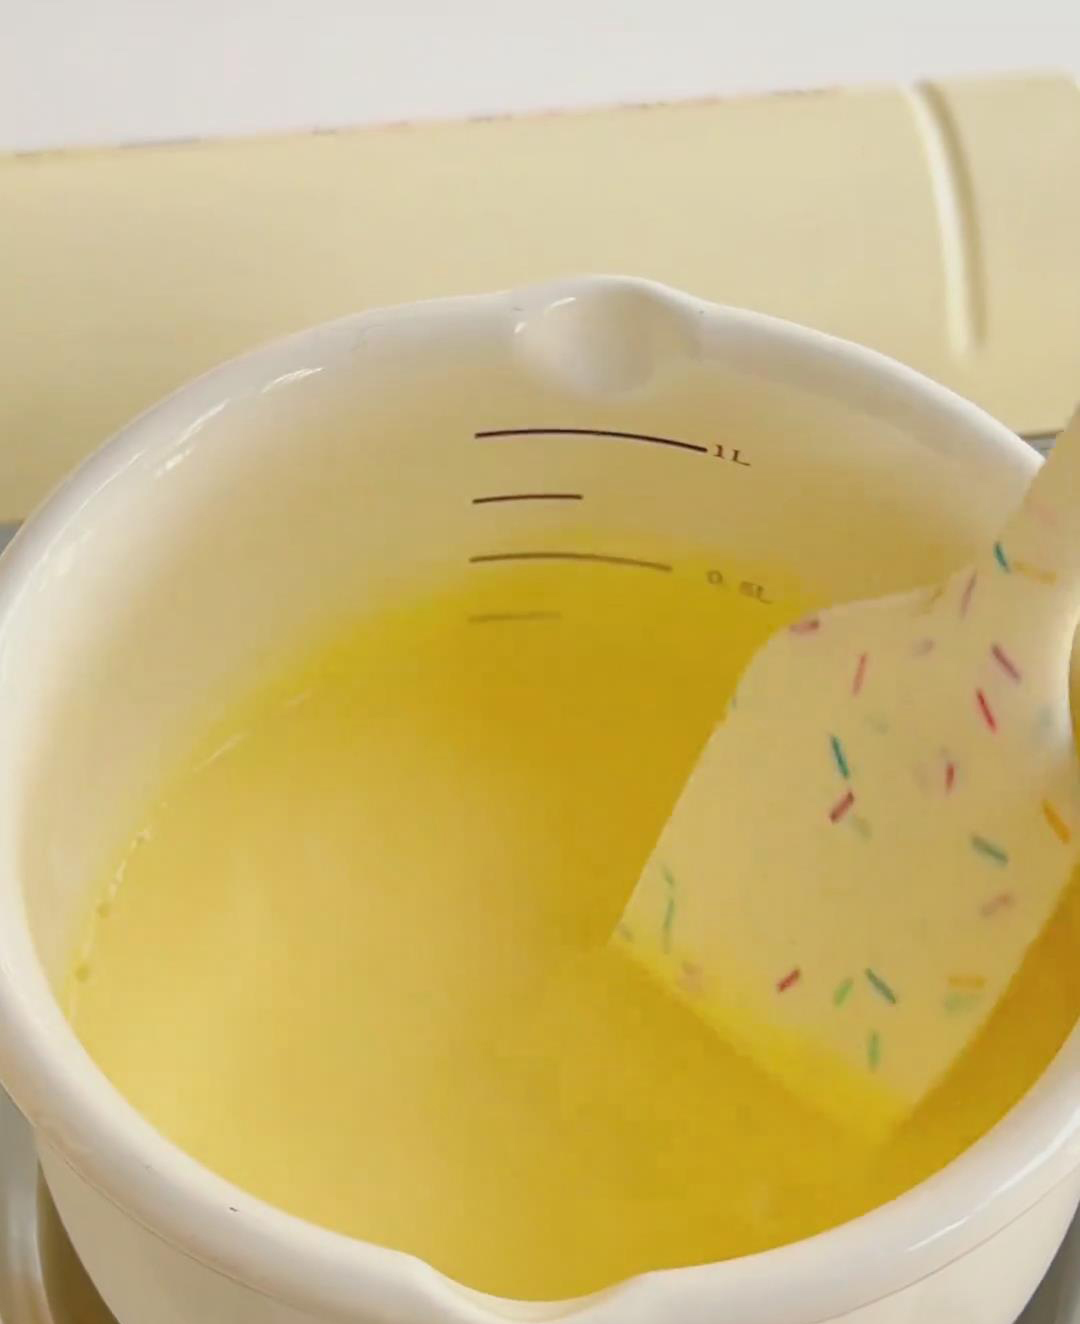
In a small saucepan, pour in 150 g of heavy cream. Add the egg yolk and sugar. Stir gently with a silicone spatula over low heat until the sugar dissolves and the mixture becomes smooth.
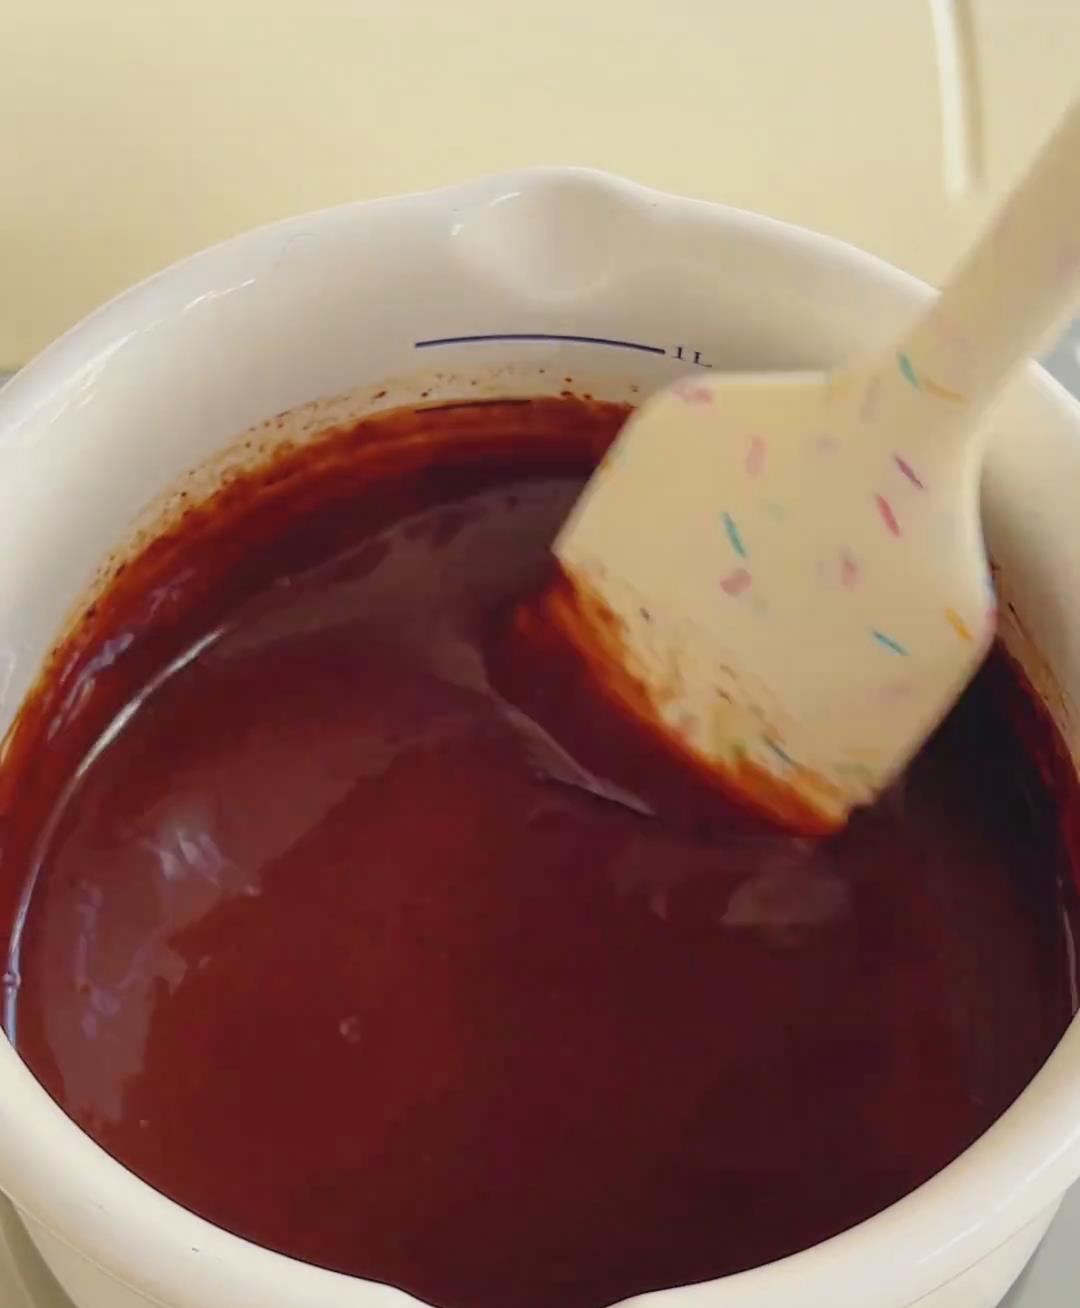
When small bubbles begin to form around the edges (without boiling), add the dark chocolate. Stir until completely melted and silky smooth. If the texture looks grainy, strain it for a finer consistency. Let the mixture cool slightly, then transfer to a piping bag.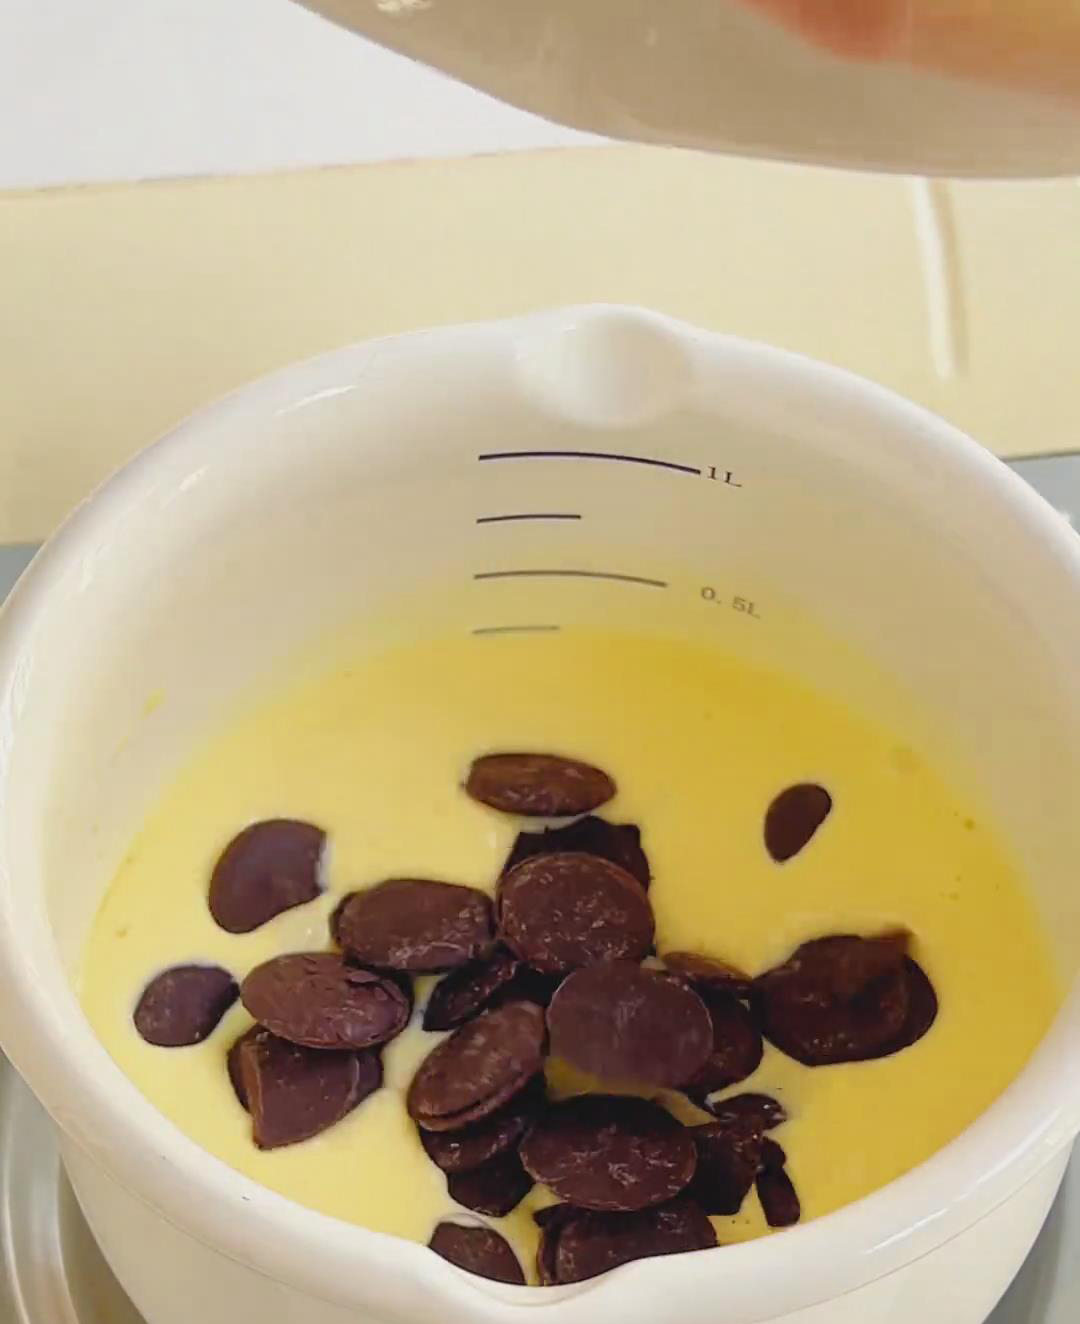
2. Fill and Chill the Tart Shells
Pipe the chocolate filling into each tart shell, filling them about 80% full to leave space for toppings. Place the filled tarts in the refrigerator for at least 4 hours to allow the filling to fully set and firm up.
(If you‘re skipping the topping, your chocolate tartlets are ready to enjoy at this point!)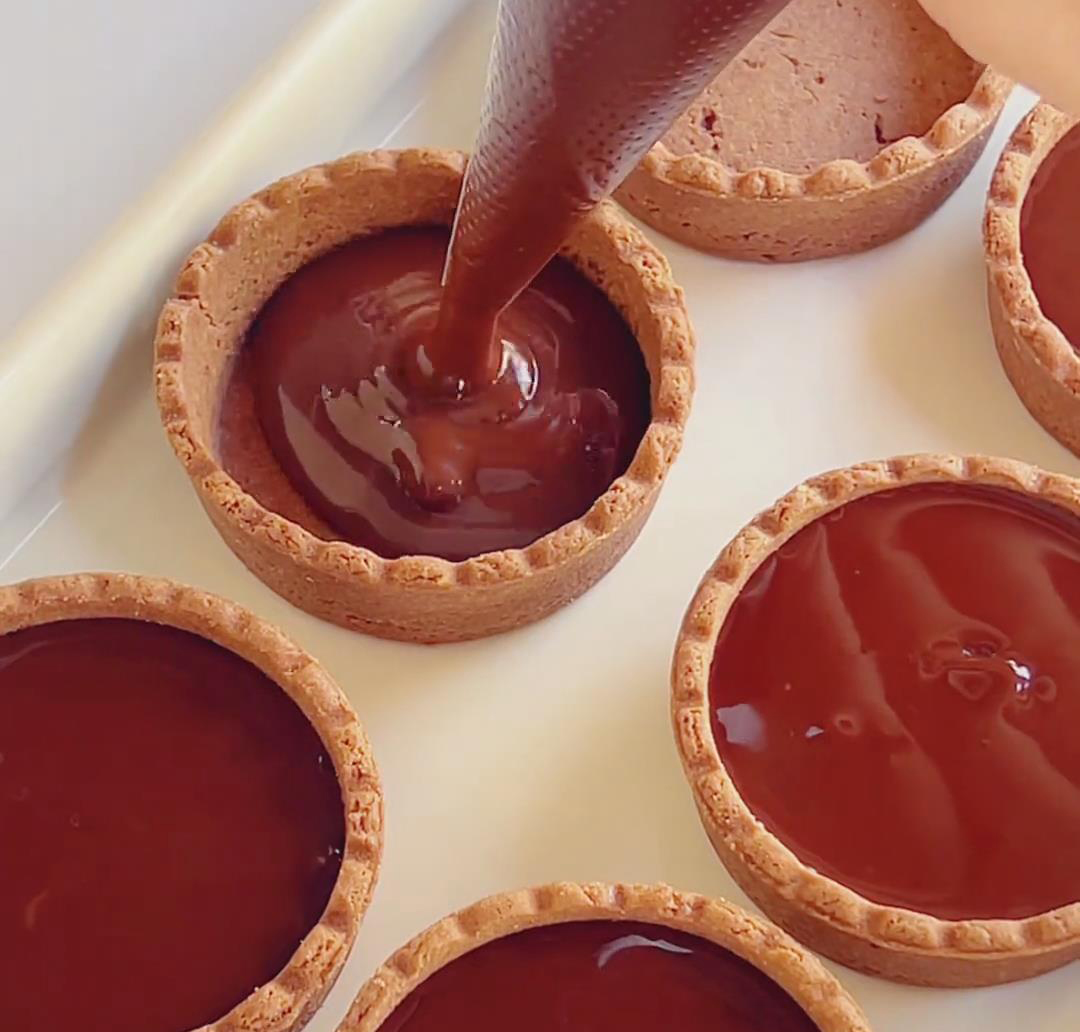
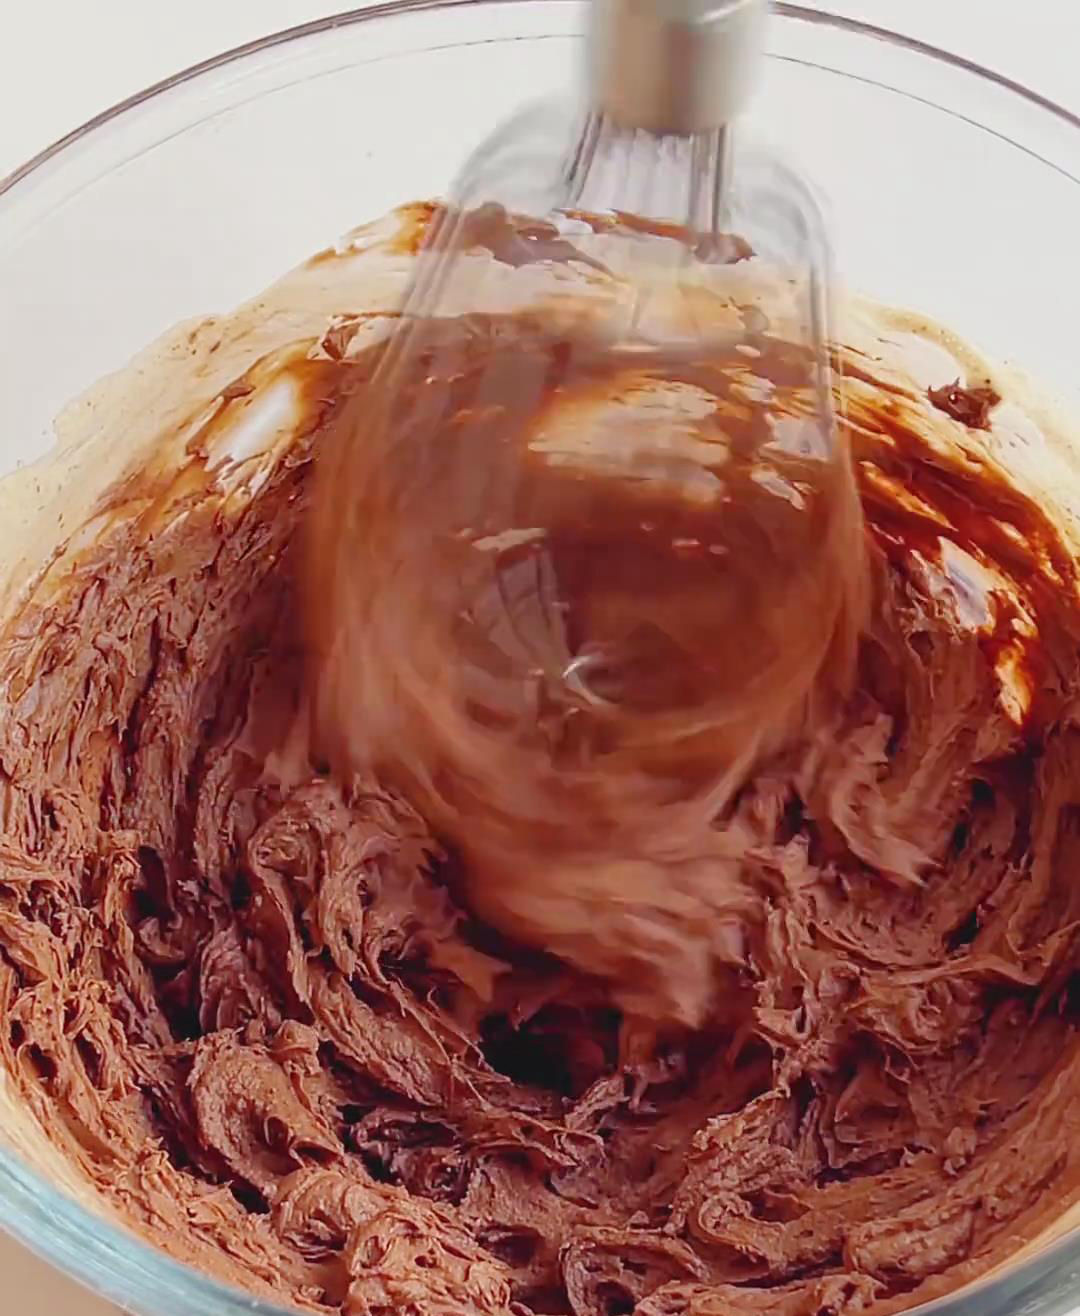
3. Make the Chocolate Whipped Cream
In a mixing bowl, combine 100 g of heavy cream and 5 g of sugar. Whip with an electric mixer on medium speed until soft peaks form — it should thicken but still flow slightly.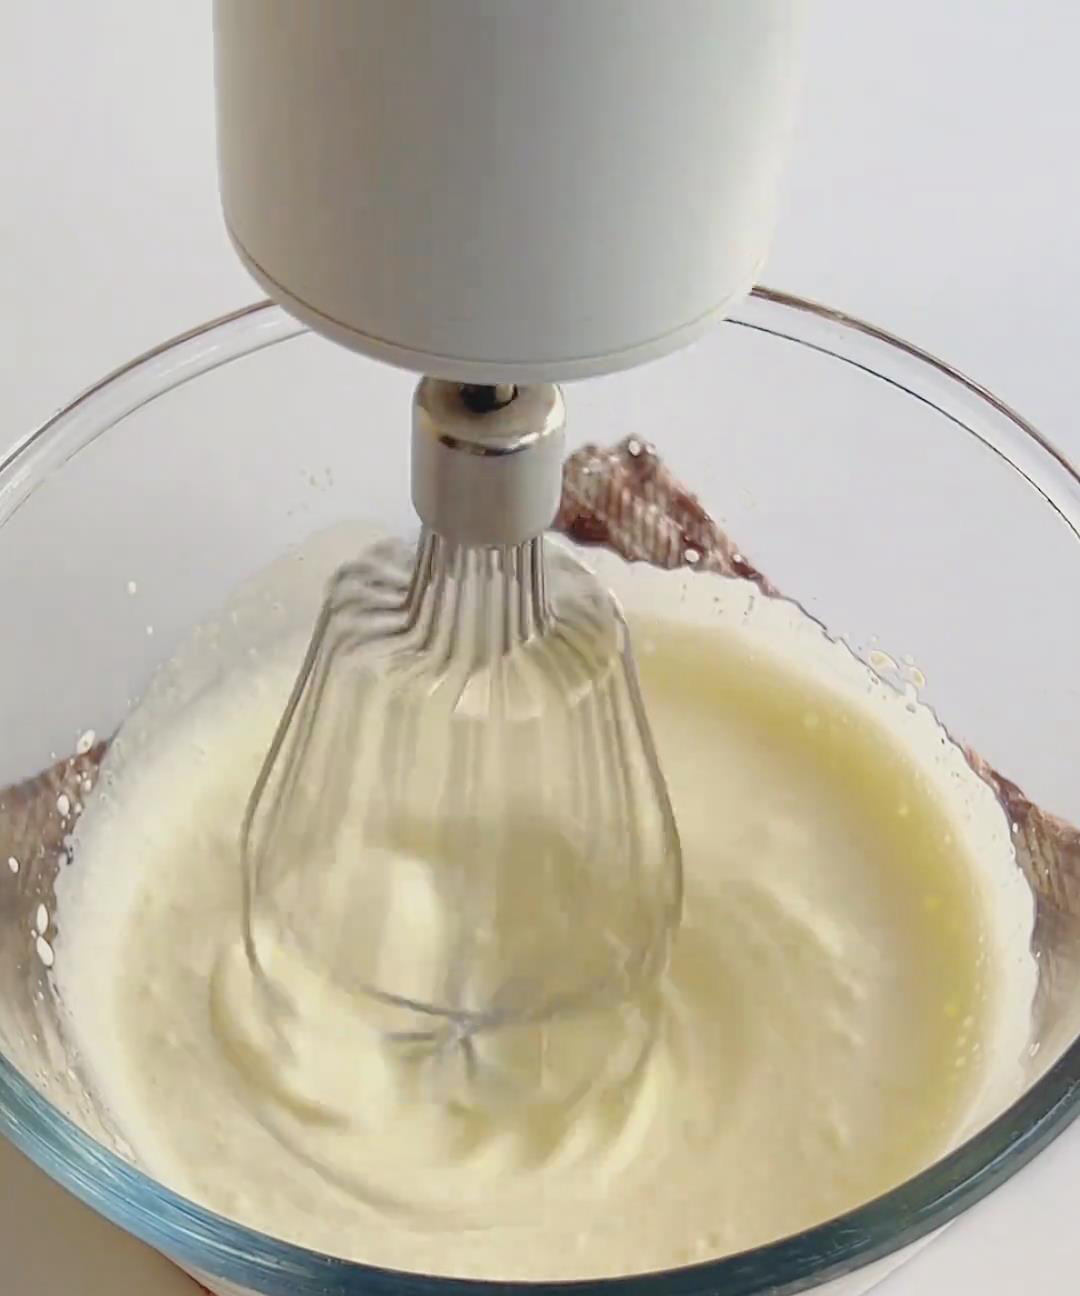
Add the chocolate sauce and continue whipping at medium-high speed until stiff peaks form. The cream should hold its shape when the whisk is lifted. Transfer the whipped cream into a piping bag with your favorite nozzle.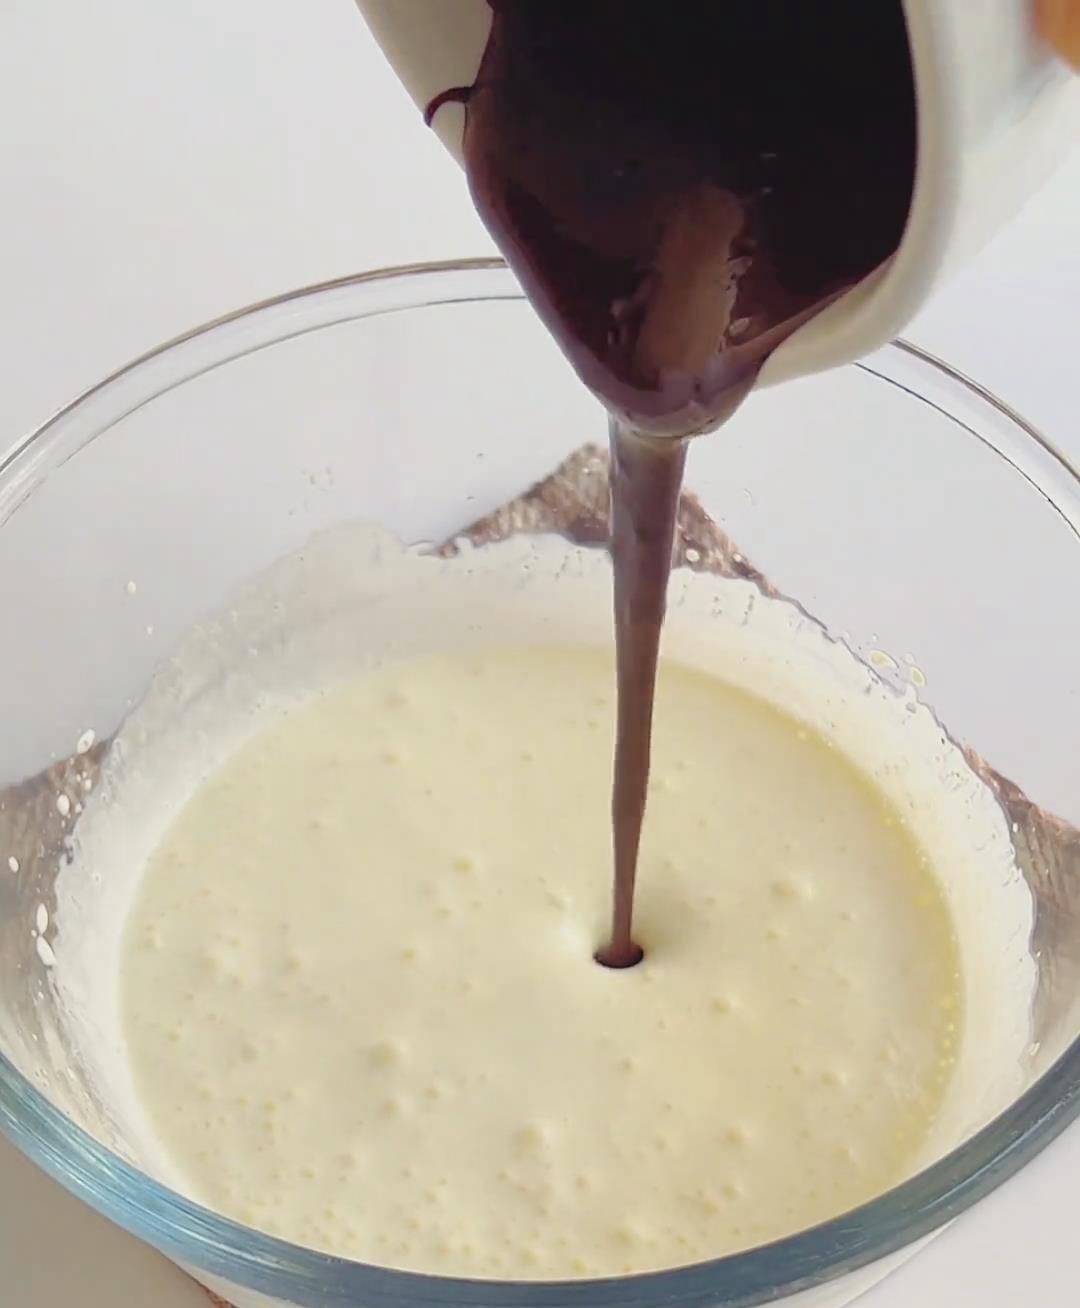
4. Assemble and Decorate
Once the tartlets are fully chilled and the filling is firm, pipe the chocolate whipped cream on top. Swirls, domes, or rosettes all look stunning. Finish with chocolate shavings or chips for a touch of elegance and crunch. Serve immediately or store chilled until ready to enjoy.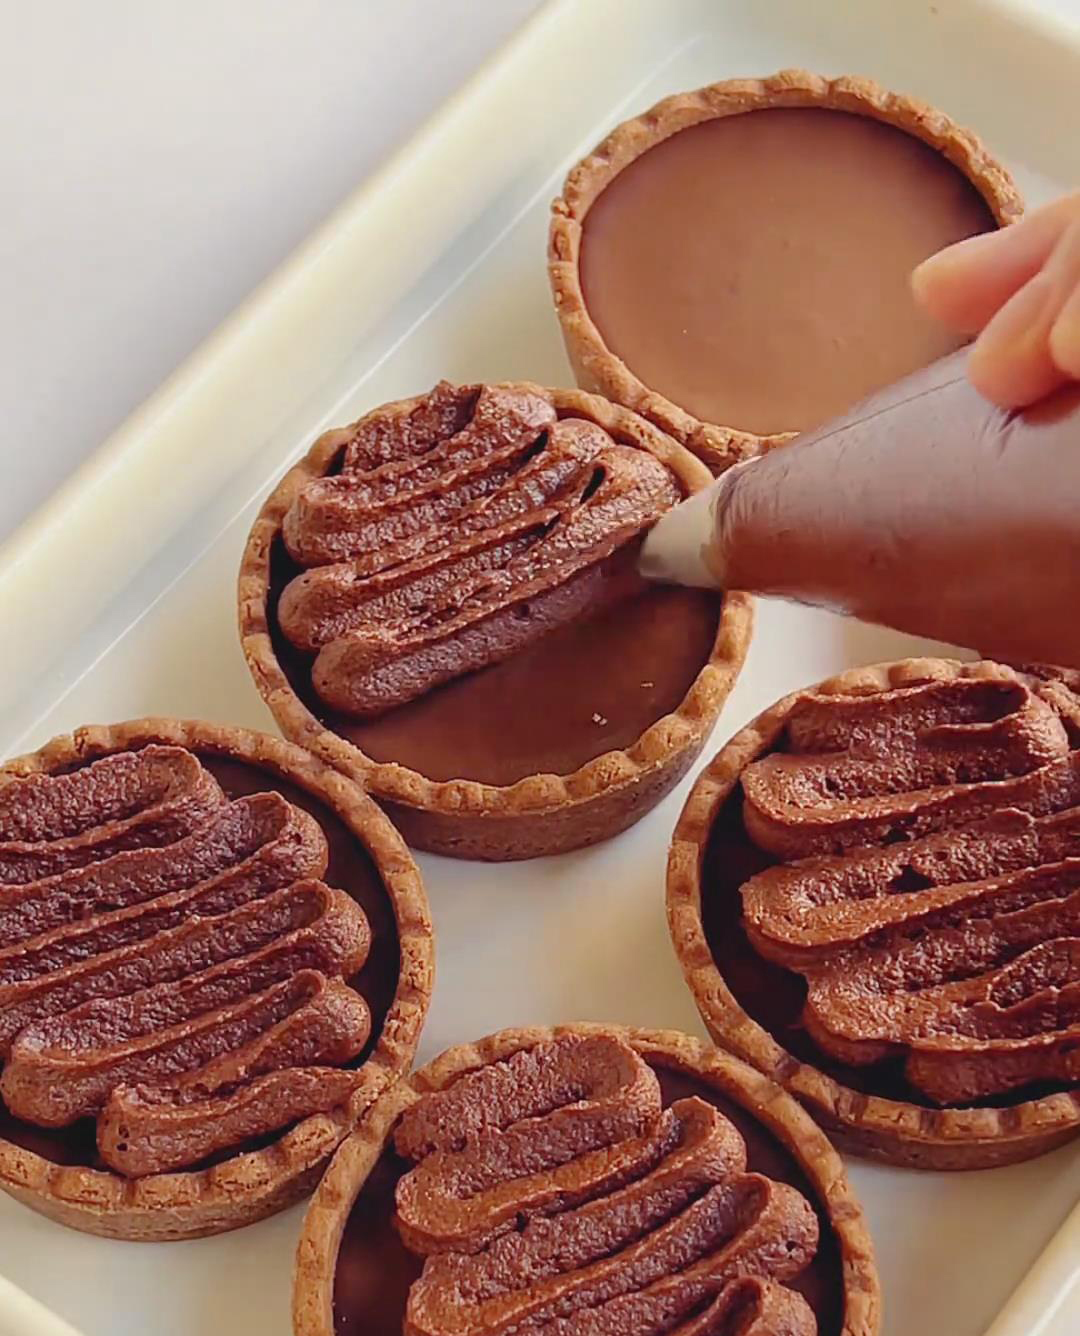
Tips & Tricks
- Use high-quality dark chocolate — the flavor of your chocolate defines the dessert, so use the best one you can find.
- Avoid overheating the cream — too much heat can cause the mixture to split or scramble the egg yolk.
- Chill long enough — the filling needs at least 4 hours to set properly for that perfect creamy texture.
- Whip the cream just right — overwhipping can make it grainy, underwhipping makes it too soft to pipe.
- Make ahead — you can prepare the tartlets a day in advance; just add the topping before serving.
Storage
Refrigerate: Store covered in the refrigerator for up to 3 days.
Freeze: You can freeze the un-topped tartlets for up to 1 month. Thaw in the fridge before decorating.
Frequently Asked Questions
Can I use milk chocolate instead of dark?
You can, but it will make the filling sweeter and less intense. If using milk chocolate, reduce the sugar slightly.
My chocolate filling turned grainy. What happened?
It may have overheated. Next time, keep the heat very low and stir continuously, or strain the filling before chilling to fix the texture.
Can I use homemade tart shells?
Absolutely! If you have time, a homemade tart shell adds a buttery, crumbly touch — just bake them fully before adding the filling.
Decadent Chocolate Tartlets Recipe – Quick & Easy Mini Tarts
Ingredients
Chocolate Lava Filling
- 6 store-bought cocoa tart shells 6-7cm diameter
- 150 g heavy cream 30-36% fat
- 1 pasteurized egg yolk
- 18 g granulated sugar
- 80 g dark chocolate approx. 70% cocoa, chopped
Chocolate Whipped Cream (Optional Topping)
- 100 g heavy cream 30-36% fat
- 5 g granulated sugar
- 60 g pure chocolate sauce
Garnish (Optional)
- Chocolate shavings or chocolate chips
Instructions
Make the Chocolate Lava Filling
- In a small saucepan, pour in 150 g of heavy cream. Add the egg yolk and sugar. Stir gently with a silicone spatula over low heat until the sugar dissolves and the mixture becomes smooth.
- When small bubbles begin to form around the edges (without boiling), add the dark chocolate. Stir until completely melted and silky smooth. If the texture looks grainy, strain it for a finer consistency. Let the mixture cool slightly, then transfer to a piping bag.
Fill and Chill the Tart Shells
- Pipe the chocolate filling into each tart shell, filling them about 80% full to leave space for toppings. Place the filled tarts in the refrigerator for at least 4 hours to allow the filling to fully set and firm up.
- (If you're skipping the topping, your chocolate tartlets are ready to enjoy at this point!)
Make the Chocolate Whipped Cream
- In a mixing bowl, combine 100 g of heavy cream and 5 g of sugar. Whip with an electric mixer on medium speed until soft peaks form — it should thicken but still flow slightly.
- Add the chocolate sauce and continue whipping at medium-high speed until stiff peaks form. The cream should hold its shape when the whisk is lifted. Transfer the whipped cream into a piping bag with your favorite nozzle.
Assemble and Decorate
- Once the tartlets are fully chilled and the filling is firm, pipe the chocolate whipped cream on top. Swirls, domes, or rosettes all look stunning. Finish with chocolate shavings or chips for a touch of elegance and crunch. Serve immediately or store chilled until ready to enjoy.
Leave a Reply