
Beat the heat with the easiest, most refreshing treat! I promise these Frozen Pineapple Bites are incredibly simple to make and will instantly become your go-to summer snack.
My Perfectly Sweet & Tangy Frozen Pineapple Bites
I’ve perfected this method to create frozen pineapple that’s bursting with flavor, not icy crystals. This recipe uses a simple saltwater soak and a quick sugar marinade to ensure every bite is sweet, tangy, and perfectly textured.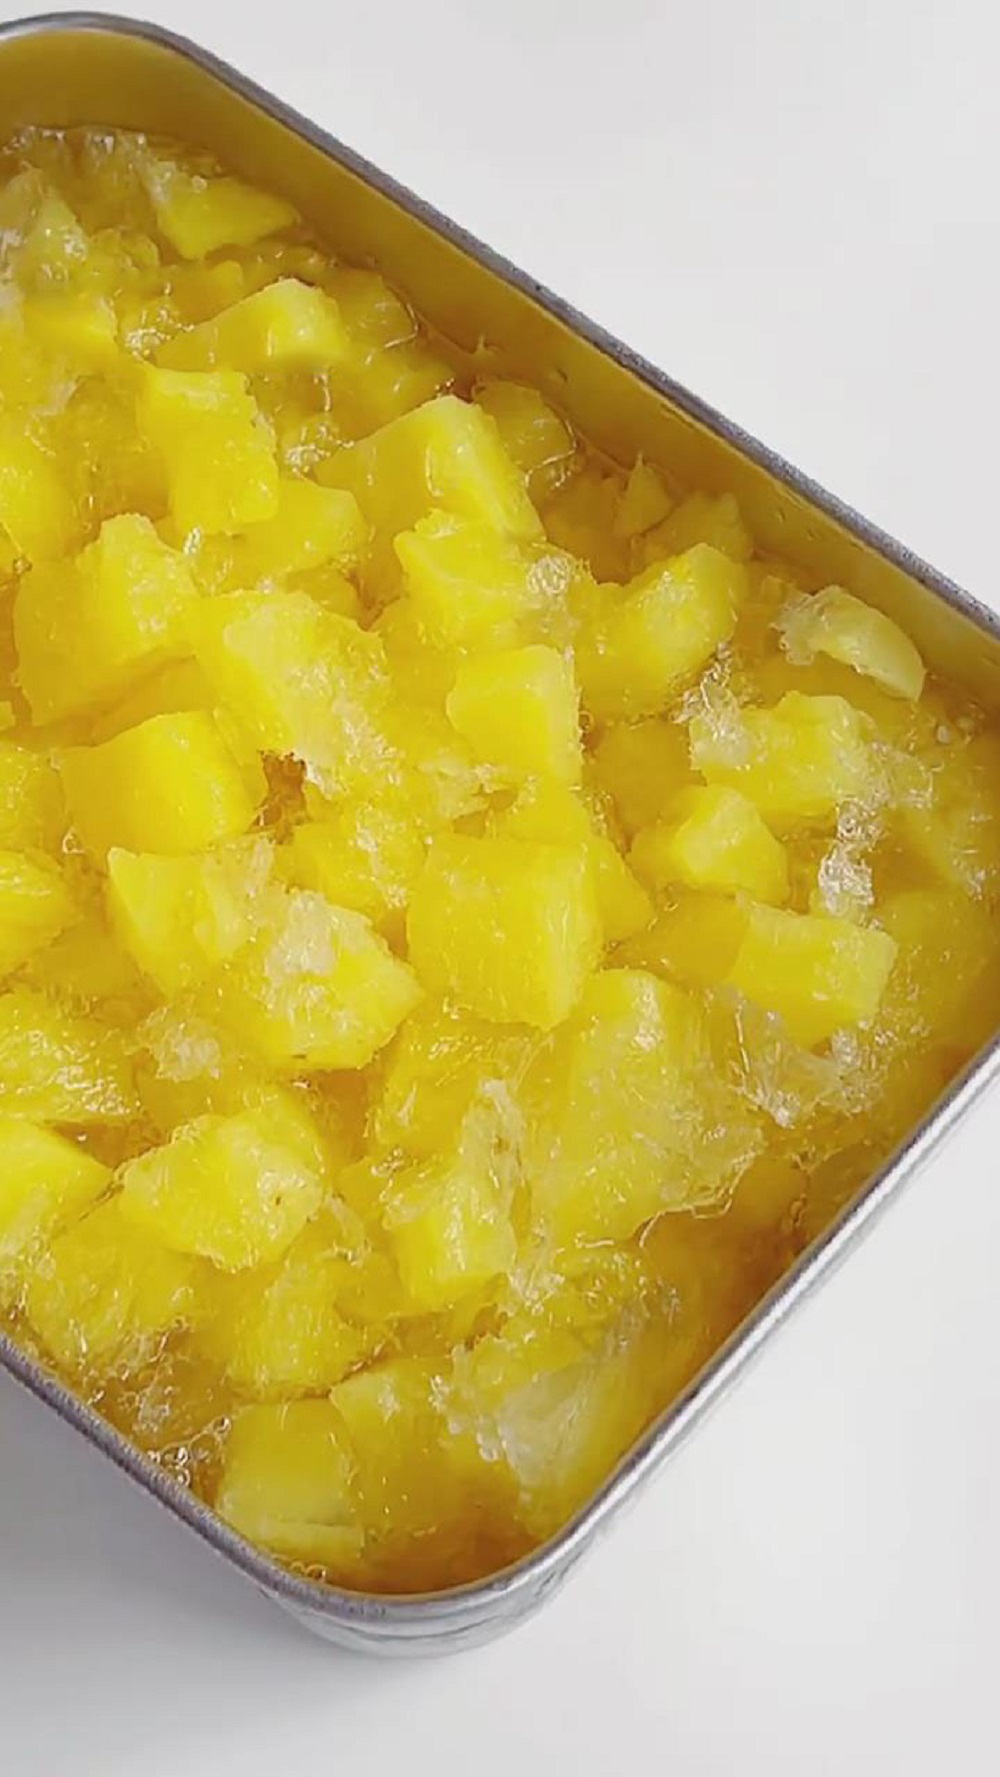
Why you’ll love this recipe:
- No Icy Bits: The secret soaking and marinating steps prevent the pineapple from freezing into a solid, icy block, giving it a fantastic slushy texture.
- Customizable Sweetness: You control the sugar! Start with less and add more after marinating until it’s perfectly suited to your taste buds.
- Incredibly Refreshing: These chilly, juicy bites are the ultimate way to cool down on a hot day. They’re like little pockets of pure sunshine.
- Naturally Dairy-Free: A delicious and healthy frozen treat that everyone can enjoy, no special diets required.
Ingredients:
- 2 whole fresh pineapples
- 1 tbsp salt
- 50-80g white granulated sugar
- 200-300ml clean water
Instructions:
Step 1: Pineapple Prep
Wash the pineapples thoroughly. Use a knife to peel the skin from top to bottom, making sure to remove all the “eyes” (cut them out diagonally to avoid leaving any hard bits that will affect the texture).
Slice the peeled pineapple into approximately 1cm thick rounds.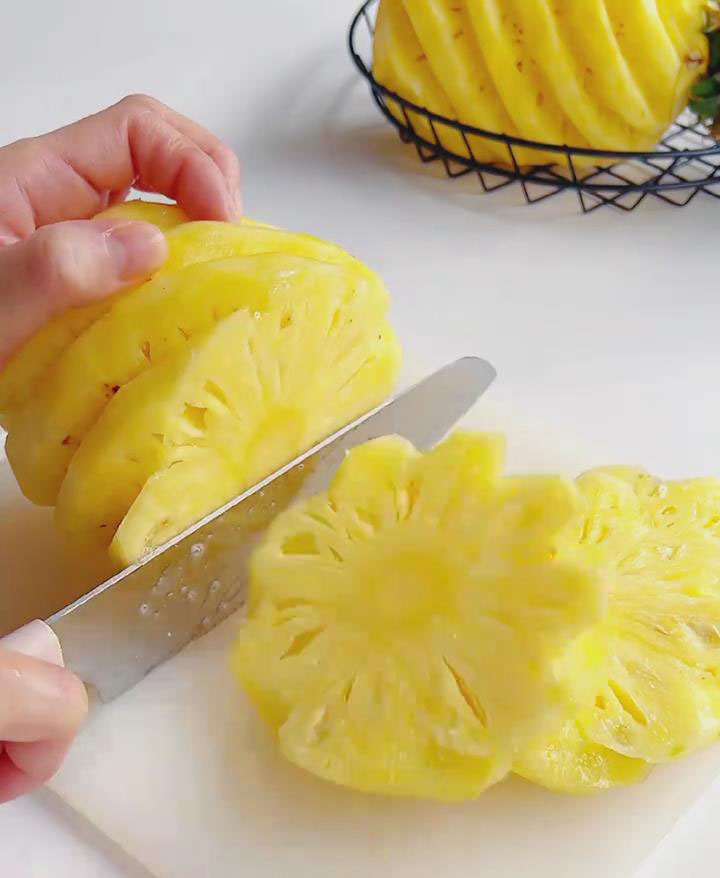
Then, cut the slices into roughly 1cm cubes (Cubes shouldn’t be too large, or the centers won’t freeze properly; nor too small, or they will turn mushy when cooked).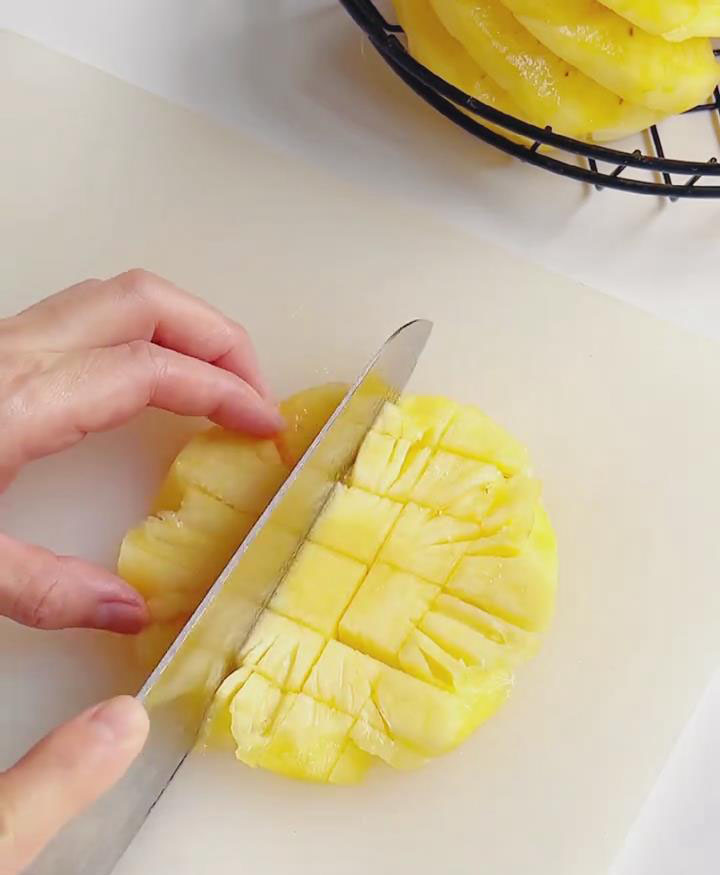
Place the pineapple cubes in a bowl. Add 1 tbsp of salt and enough cool boiled or clean water to submerge them. Stir well and let soak for 10 minutes (The salt water helps break down the bromelain enzyme, reducing mouth irritation, and removes some oxalic acid).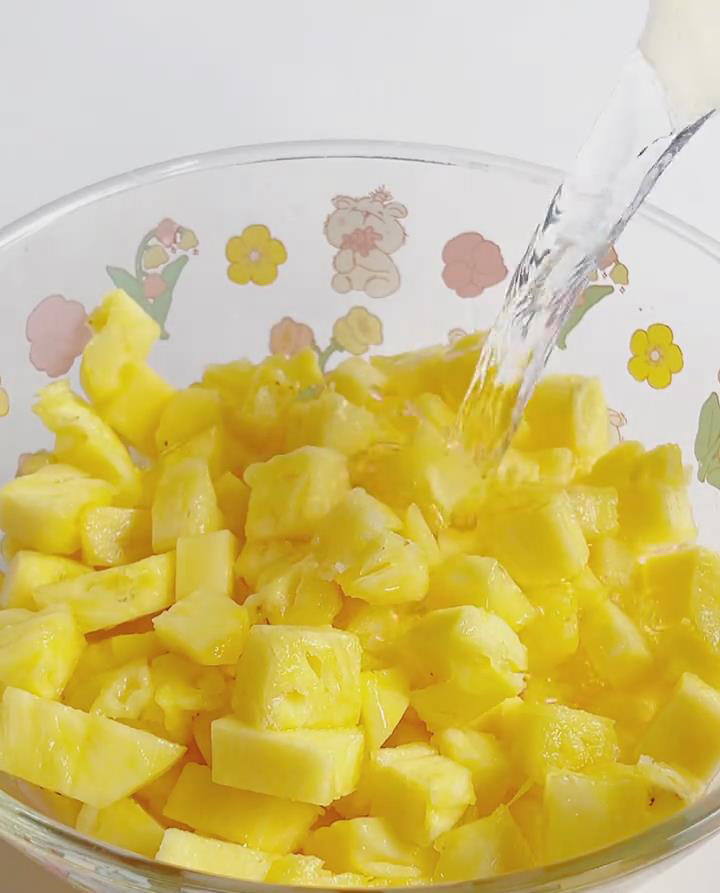
After soaking, use a slotted spoon to remove the pineapple cubes and drain them thoroughly (Draining well is crucial to avoid excess water during the next step, which would dilute the sweetness).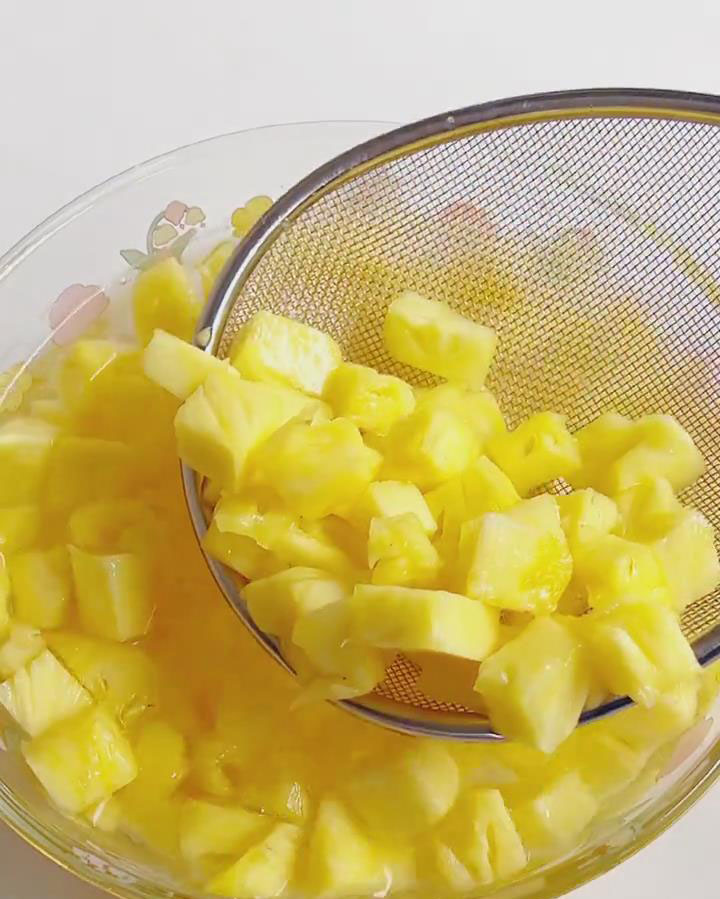
Step 2: Marinating the Pineapple (Key: Let the Fruit Fully Absorb Sweetness)
Place the drained pineapple cubes into a clean container. Add the white sugar (start with 50g; you can add more later to taste).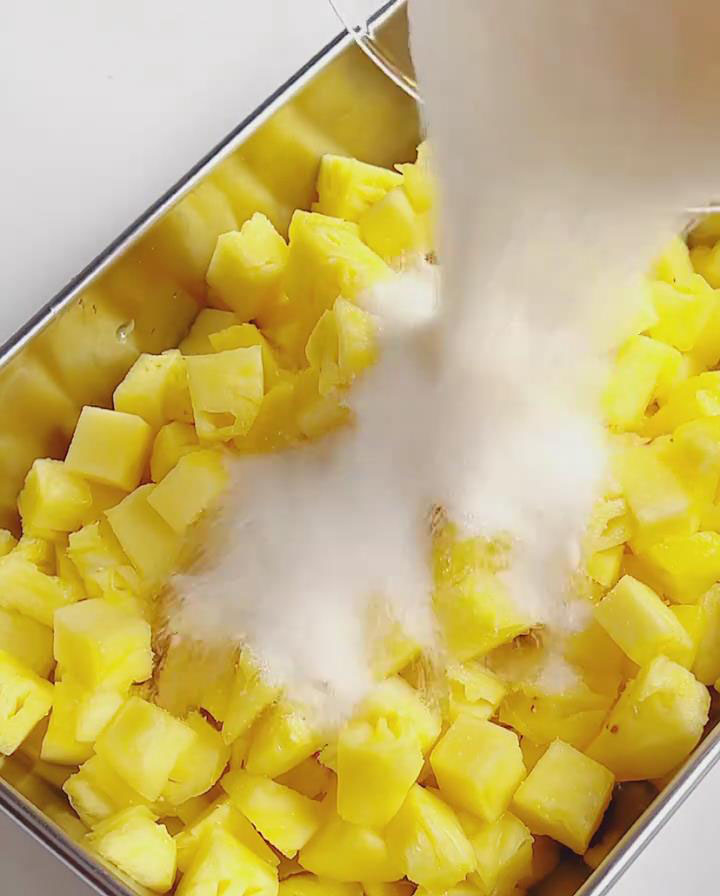
Gently toss the pineapple cubes with a spoon until each piece is evenly coated with sugar.
Cover the container (or seal it with plastic wrap) and place it in the refrigerator to marinate for 2 hours (Chilling prevents spoilage in warm temperatures and allows the sugar to dissolve slowly, letting the pineapple fully absorb the sweetness and release some of its own juice).
After 2 hours, take it out and taste a piece. If it’s too tart, you can add an additional 10-30g of sugar, toss again, and let it sit for 5 minutes (to allow the new sugar to begin dissolving).
Step 3: Cooking the Pineapple (Key: Soften, Don’t Mushify)
Pour the marinated pineapple cubes and all the accumulated juice into a cooking pot. Add the prepared water (just enough to barely cover the pineapple cubes).
Bring the pot to a boil over high heat, stirring gently occasionally to prevent the pineapple from sticking to the bottom.
Once boiling, reduce the heat to low and simmer for 5 minutes (Do not cook too long; 5 minutes is enough to soften the pineapple while still retaining some texture. Overcooking will turn it into mush).
Turn off the heat. Transfer the pineapple cubes along with a small amount of the syrup into a container. Let it cool completely to room temperature (This step is essential. Putting hot pineapple in the freezer can cause frost and affect freezing efficiency).
Step 4: Freezing & Setting (Key: Control Freezing Time, Avoid Solid Blocks)
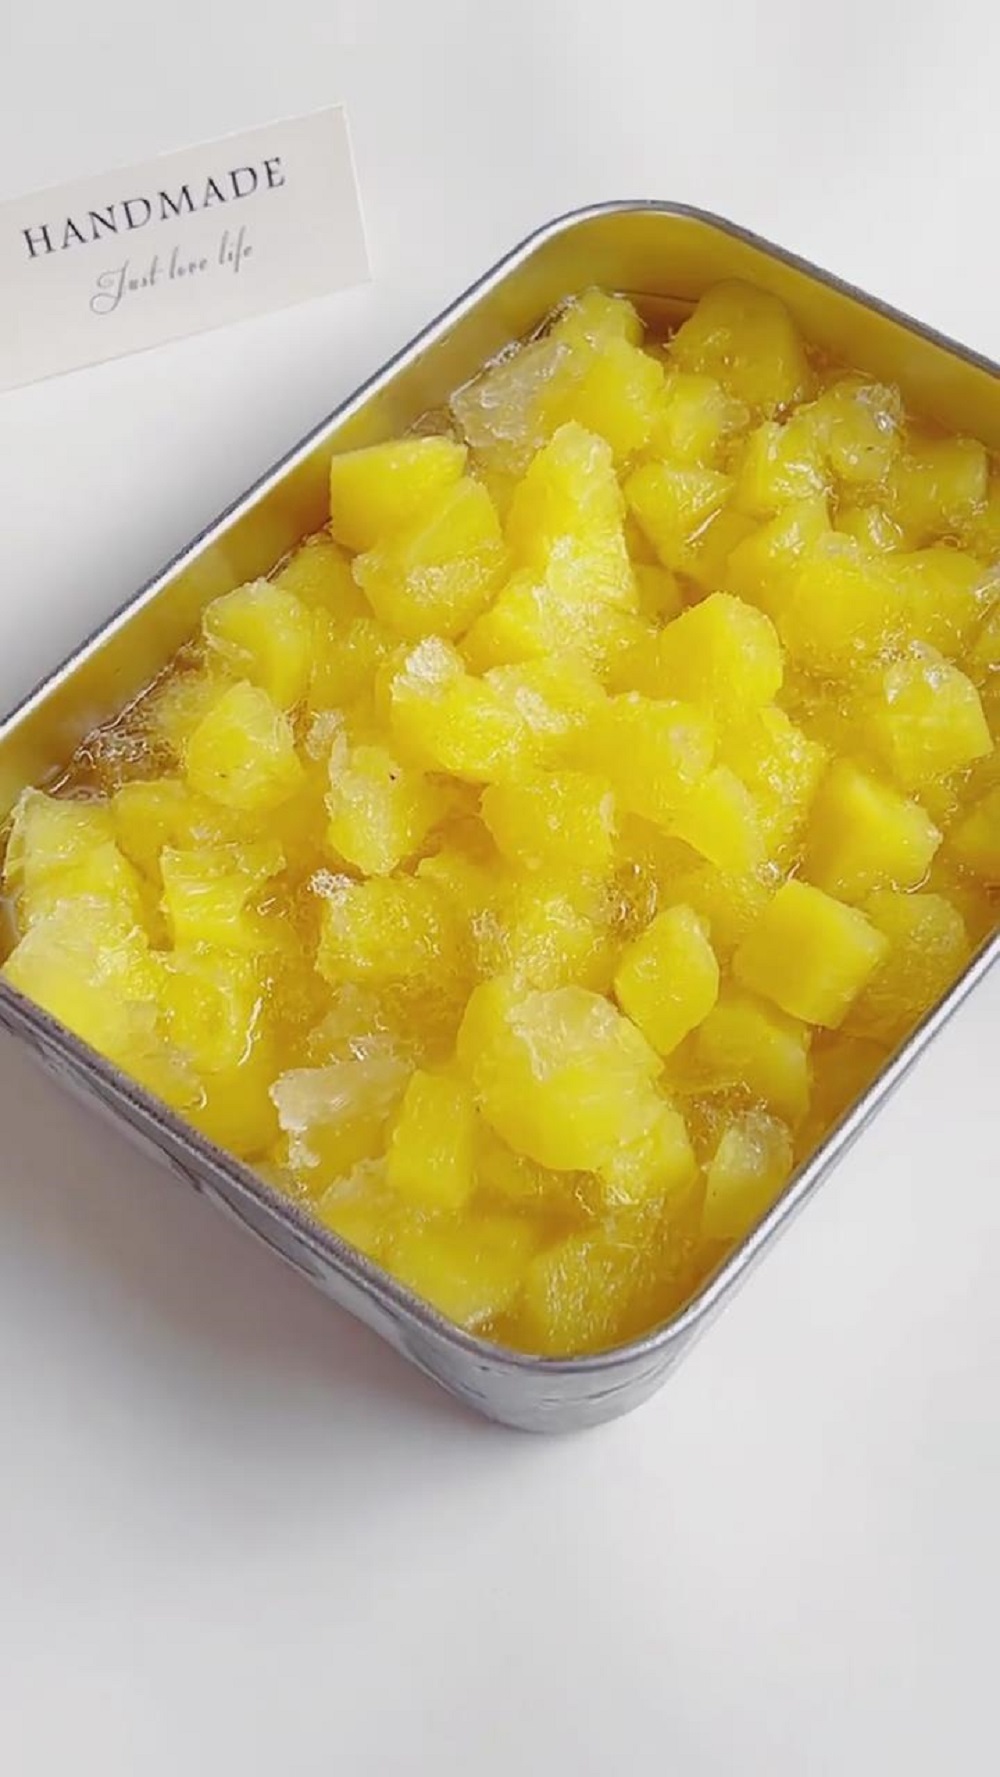
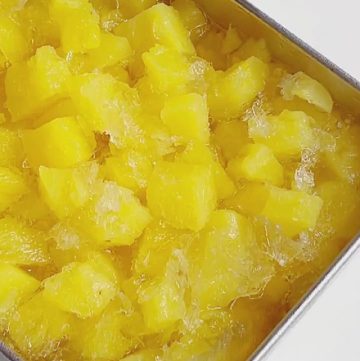
Cover the container of cooled pineapple (with some syrup) with plastic wrap. Place it in the freezer for about 4 hours. The ideal final texture is “surface frosted, interior slightly firm but not a solid block,” with a shaved ice-like consistency.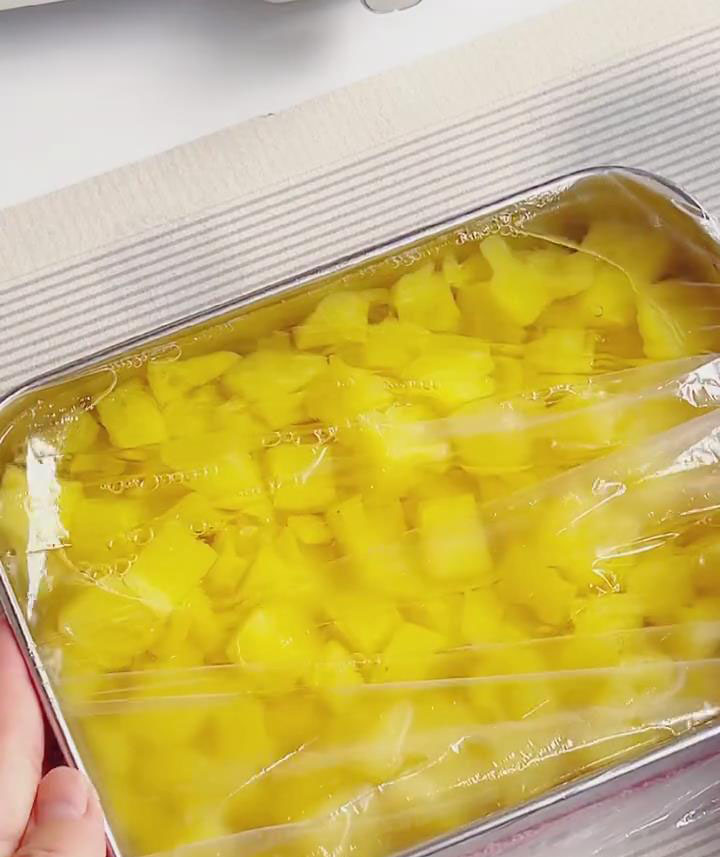
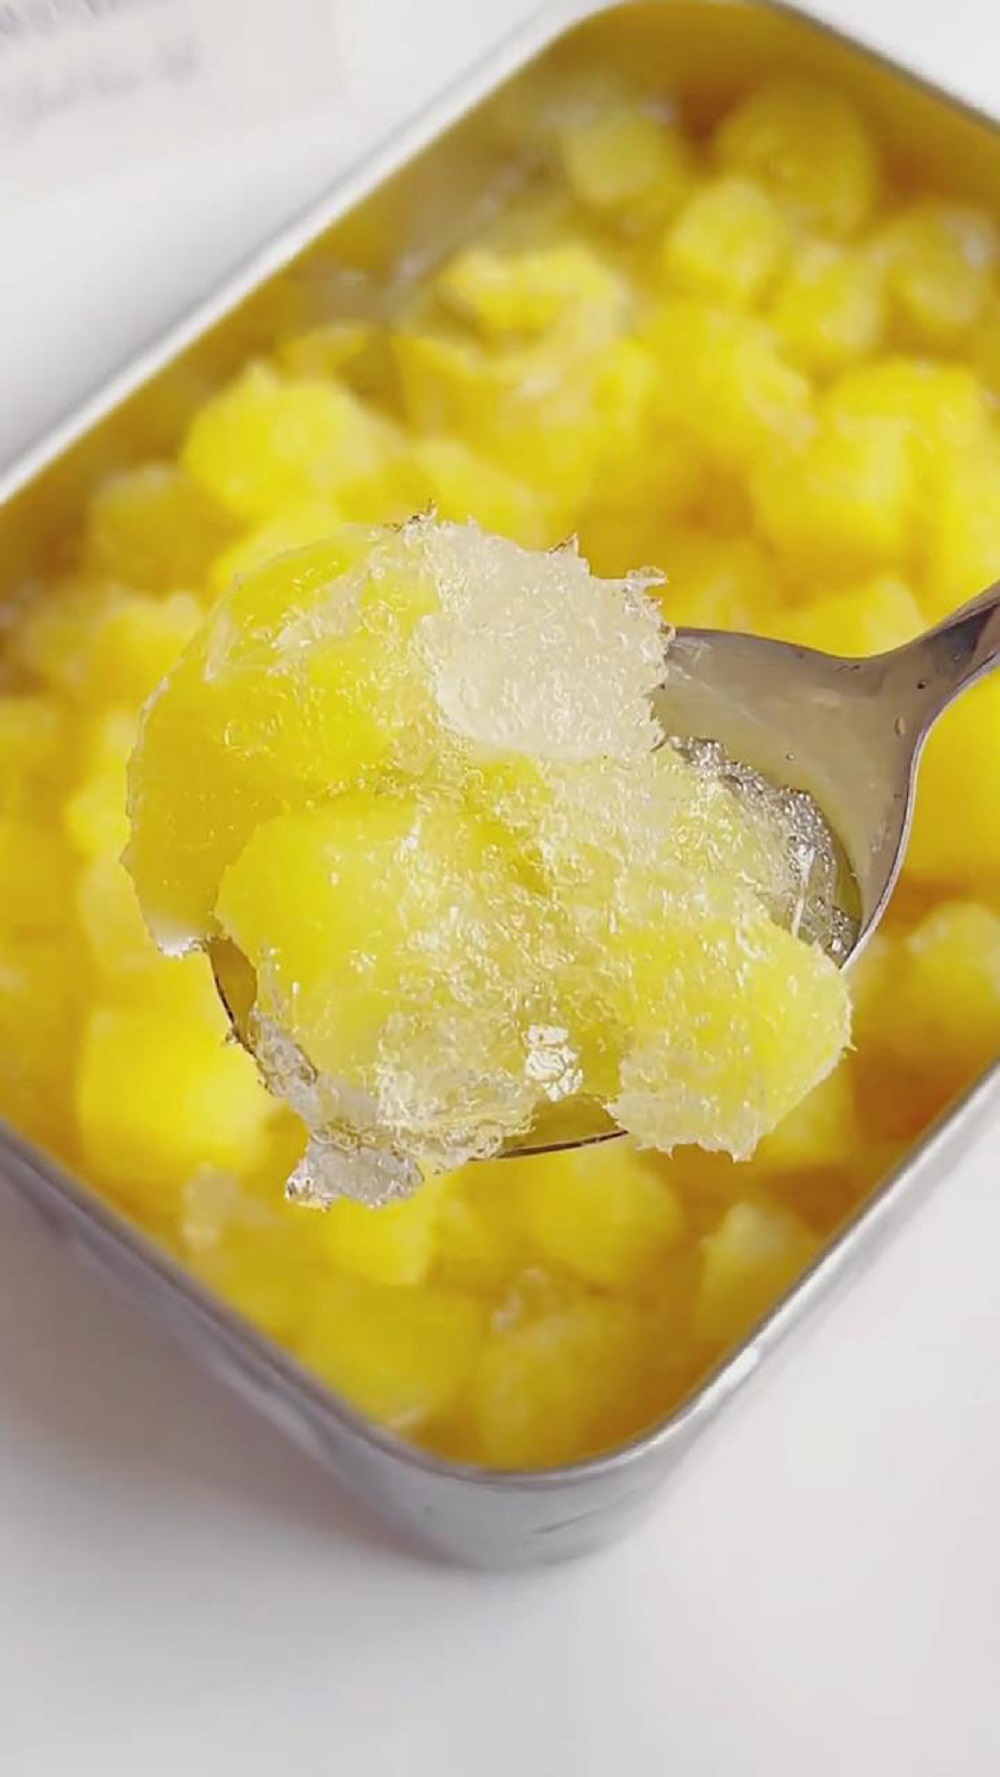
Once frozen, take it out and enjoy immediately (If frozen too long and becomes a solid block, let it sit at room temperature for 5-10 minutes before eating until the surface softens slightly for a crisper texture).
Notes:
Choosing Pineapple: Prioritize “short and stout” pineapples, as they tend to have fuller flesh. Gently press the skin – it should feel slightly soft and springy with a strong, fragrant smell, indicating ideal ripeness. Too soft and it might be spoiling; too hard means it will be sour and astringent.
Adjusting Sweetness: The amount of sugar used during marination can be adjusted flexibly. Use less if you prefer tartness, more if you prefer sweetness. You can also add a little more sugar after cooking based on the syrup’s taste (but ensure it’s fully dissolved before freezing).
Storage: The finished pineapple ice chunks can be stored sealed in the freezer for about 3-5 days (It’s best eaten soon; longer storage can cause the fruit to dehydrate, worsening the texture).
Texture Upgrade: For more complex flavor, you can add a small amount of desiccated coconut or raisins (soaked in warm water first to soften) before freezing. Alternatively, drizzle a spoonful of yogurt over it after freezing to add another layer of flavor.
Frequently Asked Questions
Q: Can I use canned pineapple?
A: I don’t recommend it. Canned pineapple is already cooked and much softer. It will become very mushy during the cooking step in this recipe and won’t provide the same texture. Fresh pineapple is essential for the best results.
Q: Why do I have to cook it? Can’t I just freeze it raw?
A: The brief cooking process helps break down the fruit’s fibers just enough so it doesn’t freeze rock solid. Skipping this step will likely result in a solid, difficult-to-eat block of frozen pineapple.
Q: What if I don’t have time to marinate for 2 hours?
A: The marinating time is key for the sugar to penetrate the fruit and draw out juices, which creates a syrup that helps the texture. For best results, don’t skip it! You can shorten it to 1 hour in a pinch, but the flavor and texture won’t be quite as good.
Refreshing Pineapple Ice Bites
Ingredients
- 2 whole fresh pineapples
- 1 tbsp salt
- 50-80 g white granulated sugar
- 200-300 ml clean water
Instructions
Step 1: Pineapple Prep
- Wash the pineapples thoroughly. Use a knife to peel the skin from top to bottom, making sure to remove all the "eyes" (cut them out diagonally to avoid leaving any hard bits that will affect the texture).
- Slice the peeled pineapple into approximately 1cm thick rounds.
- Then, cut the slices into roughly 1cm cubes (Cubes shouldn't be too large, or the centers won't freeze properly; nor too small, or they will turn mushy when cooked).
- Place the pineapple cubes in a bowl. Add 1 tbsp of salt and enough cool boiled or clean water to submerge them. Stir well and let soak for 10 minutes (The salt water helps break down the bromelain enzyme, reducing mouth irritation, and removes some oxalic acid).
- After soaking, use a slotted spoon to remove the pineapple cubes and drain them thoroughly (Draining well is crucial to avoid excess water during the next step, which would dilute the sweetness).
Step 2: Marinating the Pineapple (Key: Let the Fruit Fully Absorb Sweetness)
- Place the drained pineapple cubes into a clean container. Add the white sugar (start with 50g; you can add more later to taste).
- Gently toss the pineapple cubes with a spoon until each piece is evenly coated with sugar.
- Cover the container (or seal it with plastic wrap) and place it in the refrigerator to marinate for 2 hours (Chilling prevents spoilage in warm temperatures and allows the sugar to dissolve slowly, letting the pineapple fully absorb the sweetness and release some of its own juice).
- After 2 hours, take it out and taste a piece. If it's too tart, you can add an additional 10-30g of sugar, toss again, and let it sit for 5 minutes (to allow the new sugar to begin dissolving).
Step 3: Cooking the Pineapple (Key: Soften, Don't Mushify)
- Pour the marinated pineapple cubes and all the accumulated juice into a cooking pot. Add the prepared water (just enough to barely cover the pineapple cubes).
- Bring the pot to a boil over high heat, stirring gently occasionally to prevent the pineapple from sticking to the bottom.
- Once boiling, reduce the heat to low and simmer for 5 minutes (Do not cook too long; 5 minutes is enough to soften the pineapple while still retaining some texture. Overcooking will turn it into mush).
- Turn off the heat. Transfer the pineapple cubes along with a small amount of the syrup into a container. Let it cool completely to room temperature (This step is essential. Putting hot pineapple in the freezer can cause frost and affect freezing efficiency).
Step 4: Freezing & Setting (Key: Control Freezing Time, Avoid Solid Blocks)
- Cover the container of cooled pineapple (with some syrup) with plastic wrap. Place it in the freezer for about 4 hours. The ideal final texture is "surface frosted, interior slightly firm but not a solid block," with a shaved ice-like consistency.
- Once frozen, take it out and enjoy immediately (If frozen too long and becomes a solid block, let it sit at room temperature for 5-10 minutes before eating until the surface softens slightly for a crisper texture).
Leave a Reply