
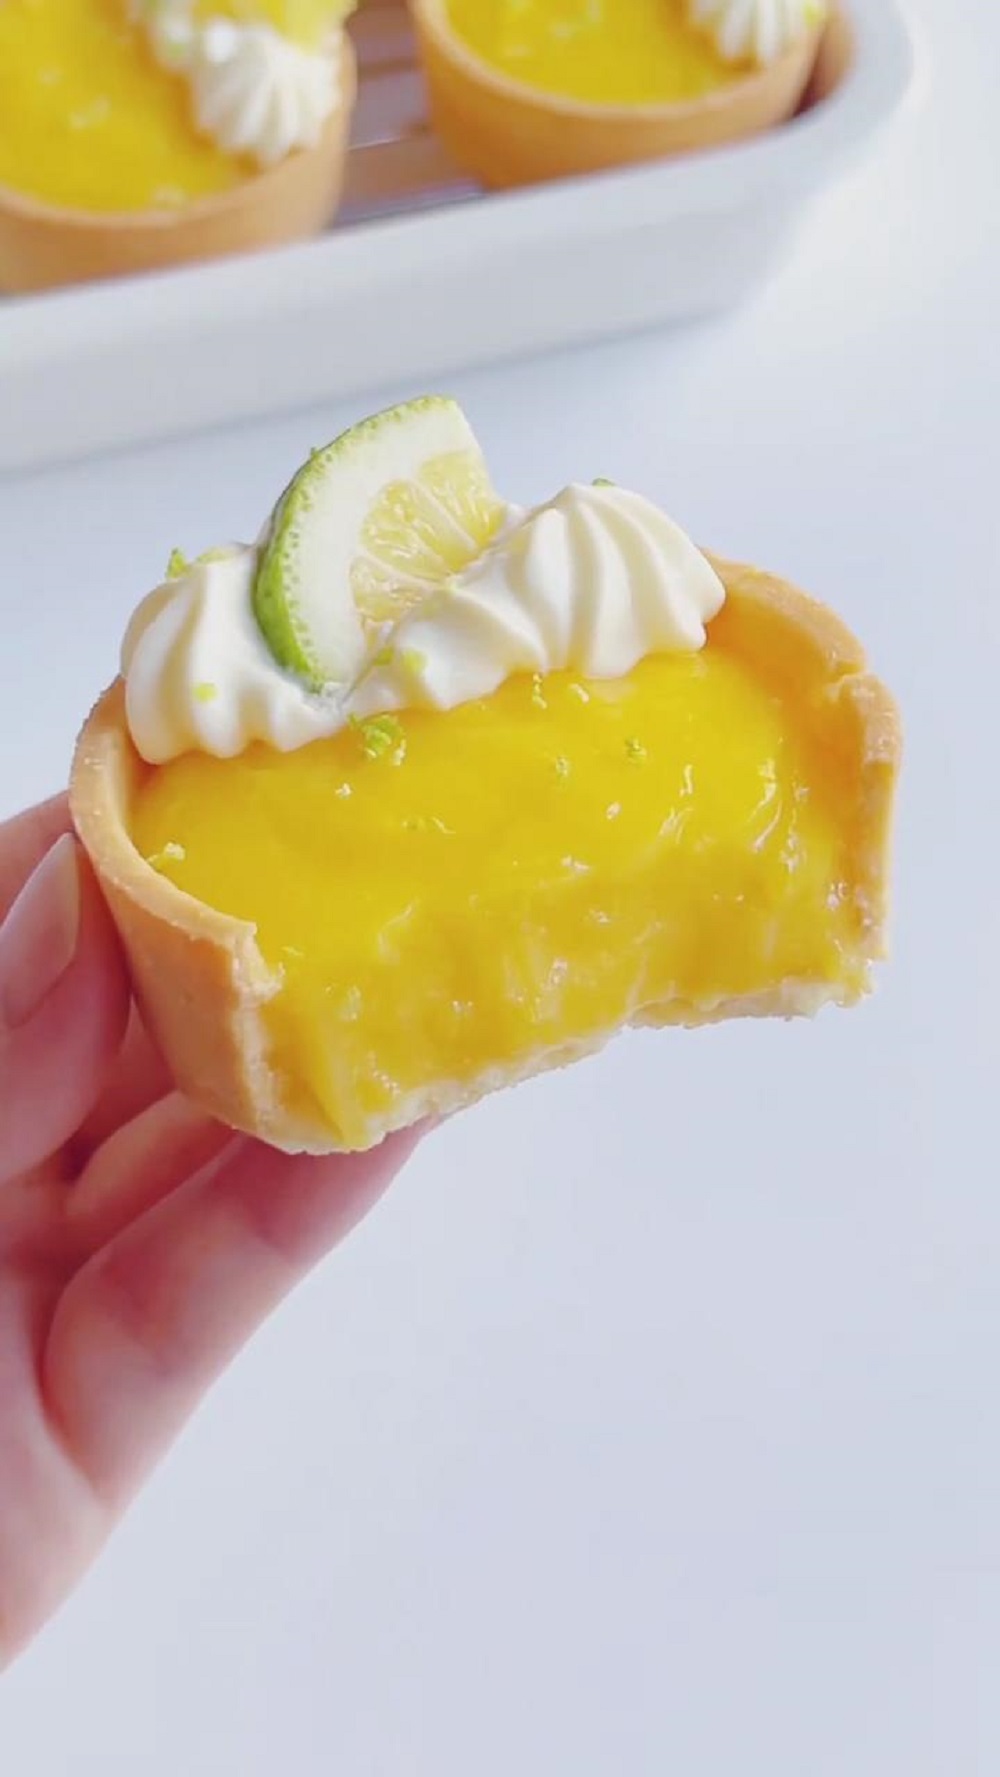
Sweet, tangy, and irresistibly creamy, these Lemon Curd Tartlets are my go-to dessert when I want something simple yet stunning. Great for making ahead too!
Lemon Curd Tartlets
For the tart base, I use the same recipe as my Homemade German Egg Custard Tarts. Then comes the star of the show—the lemon curd.
If you’ve enjoyed my Lemon Cheesecake with Yogurt or Layered Lemon Cheesecake Mousse, you already know how much I love lemon-forward desserts.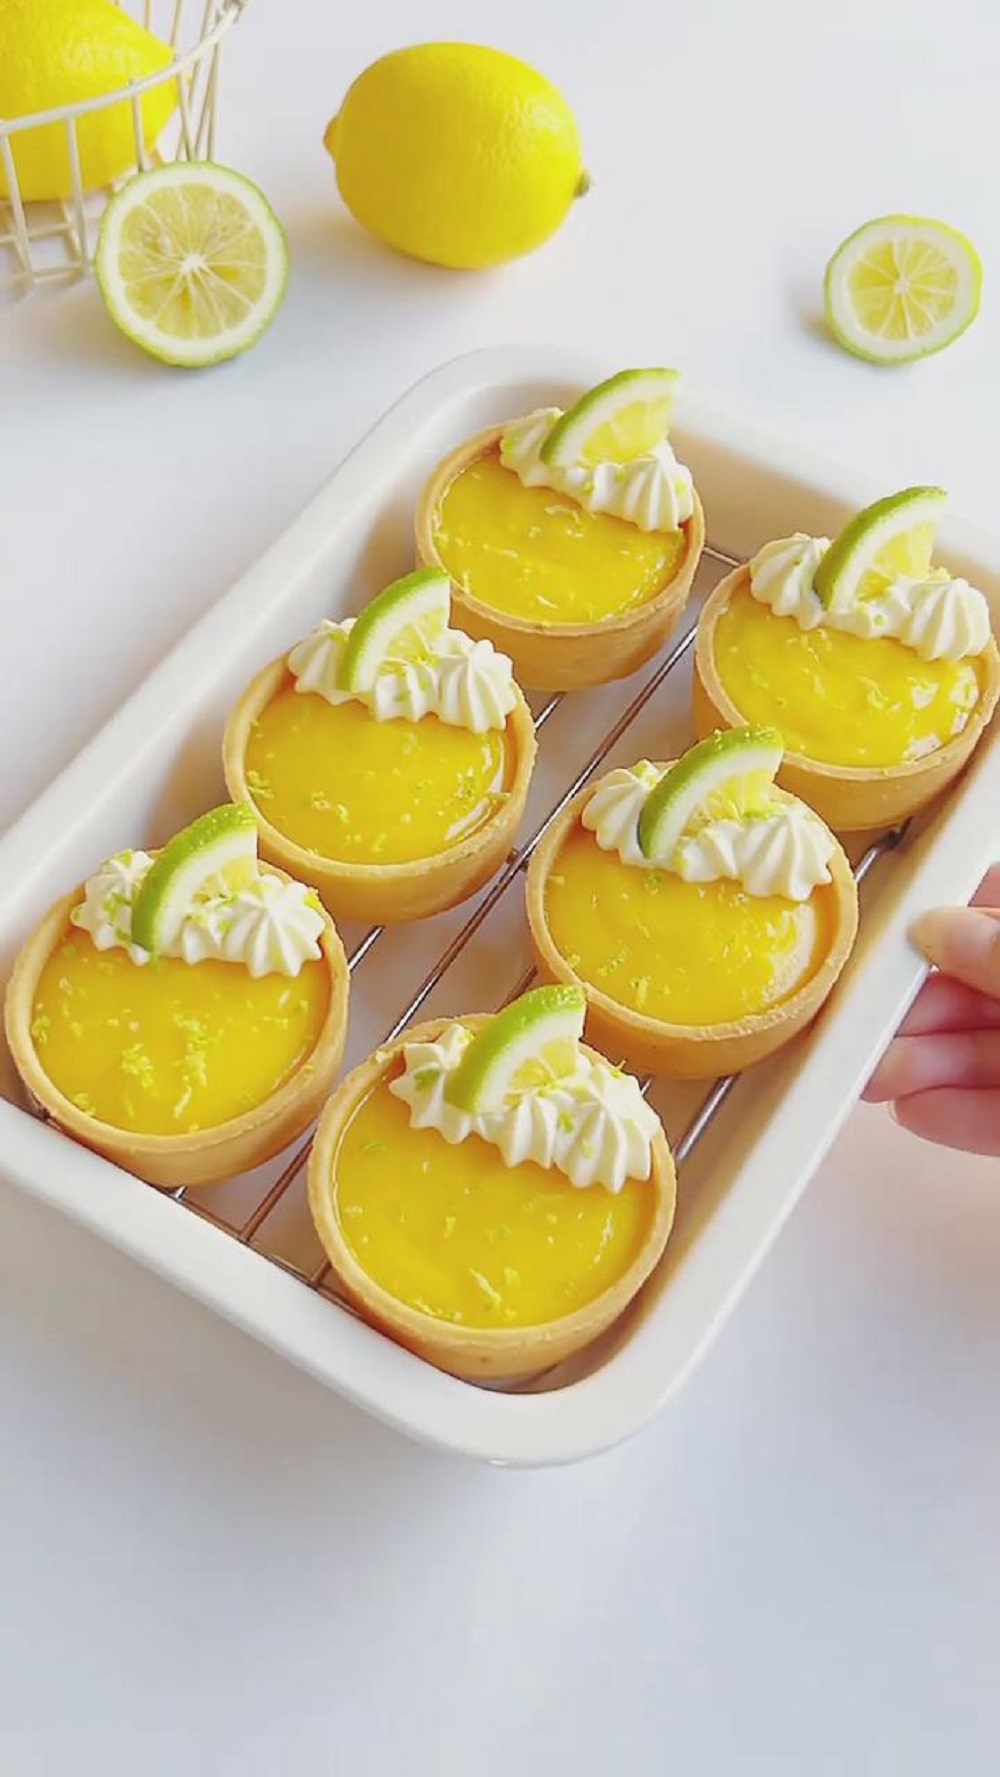
These tartlets carry that same citrusy brightness but in a smaller, handheld form that makes them perfect for gatherings, tea parties, or simply treating yourself after dinner.
And here’s the best part: they’re not nearly as complicated as they look. With a little prep and a few simple steps, you can have these impressive tartlets ready to chill in the fridge.
Don’t be surprised if they become one of your most-requested desserts—I know they’ve become a regular on my table.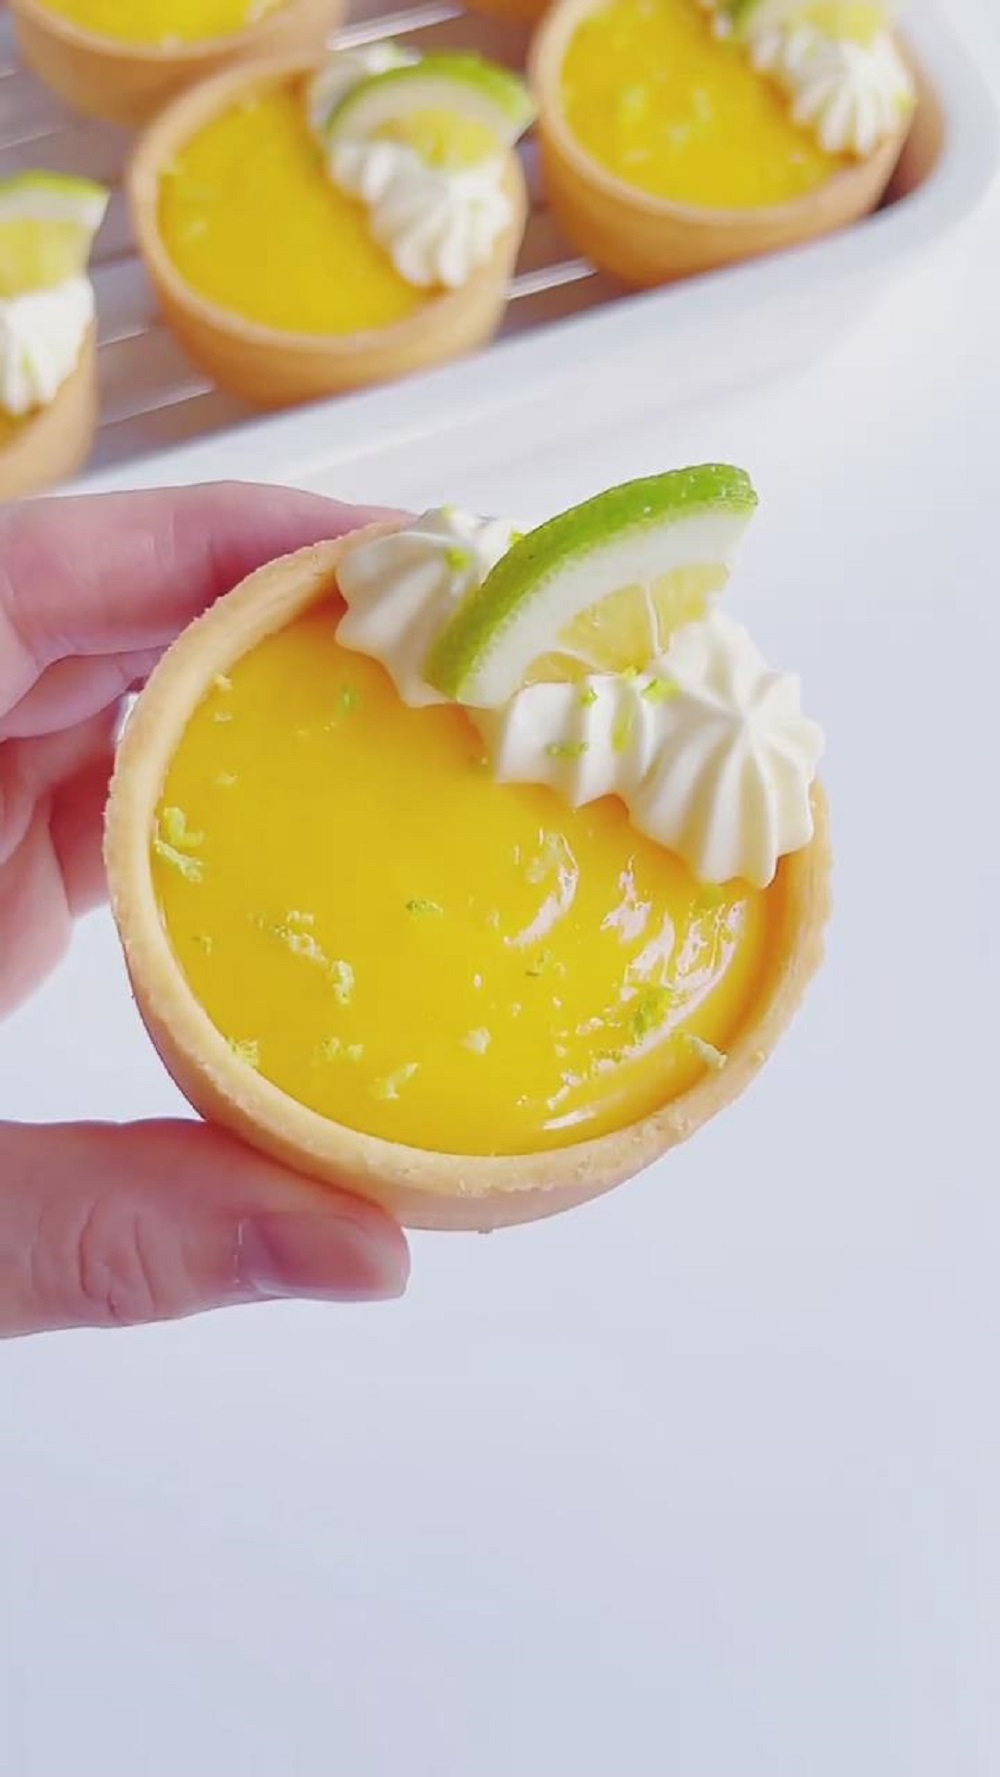
Why You’ll Love This Recipe
- Bright, zesty flavor – The lemon curd is tart and refreshing, balanced by just the right amount of sweetness.
- Make-ahead friendly – Both the tart shells and lemon curd can be prepared in advance.
- Bite-sized perfection – Mini tartlets are easy to serve at parties, showers, or tea time.
- Versatile – You can enjoy them as they are or dress them up with whipped cream, fresh berries, or a sprinkle of powdered sugar.
Ingredients and Substitutions
- Lemon juice – I recommend using freshly squeezed lemon juice rather than bottled for the brightest, most vibrant flavor. Choose smooth-skinned lemons that feel heavy for their size, as they tend to be juicier.
- Egg yolks – You’ll only need the yolks for this recipe to create that rich, creamy texture in the lemon curd. Save the egg whites for another recipe like meringues or breakfast omelets.
- Butter – Use unsalted butter that’s been softened at room temperature. The butter is what gives the lemon curd its signature silky mouthfeel and helps create that beautiful glossy finish.
- Tart shells – You can absolutely use store-bought, but if you’d like to make them from scratch, try my recipe for Homemade German Egg Custard Tarts.
- Heavy cream – Make sure to use heavy cream with at least 30% fat content that’s been well chilled. This ensures it whips up properly and holds its shape when piped onto the tarts.
- Fine sugar – We’re using just enough sugar to balance the tartness of the lemons without making the dessert overly sweet. You can adjust the amount slightly based on your personal preference and the tartness of your lemons.
How to Make No-Bake Lemon Curd Tartlets
Make the Lemon Curd
In a small saucepan, combine the egg yolks, sugar, and freshly squeezed lemon juice. Use a spatula to stir until the sugar is fully dissolved and the mixture turns pale yellow, with no visible lumps.
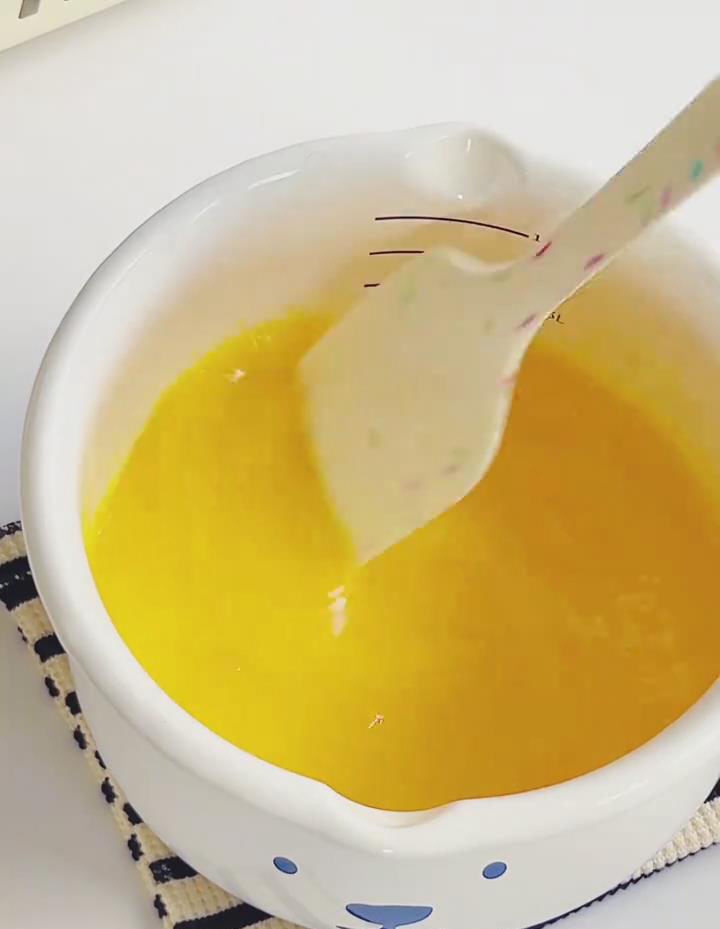
Place the saucepan over low heat and cook the mixture, stirring constantly with a silicone spatula. Make sure to scrape the bottom and sides of the pan to prevent the eggs from scrambling.
Continue cooking for 5-8 minutes until the mixture thickens enough to coat the back of the spatula.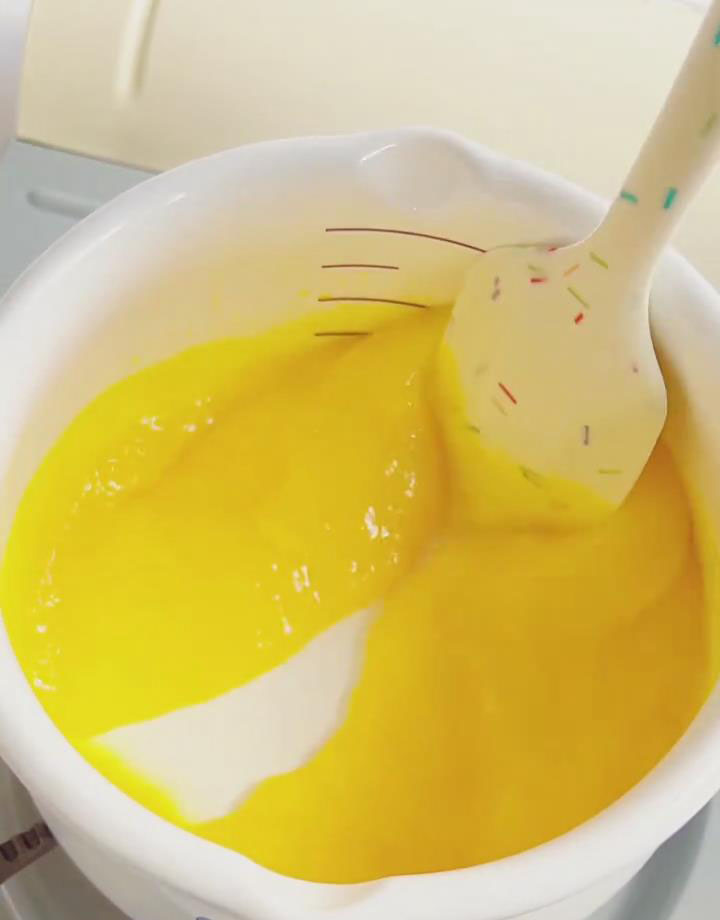
Remove the pan from heat and immediately add 60g of softened butter. Stir vigorously until the butter is completely melted and incorporated into the curd.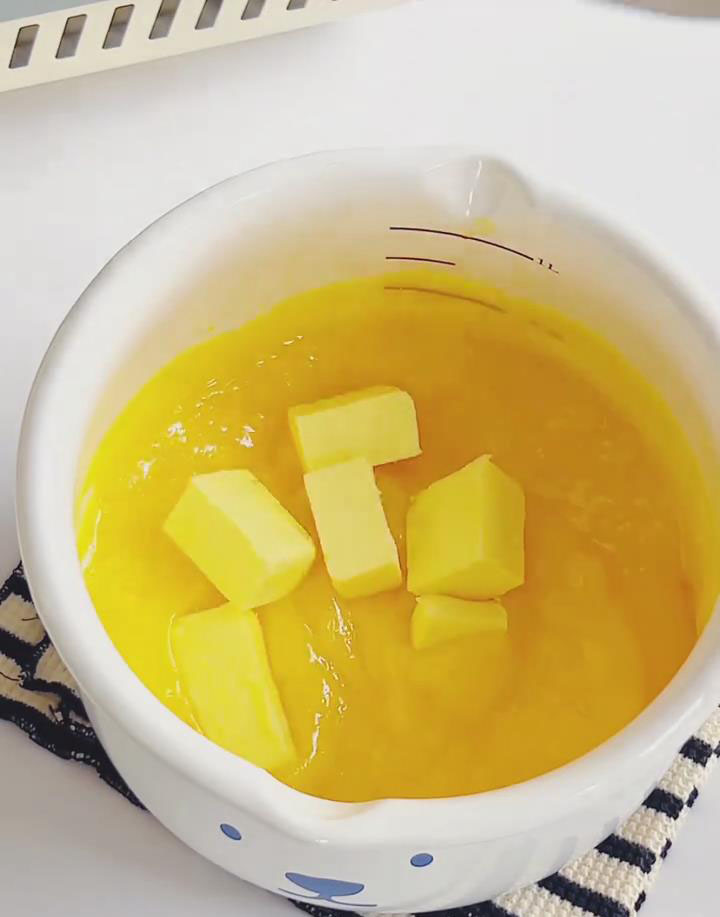
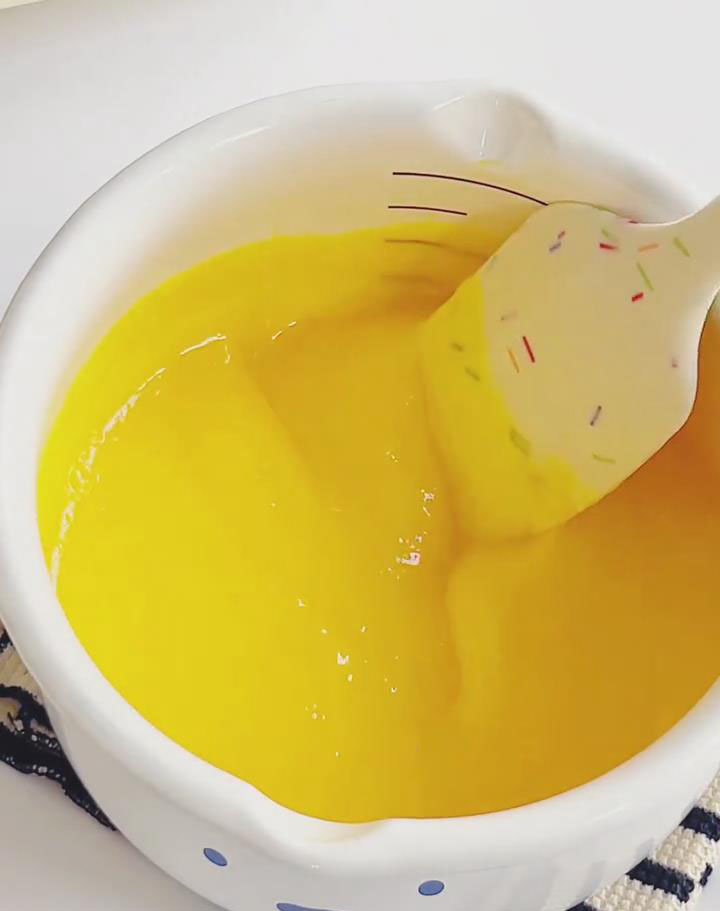
Let the lemon curd cool to room temperature.
Fill the Tart Shells
Transfer the cooled lemon curd to a piping bag. If you don’t have a piping bag, you can use a plastic bag with the corner snipped off.
Pipe the lemon curd into the 6 pre-made tart shells, filling them evenly to the rim.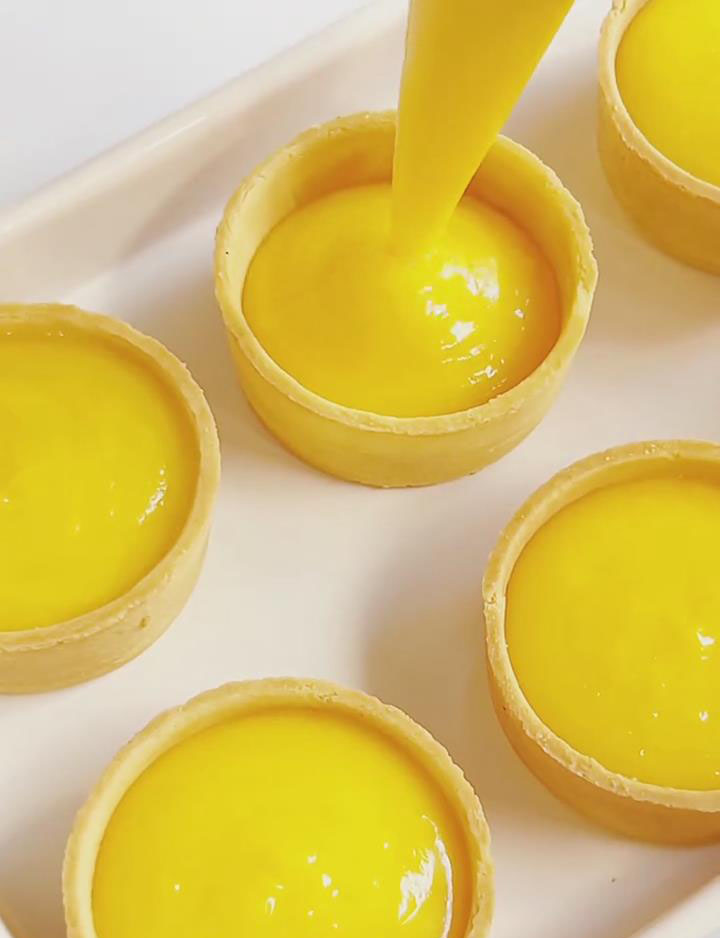
Gently tap the tartlets on the counter to remove any air bubbles and create a smooth surface.
Place the filled tartlets in the refrigerator and chill for at least 1 hour, or until the curd is completely set.
Prepare the Whipped Cream and Decorate
In a clean, chilled bowl, combine 100g of cold heavy cream and 10g of fine sugar.
Using an electric mixer, whip the cream on medium speed until stiff peaks form. Be careful not to overwhip, as this can cause the cream to become grainy.
Transfer the whipped cream to a piping bag fitted with your preferred tip.
Remove the chilled tartlets from the refrigerator.
Pipe whipped cream onto each tartlet.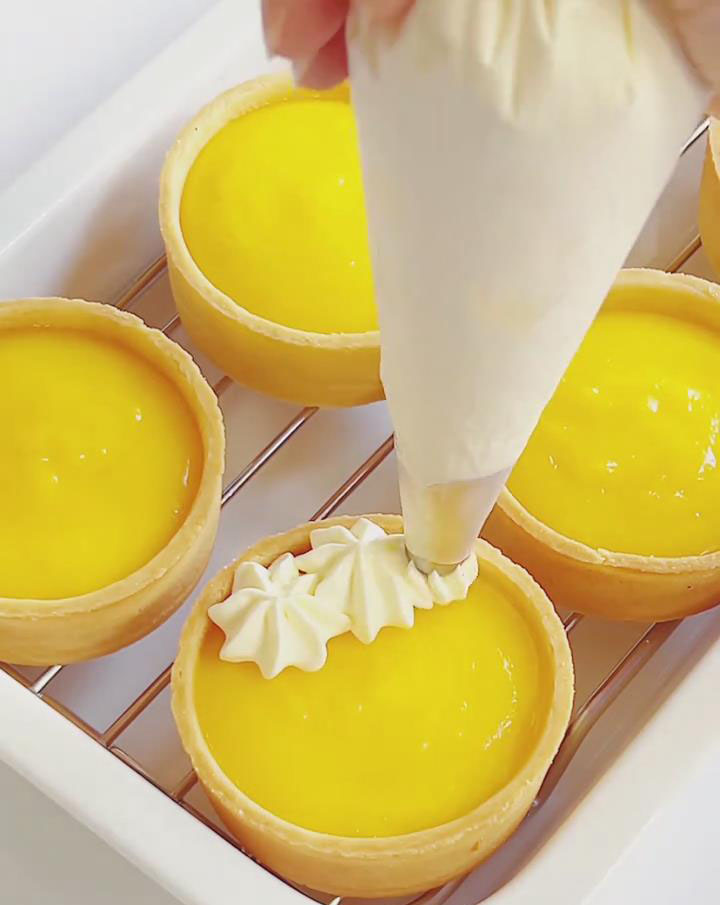
Garnish with lemon wedges, or a sprinkling of fresh lemon zest.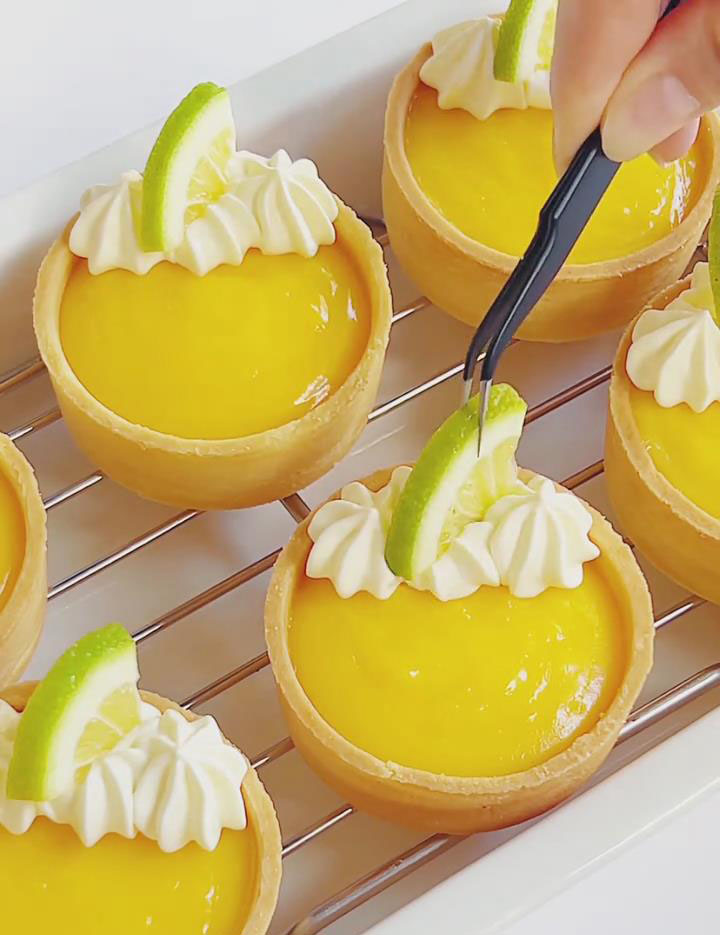
Serve immediately, or return to the refrigerator until ready to serve.
Storage
Store the tartlets in an airtight container in the refrigerator for up to 3 days. For best results, add the whipped cream garnish just before serving to maintain its texture.
Tips & Tricks
- Make sure to cook the lemon curd over low heat and stir constantly to prevent the eggs from scrambling.
- If your curd develops lumps, don’t worry – straining it through a fine-mesh sieve will give you a perfectly smooth texture.
- For the shiniest lemon curd, make sure to add the butter while the curd is still warm.
Frequently Asked Questions
Why did my lemon curd turn out grainy?
This usually happens if the eggs were cooked too quickly, causing them to scramble slightly. Always cook over low heat and stir constantly. Straining through a fine-mesh sieve will fix this issue.
Can I make the lemon curd ahead of time?
Yes, you can make the lemon curd up to 3 days in advance and store it in an airtight container in the refrigerator. Let it come to room temperature before filling the tart shells.
My whipped cream won’t hold its shape – what went wrong?
This typically happens if the cream wasn’t cold enough, or if your bowl and beaters weren’t properly chilled. Make sure everything is well chilled before you begin whipping.

Zesty Lemon Curd Tartlets – A Simple but Stunning Dessert
Ingredients
For the Lemon Curd:
- 105 g egg yolks about 5-6 yolks
- 70 g fine sugar
- 90 g fresh lemon juice
- 60 g unsalted butter softened
For Assembly:
- 6 pre-made tart shells
- For the Whipped Cream:
- 100 g heavy cream chilled
- 10 g fine sugar
For Garnish:
- Lemon slices or wedges
- Fresh lemon zest
Instructions
Make the Lemon Curd
- In a small saucepan, combine the egg yolks, sugar, and freshly squeezed lemon juice. Use a spatula to stir until the sugar is fully dissolved and the mixture turns pale yellow, with no visible lumps.
- Place the saucepan over low heat and cook the mixture, stirring constantly with a silicone spatula. Make sure to scrape the bottom and sides of the pan to prevent the eggs from scrambling.
- Continue cooking for 5-8 minutes until the mixture thickens enough to coat the back of the spatula.
- Remove the pan from heat and immediately add 60g of softened butter. Stir vigorously until the butter is completely melted and incorporated into the curd.
- Let the lemon curd cool to room temperature.
Fill the Tart Shells
- Transfer the cooled lemon curd to a piping bag. If you don't have a piping bag, you can use a plastic bag with the corner snipped off.
- Pipe the lemon curd into the 6 pre-made tart shells, filling them evenly to the rim.
- Gently tap the tartlets on the counter to remove any air bubbles and create a smooth surface.
- Place the filled tartlets in the refrigerator and chill for at least 1 hour, or until the curd is completely set.
Prepare the Whipped Cream and Decorate
- In a clean, chilled bowl, combine 100g of cold heavy cream and 10g of fine sugar.
- Using an electric mixer, whip the cream on medium speed until stiff peaks form. Be careful not to overwhip, as this can cause the cream to become grainy.
- Transfer the whipped cream to a piping bag fitted with your preferred tip.
- Remove the chilled tartlets from the refrigerator.
- Pipe whipped cream onto each tartlet.
- Garnish with lemon wedges, or a sprinkling of fresh lemon zest.
- Serve immediately, or return to the refrigerator until ready to serve.
Leave a Reply