
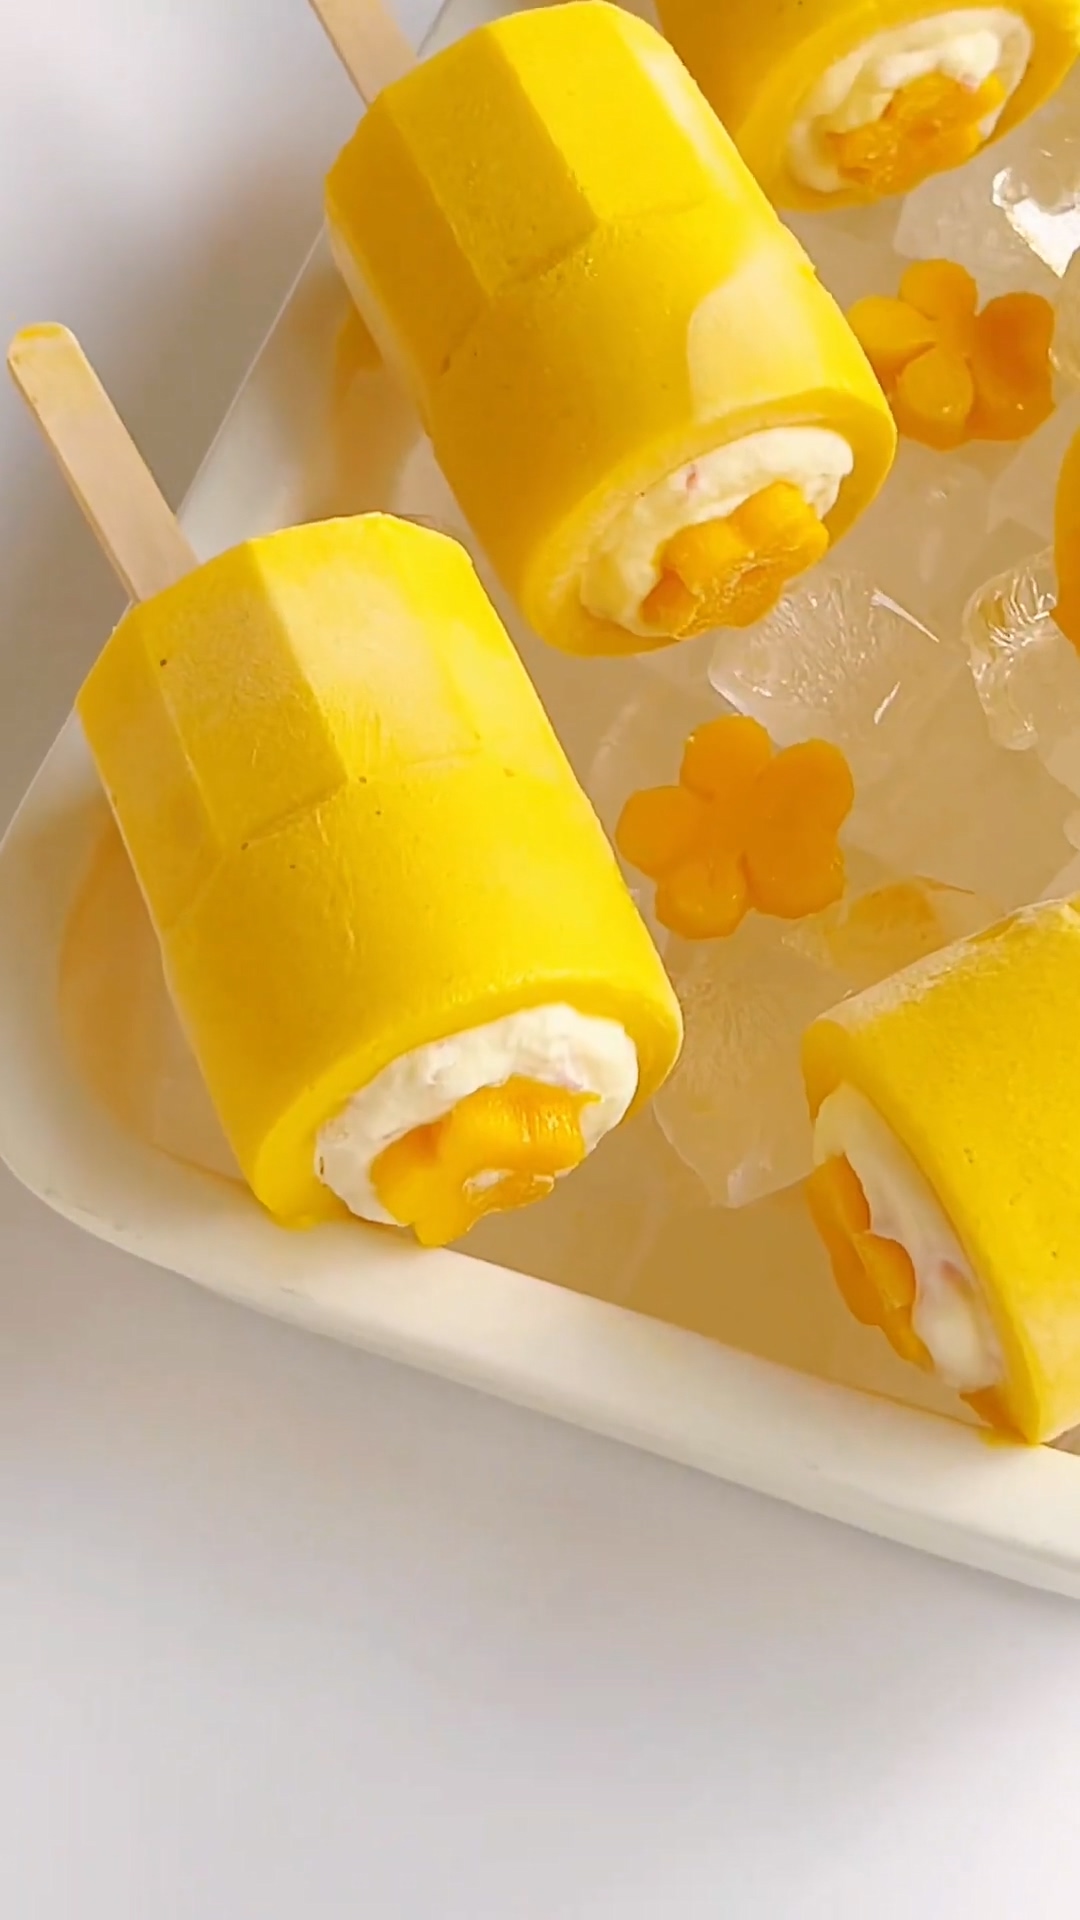
Homemade mango yogurt popsicles that taste better than store-bought! Creamy texture, real fruit pieces, and a hint of tanginess from yogurt make these irresistible and easy to make.
I’ve always been a huge fan of popsicles.
Sometimes I even have to make extra batches—because the neighbor’s kids come asking for some, and after my own kids finish one, it doesn’t take long before they’re back for another!
This recipe is an upgraded version of my Mango Popsicles and is inspired by my Strawberry Yogurt Popsicles—with a twist of Mango Pomelo Sago added in this time.
Mango Pomelo Sago is actually one of my go-to orders whenever I visit a bubble tea shop—it’s fruity, refreshing, and so satisfying.
If you’ve never tried it before, I highly recommend checking out my Mango Pomelo Sago recipe first.
After making a batch of it, I couldn’t resist turning it into these popsicles as well.
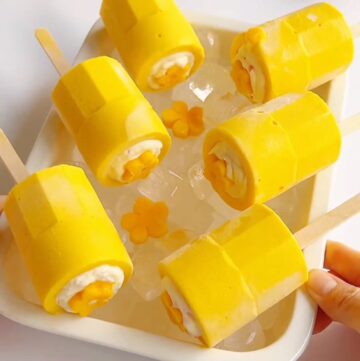
I used a special hollow-center popsicle mold for this recipe, but if you don’t have one, you can absolutely skip the filling and just make the mango popsicle base. Honestly, the base alone is already so good—creamy, fruity, and perfectly refreshing.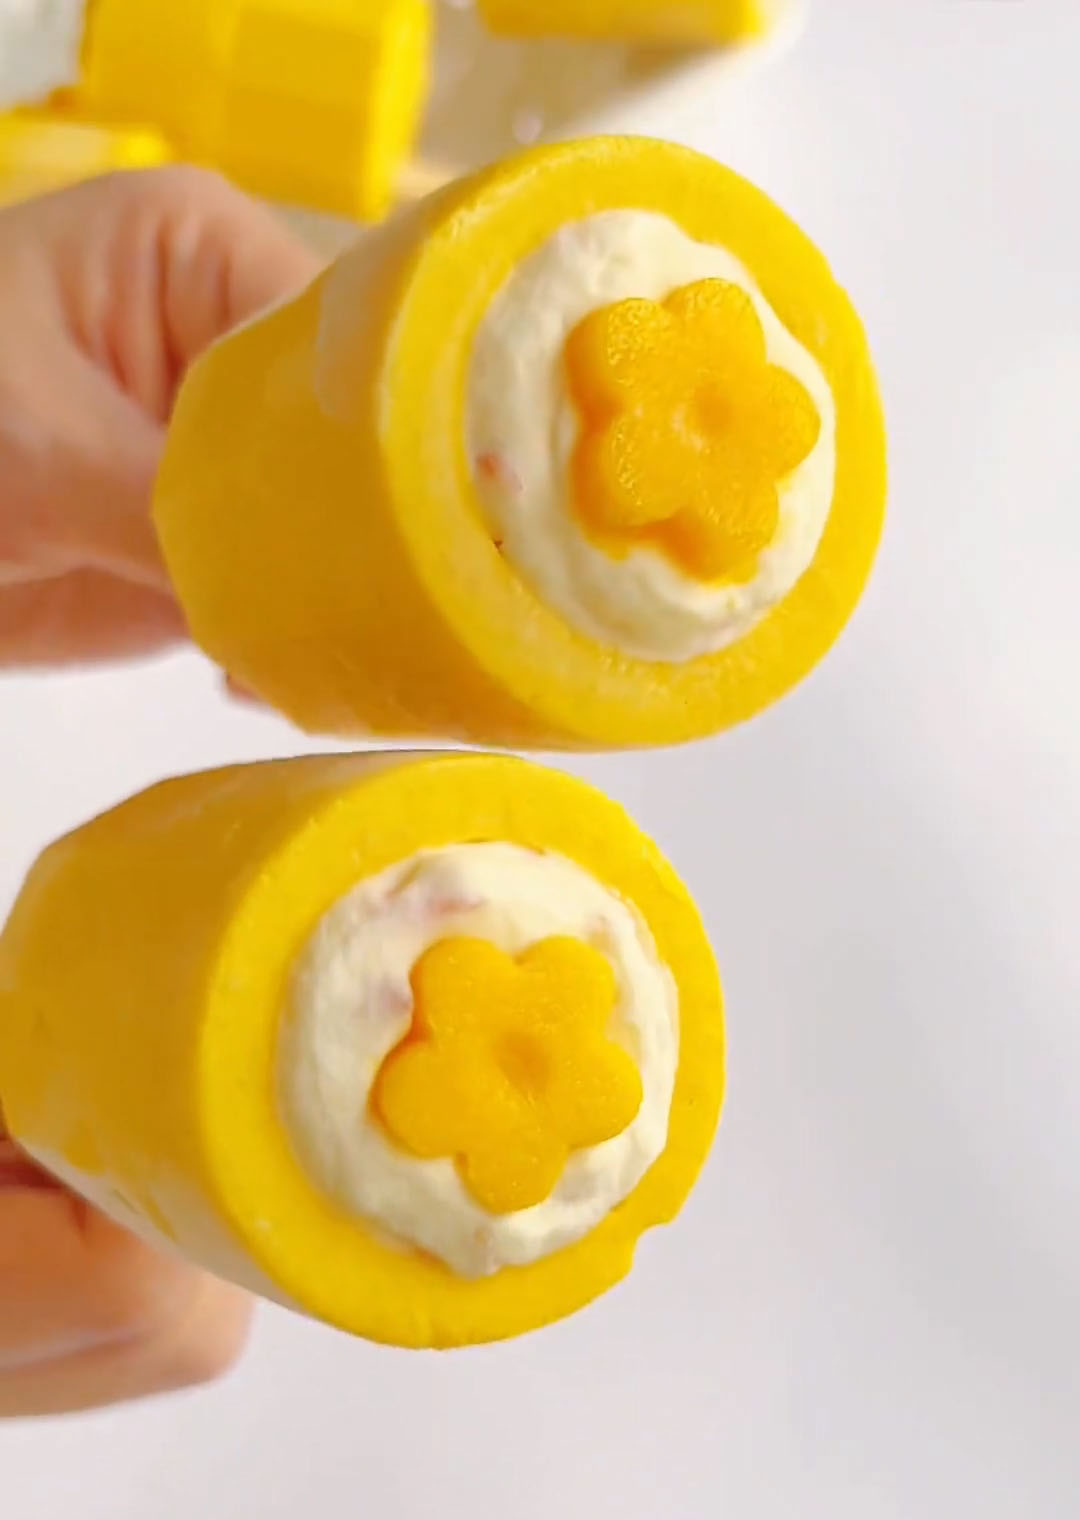
Why you’ll love this recipe
- These mango yogurt popsicles are smooth, creamy, and naturally sweet with no icy texture.
- They’re packed with real mango flavour and little bites of fruit for extra texture.
- This is a no-bake, low-effort recipe—just blend, fill, and freeze.
- The yogurt adds a slight tang that perfectly balances the sweetness of the mango.
- You can easily customise the filling or keep it simple depending on what you have.
Ingredients and substitutions
- Mango flesh – I always recommend using ripe, sweet mangoes for the best flavour. The riper they are, the more naturally sweet and fragrant your popsicles will be.
- Condensed milk – This adds sweetness and a rich, creamy texture to the popsicles. You can adjust slightly to taste, but it really helps enhance the mango flavour.
- Heavy cream – This is what makes the popsicles extra smooth and creamy. I recommend using full-fat cream for the best texture and to avoid iciness.
- Milk – A little milk helps loosen the mixture and makes it easier to blend into a silky smooth consistency.
- Heavy cream (for filling) – This is whipped to create a light and airy filling that contrasts nicely with the dense mango base.
- Sugar – Just a small amount is used to sweeten the cream without overpowering the natural fruit flavours.
- Yogurt – Adds a slight tanginess and creaminess that balances the sweetness of the mango beautifully.
- Mango cubes, pomelo pulp, cooked sago – These add texture and make the popsicles more interesting with little bursts of fruit and chewiness. You can adjust based on preference.
- Mango chunks (for decoration) – Completely optional, but I love adding these for a more vibrant look and extra mango flavour on top.
Ingredients for Recipe
Mango Popsicle Base
- 600 g mango flesh
- 25 g sweetened condensed milk
- 150 g heavy cream
- 50 g milk
Mango Pomelo Sago Filling
- 120 g heavy cream
- 10 g granulated sugar
- 100 g yogurt
- Mango chunks, as needed
- Pomelo (grapefruit) segments, as needed
- Cooked sago pearls, as needed
Decoration
- Mango chunks, as needed
How to Make Mango Yogurt Popsicles (Mango Pomelo Sago Popsicles)
Make the Popsicle Base
- Combine all base ingredients in a blender – In a blender or food processor, add the 600 g of mango flesh, 25 g of sweetened condensed milk, 150 g of heavy cream, and 50 g of milk. If your mangoes are particularly fibrous, you may want to cut them into smaller chunks before adding to the blender.
- Blend until smooth and creamy – Blend the mixture on high speed for about 30-60 seconds, or until it becomes a smooth, creamy, milkshake-like consistency. There should be no large chunks of mango remaining. The mixture should look uniform in color and texture — a beautiful, vibrant creamy orange-yellow. If the mixture seems too thick, you can add an extra splash of milk.
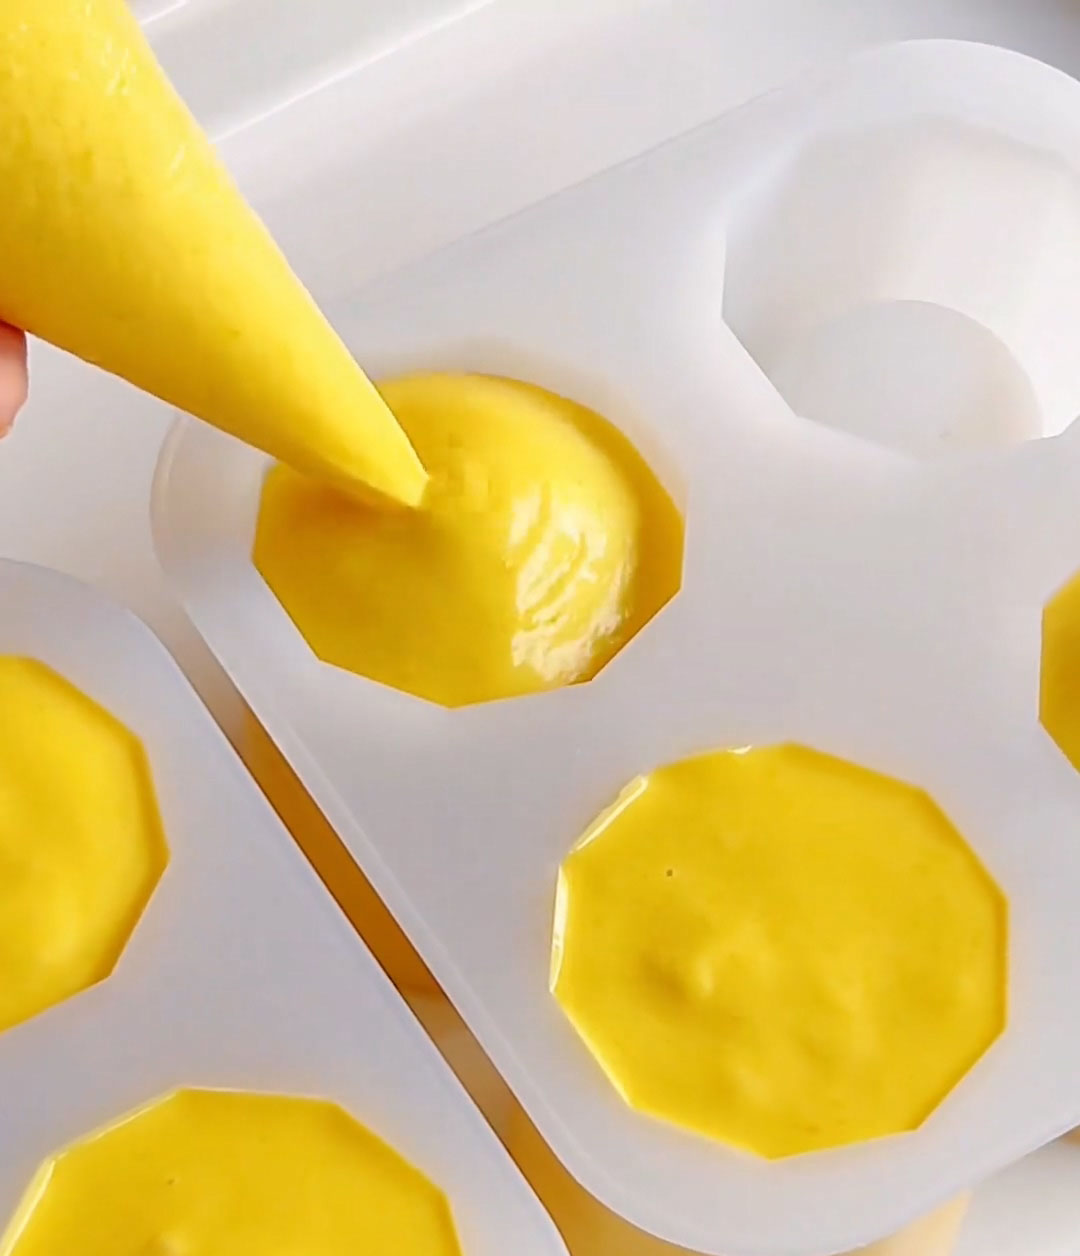
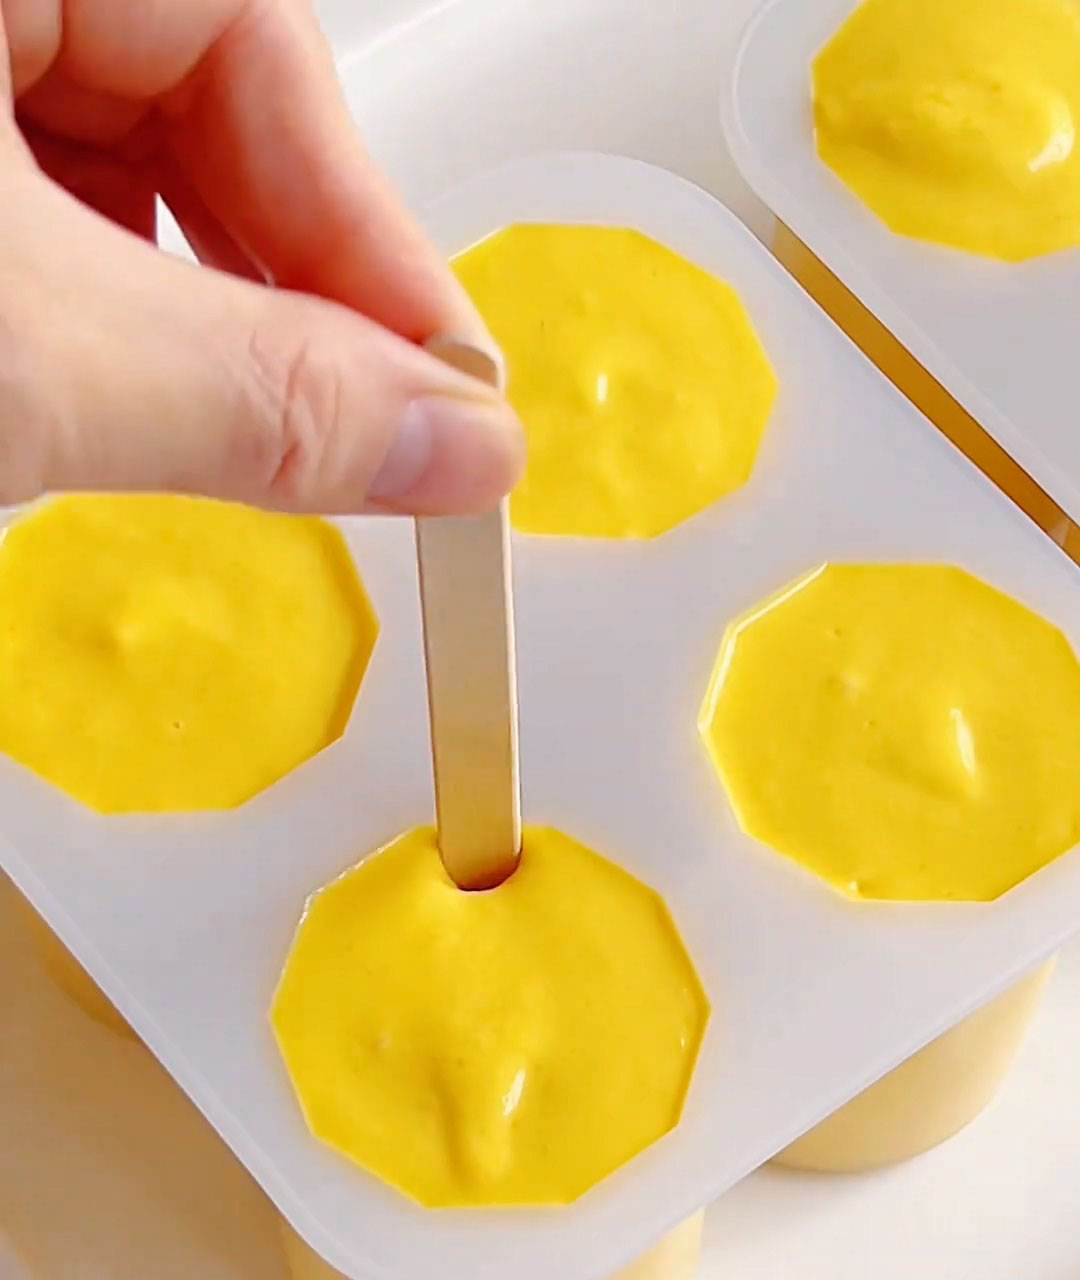
- Pour into popsicle molds – Pour the blended mango mixture into your popsicle molds. If you’re using a hollow-center mold, fill only the outer cavity (follow your specific mold’s instructions carefully).
- Insert popsicle sticks – Insert popsicle sticks into each mold. If your mold comes with its own sticks or lids with built-in sticks, use those.
- Freeze until completely solid – Place the filled molds carefully in the freezer, making sure they are standing upright and won’t tip over. Freeze for a minimum of 4 hours, or until the popsicles are completely solid from center to edge. For best results, freeze overnight. The longer they freeze, the more stable they become.
Make the Filling
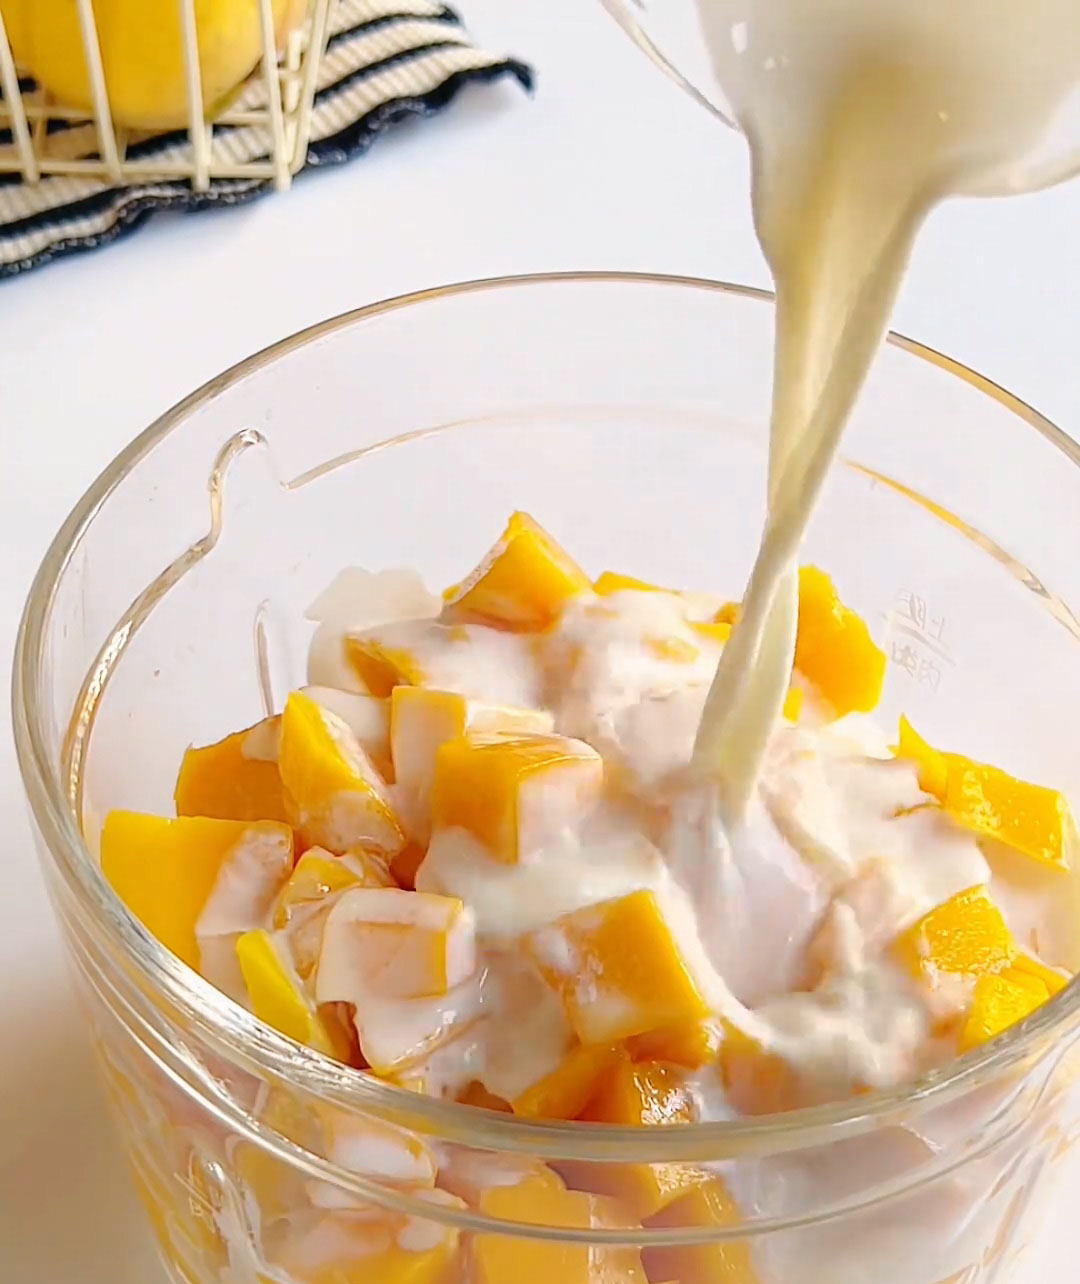
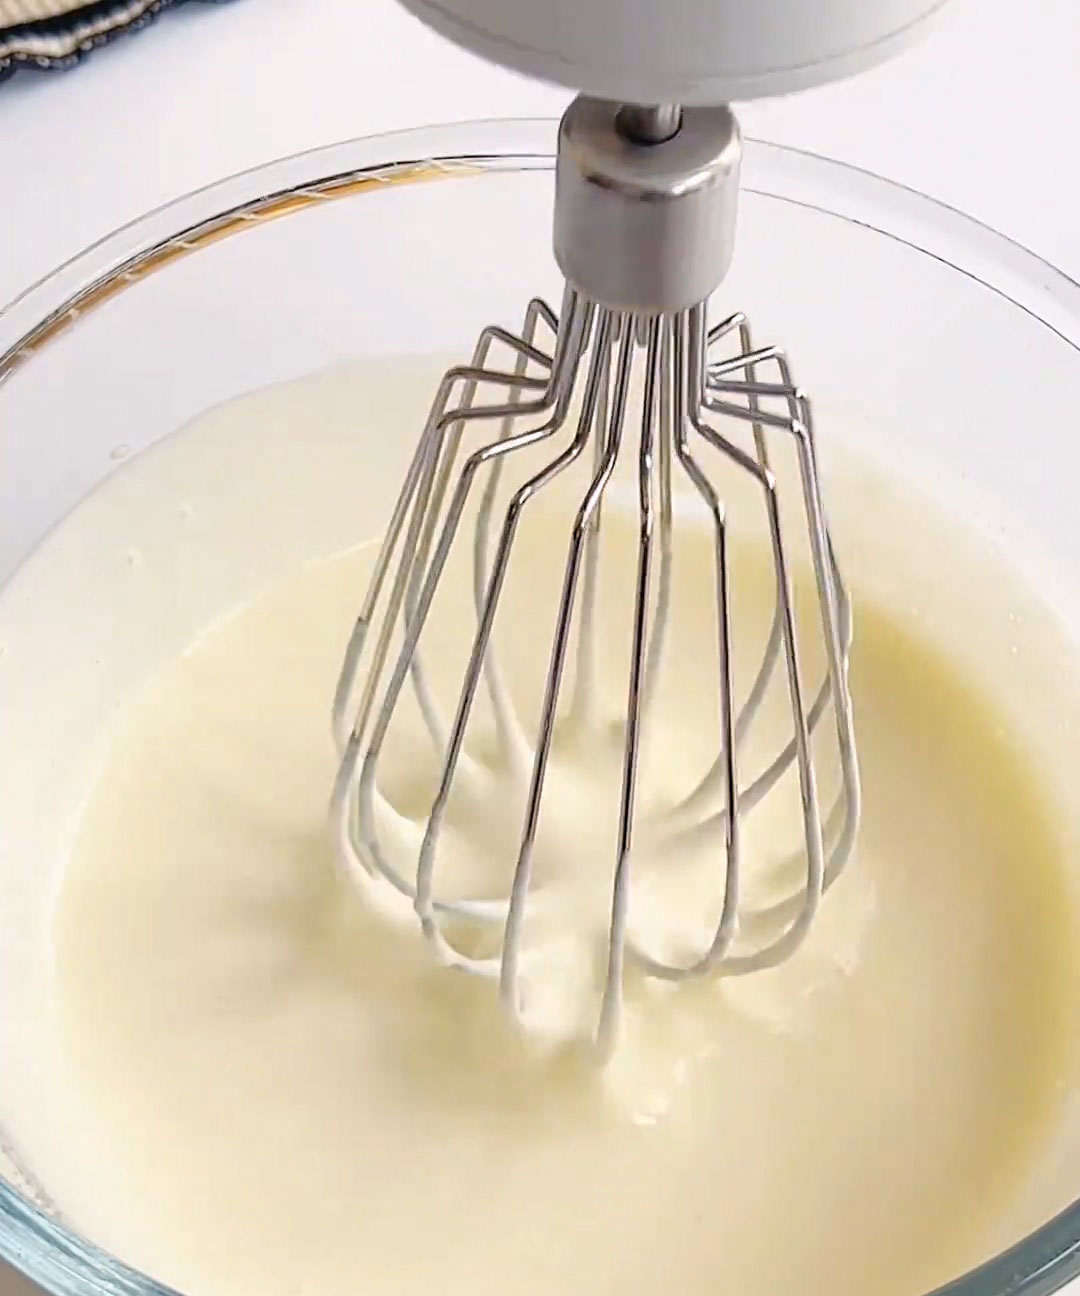
- Whip the cream for the filling – In a mixing bowl, combine the 120 g of heavy cream and 10 g of granulated sugar. Use an electric hand mixer or a whisk to whip the cream until it reaches a flowing, yogurt-like consistency.
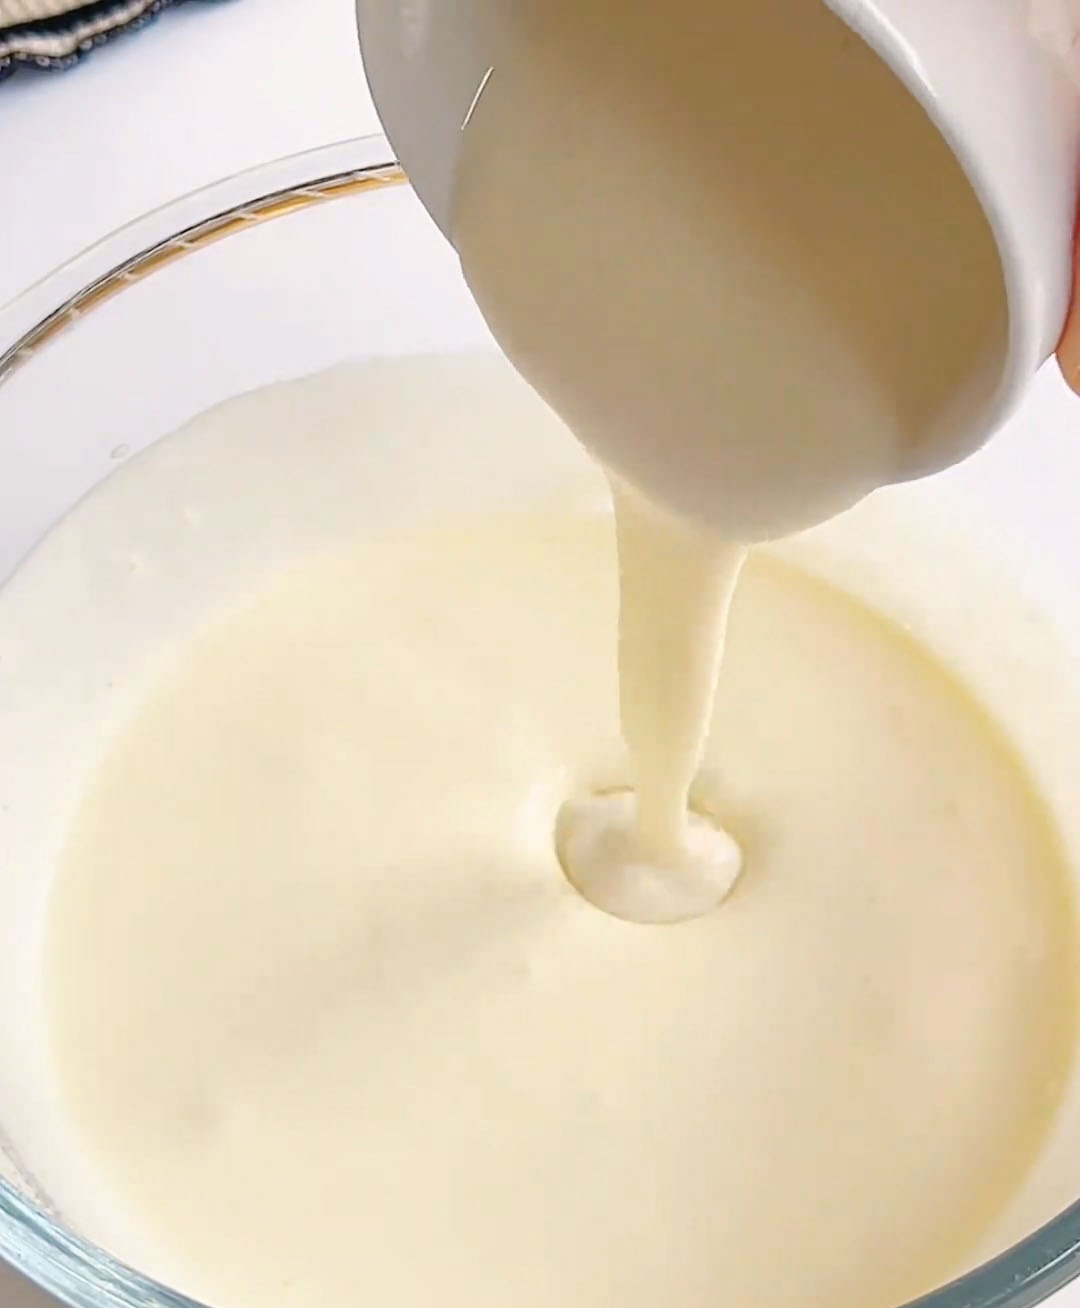
- Add the yogurt – Add the 100 g of yogurt to the whipped cream. Mix gently with a spatula until fully combined and smooth. Be careful not to over-mix — you just want to incorporate the yogurt evenly.
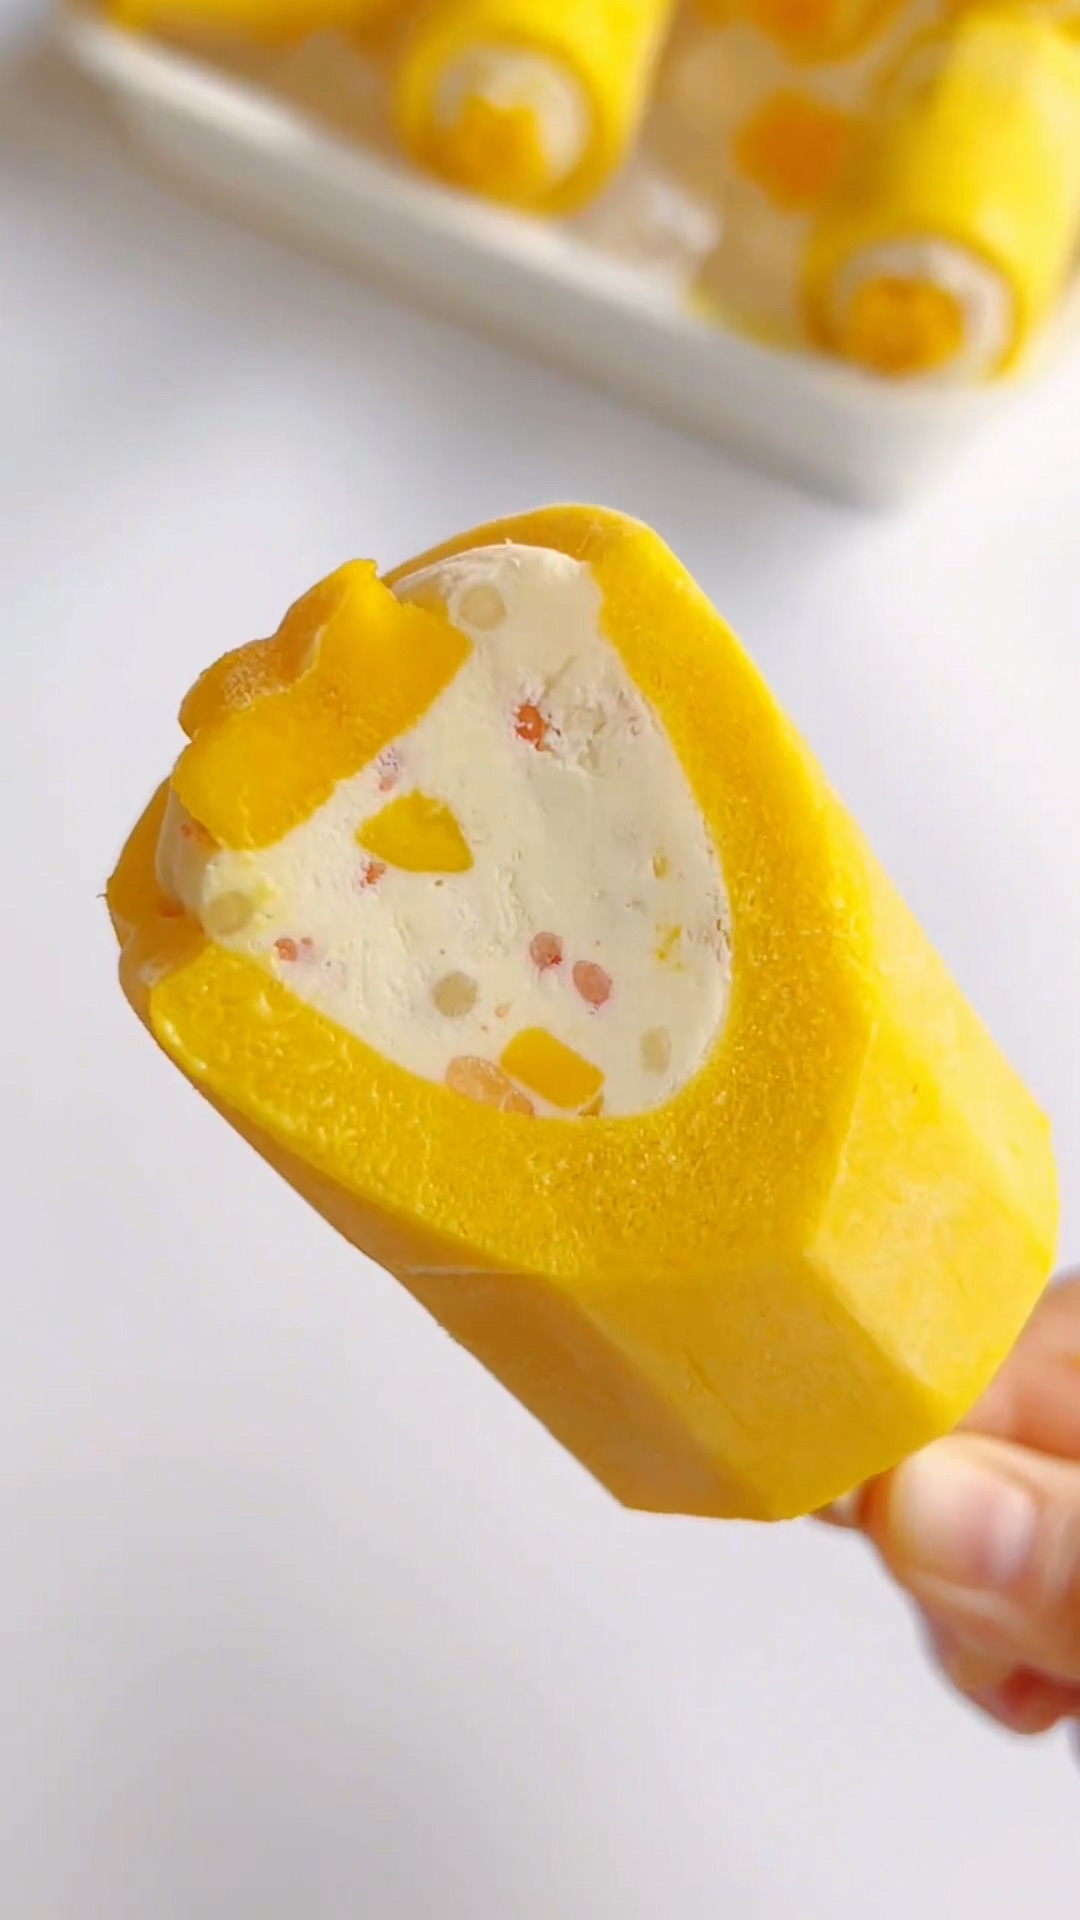
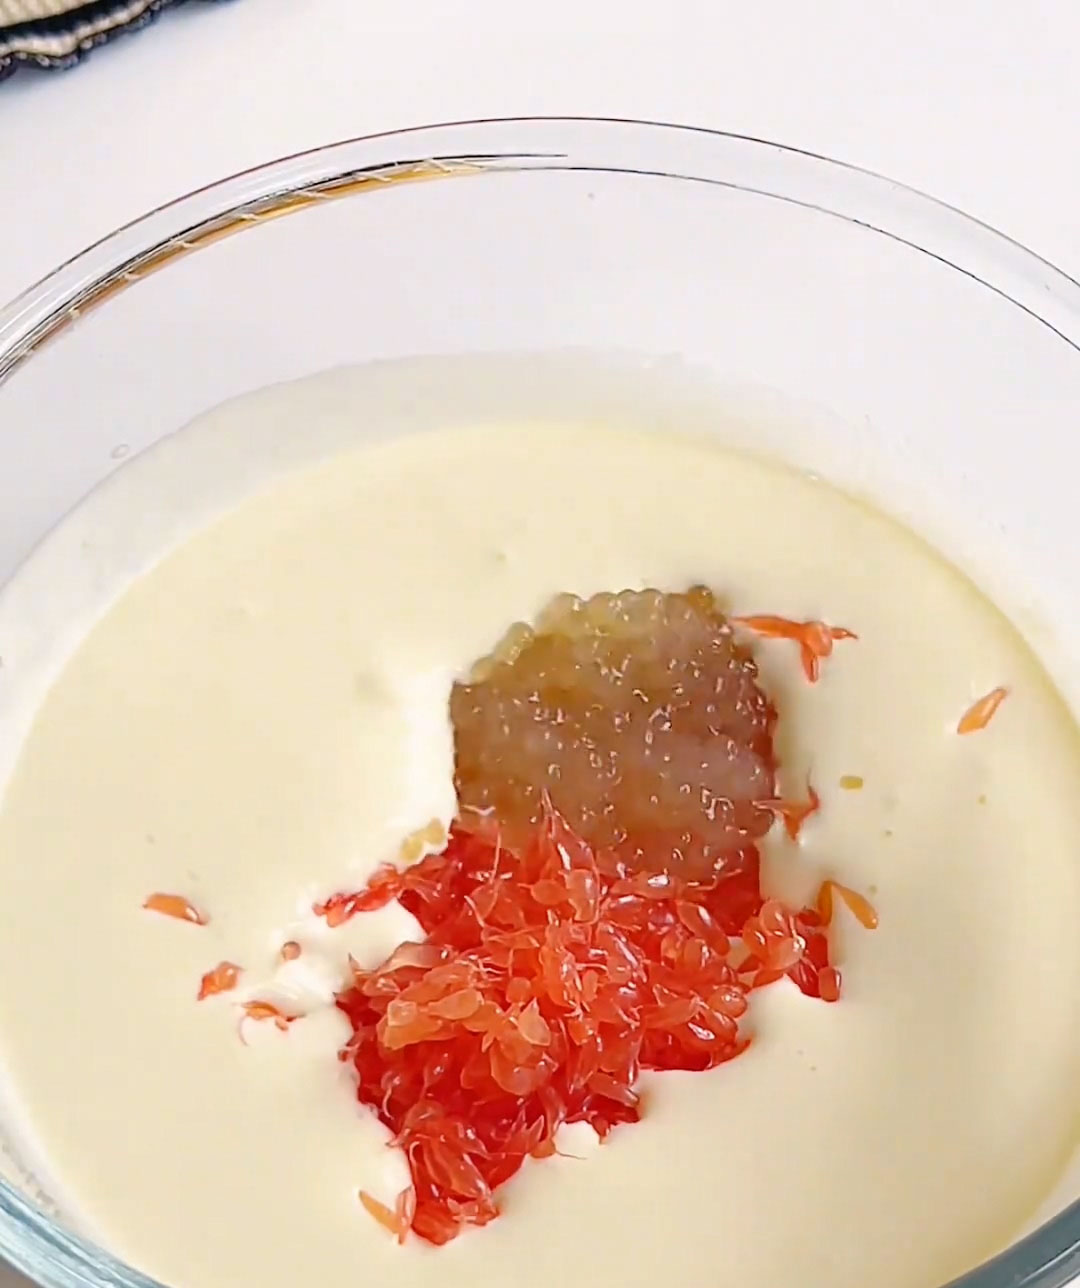
- Add the fruit and sago – Add the mango chunks, pomelo (grapefruit) segments, and cooked sago pearls to the cream mixture. Stir gently with a spatula until everything is evenly distributed throughout the filling. Try not to break up the fruit too much — you want distinct pieces of mango and pomelo.
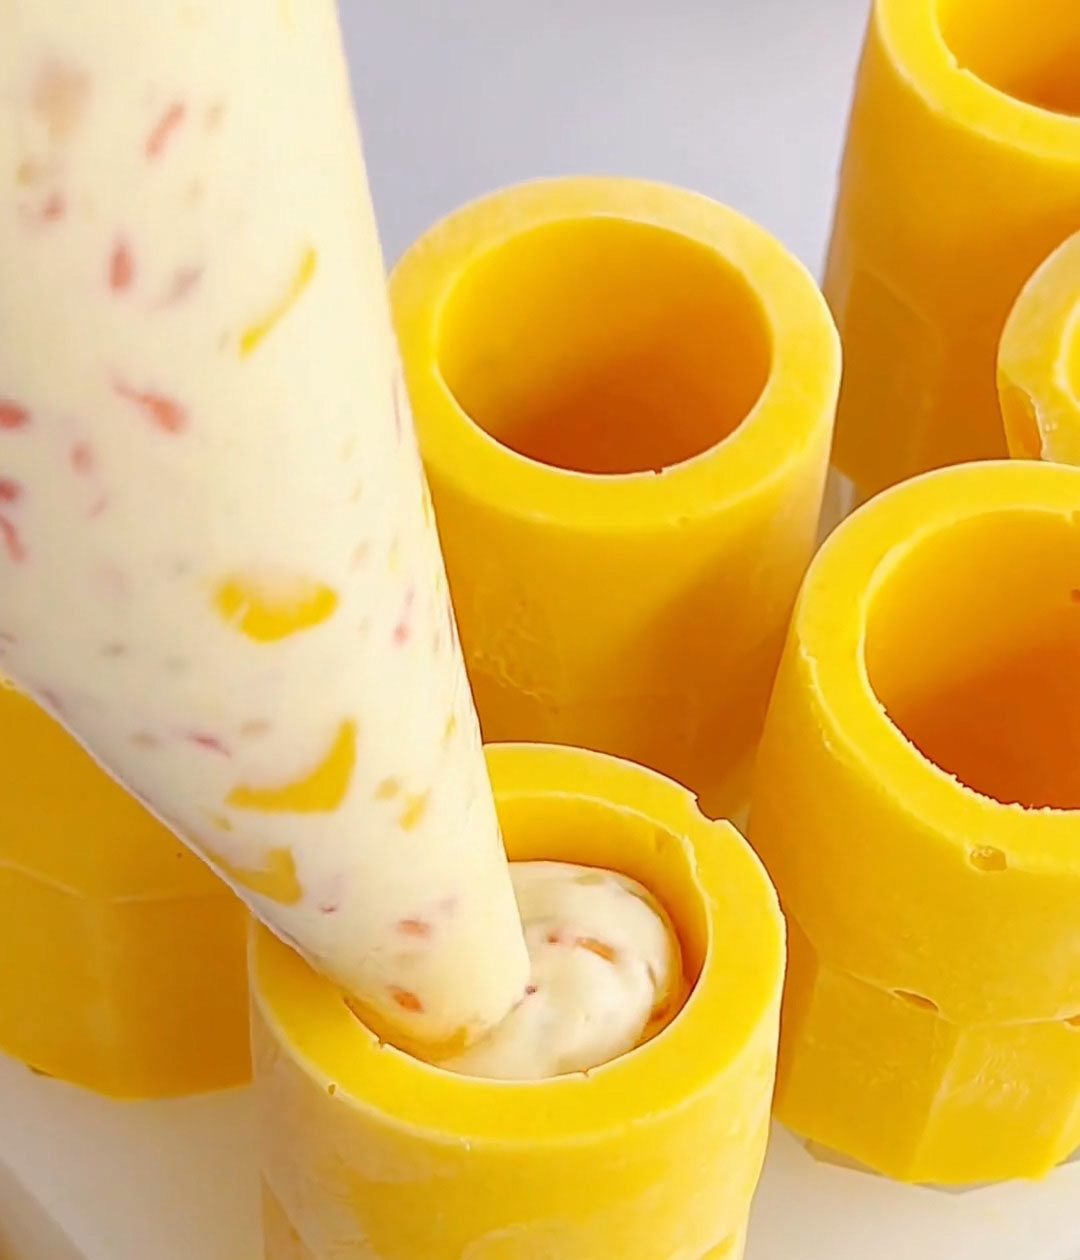
- Transfer to a piping bag – Spoon the filling mixture into a piping bag. This makes it much easier to fill the hollow centers neatly without making a mess. If you don’t have a piping bag, you can use a small spoon or a zip-top plastic bag with one corner snipped off.
Assemble and Final Freeze
- Unmold the frozen popsicles – Once the popsicle bases are completely frozen solid, remove them from the molds. If they are stuck, run the outside of the mold under warm water for 5-10 seconds to release them. If you’re using the same silicone molds as me, just unmold directly — no need to run them under water.
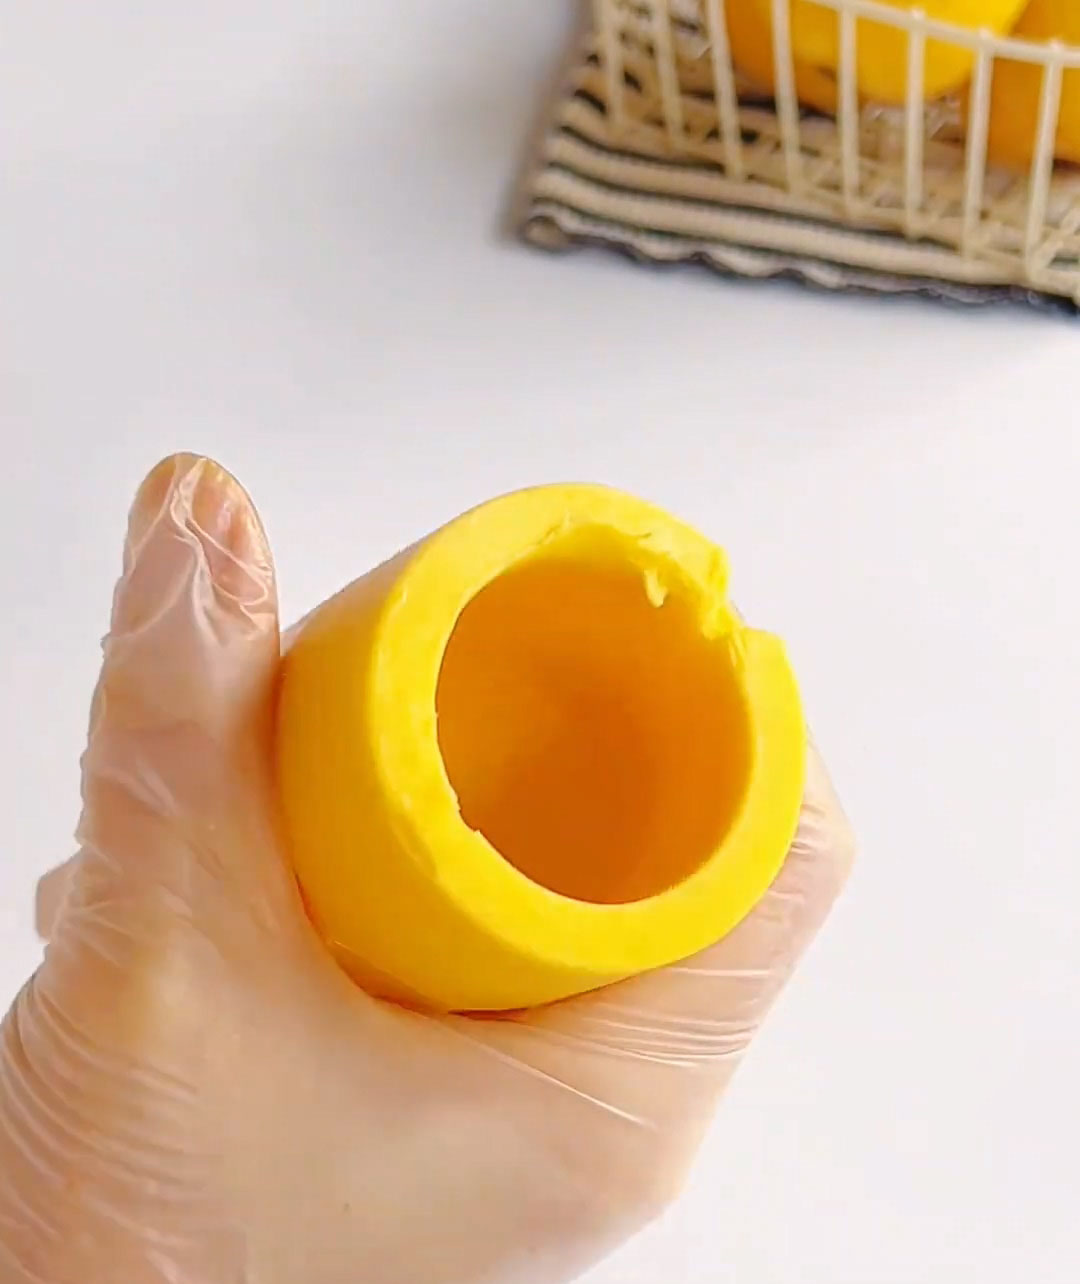
- Fill the hollow centers – If you used a hollow-center mold, you will now have popsicles with empty cavities in the middle. Pipe or spoon the filling mixture into the hollow center of each popsicle until it is completely full. Fill right to the top so there are no empty spaces.
- Add mango decoration – Place fresh mango chunks on top of the filling, pressing them in gently so they stay in place.
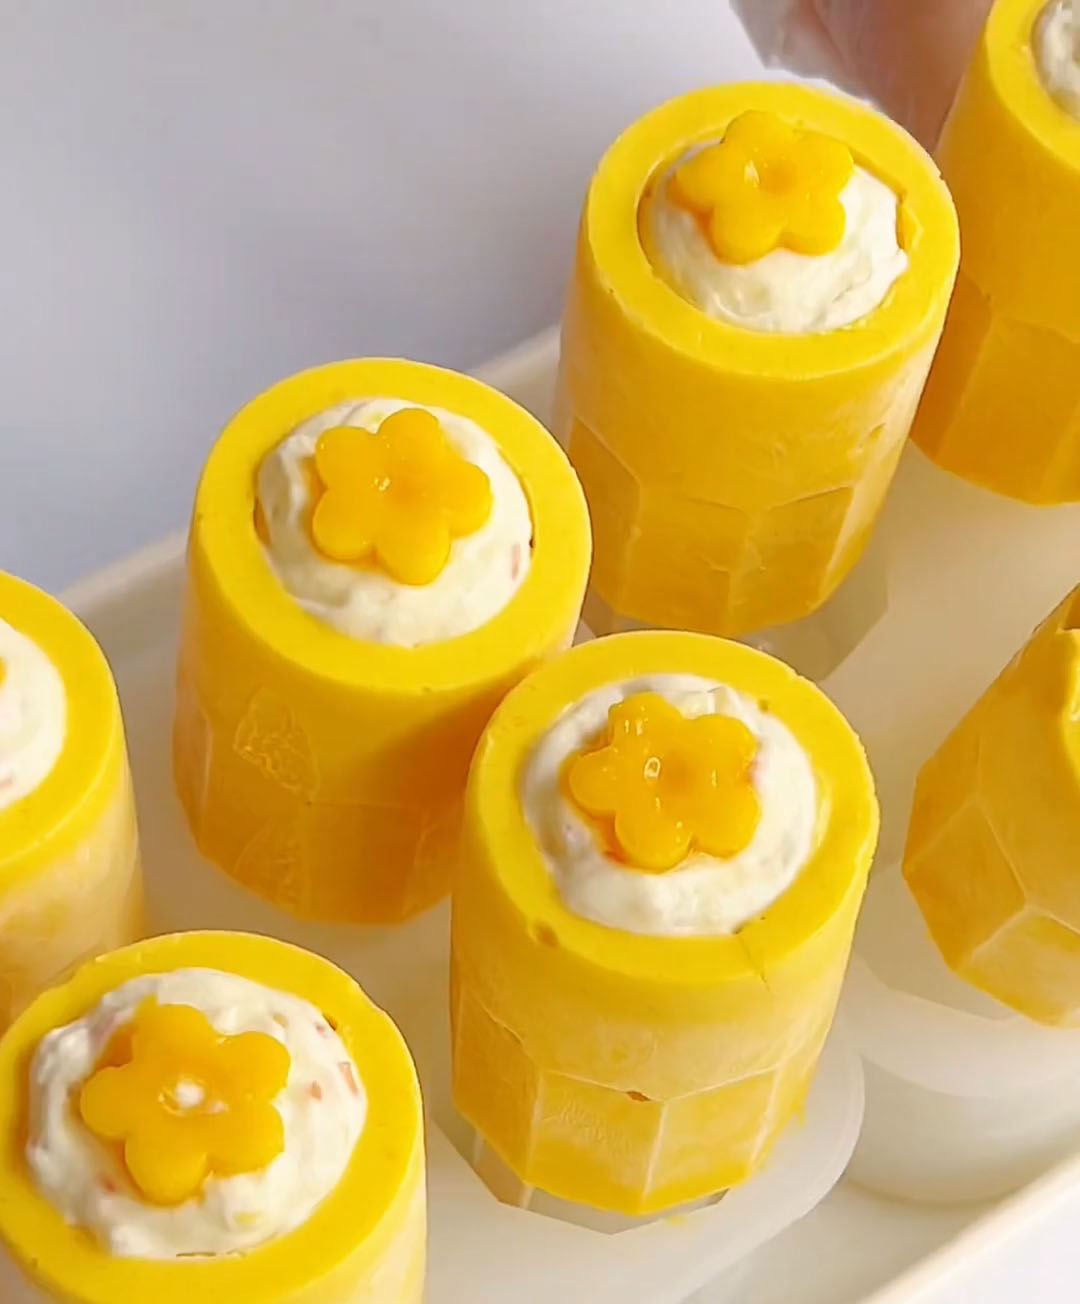
- Freeze again to set – Return the filled and decorated popsicles to the freezer. Freeze for another 1-2 hours, or until the filling is completely frozen and firm. Do not skip this second freeze — the filling needs time to solidify so it doesn’t run out when you eat the popsicle.
Tips & tricks
- Cook the sago ahead of time and place it into a bowl of cold water that you’ve prepared in advance, and rinse 2–3 times for a chewier texture.
- Use ripe mangoes for a sweeter, more fragrant result.
- Don’t overwhip the cream for the filling—it should stay soft and pipeable.
- If you don’t have popsicle molds, you can use small cups and wooden sticks as an alternative.
- Keep the filling slightly soft so it’s easier to pipe into the frozen popsicles.
Frequently asked questions
Why are my popsicles icy instead of creamy?
This usually happens if there isn’t enough fat in the mixture. Using full-fat cream and ripe mangoes helps create a smoother texture.
Can I skip the filling?
Yes! The popsicles will still be delicious as a simple mango yogurt version without the filling.
How do I remove popsicles easily from the mold?
Run the mold briefly under warm water for a few seconds to loosen them before pulling out.
Can I make these ahead of time?
Absolutely. These popsicles are perfect for making in advance and storing in the freezer for a quick treat anytime.
Mango Yogurt Popsicles (Creamy, No Ice Crystals!)
Ingredients
Mango Popsicle Base
- 600 g mango flesh
- 25 g sweetened condensed milk
- 150 g heavy cream
- 50 g milk
Mango Pomelo Sago Filling
- 120 g heavy cream
- 10 g granulated sugar
- 100 g yogurt
- Mango chunks as needed
- Pomelo grapefruit segments, as needed
- Cooked sago pearls as needed
Decoration
- Mango chunks as needed
Instructions
Make the Popsicle Base
- Combine all base ingredients in a blender – In a blender or food processor, add the 600 g of mango flesh, 25 g of sweetened condensed milk, 150 g of heavy cream, and 50 g of milk. If your mangoes are particularly fibrous, you may want to cut them into smaller chunks before adding to the blender.
- Blend until smooth and creamy – Blend the mixture on high speed for about 30-60 seconds, or until it becomes a smooth, creamy, milkshake-like consistency. There should be no large chunks of mango remaining. The mixture should look uniform in color and texture — a beautiful, vibrant creamy orange-yellow. If the mixture seems too thick, you can add an extra splash of milk.
- Pour into popsicle molds – Pour the blended mango mixture into your popsicle molds. If you're using a hollow-center mold, fill only the outer cavity (follow your specific mold's instructions carefully).
- Insert popsicle sticks – Insert popsicle sticks into each mold. If your mold comes with its own sticks or lids with built-in sticks, use those.
- Freeze until completely solid – Place the filled molds carefully in the freezer, making sure they are standing upright and won't tip over. Freeze for a minimum of 4 hours, or until the popsicles are completely solid from center to edge. For best results, freeze overnight. The longer they freeze, the more stable they become.
Make the Filling
- Whip the cream for the filling – In a mixing bowl, combine the 120 g of heavy cream and 10 g of granulated sugar. Use an electric hand mixer or a whisk to whip the cream until it reaches a flowing, yogurt-like consistency. You want it to be thick enough to hold its shape slightly but still pourable — not stiff peaks. Think of the consistency of thick pancake batter or Greek yogurt.
- Add the yogurt – Add the 100 g of yogurt to the whipped cream. Mix gently with a spatula until fully combined and smooth. Be careful not to over-mix — you just want to incorporate the yogurt evenly.
- Add the fruit and sago – Add the mango chunks, pomelo (grapefruit) segments, and cooked sago pearls to the cream mixture. Stir gently with a spatula until everything is evenly distributed throughout the filling. Try not to break up the fruit too much — you want distinct pieces of mango and pomelo.
- Transfer to a piping bag – Spoon the filling mixture into a piping bag. This makes it much easier to fill the hollow centers neatly without making a mess. If you don't have a piping bag, you can use a small spoon or a zip-top plastic bag with one corner snipped off.
Assemble and Final Freeze
- Unmold the frozen popsicles – Once the popsicle bases are completely frozen solid, remove them from the molds. If they are stuck, run the outside of the mold under warm water for 5-10 seconds to release them. If you're using the same silicone molds as me, just unmold directly — no need to run them under water.
- Fill the hollow centers – If you used a hollow-center mold, you will now have popsicles with empty cavities in the middle. Pipe or spoon the filling mixture into the hollow center of each popsicle until it is completely full. Fill right to the top so there are no empty spaces.
- Add mango decoration – Place fresh mango chunks on top of the filling, pressing them in gently so they stay in place.
- Freeze again to set – Return the filled and decorated popsicles to the freezer. Freeze for another 1-2 hours, or until the filling is completely frozen and firm. Do not skip this second freeze — the filling needs time to solidify so it doesn't run out when you eat the popsicle.
Leave a Reply