
Every time I bake these mini cupcakes, I can’t help but make a big batch — this recipe yields around 48 tiny cakes, and they disappear faster than you’d think.
With just a few pantry staples — eggs, milk, sugar, and a bit of flour — you can create something soft, fluffy, and comforting. It’s the kind of recipe I turn to when I want something quick, simple, and guaranteed to bring smiles.
My kids absolutely adore them. Each one is just the right size for little hands — one bite and they’re gone!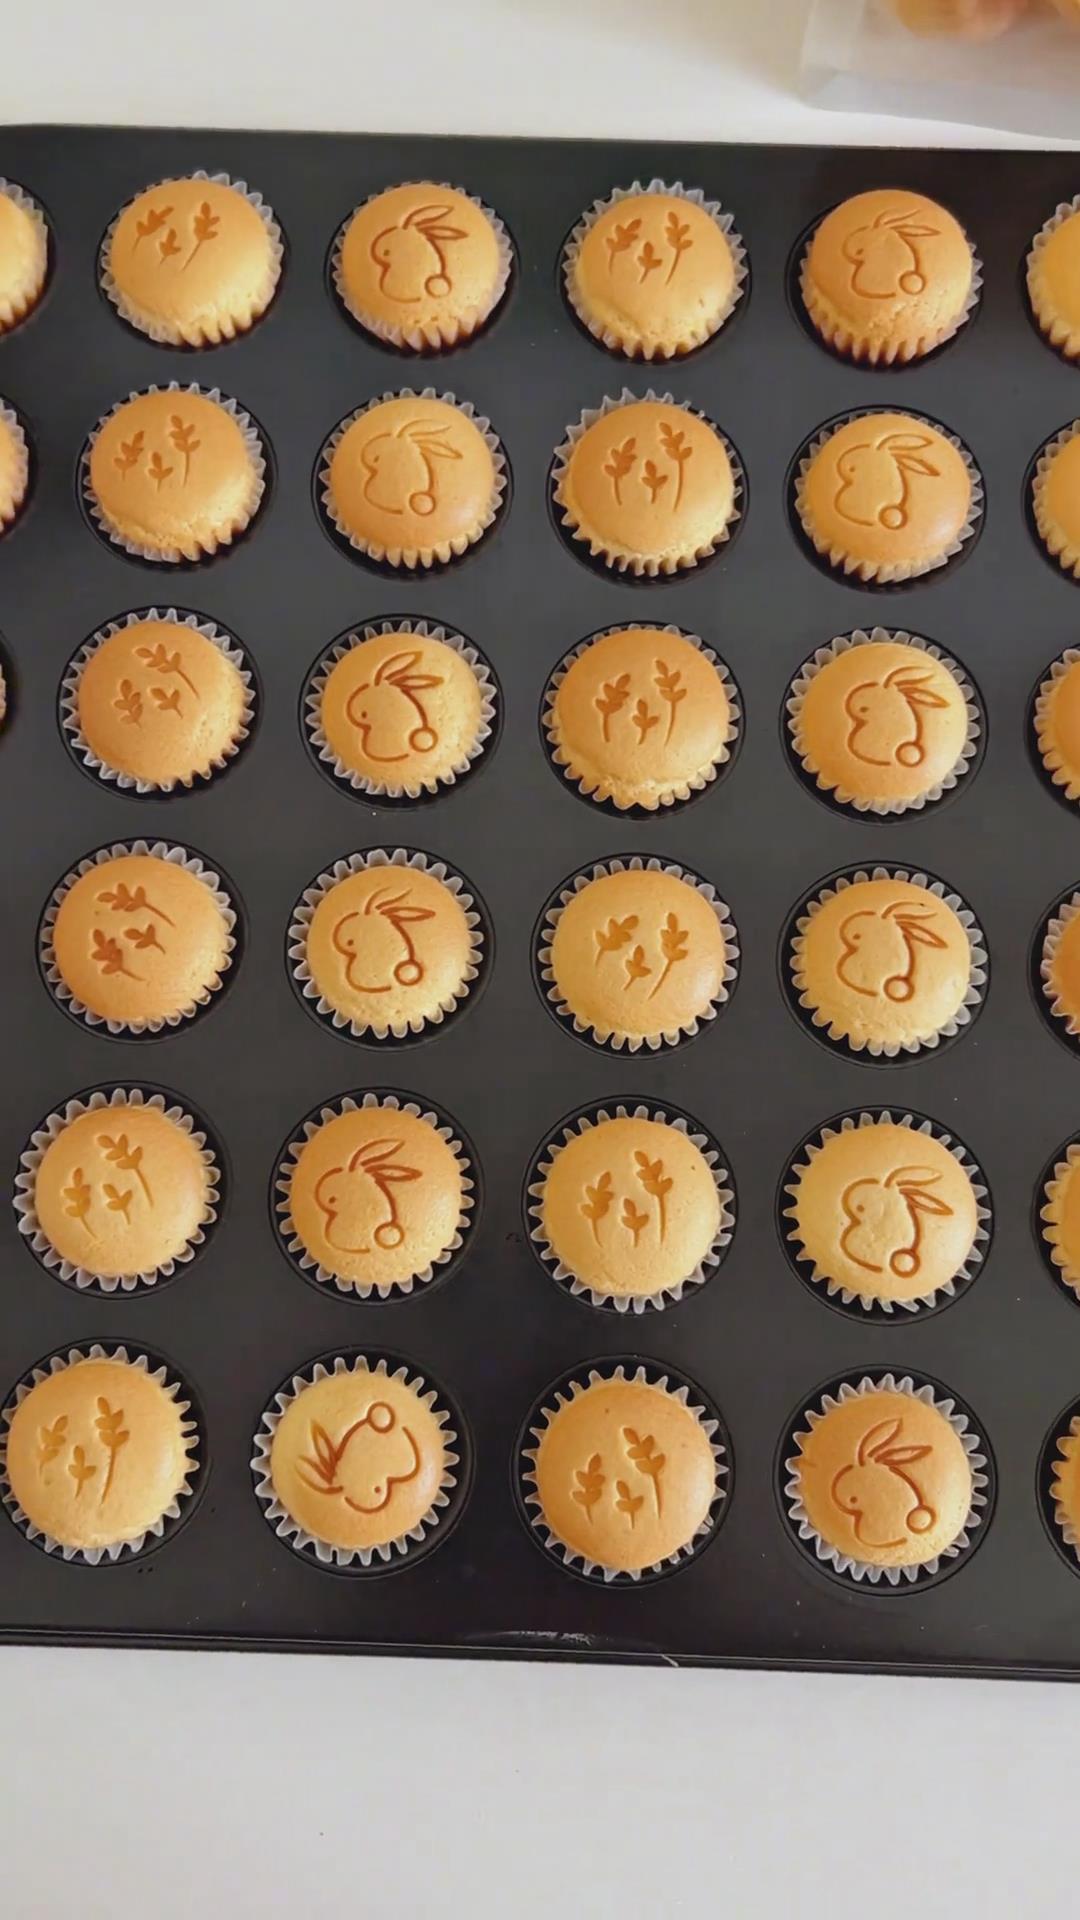
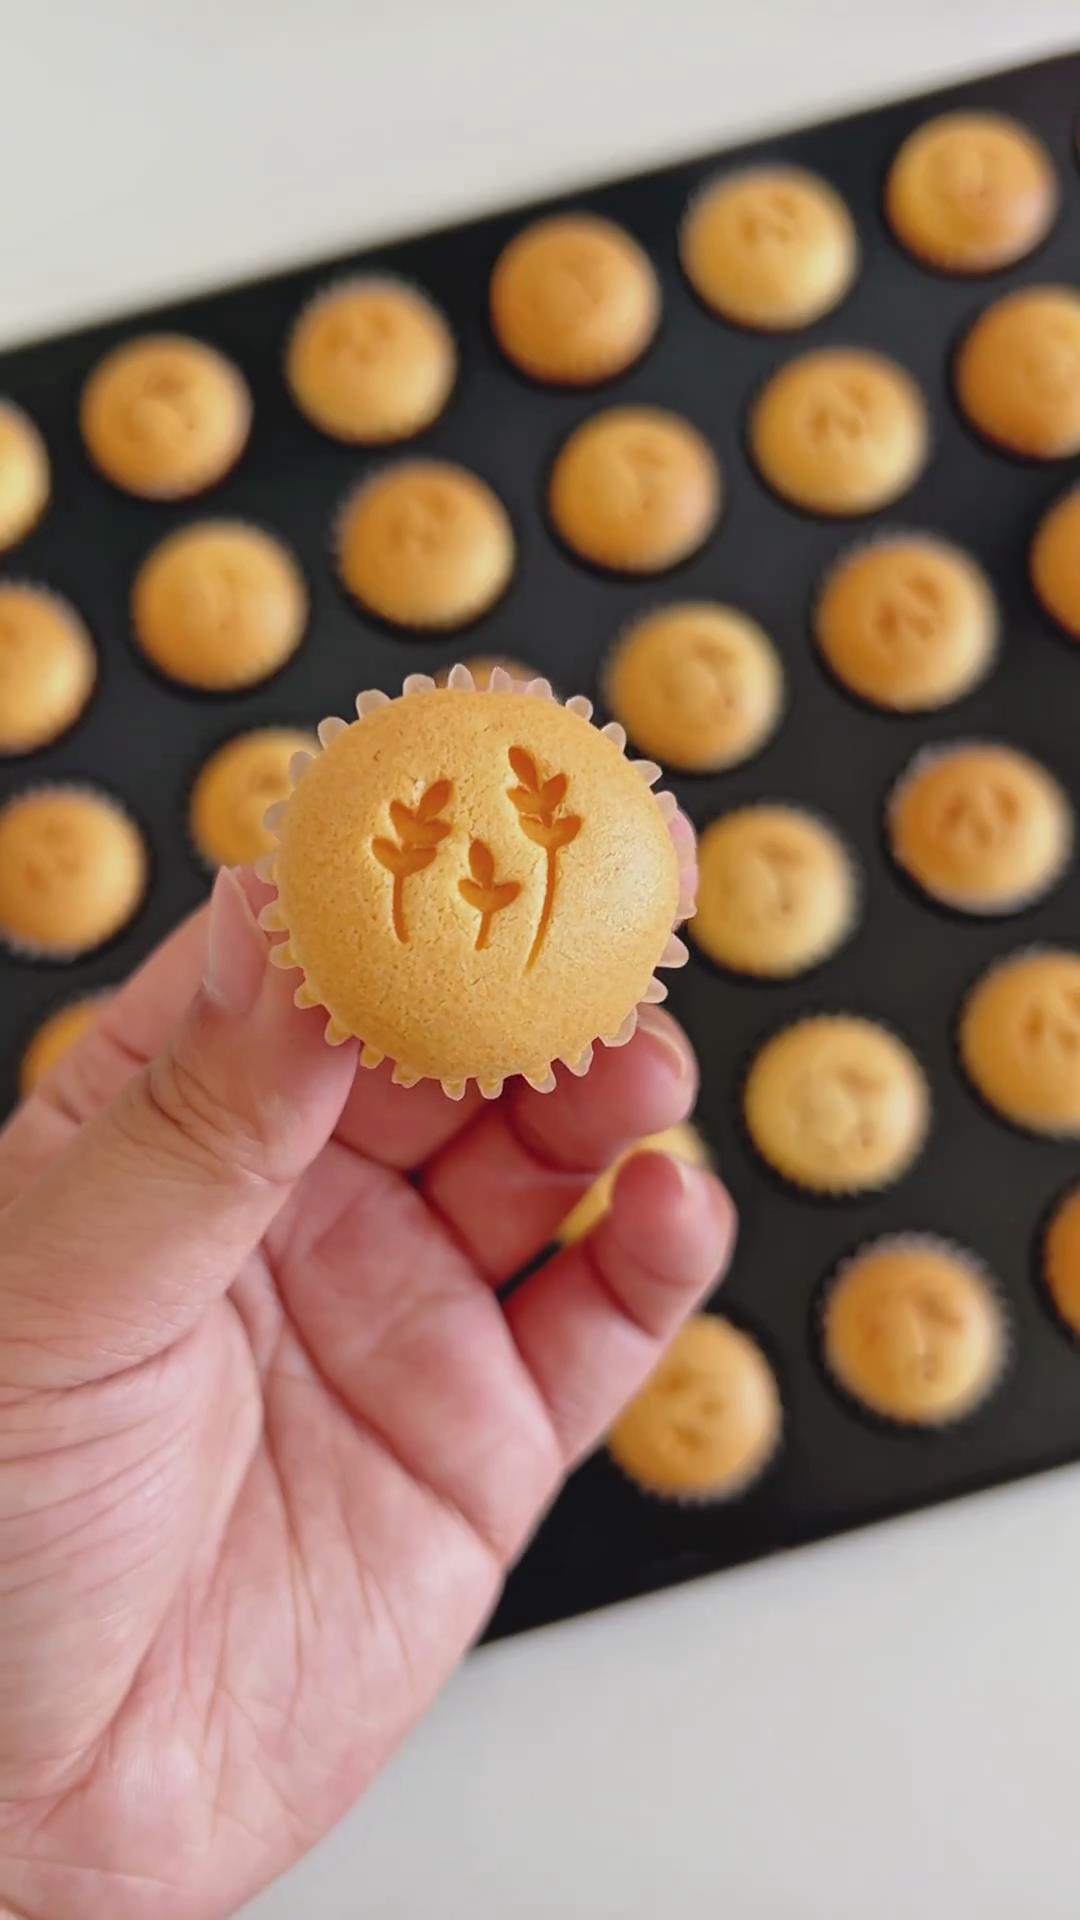
I like to keep things simple, so I skip frosting these mini cupcakes.
Instead, once they’ve cooled, I use a small stamp to imprint cute little designs directly onto the tops.
But of course, if you want to dress them up, you can always add a touch of whipped cream or a sprinkle of powdered sugar on top. Either way, they’re pure happiness in bite-sized form.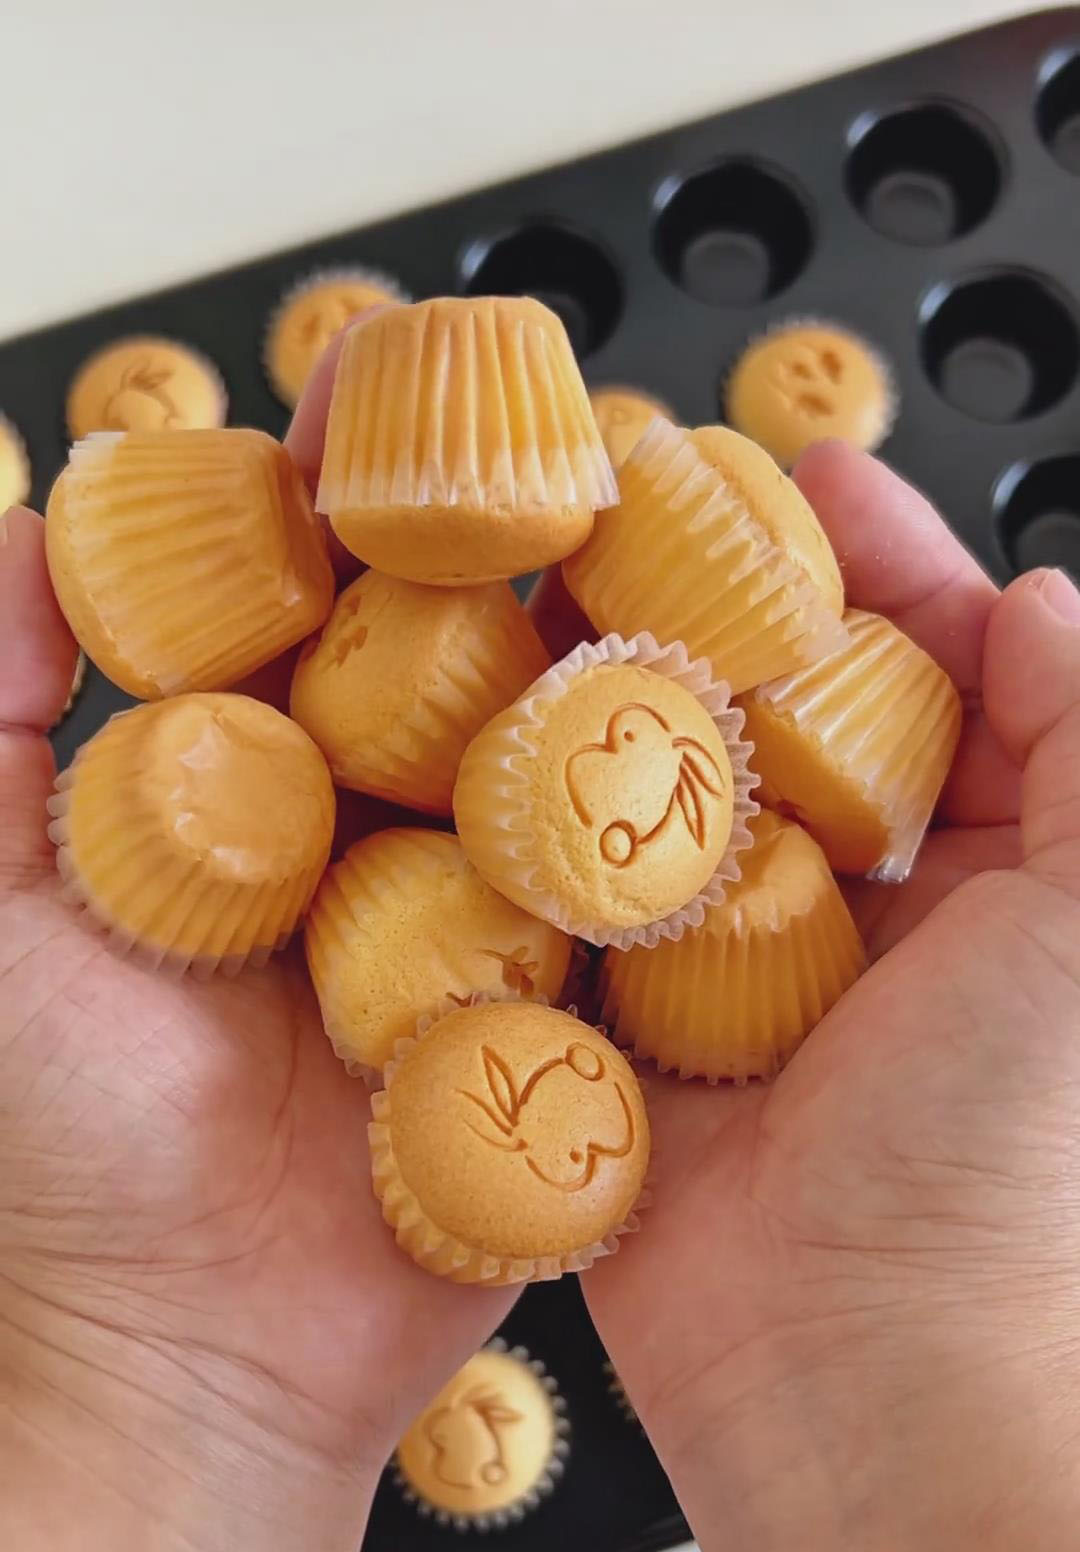
Why You‘ll Love This Recipe
- Soft, fluffy texture — the low-temperature bake and whipped meringue create a cloud-like crumb.
- Simple pantry ingredients — eggs, flour, milk, and oil, that’s it!
- Beginner-friendly — no fancy tools or butter creaming needed.
- Customizable flavors — make them chocolatey, matcha, or keep them plain and milky.
- Cute and giftable — perfect for lunch boxes, birthdays, or a homemade treat jar.
Ingredients and substitutions
- Egg – You’ll need to separate the egg, using both the yolk and the white. Using fresh, cold eggs makes separating easier, and the chilled egg white whips up higher and more stable.
- Corn Oil – I recommend using a neutral-tasting oil like corn oil to keep the cake’s texture exceptionally moist and light without adding any competing flavor. Avoid using melted butter, as it can weigh the batter down and lead to deflation.
- Milk – This adds moisture and a subtle richness to the crumb. While you can use water in a pinch, the flavor will be less complex.
- Cake Flour / Low-Protein Flour – This is non-negotiable for the most delicate and tender texture. Its low protein content prevents the formation of gluten, which would otherwise make the cupcakes tough and dense. Do not substitute with all-purpose flour.
- Fine Granulated Sugar – This not only sweetens the cupcakes but also stabilizes the whipped egg white meringue. The sugar is added gradually to the egg whites to help dissolve it completely and create a strong, glossy meringue.
- Lemon Juice – A small amount of acid is crucial for stabilizing the whipped egg whites. If you don’t have lemon juice, an equal amount of white vinegar works just as well.
How to make Mini Sponge Cupcakes
Step 1: Preparation
Separate the egg whites and yolks carefully, placing them into two clean, completely grease-free bowls. Place the egg white bowl in the freezer for about 5-10 minutes.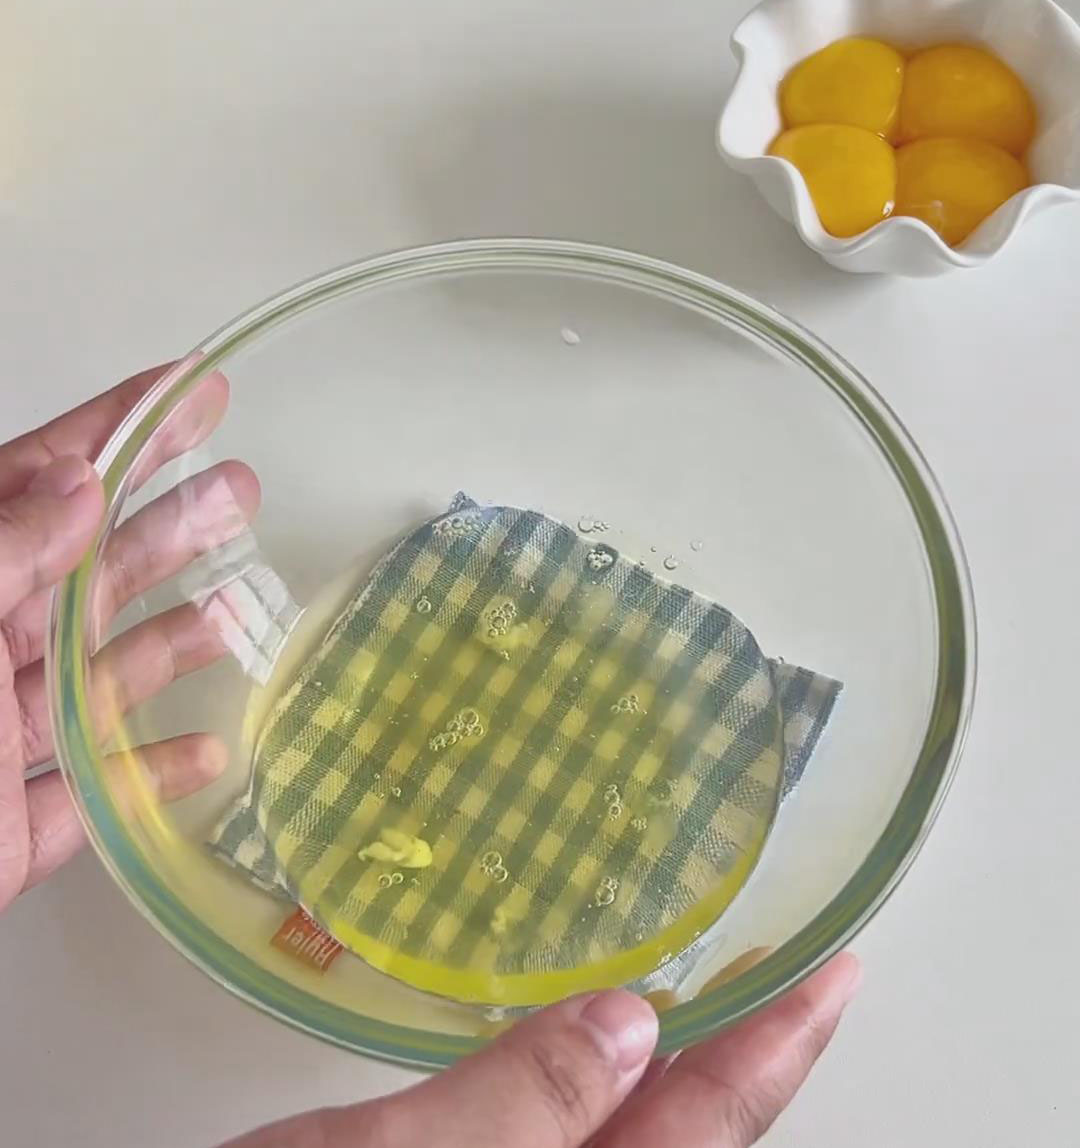
Place mini cupcake liners in a muffin tin. Preheat your oven to 140°C (284°F) with both top and bottom heat for a full 15 minutes.
Step 2: Make the egg yolk batter
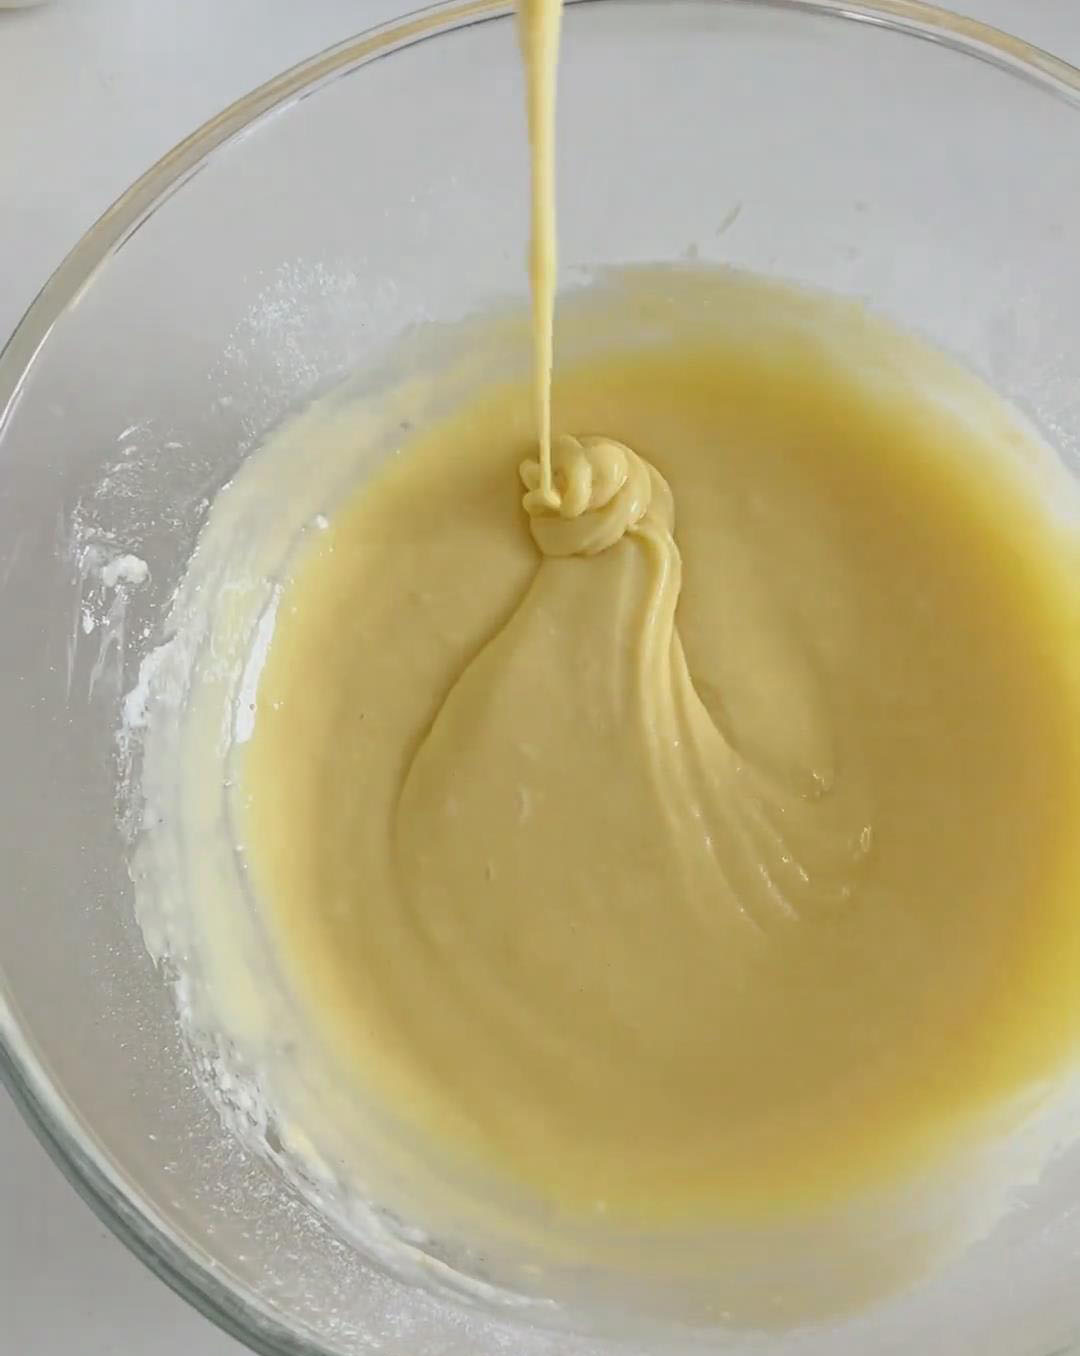
In a mixing bowl, combine 30 g of corn oil and 45 g of milk. Use a whisk to mix vigorously until the ingredients are fully combined, emulsified, and the surface looks smooth.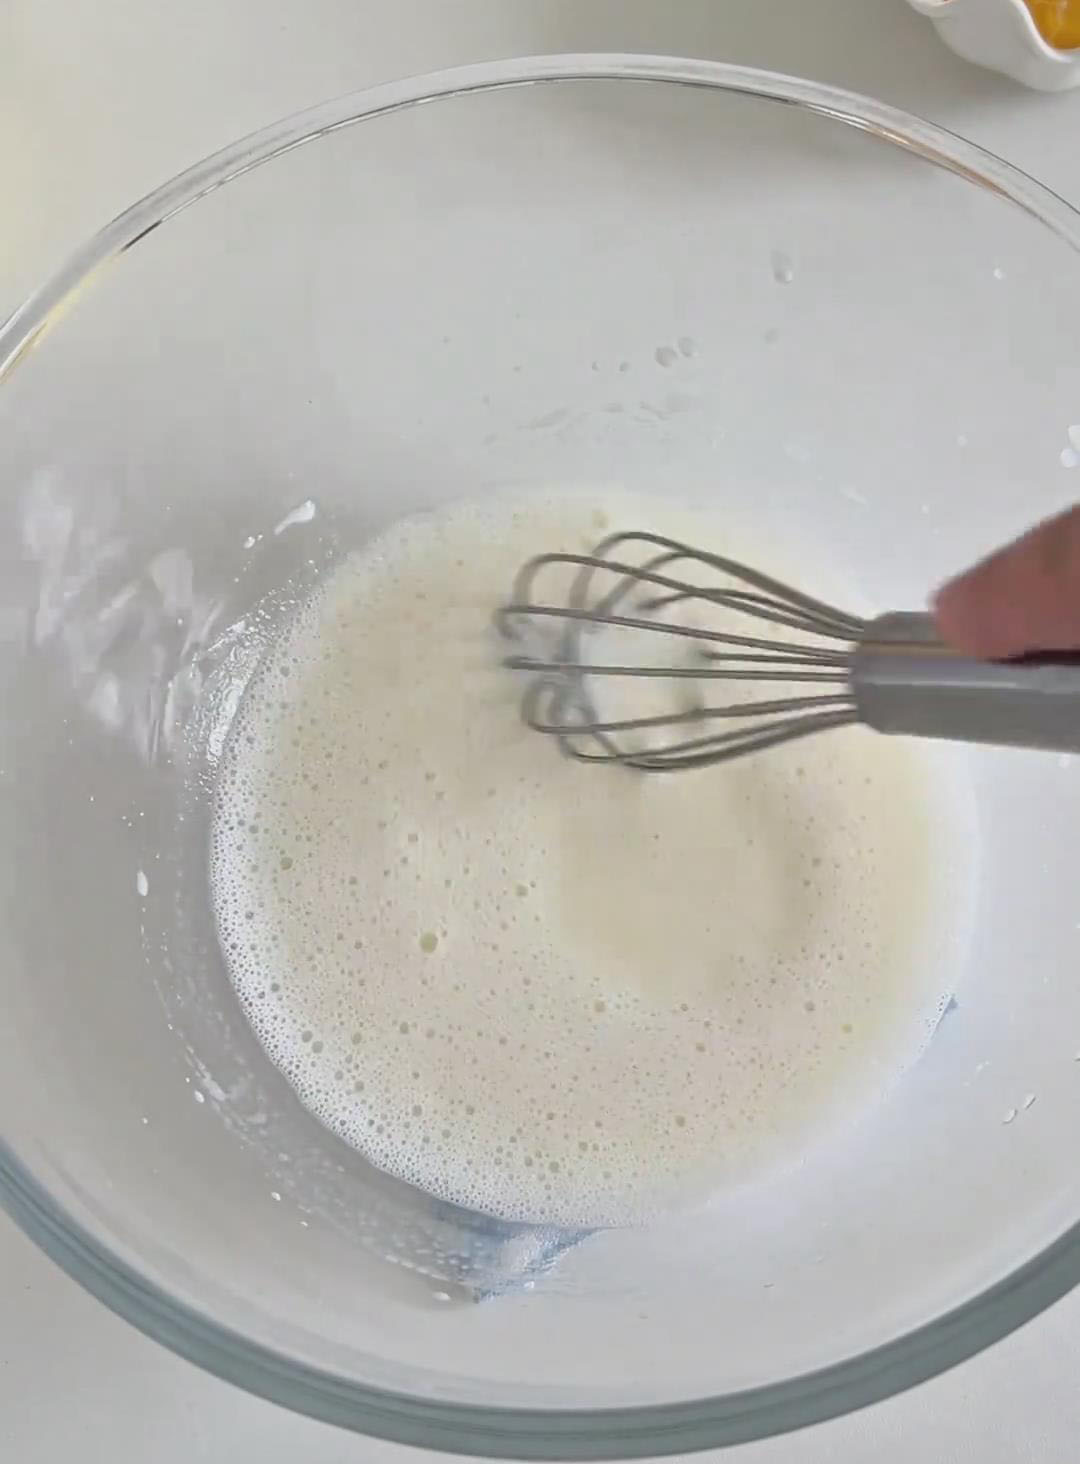
Sift the 25g of cake flour directly into the wet ingredients. Use the whisk to gently stir until just combined and no dry flour remains.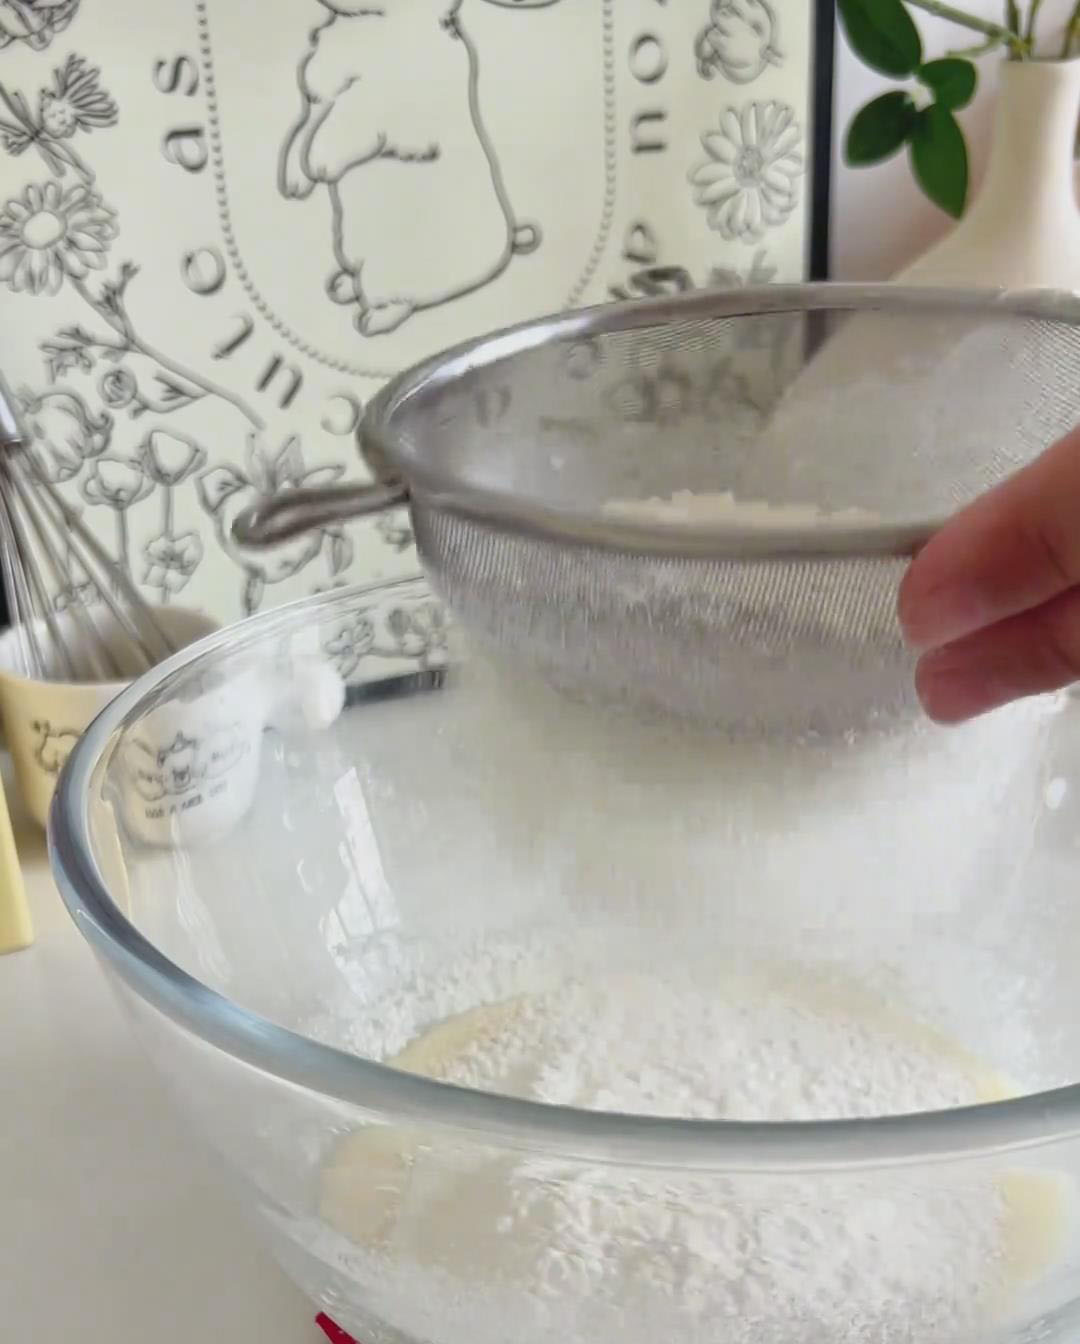
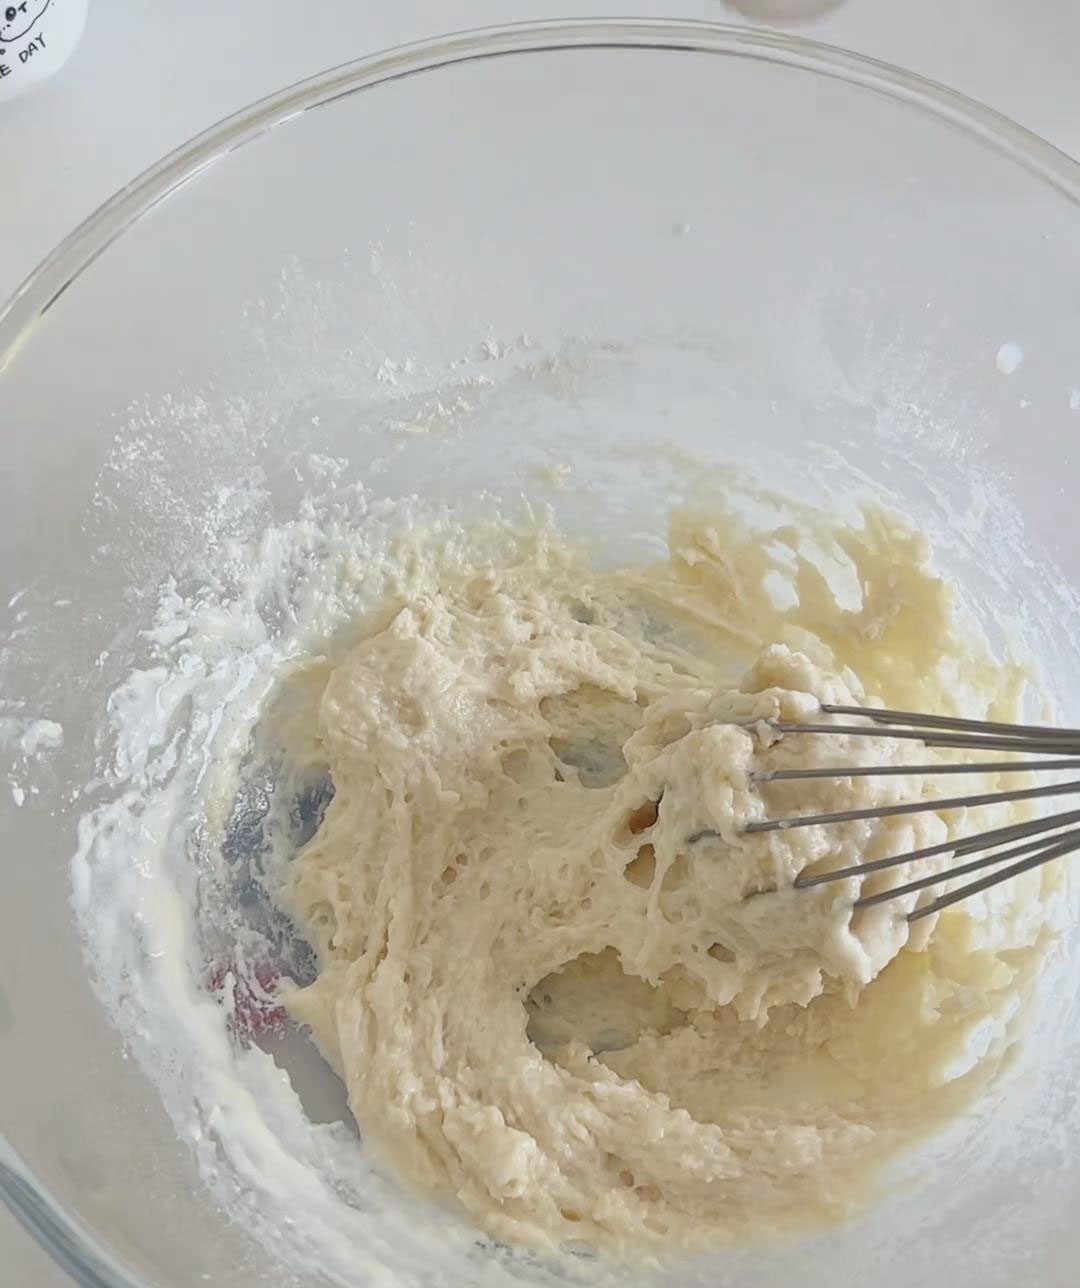
Add the egg yolks to the batter. Using a “Z”-shaped motion (or a gentle folding motion), stir until the batter is smooth and uniform. Be careful not to overmix or stir in circles, as this can develop gluten and make the cake tough.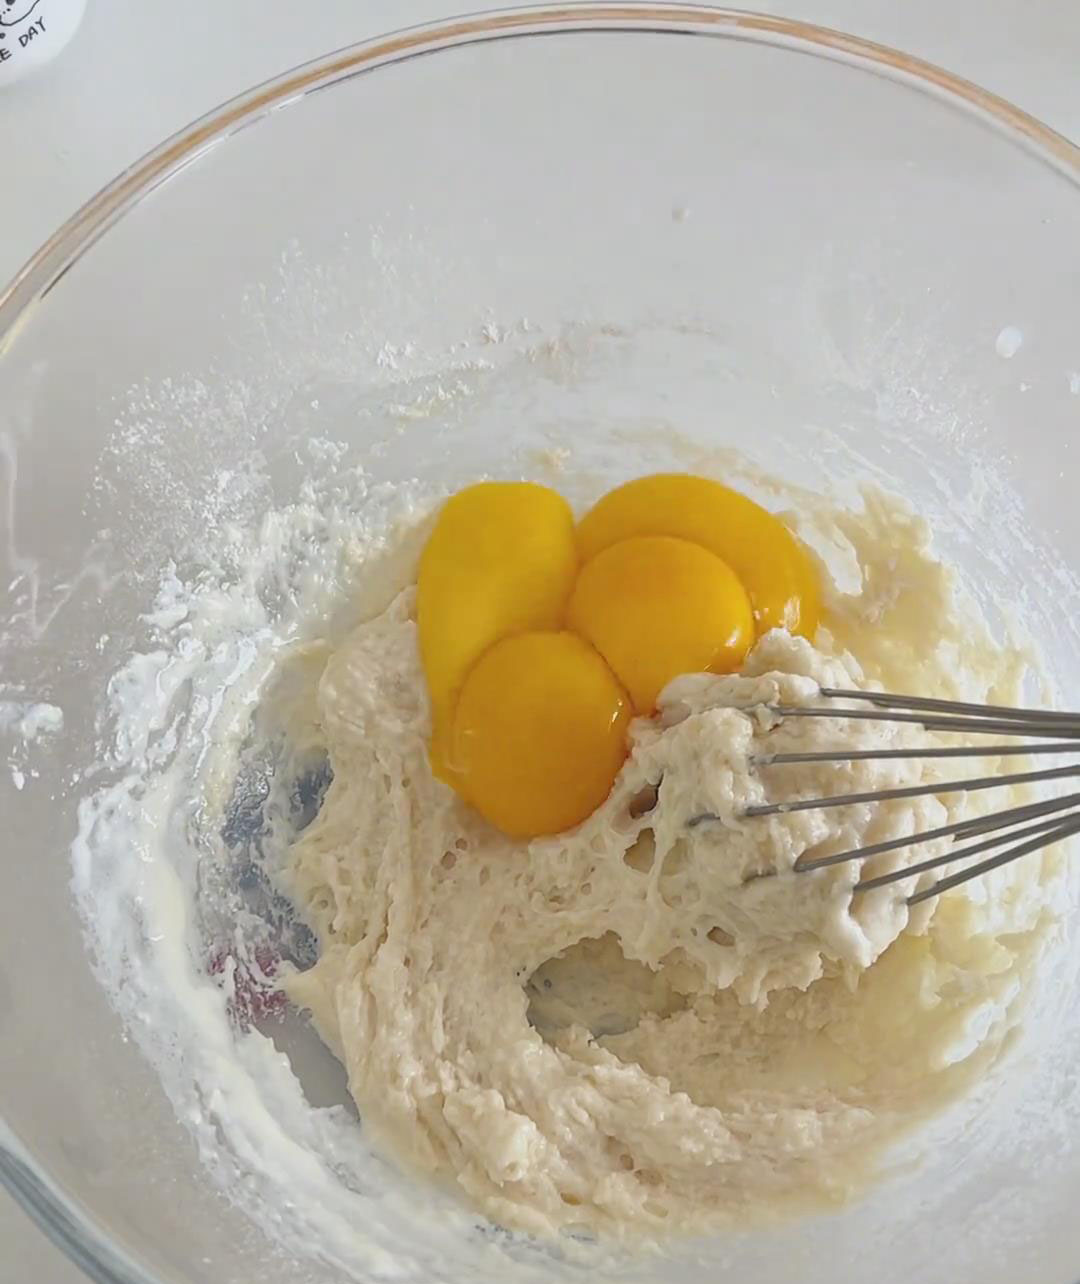
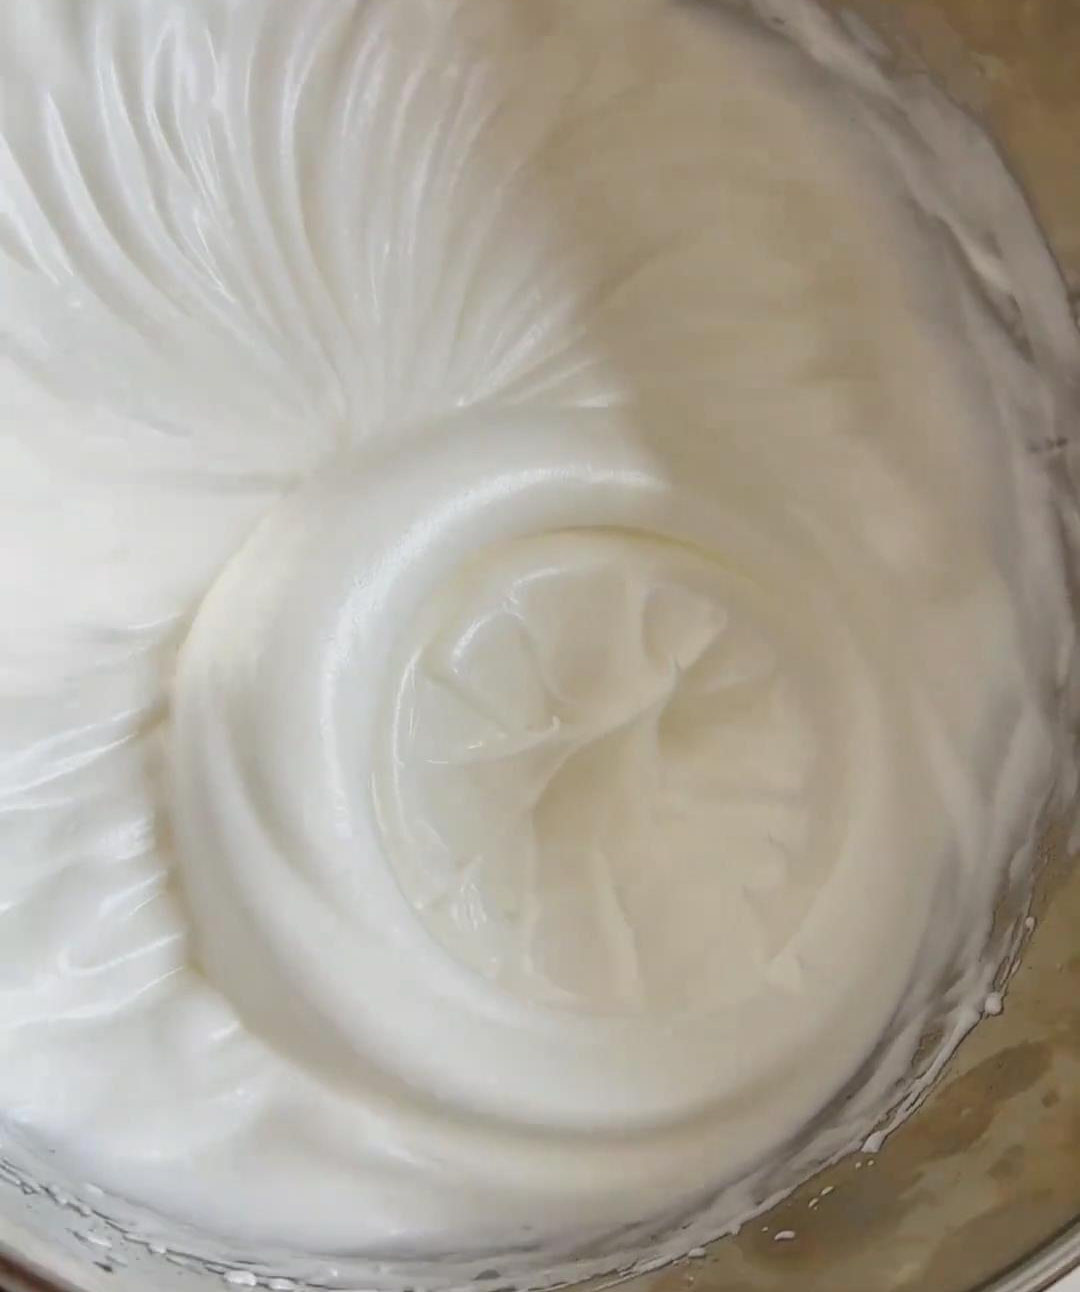
Step 3: Whip the meringue
Take the chilled egg whites from the freezer. Add the small amount of lemon juice.
Using an electric mixer on low speed, begin whipping until the egg whites become frothy and large bubbles (like “fish eyes”) form.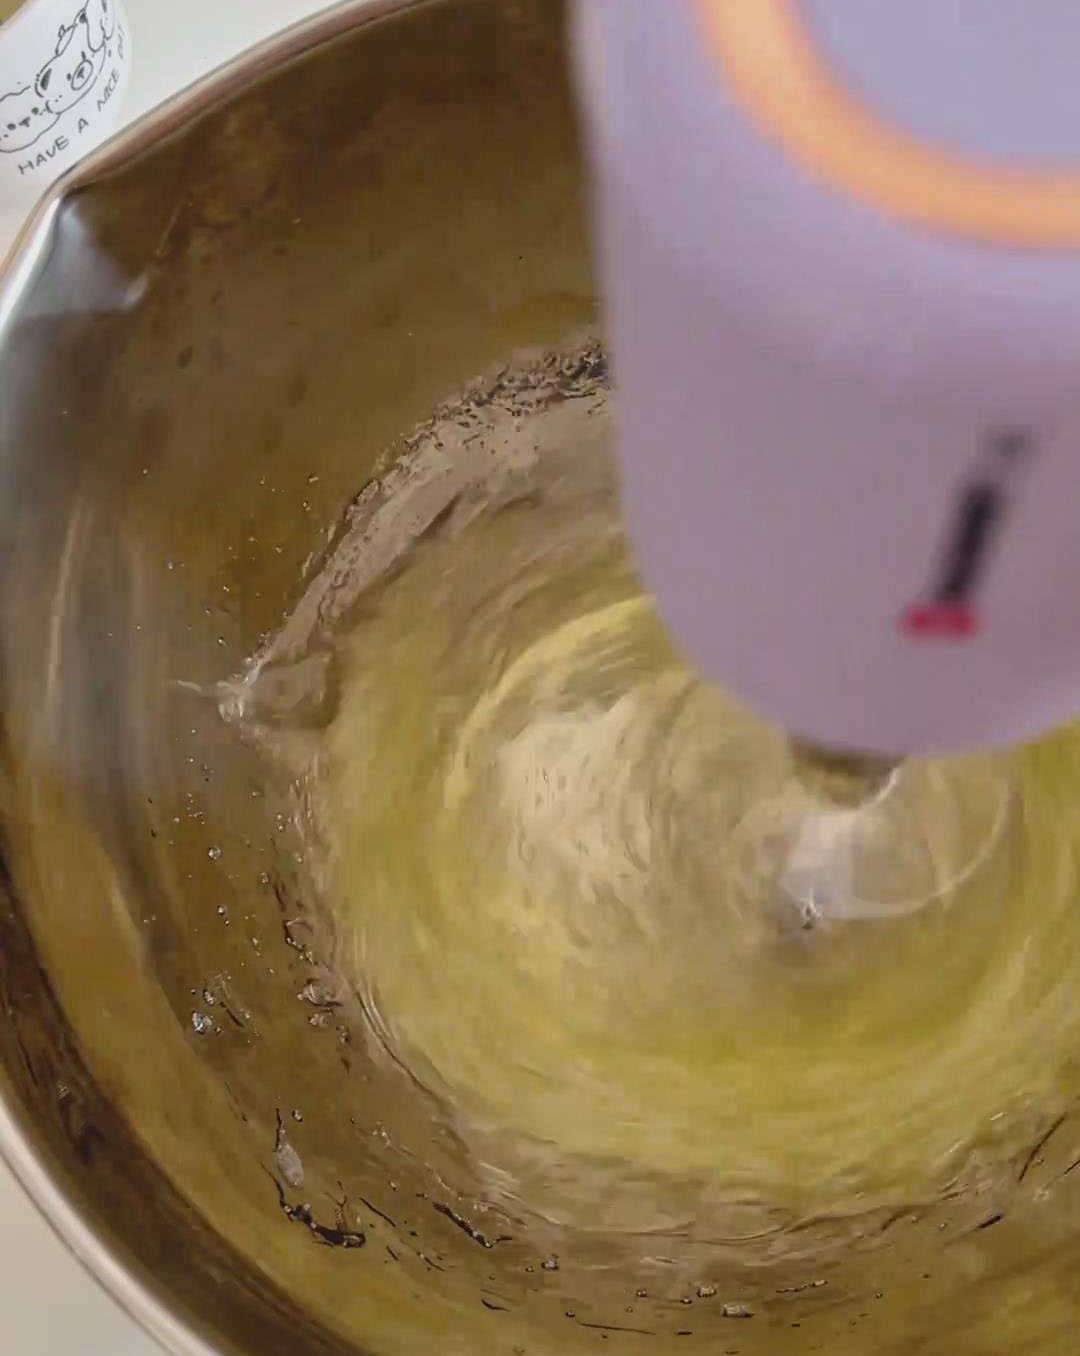
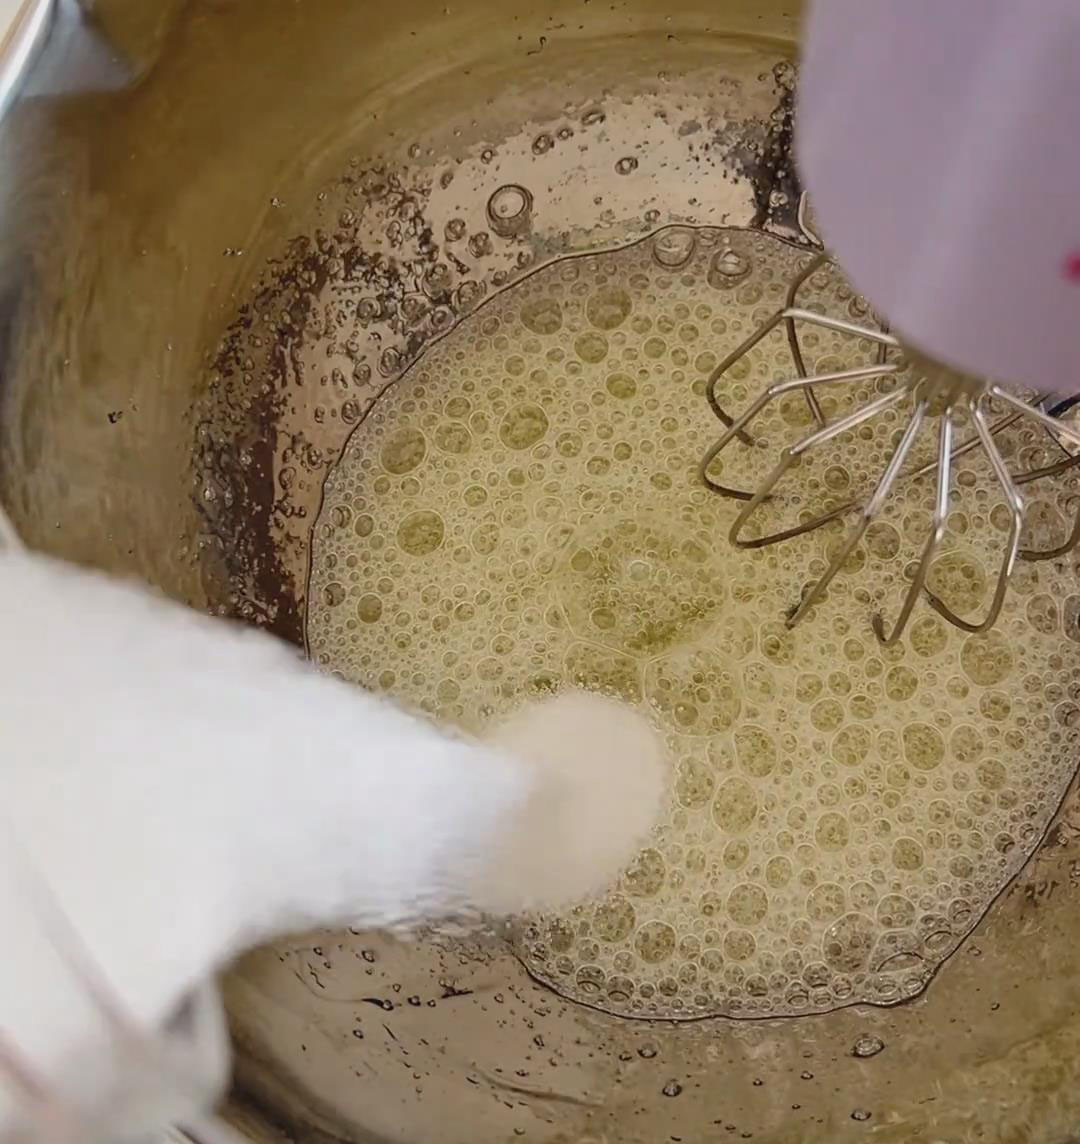
Add the fine granulated sugar in 3 separate additions:
- First addition: Add about one-third of the sugar. Increase the mixer speed to medium and whip until the bubbles become fine and foamy.
- Second addition: Add another third of the sugar. Increase the speed to high and whip until the beaters start to leave visible trails in the meringue.
- Third addition: Add the remaining sugar. Reduce the speed to low and continue whipping until you reach stiff, glossy peaks. The meringue is ready when you lift the beaters and the peaks stand straight up without drooping.
Step 4: Combine the batters
Add about one-third of the meringue to the egg yolk batter.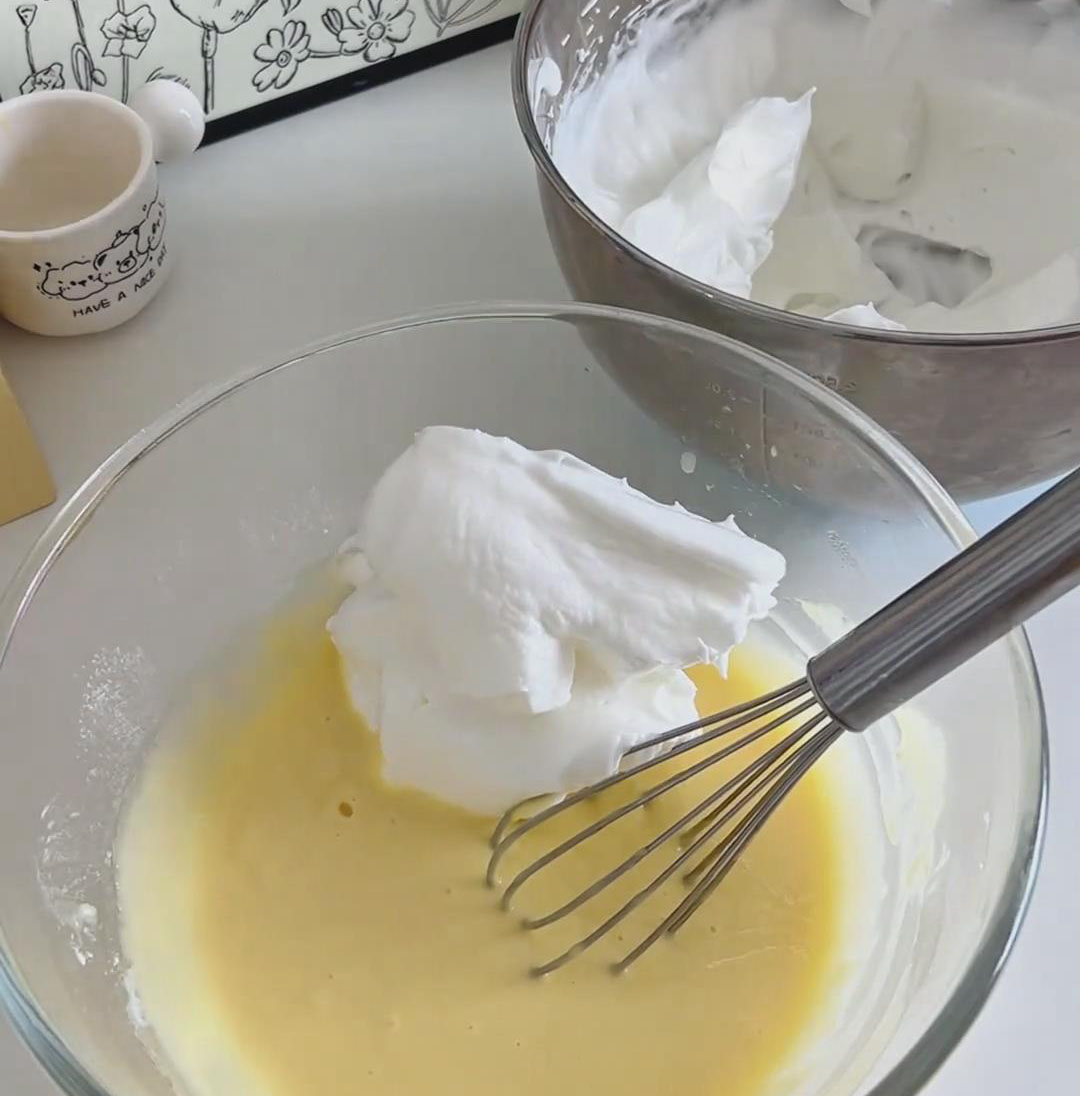
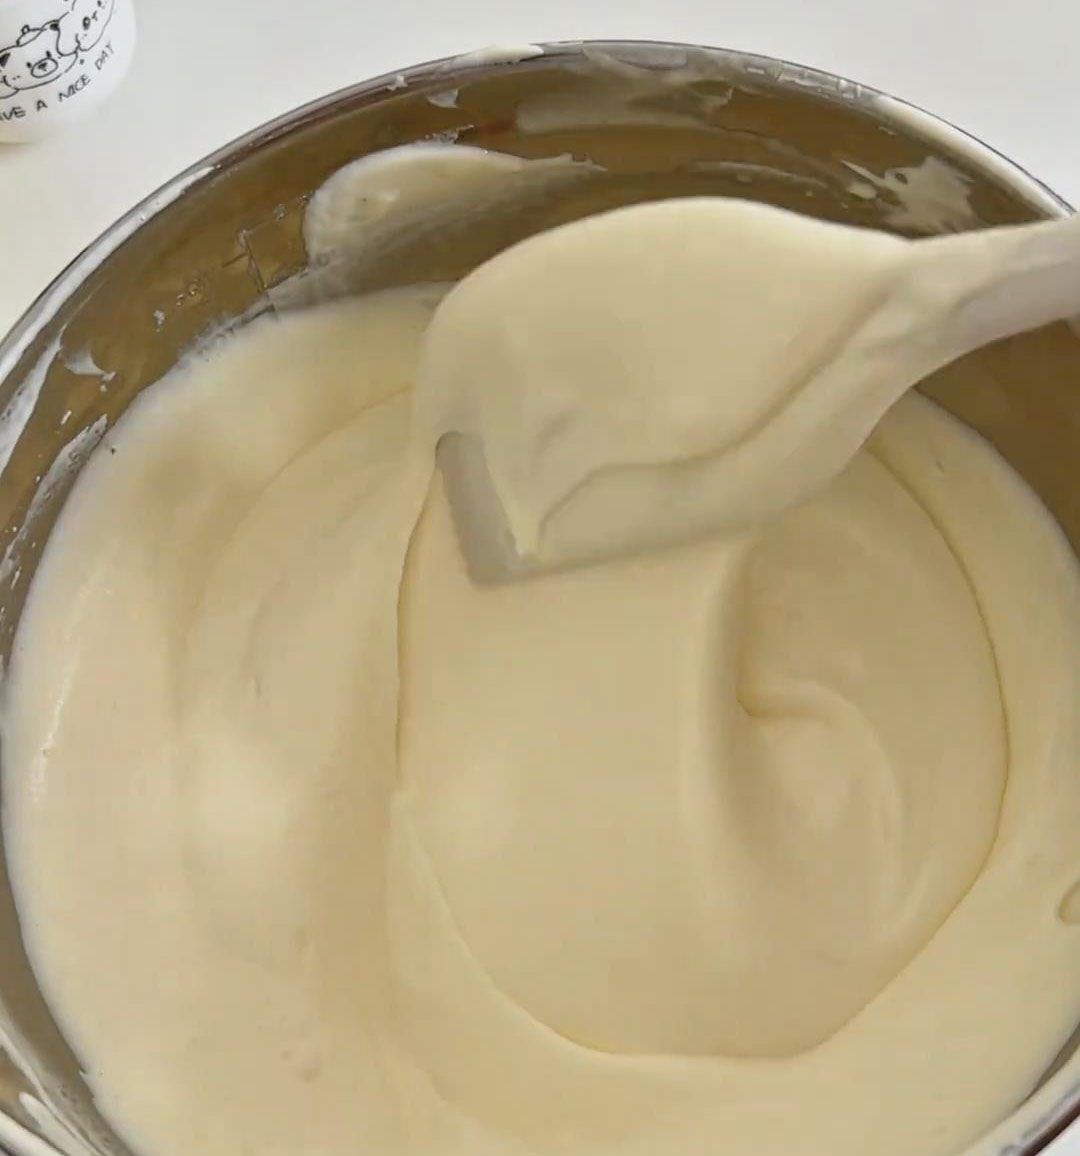
Use a whisk to roughly combine the two mixtures — this helps balance their densities and prevents deflation. Then, switch to a spatula and gently fold from the bottom until the batter is smooth and evenly mixed.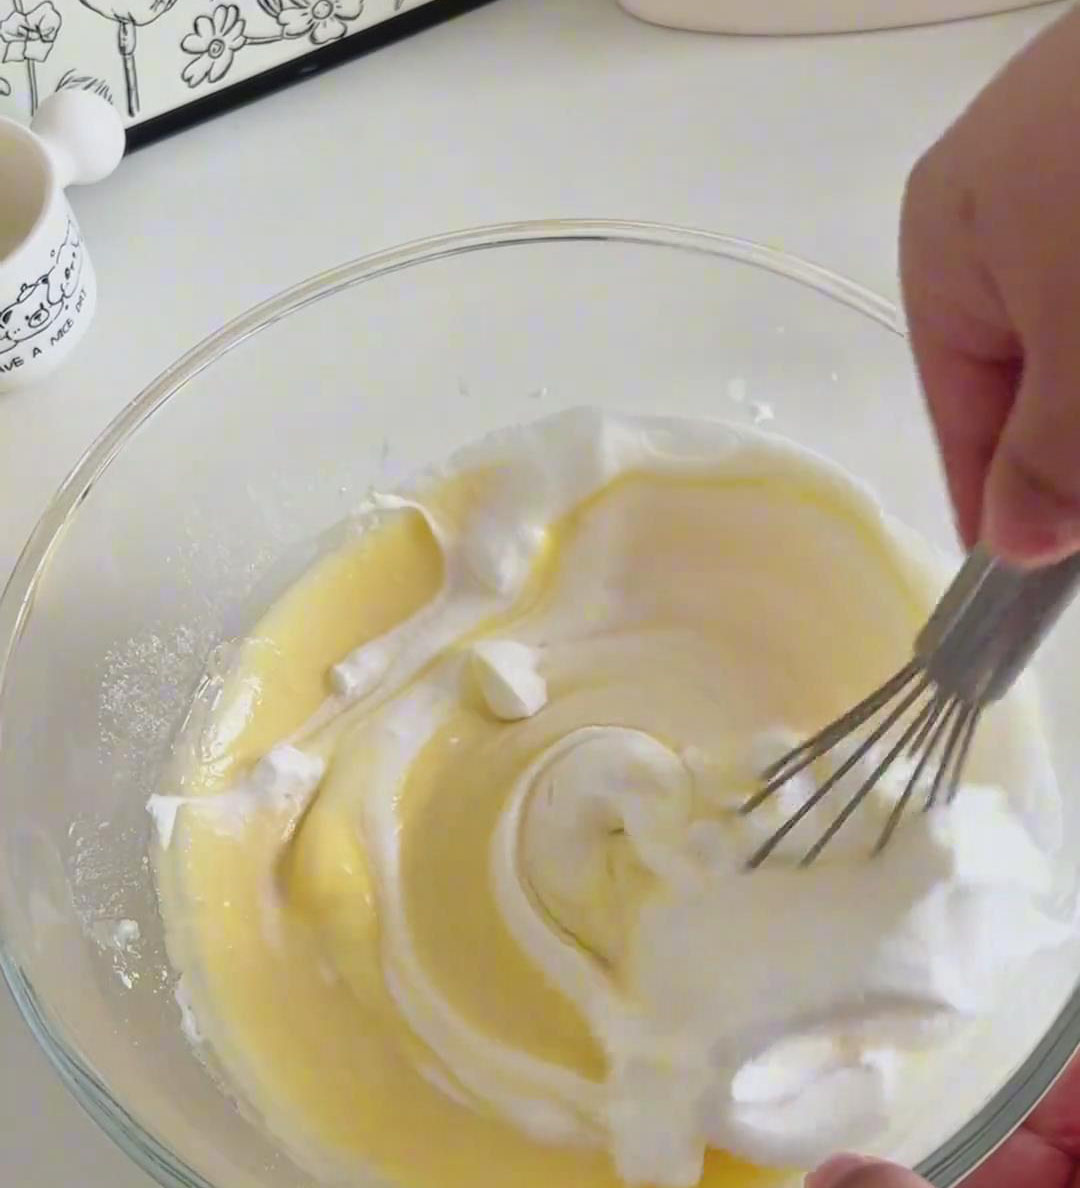
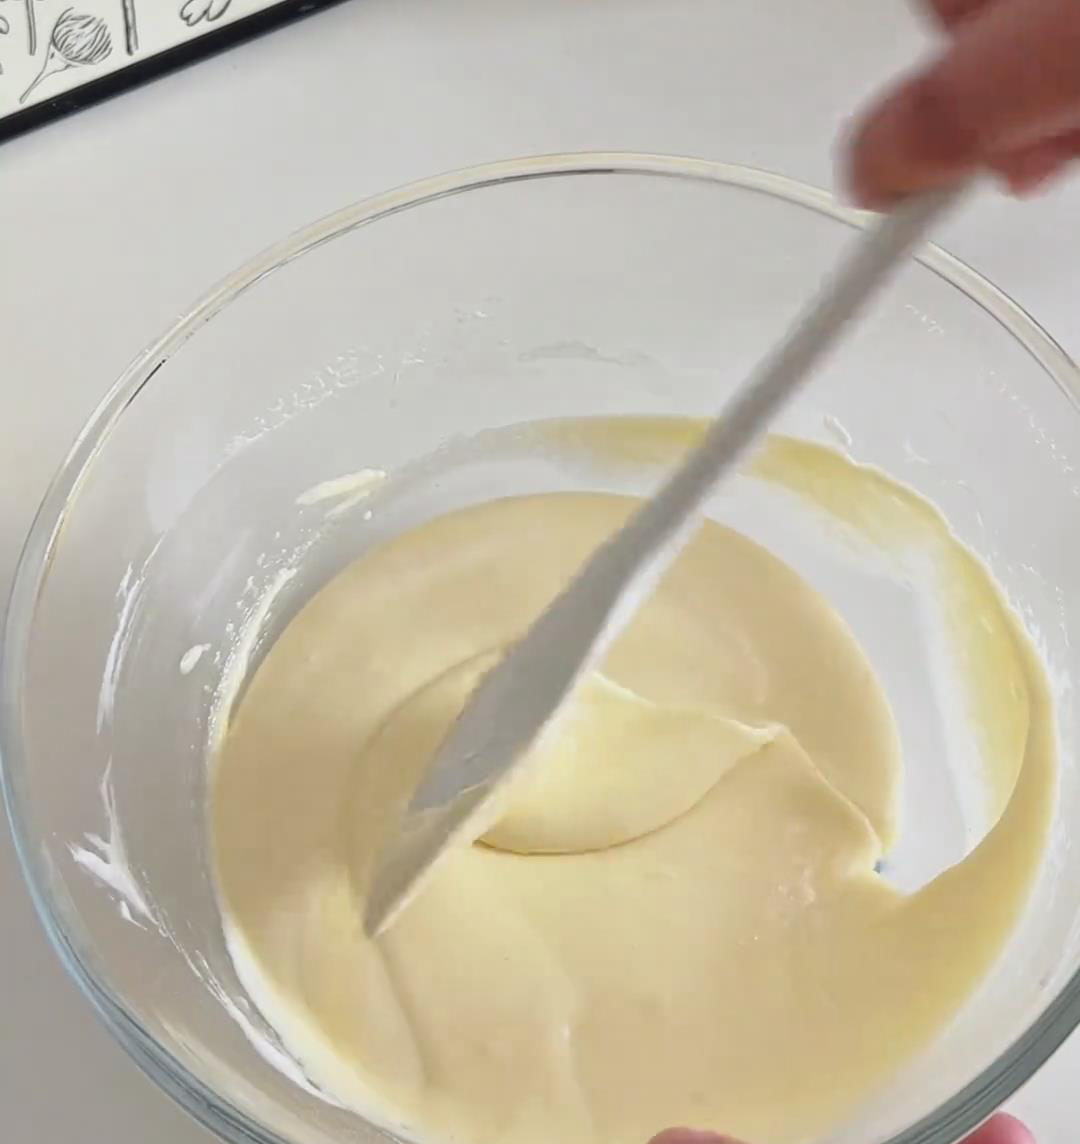
Pour back into remaining meringue and continue folding gently with an under-and-over motion until the batter is glossy and uniform.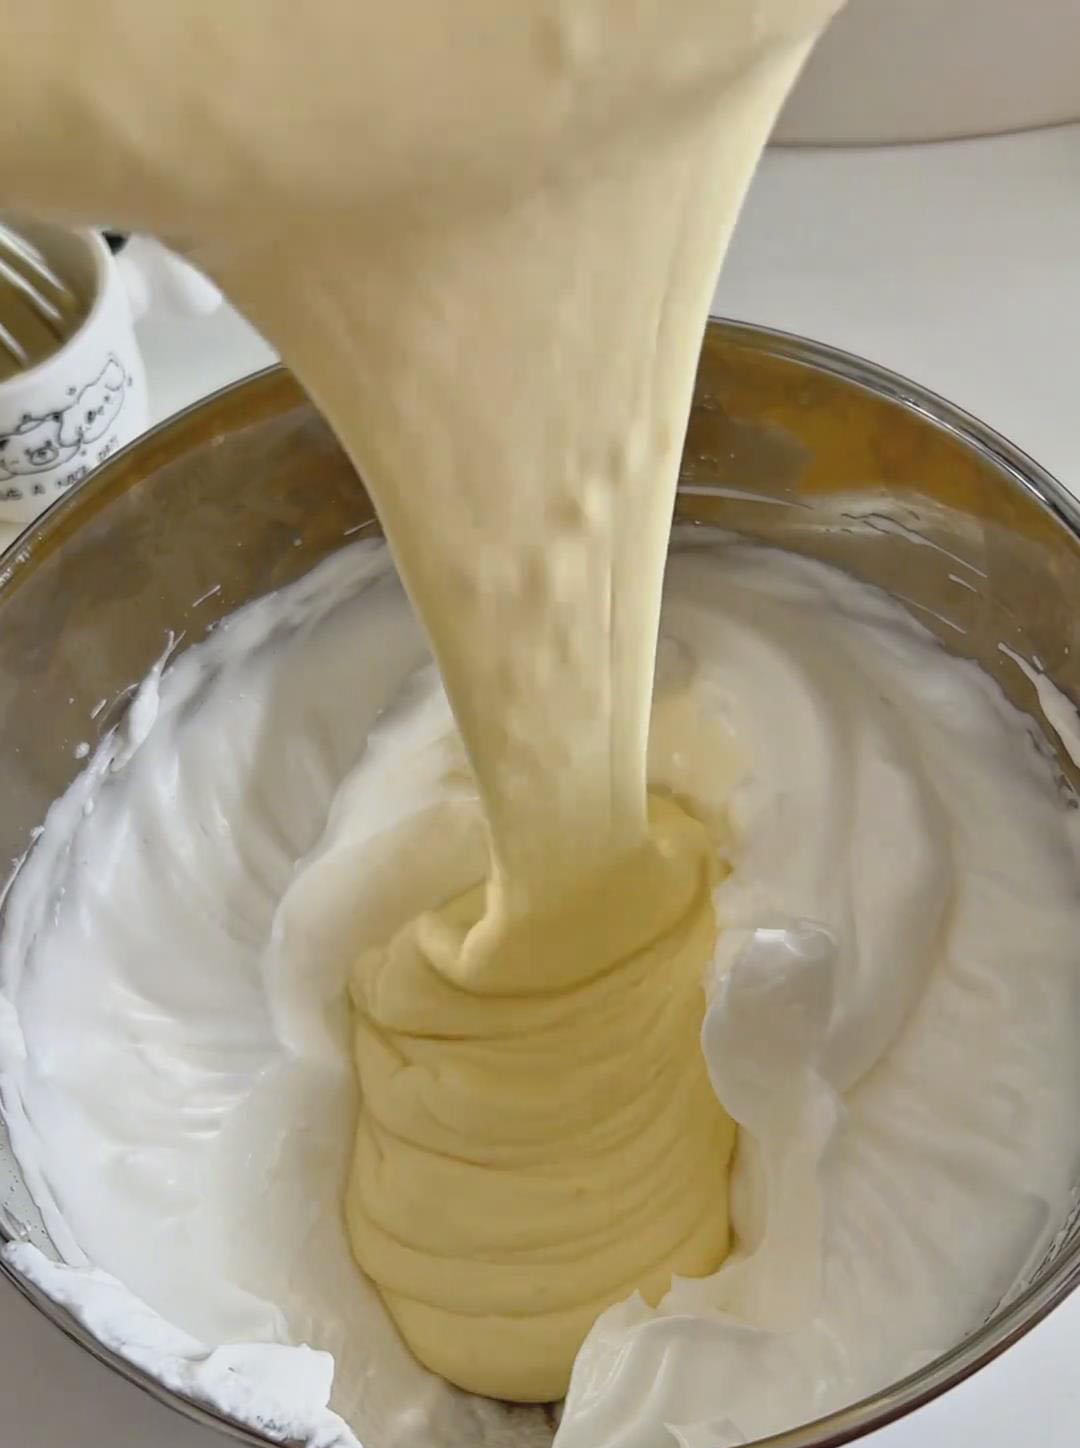
Step 5: Bake and cool
Transfer the final batter to a piping bag for neat and easy filling. Pipe the batter into the prepared mini cupcake liners, filling each one to about 80% full.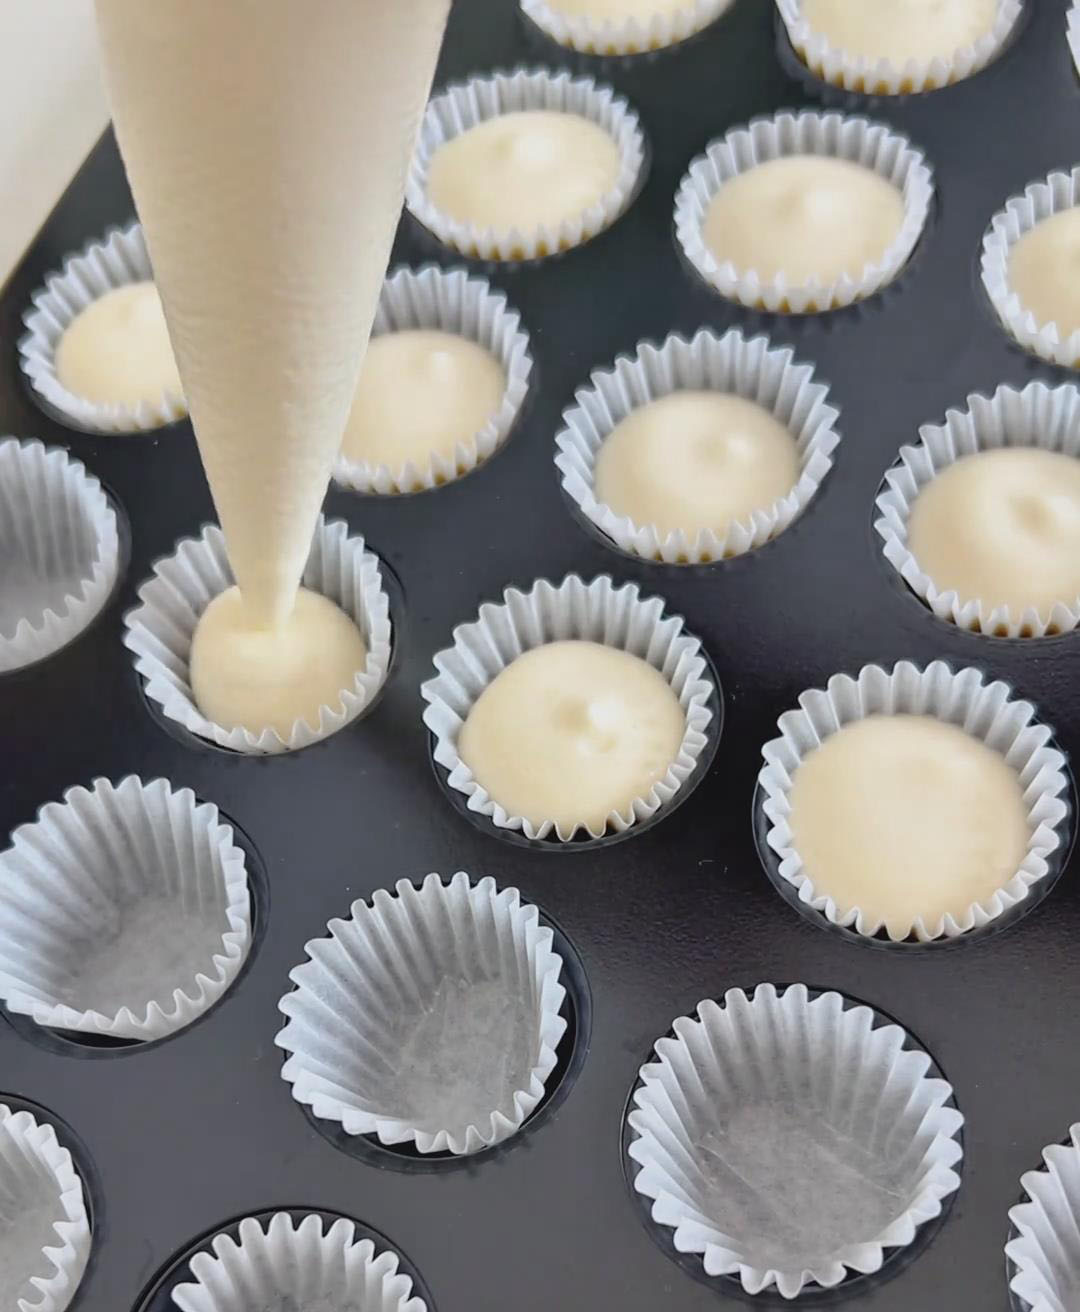
Hold the filled pan firmly and tap it gently on the counter 2-3 times.
Place the pan on the middle rack of the preheated oven. Bake at 140°C (284°F) for 35-40 minutes.
The cakes are done when they spring back lightly when touched and a toothpick inserted into the center comes out clean.
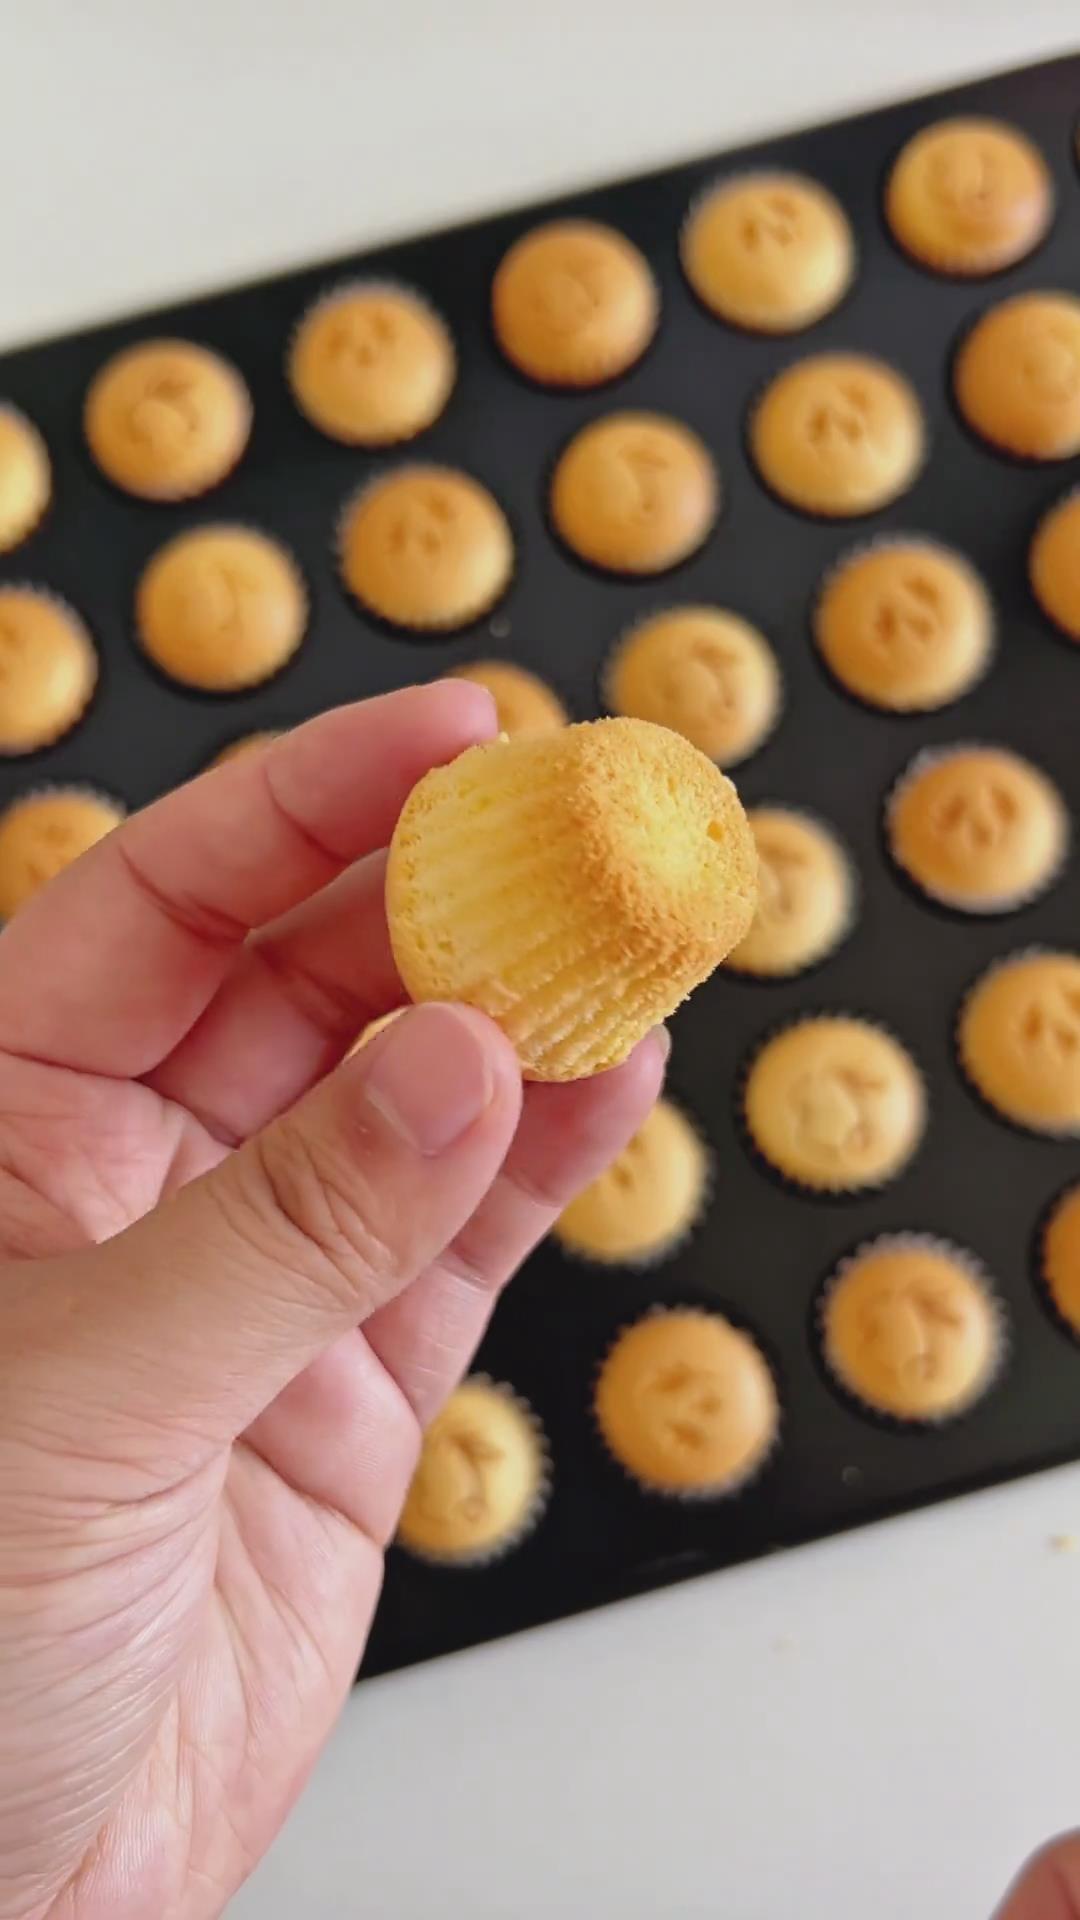
As soon as they come out of the oven, tap the pan again on the counter to release steam. Then, immediately turn the cupcakes on their sides in the pan to cool. This step is critical to prevent the delicate cakes from collapsing and shrinking.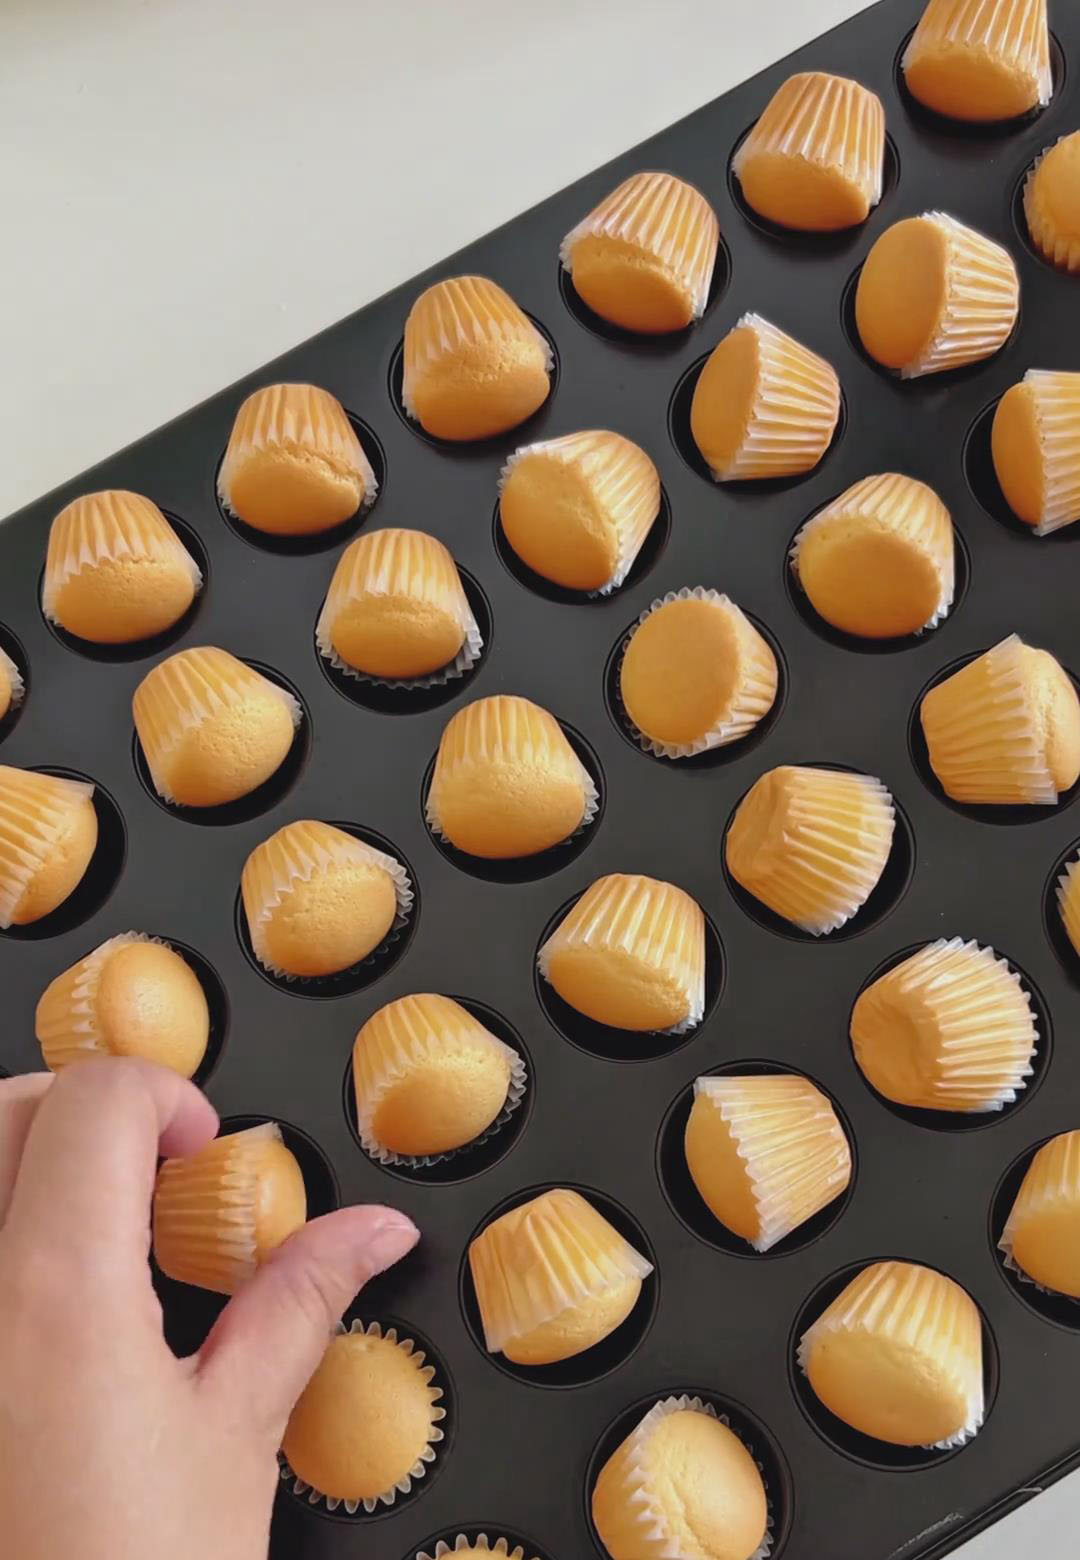
Once cooled, you can either stamp your favorite design on the surface or enjoy the cupcakes as they are.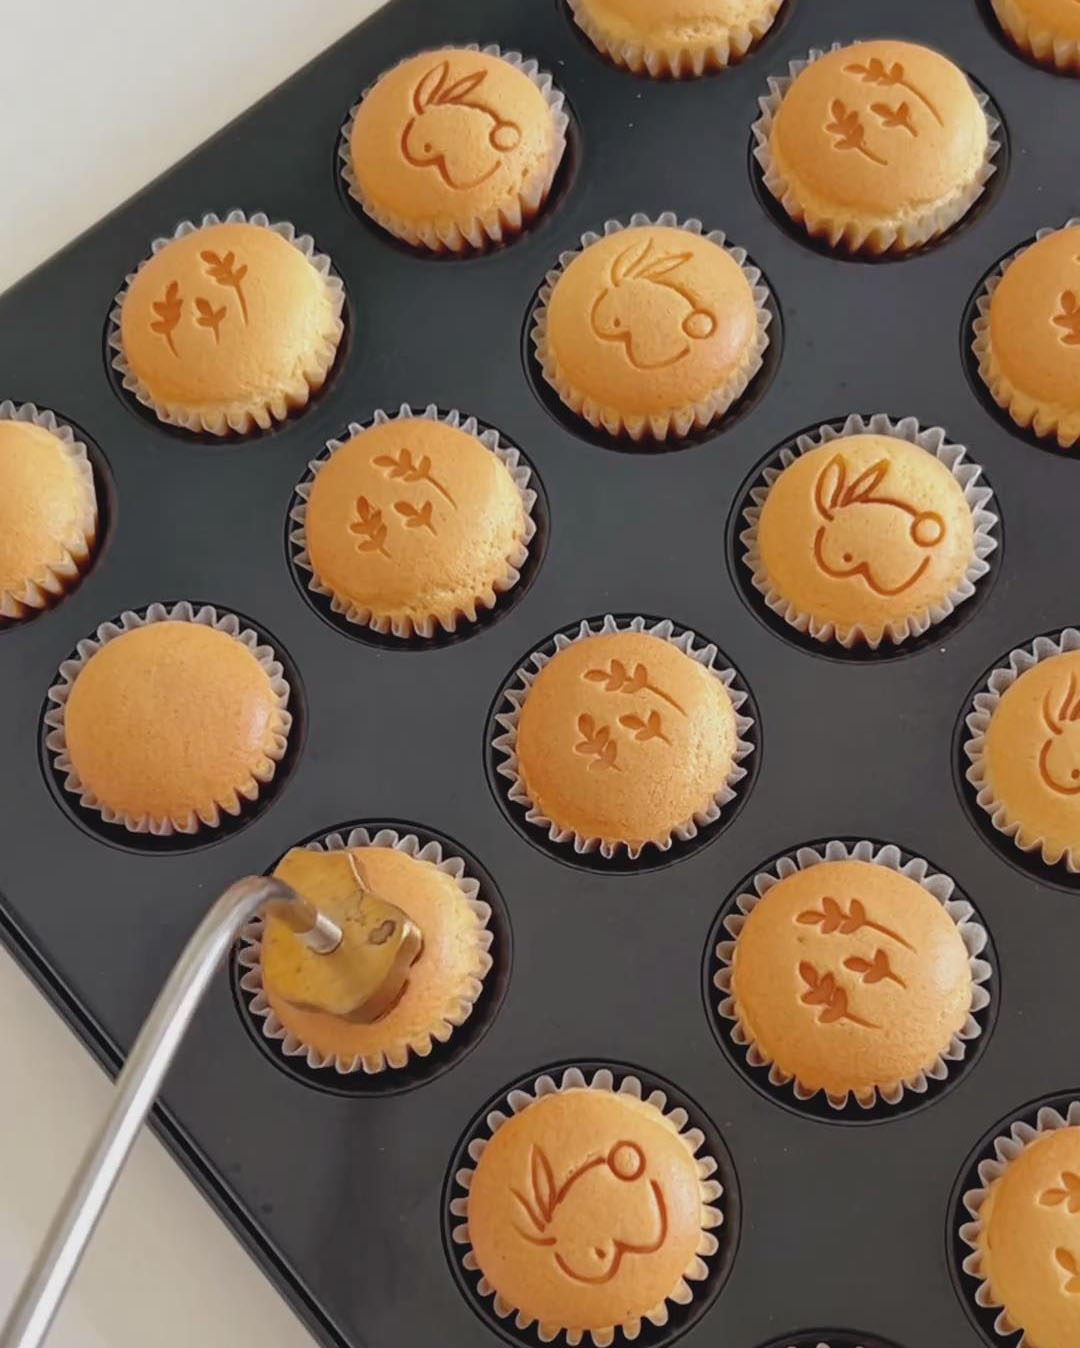
Tips & Troubleshooting
Egg Whites & Mixing
- Use clean, oil-free bowls — even tiny grease traces prevent whipping.
- Add lemon juice for better stability.
- Whip to stiff peaks — under-whipped causes collapse, over-whipped creates coarse texture.
- Fold gently and quickly — avoid stirring in circles.
Baking & Cooling
- Preheat oven thoroughly for even baking.
- Keep temperature moderate (140°C) — too high burns the top before the center sets.
- Tap and side-cool to prevent shrinkage.
Flavor & Decoration Ideas
- Classic: Original soft, milky flavor.
- Chocolate: Add 5 g cocoa powder (replace same amount of flour).
- Matcha: Add 10 g matcha powder.
- Decorated: Spread whipped cream, top with diced fruit or sprinkles after cooling.
Storage
- Room temperature: 2–3 days (sealed).
- Refrigerated: 5–7 days — let rest 10 min before eating.
- Frozen: Up to 1 month — reheat at 120°C for 5 minutes or microwave for 10 seconds to restore softness.
Frequently asked questions
Q: Why did my sponge collapse after baking?
A: Likely under-whipped egg whites or uneven oven heat. Make sure your meringue reaches stiff peaks and your oven is fully preheated.
Q: Can I use butter instead of corn oil?
A: Technically yes, but it will change the texture — the cakes will be heavier and less airy.
Q: Can I bake in regular cupcake molds?
A: Absolutely! Just increase the baking time slightly — around 40–45 minutes depending on size.

Fluffy Mini Cupcakes (No Butter, No Cream)
Ingredients
Egg Yolk Batter
- 30 g egg yolk from approx. 1.5 medium eggs
- 30 g corn oil
- 45 g milk
- 25 g cake flour / low-protein flour
Meringue
- 30 g egg white from approx. 1.5 medium eggs
- 25 g fine granulated sugar
- A small amount of lemon juice
Instructions
Step 1: Preparation
- Separate the egg whites and yolks carefully, placing them into two clean, completely grease-free bowls. Place the egg white bowl in the freezer for about 5-10 minutes.
- Place mini cupcake liners in a muffin tin. Preheat your oven to 140°C (284°F) with both top and bottom heat for a full 15 minutes.
Step 2: Make the egg yolk batter
- In a mixing bowl, combine 30 g of corn oil and 45 g of milk. Use a whisk to mix vigorously until the ingredients are fully combined, emulsified, and the surface looks smooth.
- Sift the 25g of cake flour directly into the wet ingredients. Use the whisk to gently stir until just combined and no dry flour remains.
- Add the egg yolks to the batter. Using a "Z"-shaped motion (or a gentle folding motion), stir until the batter is smooth and uniform. Be careful not to overmix or stir in circles, as this can develop gluten and make the cake tough.
Step 3: Whip the meringue
- Take the chilled egg whites from the freezer. Add the small amount of lemon juice.
- Using an electric mixer on low speed, begin whipping until the egg whites become frothy and large bubbles (like "fish eyes") form.
- Add the fine granulated sugar in 3 separate additions:
- First addition: Add about one-third of the sugar. Increase the mixer speed to medium and whip until the bubbles become fine and foamy.
- Second addition: Add another third of the sugar. Increase the speed to high and whip until the beaters start to leave visible trails in the meringue.
- Third addition: Add the remaining sugar. Reduce the speed to low and continue whipping until you reach stiff, glossy peaks. The meringue is ready when you lift the beaters and the peaks stand straight up without drooping.
Step 4: Combine the batters
- Add about one-third of the meringue to the egg yolk batter.
- Use a whisk to roughly combine the two mixtures — this helps balance their densities and prevents deflation. Then, switch to a spatula and gently fold from the bottom until the batter is smooth and evenly mixed.
- Pour back into remaining meringue and continue folding gently with an under-and-over motion until the batter is glossy and uniform.
Step 5: Bake and cool
- Transfer the final batter to a piping bag for neat and easy filling. Pipe the batter into the prepared mini cupcake liners, filling each one to about 80% full.
- Hold the filled pan firmly and tap it gently on the counter 2-3 times.
- Place the pan on the middle rack of the preheated oven. Bake at 140°C (284°F) for 35-40 minutes.
- The cakes are done when they spring back lightly when touched and a toothpick inserted into the center comes out clean.
- As soon as they come out of the oven, tap the pan again on the counter to release steam. Then, immediately turn the cupcakes on their sides in the pan to cool. This step is critical to prevent the delicate cakes from collapsing and shrinking.
- Once cooled, you can either stamp your favorite design on the surface or enjoy the cupcakes as they are.
Leave a Reply