
I can’t wait to share this Oreo mochi recipe with you! If you’re a fan of both chewy mochi and the classic taste of Oreos, this is the perfect dessert for you. It’s a fun combination of textures and flavors that’s sure to impress!
Why You‘ll Love This Recipe
I love making Oreo mochi because it’s such a unique twist on the traditional mochi! The soft, chewy exterior combined with the crunchy, chocolatey Oreo bits inside is a mouthwatering combination. Plus, the sea salt milk foam on top adds the perfect balance of sweet and savory. Whether you’re looking for a fun dessert to share or a treat to enjoy on your own, this Oreo mochi is sure to hit the spot!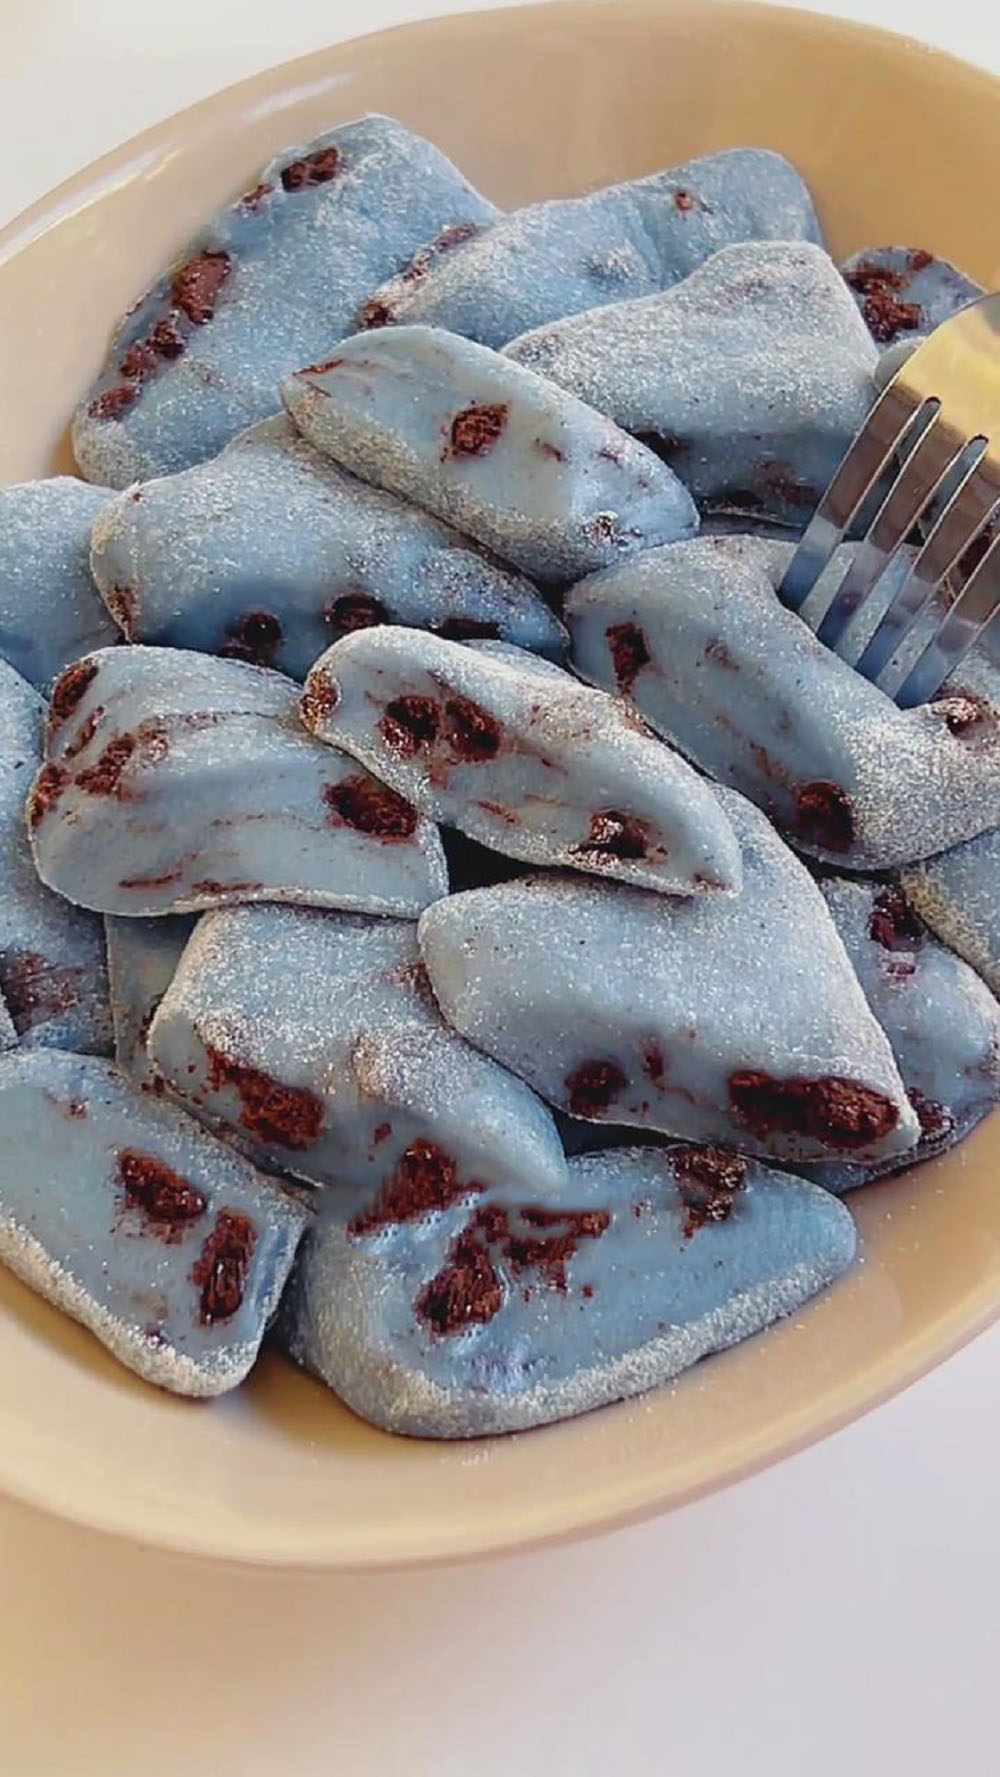
Tips for Making Oreo Mochi
Mixing the Batter:
When mixing the batter, make sure to stir it thoroughly to avoid any dry flour clumps. If you end up with any lumps, you can sift the batter to make it smoother and more refined, which will help create a better texture for your mochi.
Cooking the Mochi:
Always cook the mochi over medium-low heat, and keep stirring it constantly. This ensures even heating and prevents any parts from burning. If the dough starts to stick to the pan, that’s a sign it’s almost ready. At this point, you’ll want to speed up your stirring to make sure it cooks evenly and becomes smooth.
Stretching the Dough:
Pay attention to the dough’s temperature when stretching it. If it’s too hot, you might burn your hands; if it’s too cool, it will be too stiff to stretch properly. The dough should be warm but not hot to the touch. You can alternate hands while stretching, pulling the dough from one end to the other, and repeating the process a few times.
Whipping the Milk Foam:
Make sure the bowl you use to whip the cream is clean and dry, with no water or oil in it—otherwise, it could mess with the whipping process. Gradually add the sea salt condensed milk as the cream thickens, instead of adding it all at once. This way, you can adjust the sweetness and saltiness to your liking. The whipped cream should be firm enough to hold its shape but not too stiff, so it spreads smoothly on the mochi.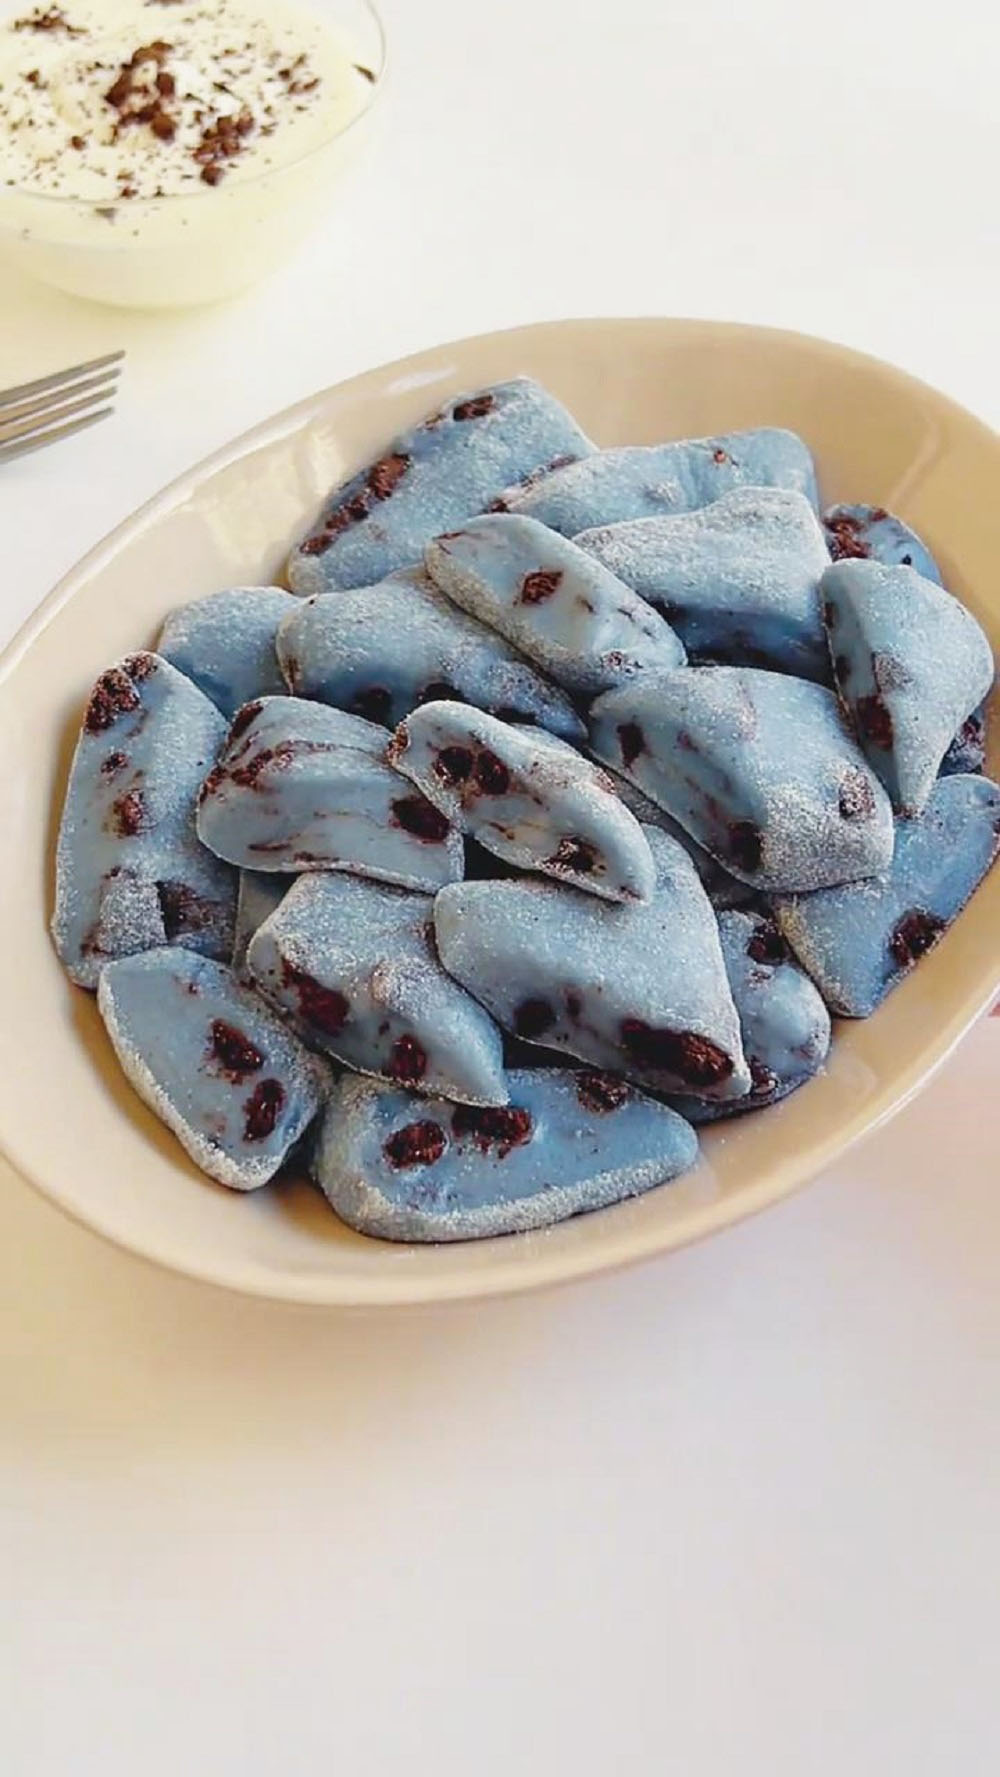
Ingredients:
- 150g glutinous rice flour (for a soft, chewy texture)
- 30g cornstarch (to smooth out the texture and prevent stickiness)
- 5g butterfly pea flower powder (optional, for a beautiful color)
- 25g granulated sugar (for sweetness)
- 25g corn oil (to help make the mochi softer)
- 230g whole milk (to adjust the batter consistency)
For the filling and decoration:
- 35g Oreo cookie crumbs (crushed plain Oreos, no filling, for a rich chocolate flavor)
- For the sea salt milk foam:
- 100-150g heavy cream (adjust for the desired richness)
- 2-3 tablespoons sea salt condensed milk (adjust to taste for the perfect balance of salty and sweet)
Instructions:
Make the Batter: In a large bowl, combine the 150g glutinous rice flour, 30g cornstarch, 5g butterfly pea flower powder, and 25g granulated sugar. Stir until well combined.
Add 25g corn oil and 230g whole milk, and whisk until the mixture is smooth and free of lumps. Scrape down the sides of the bowl to make sure everything is fully mixed.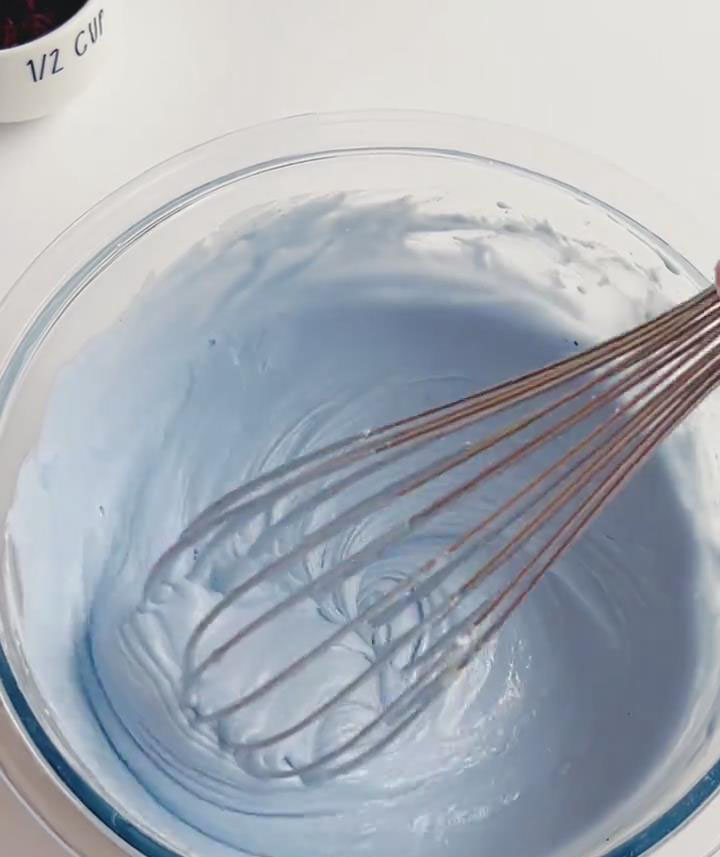
Cook the Mochi: Pour the batter into a non-stick pan and heat it over medium-low heat. Stir constantly to prevent it from sticking to the pan. As the batter heats up, it will thicken and turn into a dough-like consistency. Keep stirring for about 5-8 minutes, or until the dough becomes smooth and pulls away from the pan.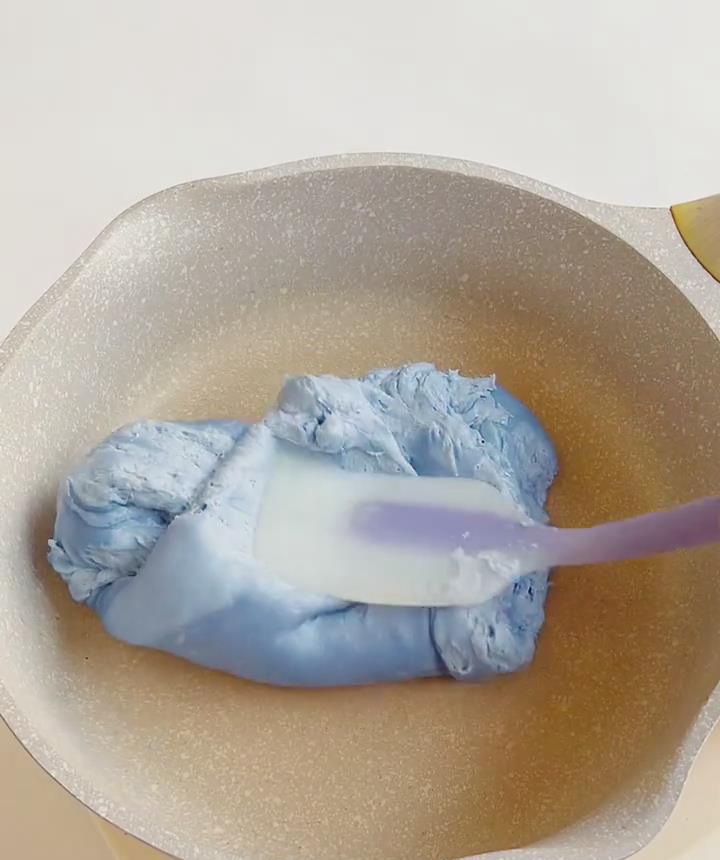
Stretch and Knead the Dough: Once the dough is ready, transfer it to a clean surface or bowl. Let it cool slightly until it’s just warm enough to handle. Then, stretch and pull the dough with your hands to make it more elastic. Continue until the dough is smooth and shiny.
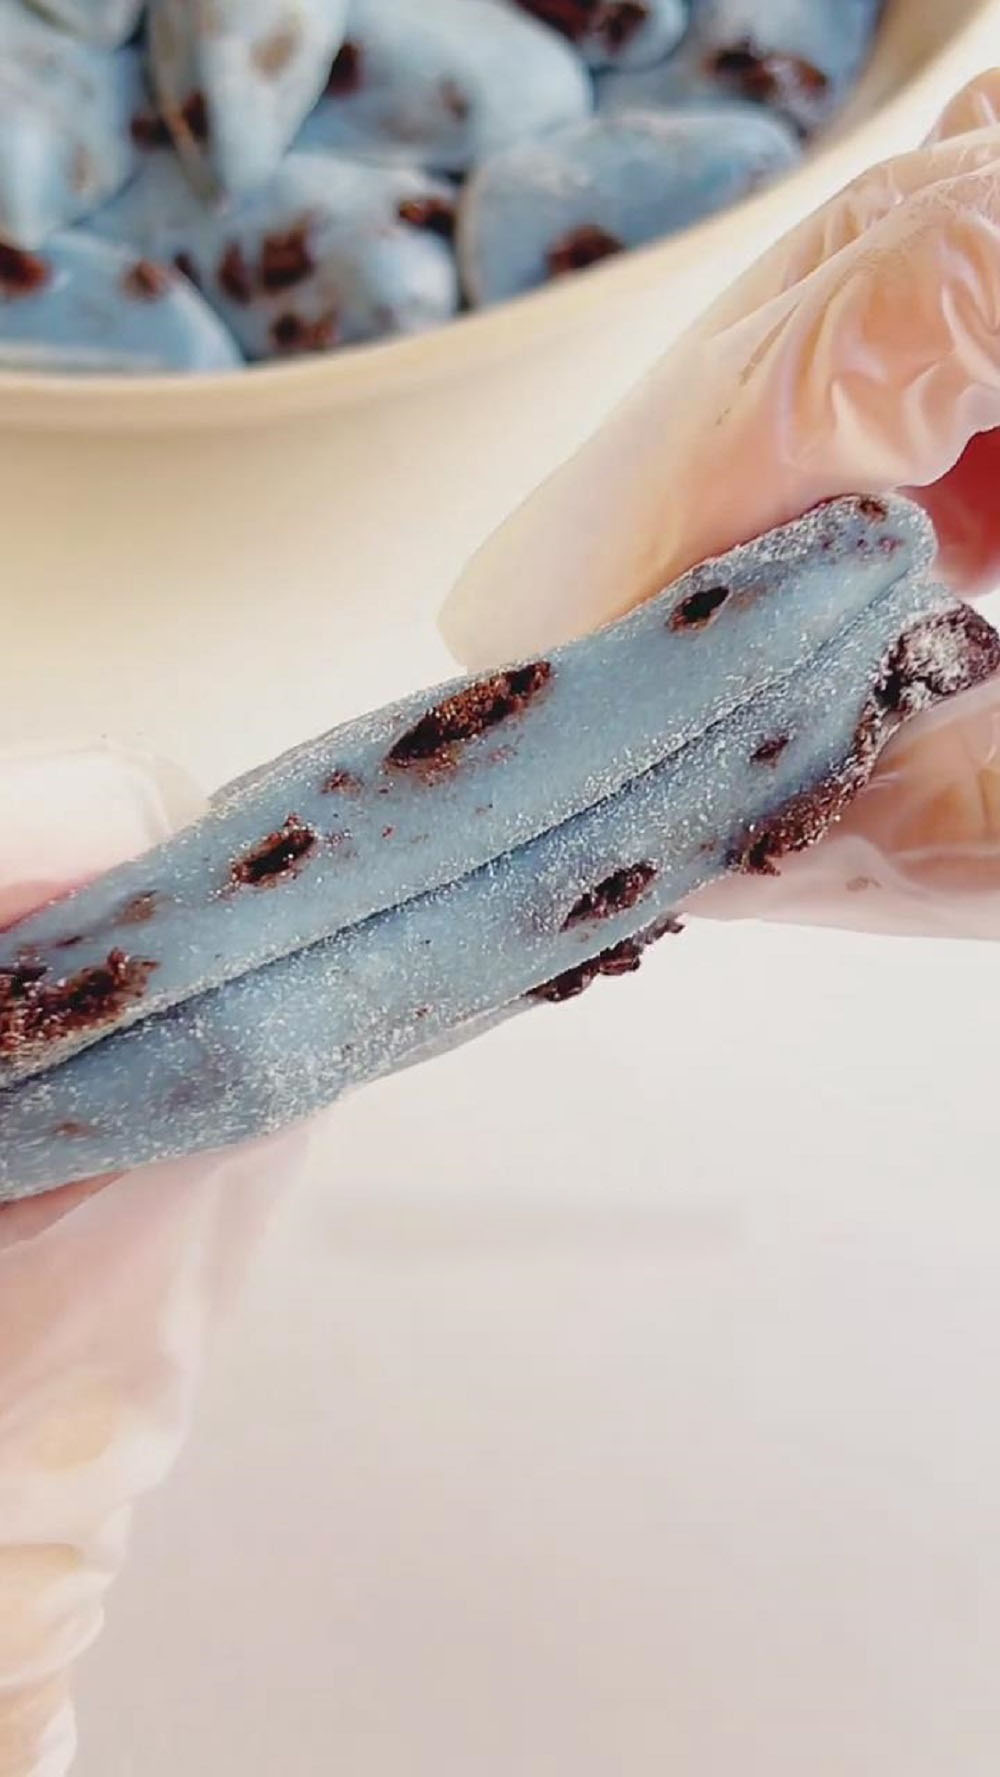
Add the Oreo Crumbs: Fold in the 35g crushed Oreo crumbs, making sure they’re evenly distributed throughout the dough. Once mixed, roll the dough into a log shape and cut it into even pieces. Set aside for later.
Make the Sea Salt Milk Foam: In a clean bowl, pour 100-150g heavy cream. Using a mixer, beat the cream on low speed, gradually adding 2-3 tablespoons of sea salt condensed milk. Continue to beat until stiff peaks form, but be careful not to over-beat the cream.
Assemble the Mochi: Place the mochi pieces on a plate. Spoon or pipe the sea salt milk foam onto each piece, making sure to cover them evenly. Optionally, sprinkle more crushed Oreo crumbs on top for extra flavor and decoration.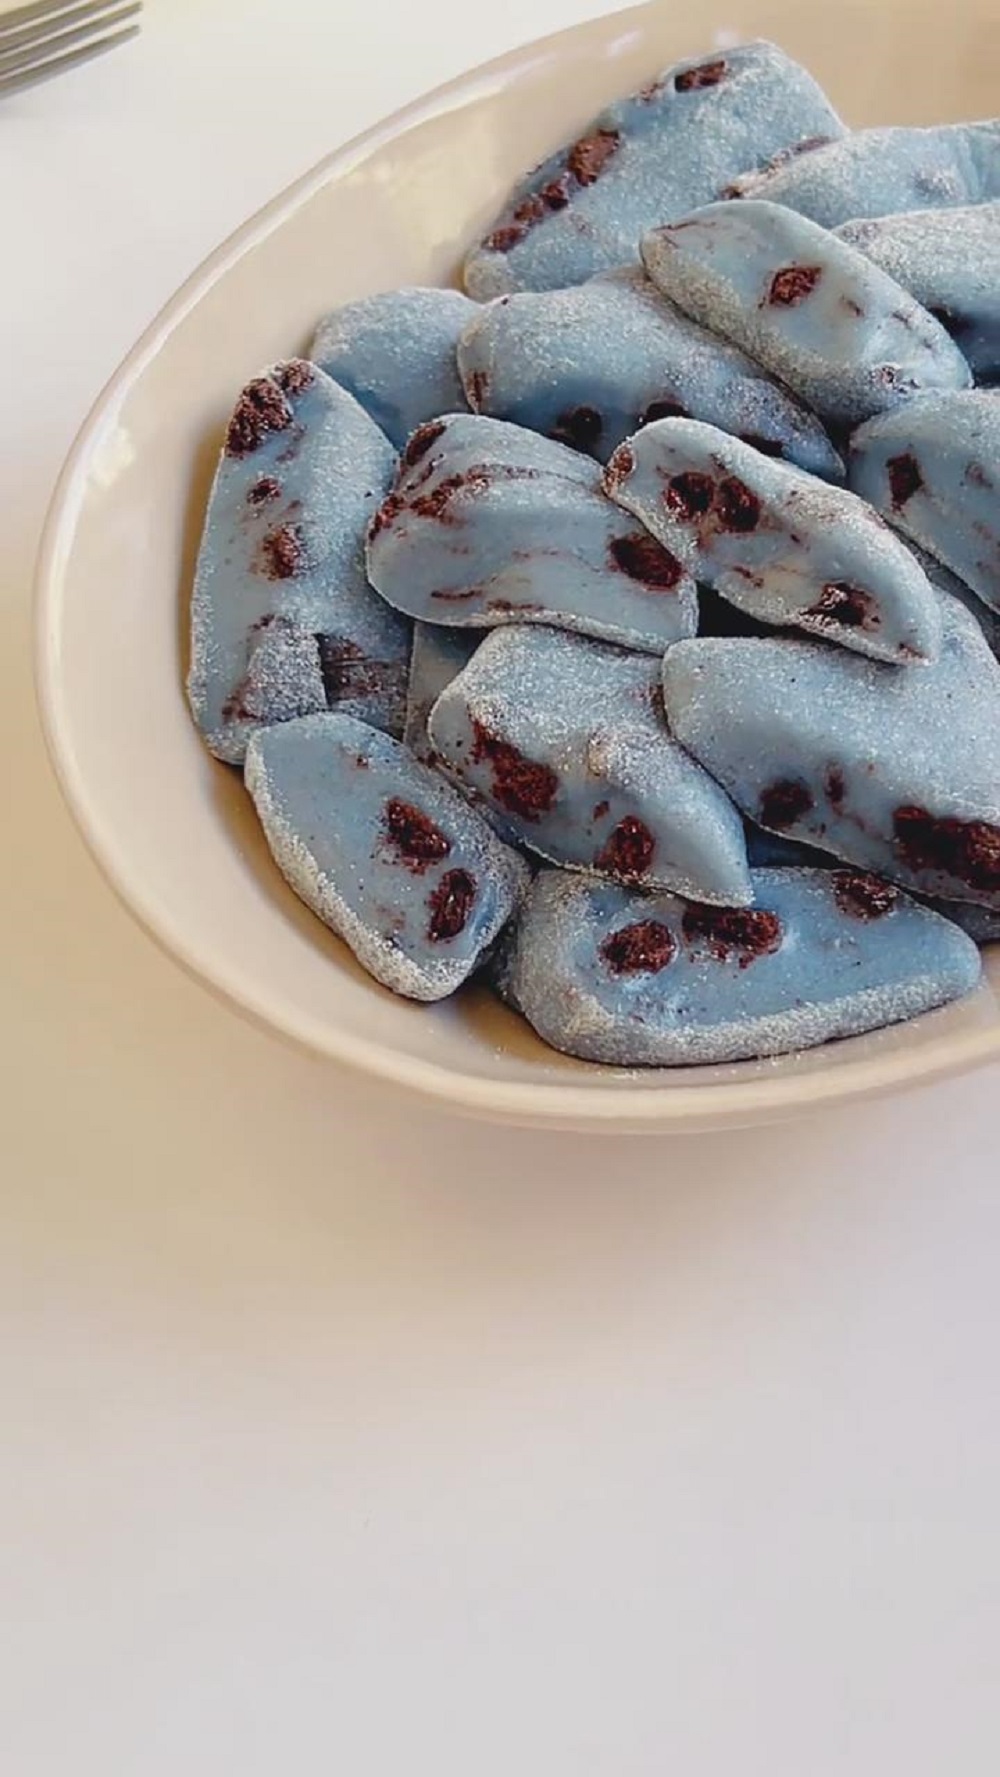
Frequently Asked Questions
Can I substitute the butterfly pea flower powder?
Yes, if you can’t find butterfly pea flower powder, you can either leave it out or use another type of food coloring to give your mochi a colorful twist.
What can I use instead of heavy cream for the milk foam?
You can use whipped coconut cream or any plant-based cream as a dairy-free alternative.
How do I store leftovers?
Keep any leftover mochi in an airtight container at room temperature for up to 2 days. If you want to keep them longer, store them in the fridge and reheat slightly before serving.

Oreo Mochi Recipe
Ingredients
- 150 g glutinous rice flour for a soft, chewy texture
- 30 g cornstarch to smooth out the texture and prevent stickiness
- 5 g butterfly pea flower powder optional, for a beautiful color
- 25 g granulated sugar for sweetness
- 25 g corn oil to help make the mochi softer
- 230 g whole milk to adjust the batter consistency
For the filling and decoration:
- 35 g Oreo cookie crumbs crushed plain Oreos, no filling, for a rich chocolate flavor
- For the sea salt milk foam:
- 100-150 g heavy cream adjust for the desired richness
- 2-3 tablespoons sea salt condensed milk adjust to taste for the perfect balance of salty and sweet
Instructions
- Make the Batter: In a large bowl, combine the 150g glutinous rice flour, 30g cornstarch, 5g butterfly pea flower powder, and 25g granulated sugar. Stir until well combined.
- Add 25g corn oil and 230g whole milk, and whisk until the mixture is smooth and free of lumps. Scrape down the sides of the bowl to make sure everything is fully mixed.
- Cook the Mochi: Pour the batter into a non-stick pan and heat it over medium-low heat. Stir constantly to prevent it from sticking to the pan. As the batter heats up, it will thicken and turn into a dough-like consistency. Keep stirring for about 5-8 minutes, or until the dough becomes smooth and pulls away from the pan.
- Stretch and Knead the Dough: Once the dough is ready, transfer it to a clean surface or bowl. Let it cool slightly until it's just warm enough to handle. Then, stretch and pull the dough with your hands to make it more elastic. Continue until the dough is smooth and shiny.
- Add the Oreo Crumbs: Fold in the 35g crushed Oreo crumbs, making sure they're evenly distributed throughout the dough. Once mixed, roll the dough into a log shape and cut it into even pieces. Set aside for later.
- Make the Sea Salt Milk Foam: In a clean bowl, pour 100-150g heavy cream. Using a mixer, beat the cream on low speed, gradually adding 2-3 tablespoons of sea salt condensed milk. Continue to beat until stiff peaks form, but be careful not to over-beat the cream.
- Assemble the Mochi: Place the mochi pieces on a plate. Spoon or pipe the sea salt milk foam onto each piece, making sure to cover them evenly. Optionally, sprinkle more crushed Oreo crumbs on top for extra flavor and decoration.
Leave a Reply