
These Oreo popsicles are ultra creamy, smooth, and completely free of ice crystals! Made with simple ingredients like milk, cream, and crushed Oreo cookies, this easy no-bake dessert comes together in just minutes. Perfect for summer treats, kids’ snacks, or a quick homemade ice cream fix.
Popsicles are something I make all the time in summer to keep my kids happy, and I love switching up the flavors.
This time, I used Oreo cookies because my family loves them.
Just like my Blueberry Popsicles, Milk Popsicles, and Strawberry Popsicles, I wanted to make Oreo popsicles with the simplest ingredients possible.
No complicated steps, no hard-to-find ingredients — just creamy, dreamy popsicles that taste like the childhood pudding pops we all remember.
If you’re looking for a more advanced version with an even richer texture, check out my Oreo ice cream bars.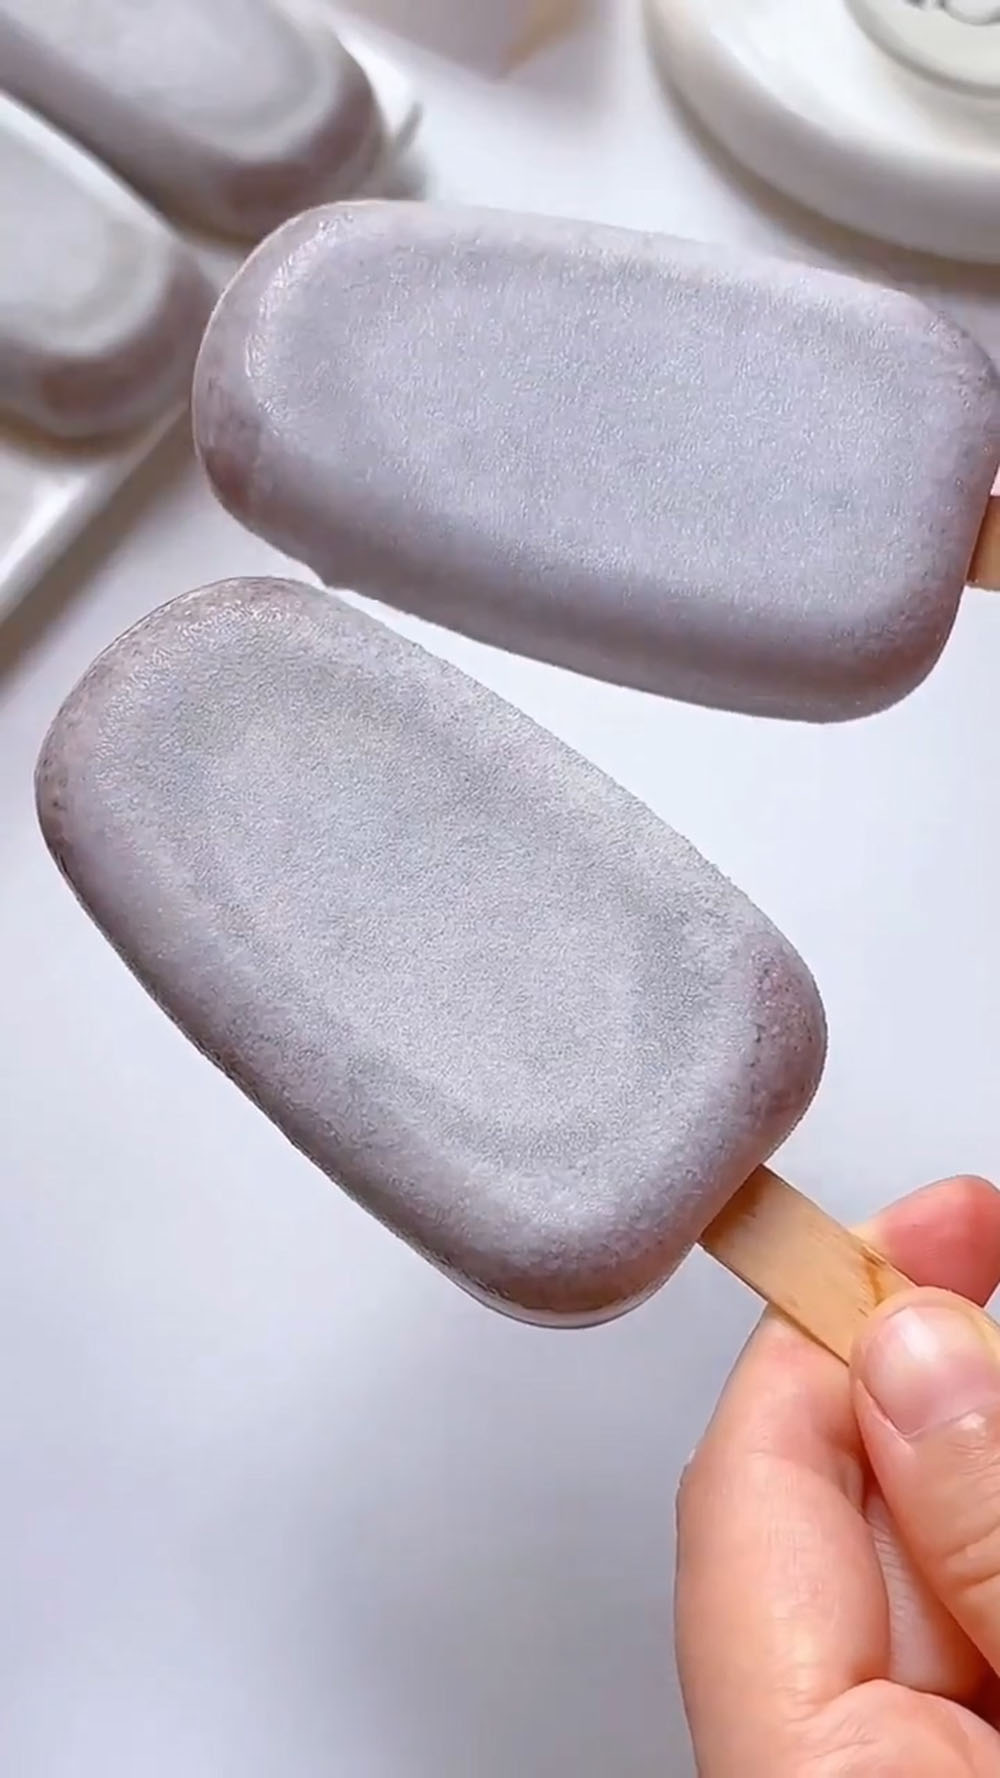
But for a quick, satisfying, no-fuss frozen treat, this one’s for you.
Why You’ll Love This Recipe
- Ready in just 5 minutes of active time — mix, cook, pour, freeze. That’s it!
- No ice crystals — thanks to the cornstarch and careful cooking method, these popsicles turn out smooth and creamy, not icy or grainy.
- No oven, no fancy equipment — you don’t need an ice cream maker, a blow torch, or any special tools.
- No heavy cream needed — wait, yes it’s in the recipe! But unlike many popsicle recipes that rely entirely on heavy cream for creaminess, this one uses a smart combination of milk, a smaller amount of cream, milk powder, and cornstarch to achieve that perfect texture without breaking the bank.
- Tastes like an upgraded childhood favorite — that nostalgic milk pudding flavor meets the crunchy, chocolatey bite of Oreo.
- Beginner-friendly and foolproof — follow the steps exactly as written, and you’ll succeed on your very first try.
Ingredients
- Milk — Whole milk works best here for the creamiest result, but you can use 2% if that’s what you have. I recommend avoiding skim milk, as it won’t give you that rich, smooth texture we’re after.
- Heavy cream — This adds just enough richness to keep the popsicles creamy without making them heavy. You don’t need a lot — that’s the beauty of this recipe.
- White sugar — Just 20g gives a pleasant sweetness without overpowering the milky flavor or the Oreo cookies. You can adjust slightly to taste if you prefer a sweeter pop.
- Milk powder — This is the secret weapon for creaminess without extra liquid. Milk powder adds concentrated milk solids that prevent ice crystals and give that nostalgic “pudding pop” flavor. Don’t skip it!
- Cornstarch — The magic ingredient that thickens the mixture and guarantees a smooth, ice-crystal-free texture. It also helps the popsicles hold their shape once frozen.
- Crushed Oreos (cream filling removed) — You want just the crunchy cookie part here. The cream filling would make the texture weird and too sweet, so scrape it off before crushing. Leave the pieces fairly small but not powdery — you want little crunchy bits throughout each bite.
How to Make Oreo Little Pudding Popsicles
1. Combine the dry and wet ingredients
In a medium bowl, add the milk, heavy cream, white sugar, milk powder, and cornstarch. Whisk vigorously until everything is completely dissolved and there are no lumps whatsoever. The mixture should look smooth and uniform.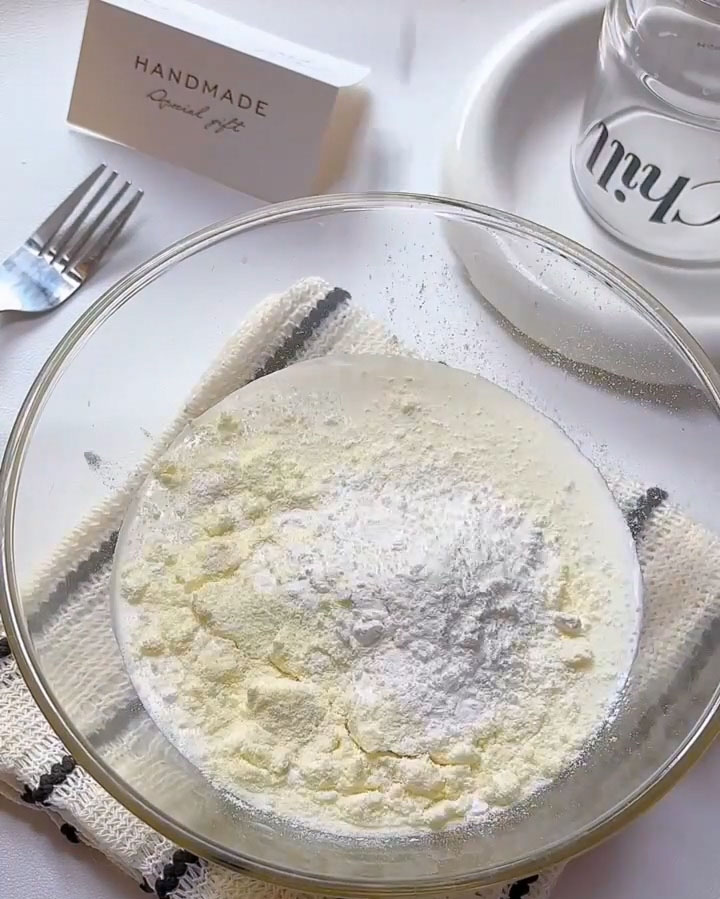
2. Cook the mixture
Pour the mixture into a non-stick pan. Turn the heat to low. Cook the mixture while stirring continuously with a spatula or whisk. Do not walk away! Low heat and constant stirring prevent the bottom from burning and the mixture from forming lumps. Keep stirring until the mixture thickens and becomes silky smooth, like a thin pudding. This usually takes about 3-5 minutes. Once it’s thick and coats the back of your spatula, turn off the heat immediately.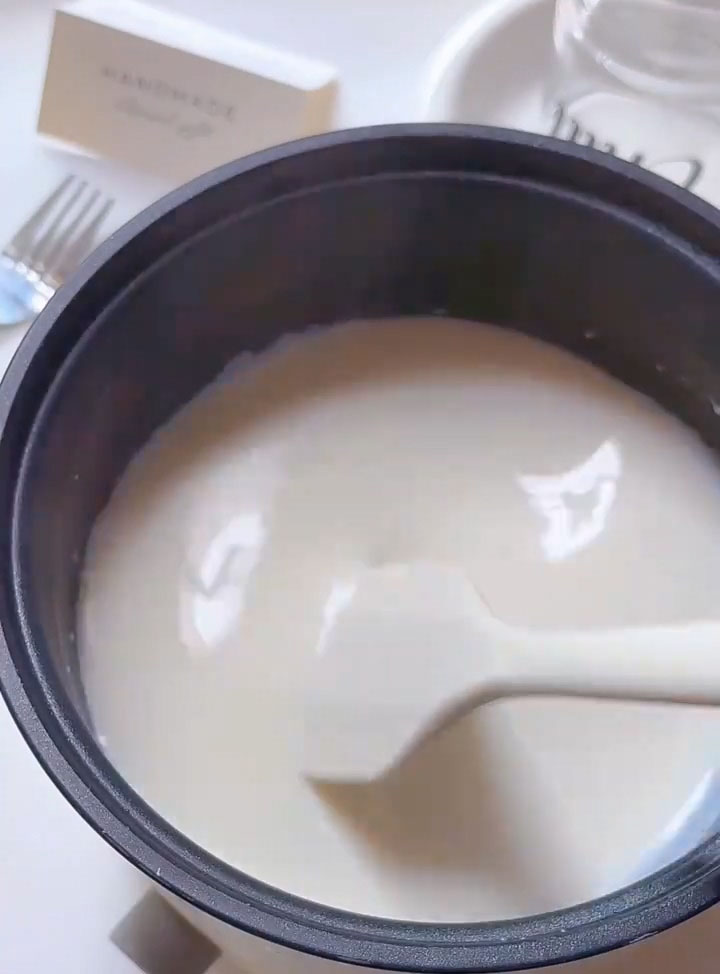
3. Add the Oreo crumbs
Remove the pan from the heat. Add your crushed Oreo pieces (cream removed) to the warm mixture. Stir until they are evenly distributed throughout. Set the mixture aside and let it cool completely to room temperature. This step is important — don’t skip it!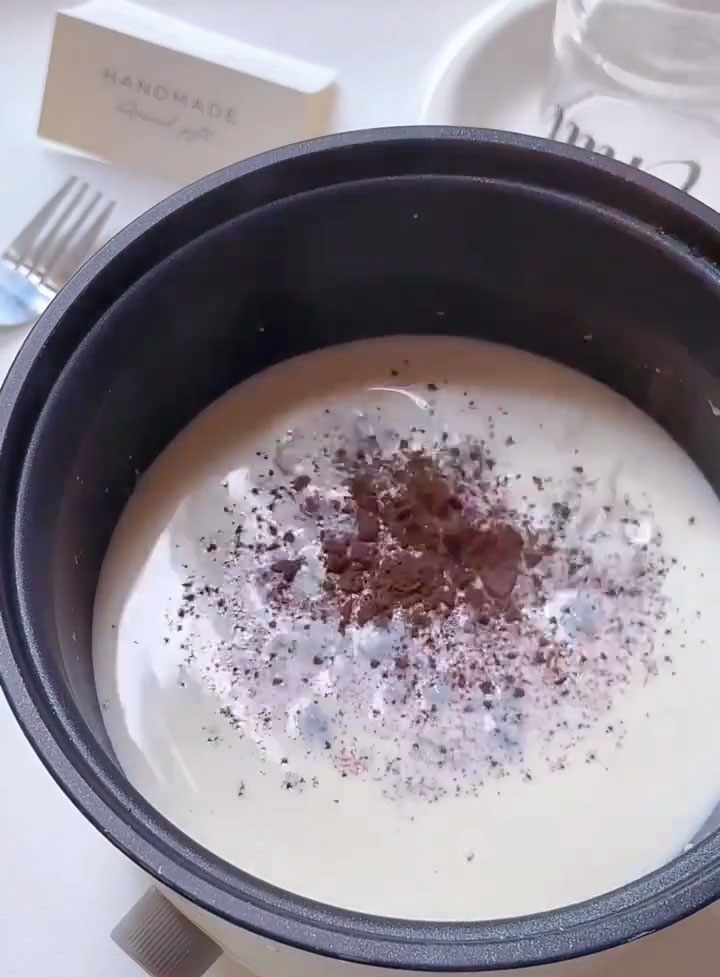
4. Cool before pouring
Allow the mixture to come to room temperature naturally. Do not pour warm or hot liquid into your popsicle molds — it can warp plastic molds, create condensation that turns into ice crystals, and cause uneven freezing. Patience here pays off.
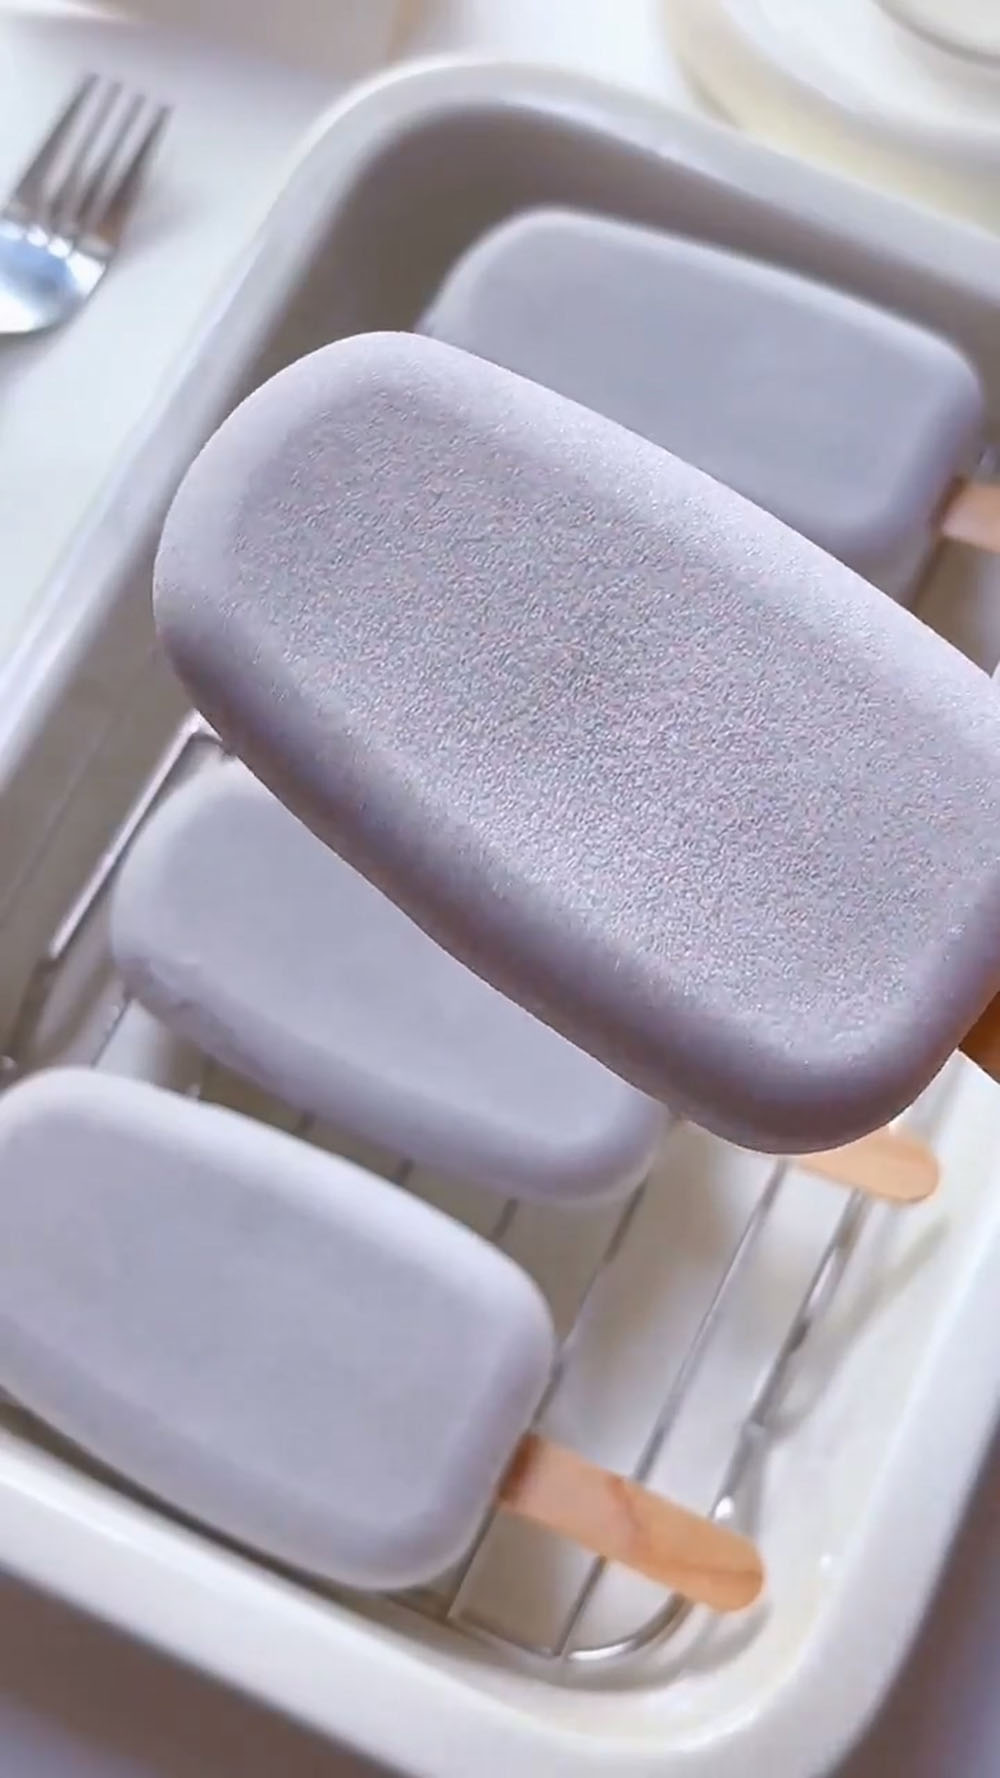
5. Pour into molds and freeze
Once cooled, pour the mixture evenly into your popsicle molds. Cover with the lid (if your molds have one), and place them in the freezer. Freeze for at least 4 hours, but overnight is even better. The popsicles need to be completely solid from center to edge.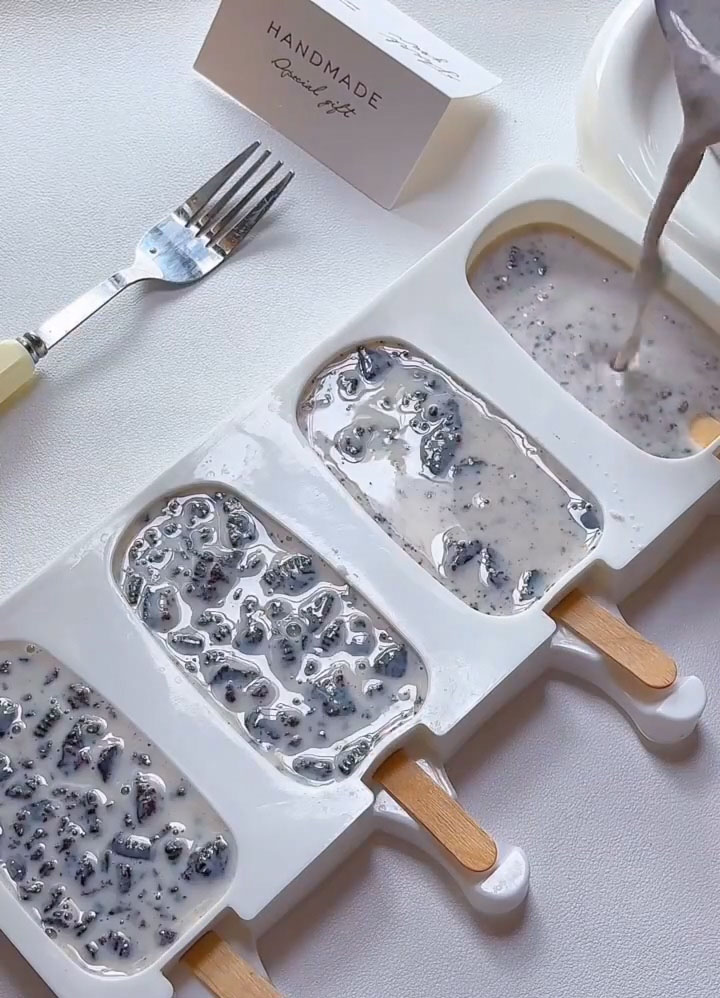
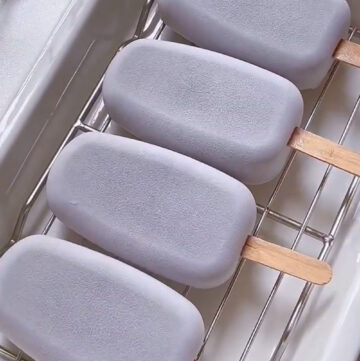
6. Unmold and enjoy
When you’re ready to enjoy your popsicles, remove the molds from the freezer. Run the outside of the molds under warm water for 10-15 seconds — just enough to loosen them. Gently pull the popsicles out. Serve immediately. If you’re using the same silicone molds as me, just unmold directly — no need to run them under water.
Storage
These Oreo popsicles can be stored in their molds, covered tightly, in the freezer for up to 2-3 weeks. Once unmolded, you can wrap each popsicle individually in plastic wrap or place them in an airtight freezer bag for up to a month. They’re best enjoyed within the first week for optimal texture and flavor.
Tips & Tricks
- Stir constantly over low heat — This is the most important tip in the entire recipe. High heat or lazy stirring will cause the milk mixture to scorch on the bottom, leaving you with burnt bits and lumps. Low and slow is the way.
- Add the Oreo crumbs at the very end — Adding them too early (while cooking) will turn them into a mushy, pasty mess. By stirring them in after you turn off the heat, you preserve that wonderful crunchy contrast against the creamy popsicle.
- Let the mixture cool completely before pouring into molds — I know it’s tempting to rush, but warm liquid + cold freezer = condensation = ice crystals. Plus, hot liquid can warp plastic molds or cause them to crack. Be patient and let it come to room temperature.
- Remove the Oreo cream filling — The white cream inside Oreos is soft and sweet, but it doesn’t freeze well in this context. It can turn gummy and create an odd texture. Take the extra minute to scrape it off — you’ll be glad you did.
- Don’t overfill the molds — Leave a little space at the top because the mixture will expand slightly as it freezes. Overfilled molds can be impossible to open or may crack.
- Use a non-stick pan — This recipe uses milk and cornstarch, both of which love to stick to regular pans. A good non-stick pan makes cleanup effortless and prevents burning.
Frequently Asked Questions
Why do my popsicles have ice crystals?
Ice crystals usually form for one of three reasons: you didn’t stir constantly while cooking (the cornstarch didn’t activate properly), you poured warm mixture into the molds (causing condensation), or your freezer temperature fluctuates too much. Follow the tips above and you’ll get smooth, creamy popsicles every time.
Can I use Double Stuf Oreos?
You can, but you’ll still want to remove the cream filling. Double Stuf has even more cream, which means more work scraping it off. Regular Oreos are actually better for this recipe.
Can I make these dairy-free?
This specific recipe relies on milk, heavy cream, and milk powder for its texture. A dairy-free version would require significant testing and different ratios, so I don’t recommend substituting ingredients here. Check out my other popsicle recipes for dairy-free options.
How finely should I crush the Oreos?
Aim for small pieces — think the size of chocolate chips or slightly smaller. You don’t want Oreo dust (that disappears into the mixture), and you don’t want large chunks (too hard to bite into when frozen). A happy medium gives you crunch in every bite.
My mixture was lumpy while cooking — what went wrong?
This happens when you didn’t whisk the dry ingredients (especially cornstarch and milk powder) thoroughly enough at the beginning, or when you cooked over heat that was too high. Next time, whisk the cold ingredients extra well before turning on the heat, and keep that flame low.
Can I add other mix-ins?
Absolutely! Once you master this base recipe, try adding mini chocolate chips, a swirl of chocolate sauce, or even a teaspoon of vanilla extract to the base mixture. Just keep the total amount of add-ins reasonable so the popsicles still freeze properly.
How do I know when the mixture is thick enough?
You’re looking for a consistency similar to a thin pudding or a thick custard — it should coat the back of a spatula and slowly drip off rather than running off quickly. If you drag your finger across the coated spatula, it should leave a clear line that doesn’t immediately fill back in.
Creamy Oreo Popsicles – Easy No-Oven Summer Treat
Ingredients
- 200 g milk
- 160 g heavy cream
- 20 g white sugar
- 35 g milk powder
- 10 g cornstarch
- Crushed Oreos cream removed, as needed
Instructions
Combine the dry and wet ingredients
- In a medium bowl, add the milk, heavy cream, white sugar, milk powder, and cornstarch. Whisk vigorously until everything is completely dissolved and there are no lumps whatsoever. The mixture should look smooth and uniform.
Cook the mixture
- Pour the mixture into a non-stick pan. Turn the heat to low. Cook the mixture while stirring continuously with a spatula or whisk. Do not walk away! Low heat and constant stirring prevent the bottom from burning and the mixture from forming lumps. Keep stirring until the mixture thickens and becomes silky smooth, like a thin pudding. This usually takes about 3-5 minutes. Once it's thick and coats the back of your spatula, turn off the heat immediately.
Add the Oreo crumbs
- Remove the pan from the heat. Add your crushed Oreo pieces (cream removed) to the warm mixture. Stir until they are evenly distributed throughout. Set the mixture aside and let it cool completely to room temperature. This step is important — don't skip it!
Cool before pouring
- Allow the mixture to come to room temperature naturally. Do not pour warm or hot liquid into your popsicle molds — it can warp plastic molds, create condensation that turns into ice crystals, and cause uneven freezing. Patience here pays off.
Pour into molds and freeze
- Once cooled, pour the mixture evenly into your popsicle molds. Cover with the lid (if your molds have one), and place them in the freezer. Freeze for at least 4 hours, but overnight is even better. The popsicles need to be completely solid from center to edge.
Unmold and enjoy
- When you're ready to enjoy your popsicles, remove the molds from the freezer. Run the outside of the molds under warm water for 10-15 seconds — just enough to loosen them. Gently pull the popsicles out. Serve immediately. If you're using the same silicone molds as me, just unmold directly — no need to run them under water.
Leave a Reply