
This Oreo Peanut Mochi is one of those recipes that’s simple, delicious, and always gets my family excited when I bring it to the table.
Mochi: A New Family Favorite with Endless Possibilities
While mochi originates from Japan, it has quickly become a beloved treat in my household.
What I find most exciting about mochi is its incredible versatility—you can experiment with different types of wrappers and an endless variety of fillings to create unique flavor combinations.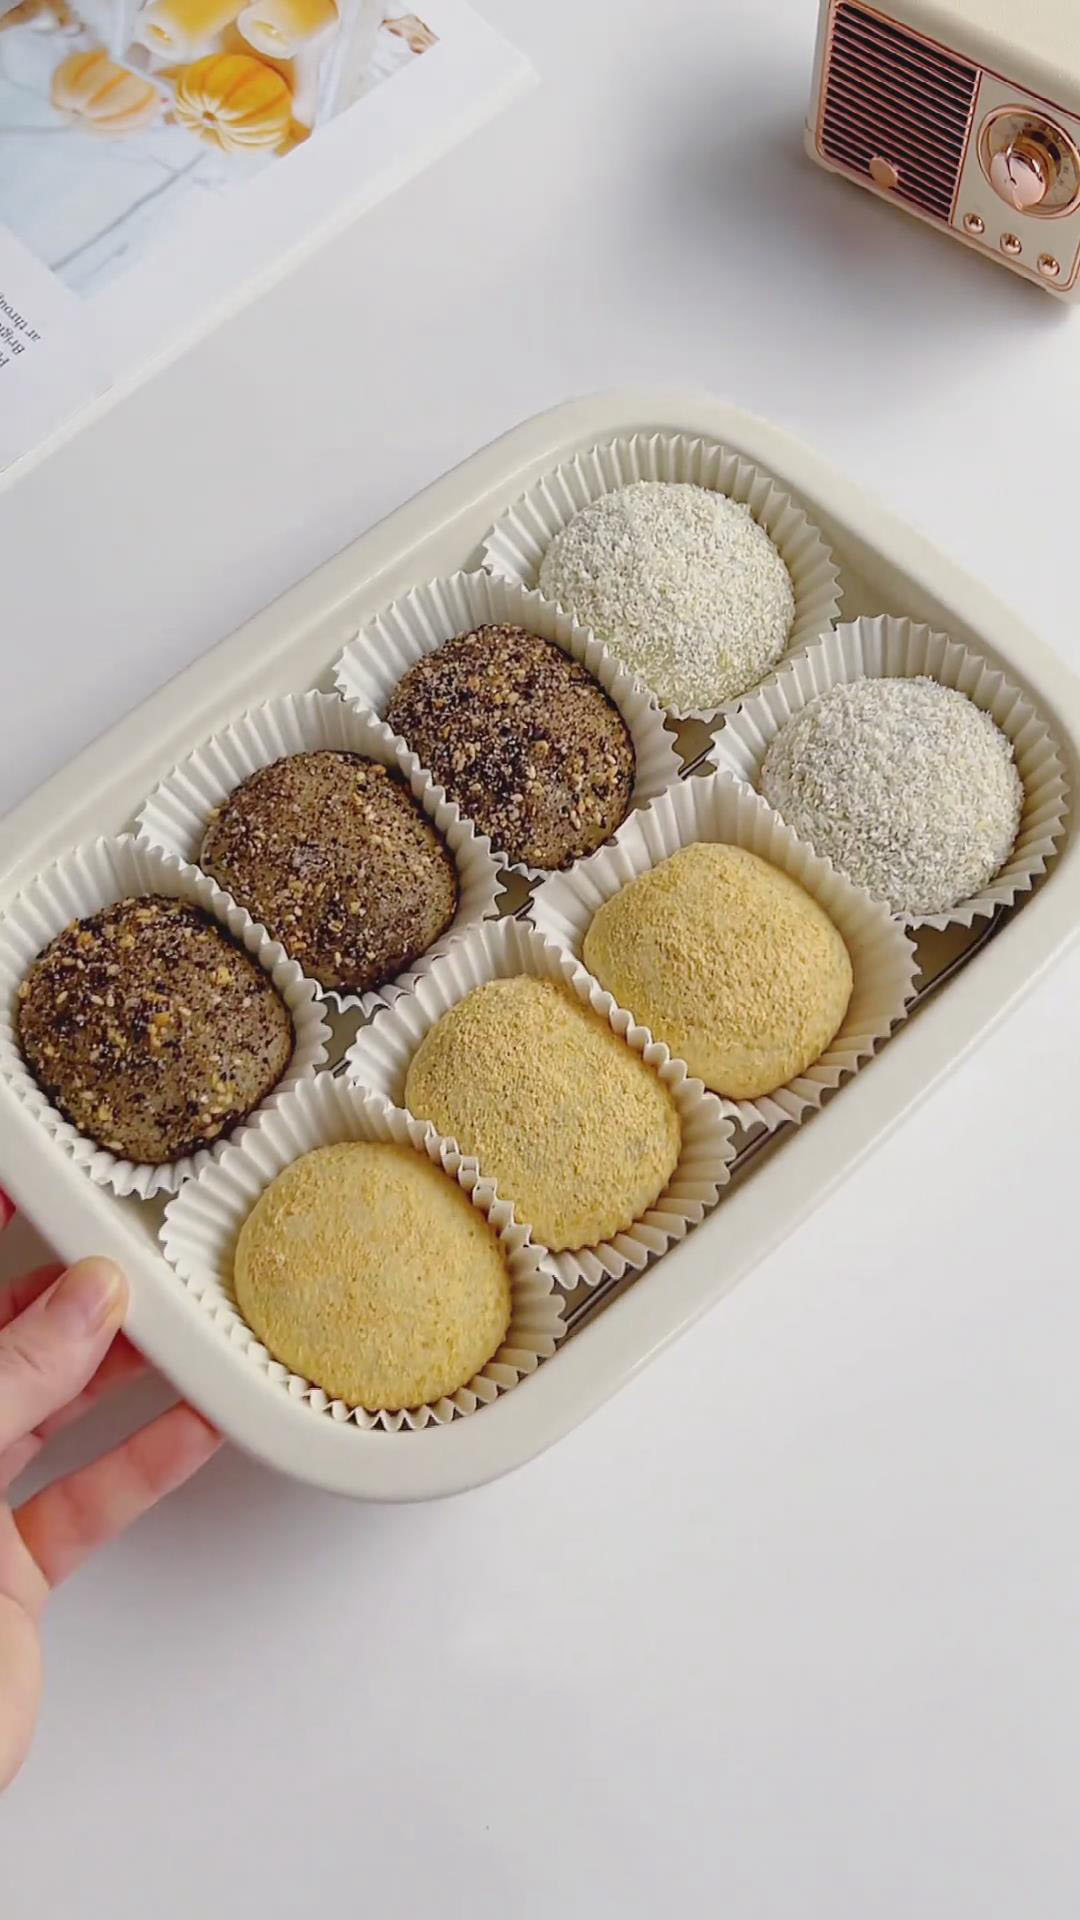
If you’re looking for inspiration, here are some popular mochi variations I’ve shared previously:
- Osmanthus Mochi
- Matcha Mochi Bites
- Brown Sugar Pearl Mochi
- Sweet Potato Mochi with Cheese
- Watermelon Mochi Bites
- Passionfruit Mochi
Coating Options and Preparation Tips
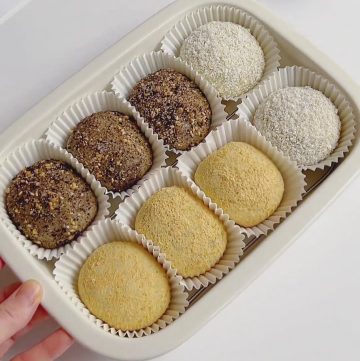
For coating the mochi, I typically use one of three materials: soybean flour, coconut flakes, or reserved filling mixture. You can choose just one option, or even use toasted glutinous rice flour as an alternative.
How to Toast Glutinous Rice Flour:
Simply place the flour in a dry pan over low heat. Stir continuously for 3-5 minutes until it turns lightly golden and develops a nutty aroma. Allow it to cool completely before using.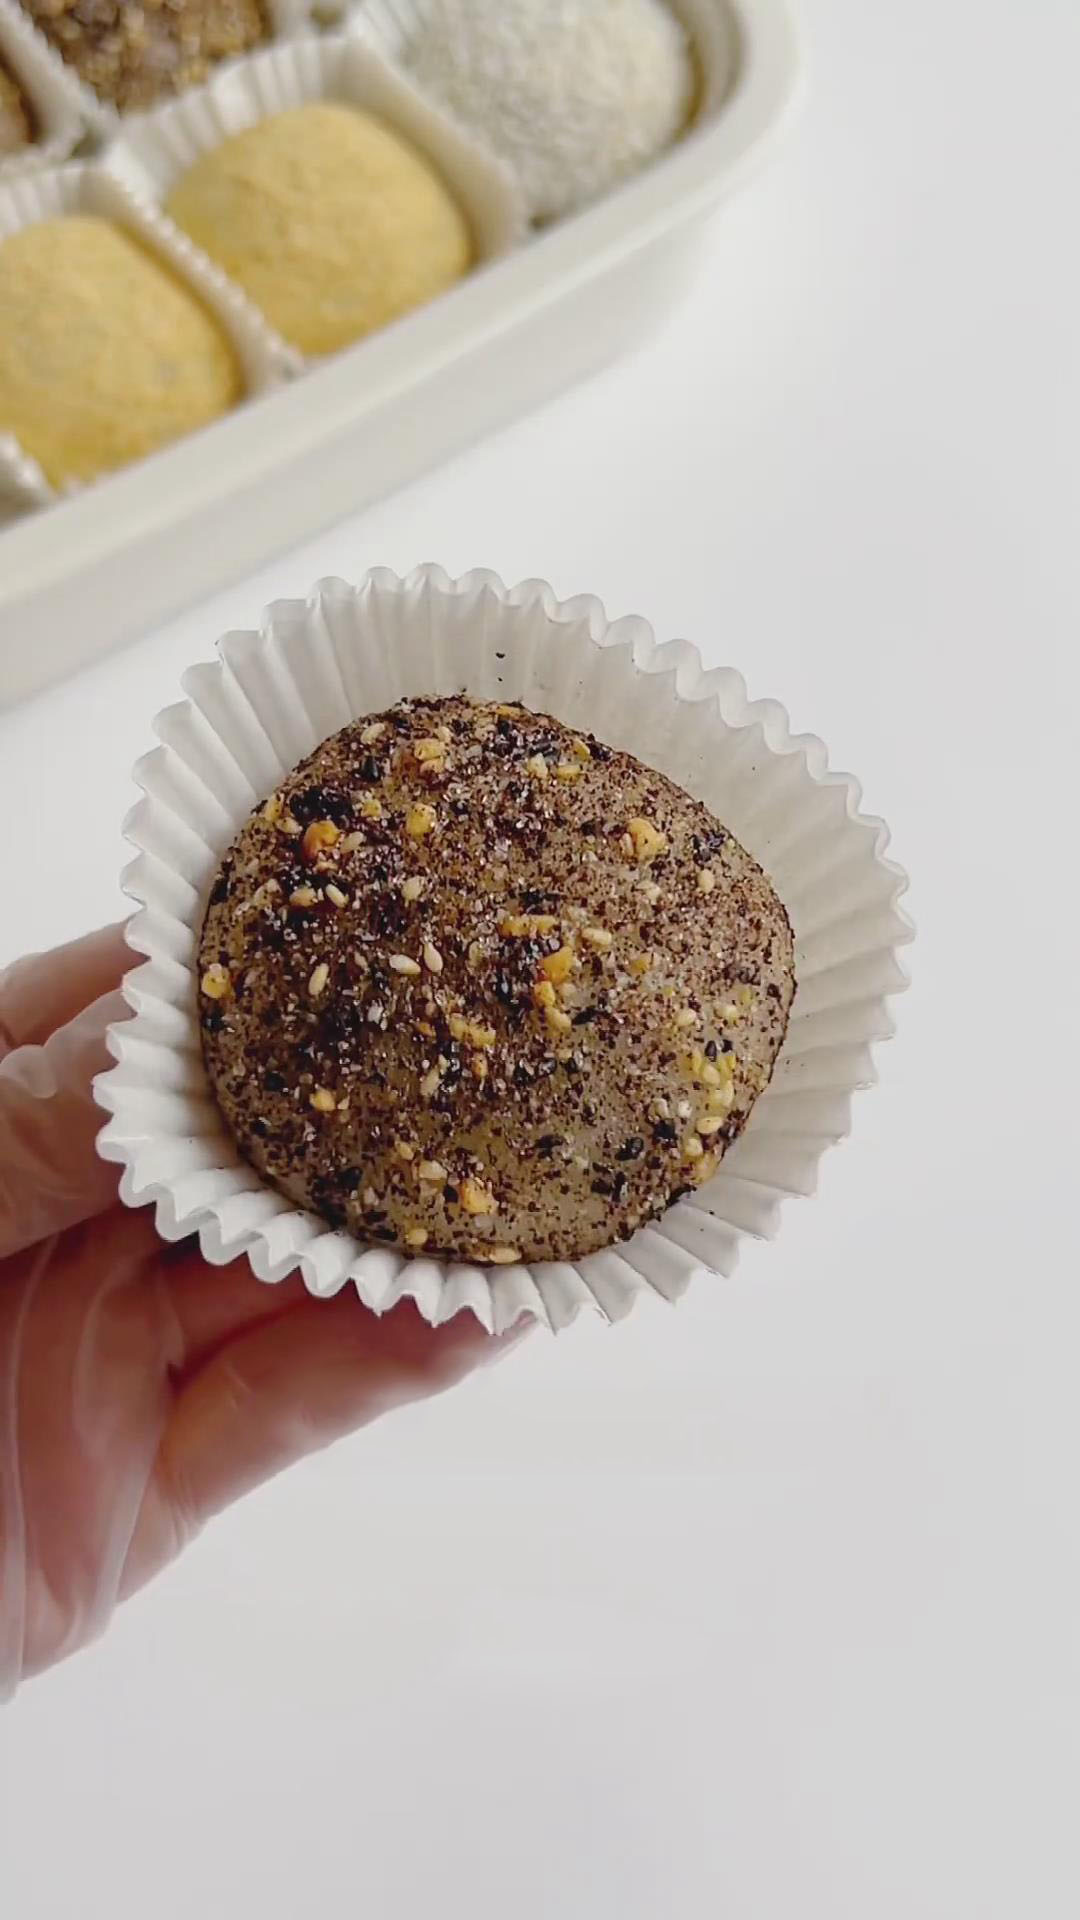
Filling Preparation Notes
For the filling, I usually remove the white cream and use just the dark cookie biscuits to avoid excess sweetness. However, the version with cream can also work well—just note that it might make the filling slightly sweeter.
Important Blending Tip:
When processing the filling ingredients, be careful not to over-blend. The mixture should retain some texture and granularity to maintain a pleasant crunchy mouthfeel. Pulse the food processor briefly rather than running it continuously.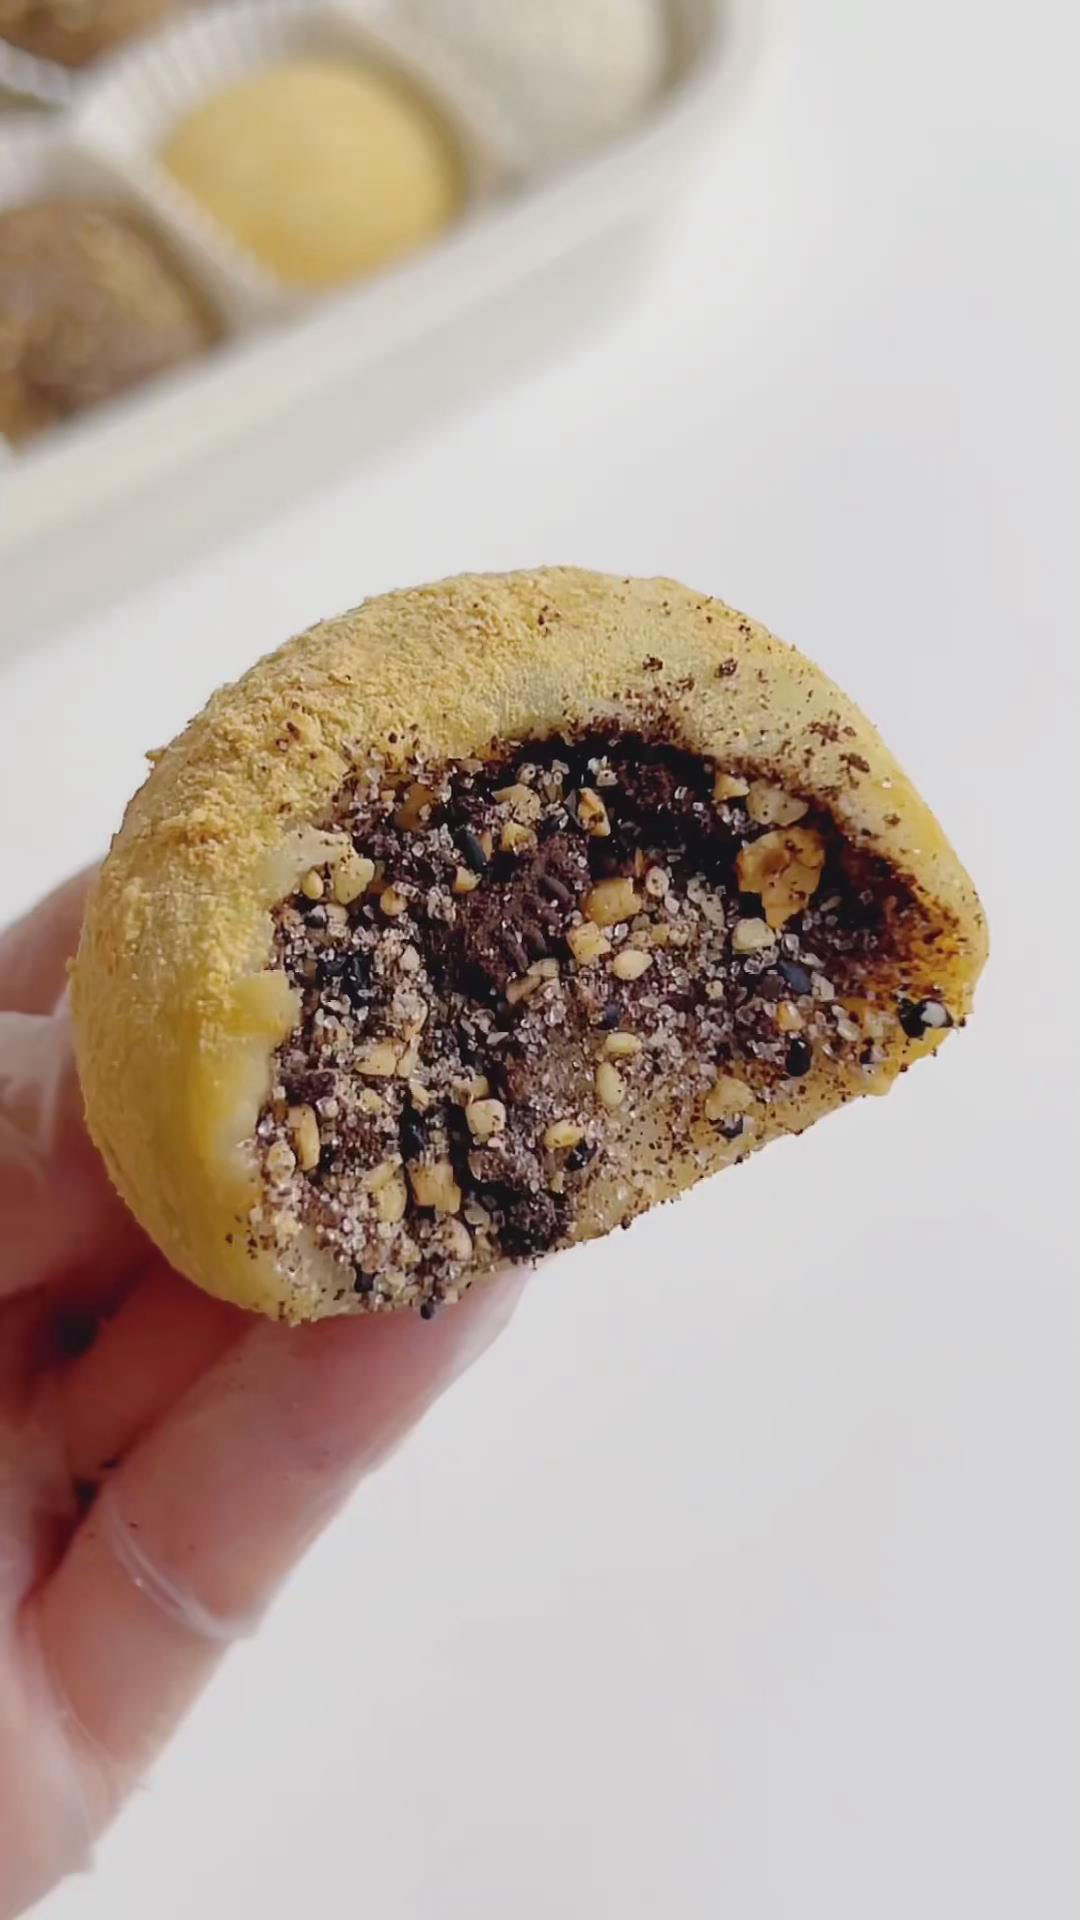
Tips for Wrapping Peanut Mochi
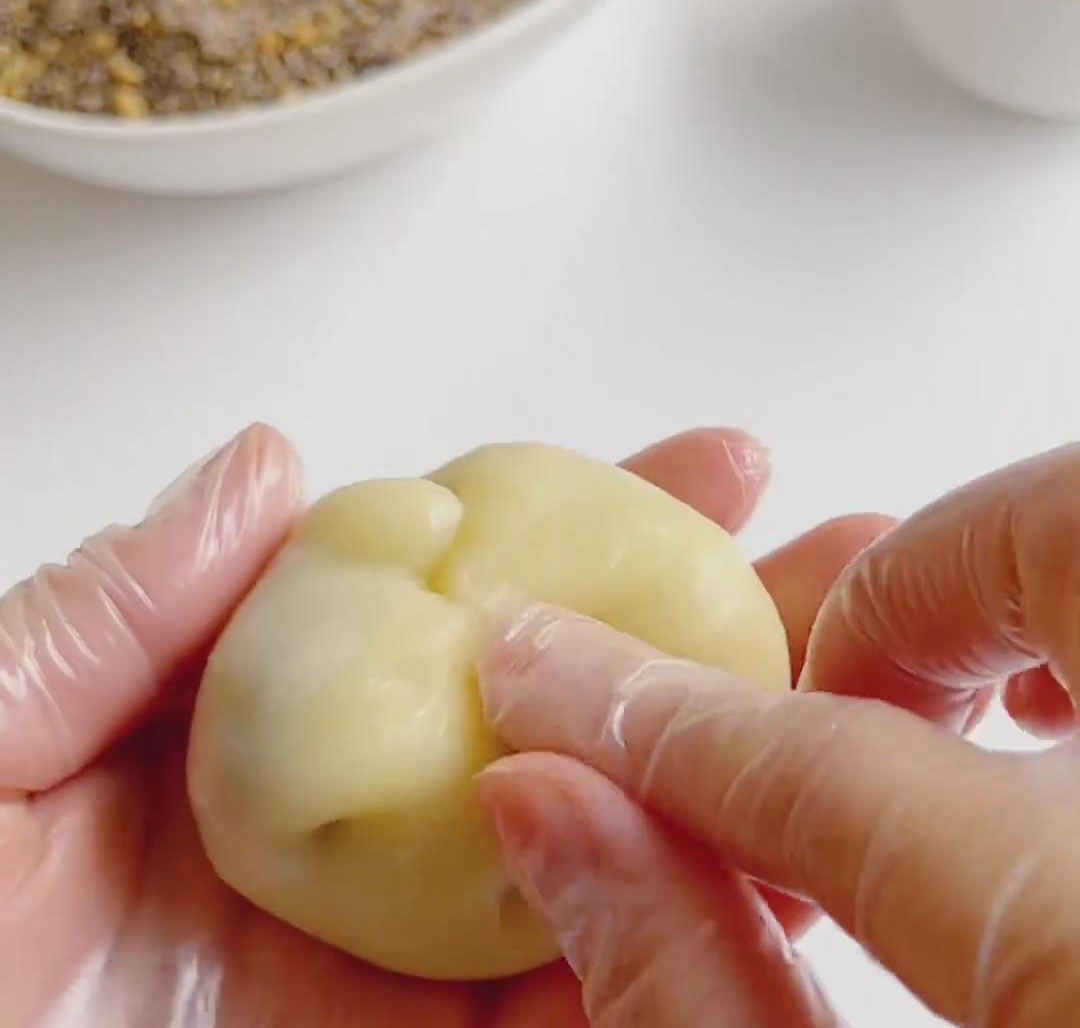
If you’ve ever made mochi before, you’ll know wrapping is not as intimidating as it seems.
In fact, peanut mochi is even easier to wrap than something like Strawberry Mochi, where you need to shape the dough into a small “bowl” to hold the fruit. With peanut mochi, there’s no need for tools or special equipment.
Even if you don’t have a rolling pin, you can do what I often do: simply press the dough flat with your palms, gently stretch it into a round disc, and it’s ready for wrapping.
Place the filling ball in the center, fold the edges over, and pinch to seal. It’s simple, satisfying, and doesn’t take long to get the hang of.
Why You‘ll Love This Recipe
- Soft, chewy mochi skin with a silky texture.
- Nutty, chocolatey filling with just the right crunch.
- Perfectly sweet but not overwhelming.
- Can be made ahead and served chilled for a refreshing bite.
- Fun to make at home—great for family or gatherings.
Ingredients
Mochi Skin
- 200g glutinous rice flour (wet-milled preferred for smooth texture; avoid dry-milled)
- 30g cornstarch (adds elasticity and prevents tearing; do not substitute)
- 30g sugar (adjust ±5g for sweetness)
- 250ml whole milk (or coconut milk if lactose intolerant)
- 25g unsalted butter (softened; adds smoothness, prevents stickiness)
- roasted soybean flour / desiccated coconut / ground filling (as needed, for coating and anti-stick)
Filling
- 80g roasted peanuts (peeled and crushed; for crunch and aroma)
- 10g roasted black sesame
- 15g roasted white sesame
- 50g sugar (adjust ±10g to taste)
- 30g Oreo cookies (cream removed, only biscuits; crushed for chocolate flavor and texture)
Instructions
Step 1: Make the Filling
Place peanuts, sesame seeds, Oreo biscuits, and sugar in a food processor.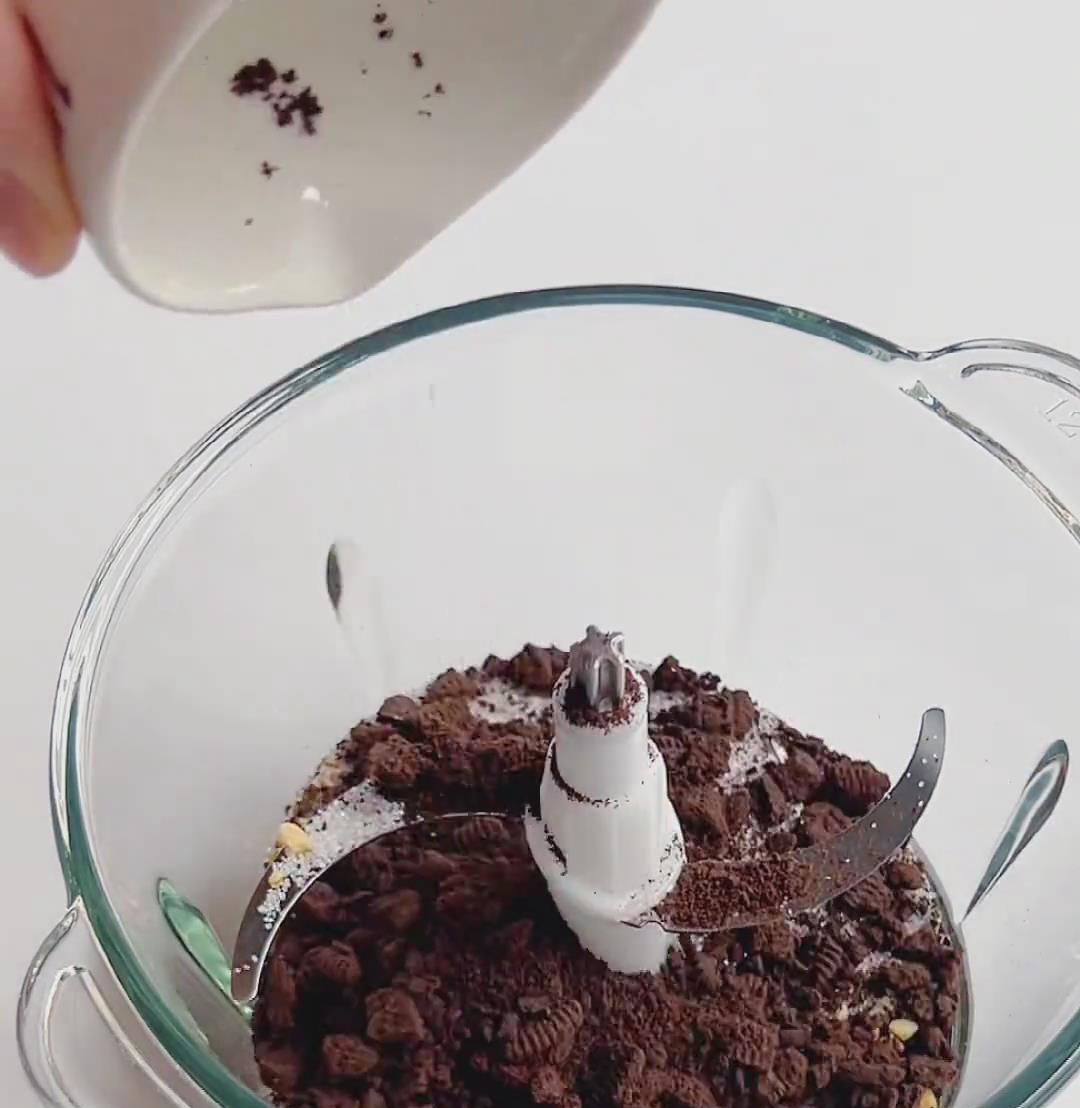
Pulse 10–15 seconds until coarse (do not over-process; keep texture).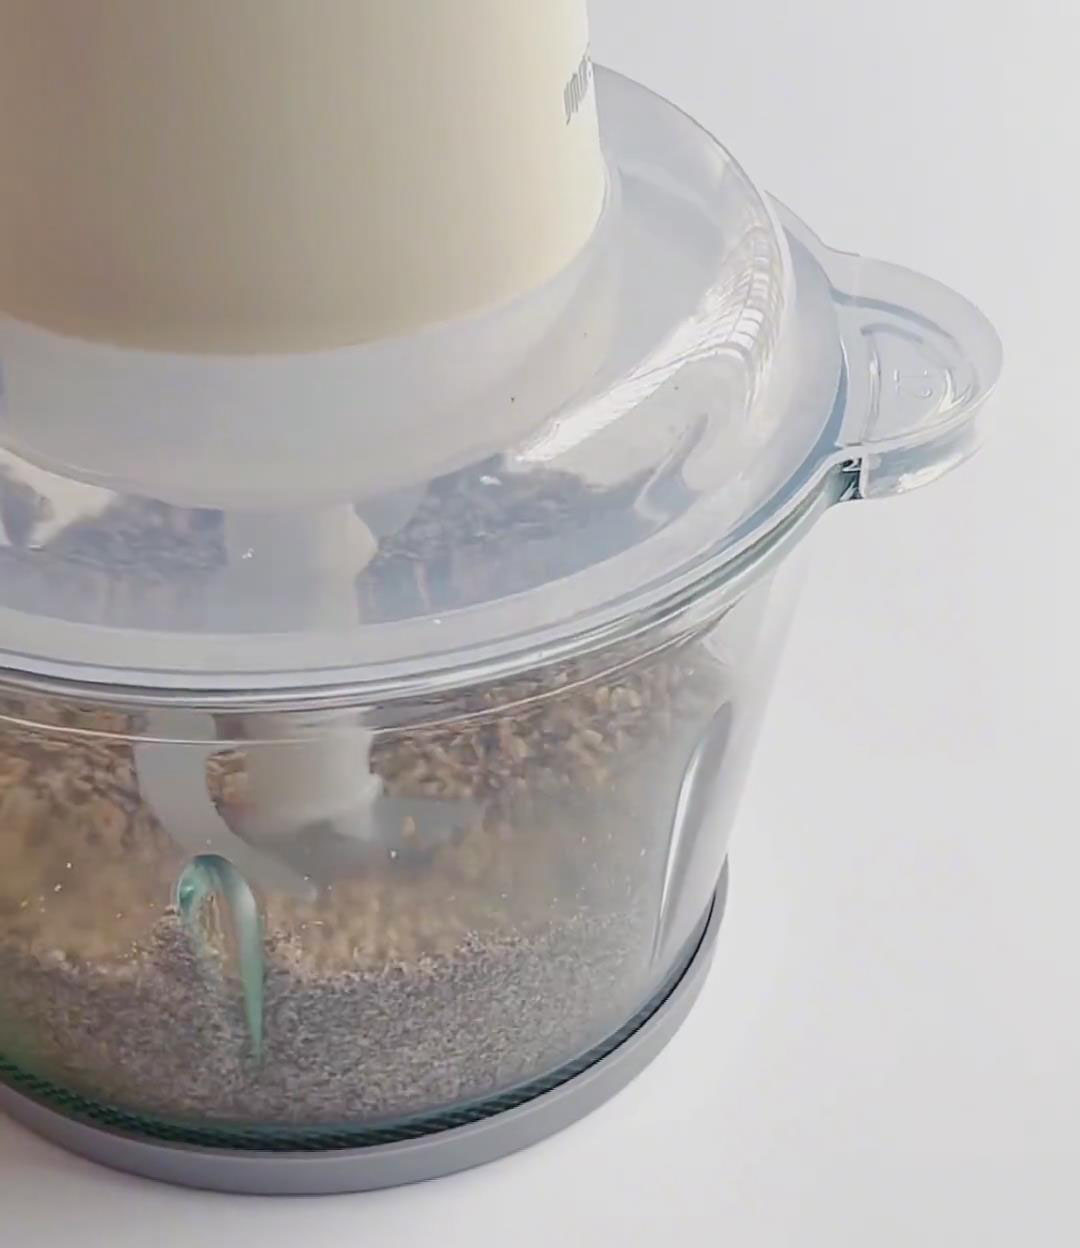
If no processor, crush in a sealed bag with a rolling pin.
Step 2: Prepare Mochi Skin
In a bowl, mix glutinous rice flour, cornstarch, and sugar.
Slowly whisk in milk until smooth, no lumps remain.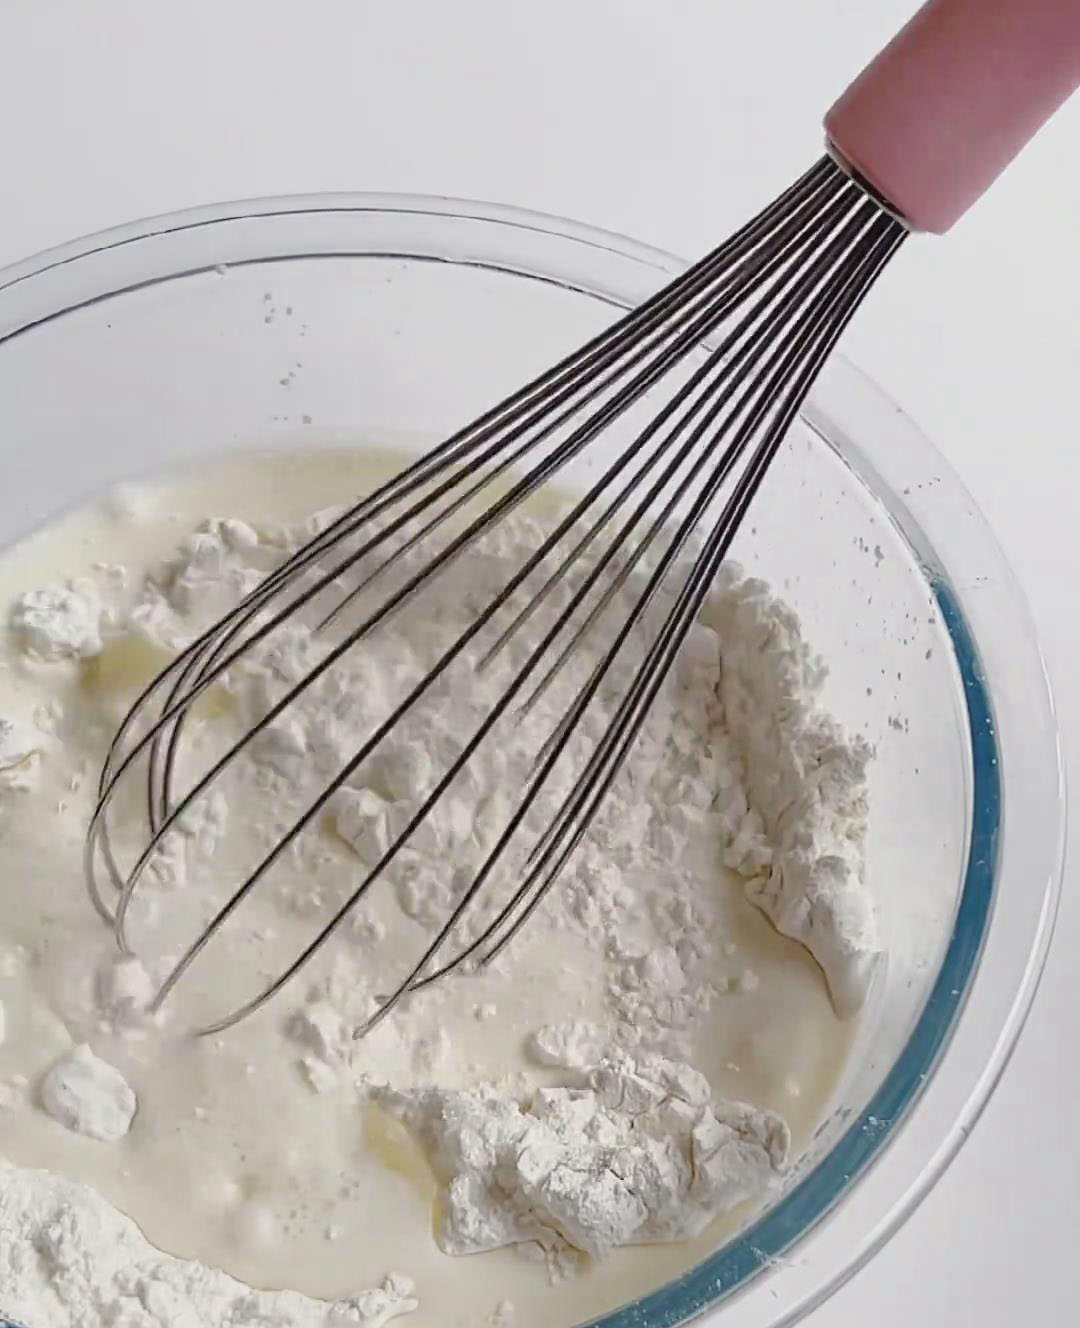
Pour the mixture through a fine sieve into a heatproof container.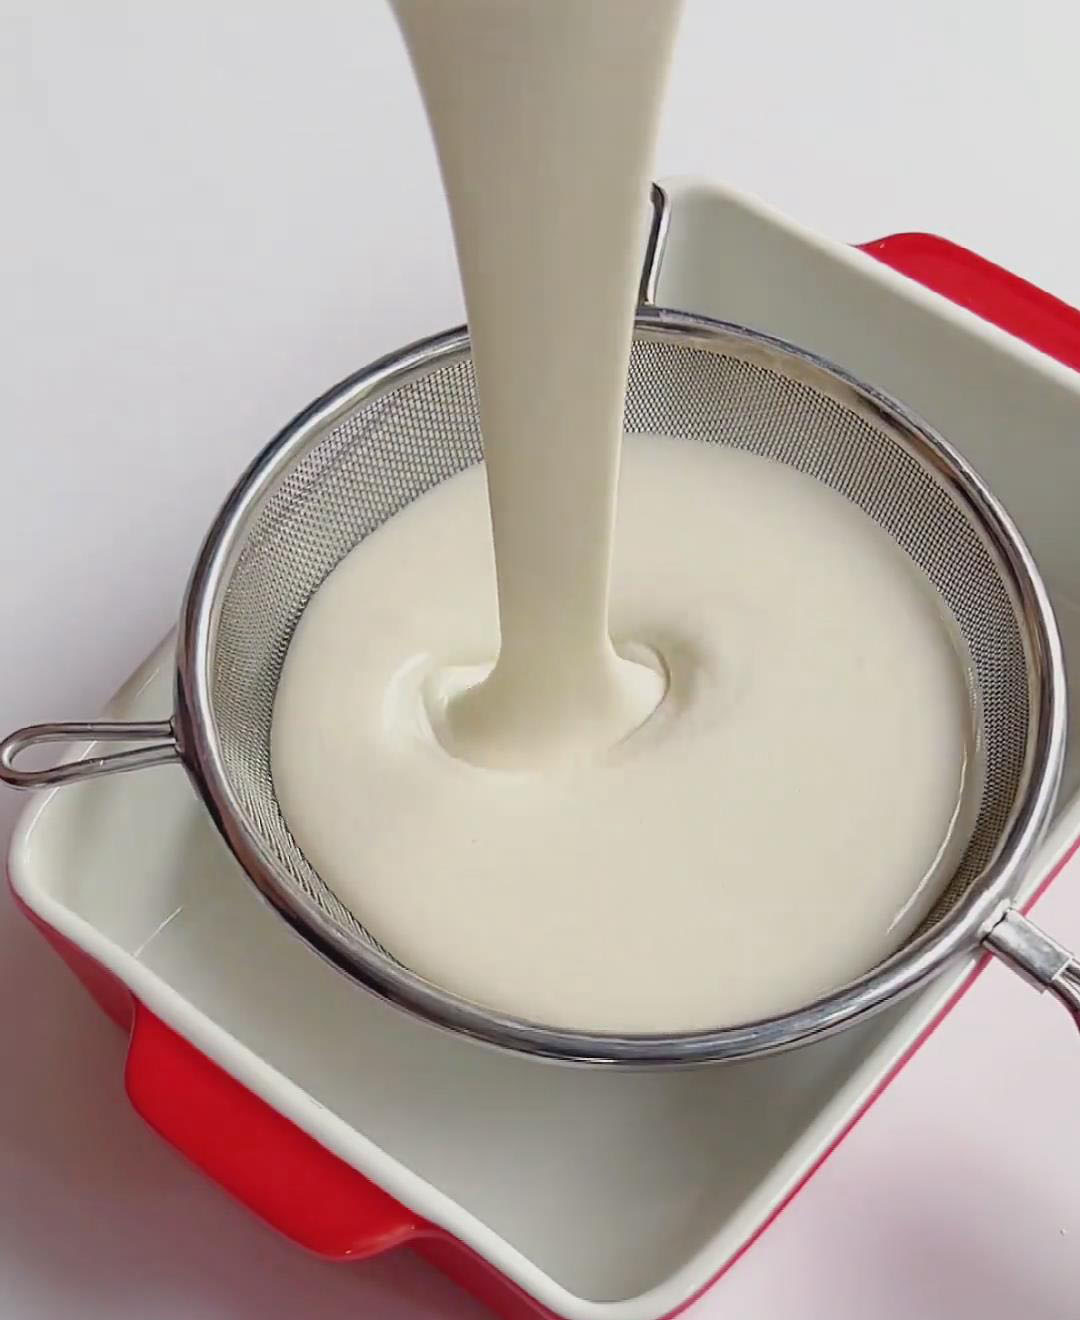
Cover the container with plastic wrap, poke 10+ small holes.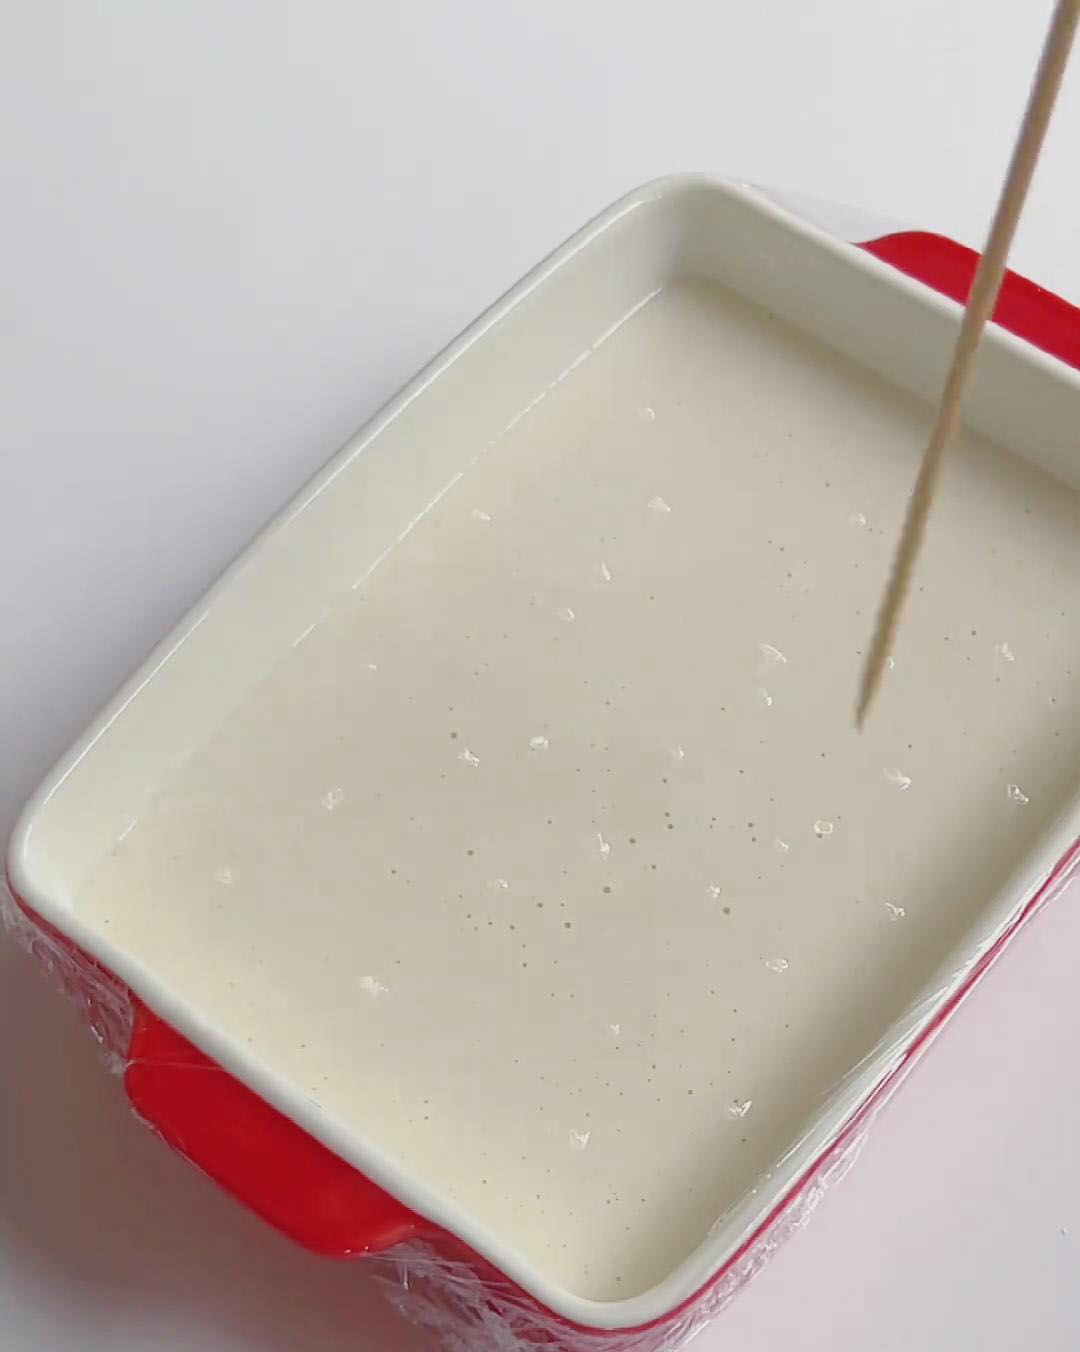
Steam over high heat for 25 minutes. Do not open lid during steaming.
Remove, add butter while hot, fold until absorbed.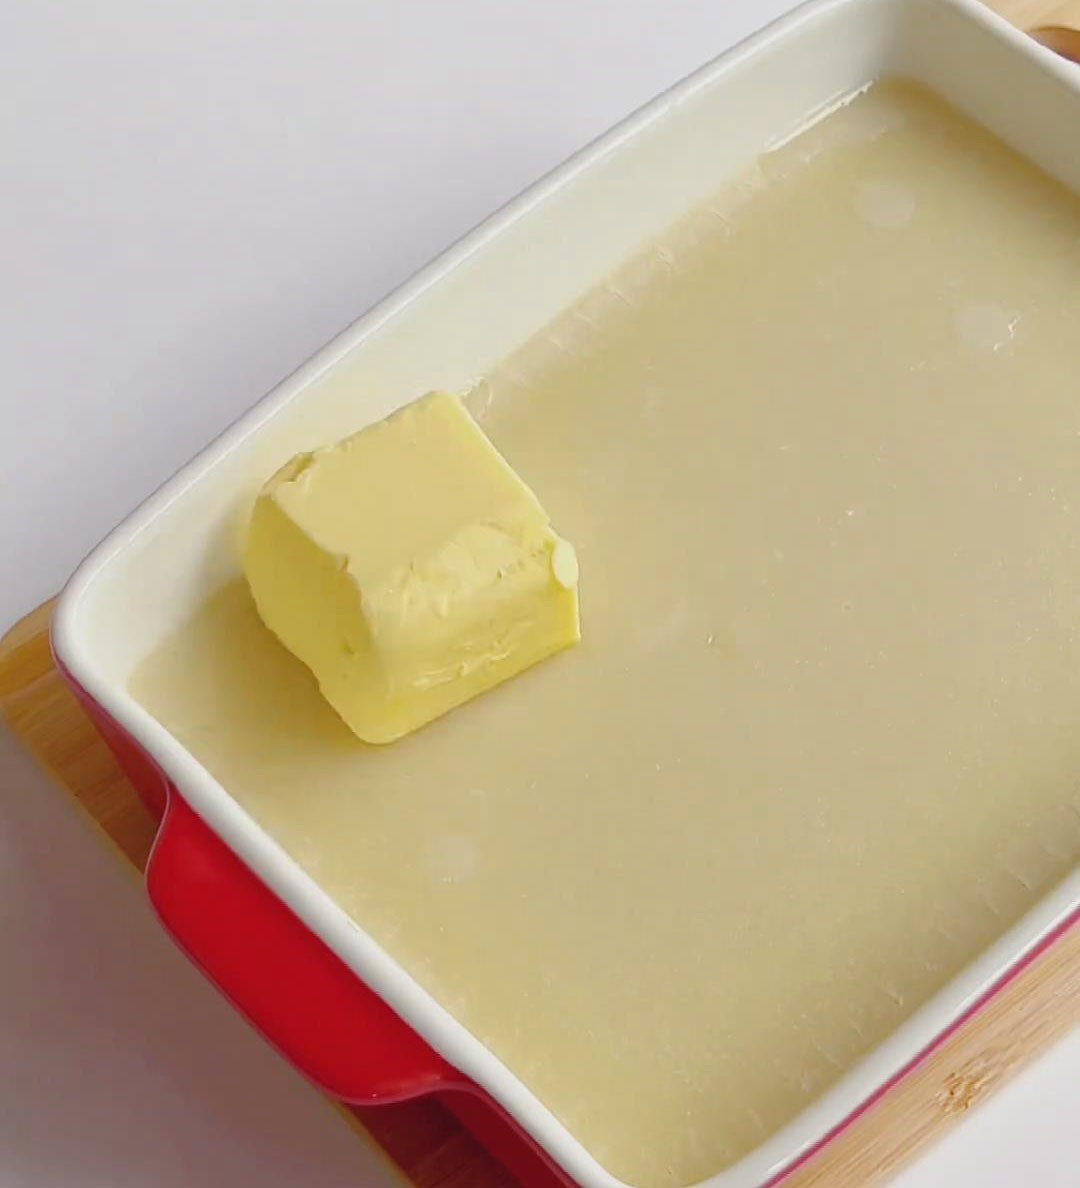
When warm (about 40°C), knead for 5–8 minutes until smooth, elastic, and non-sticky.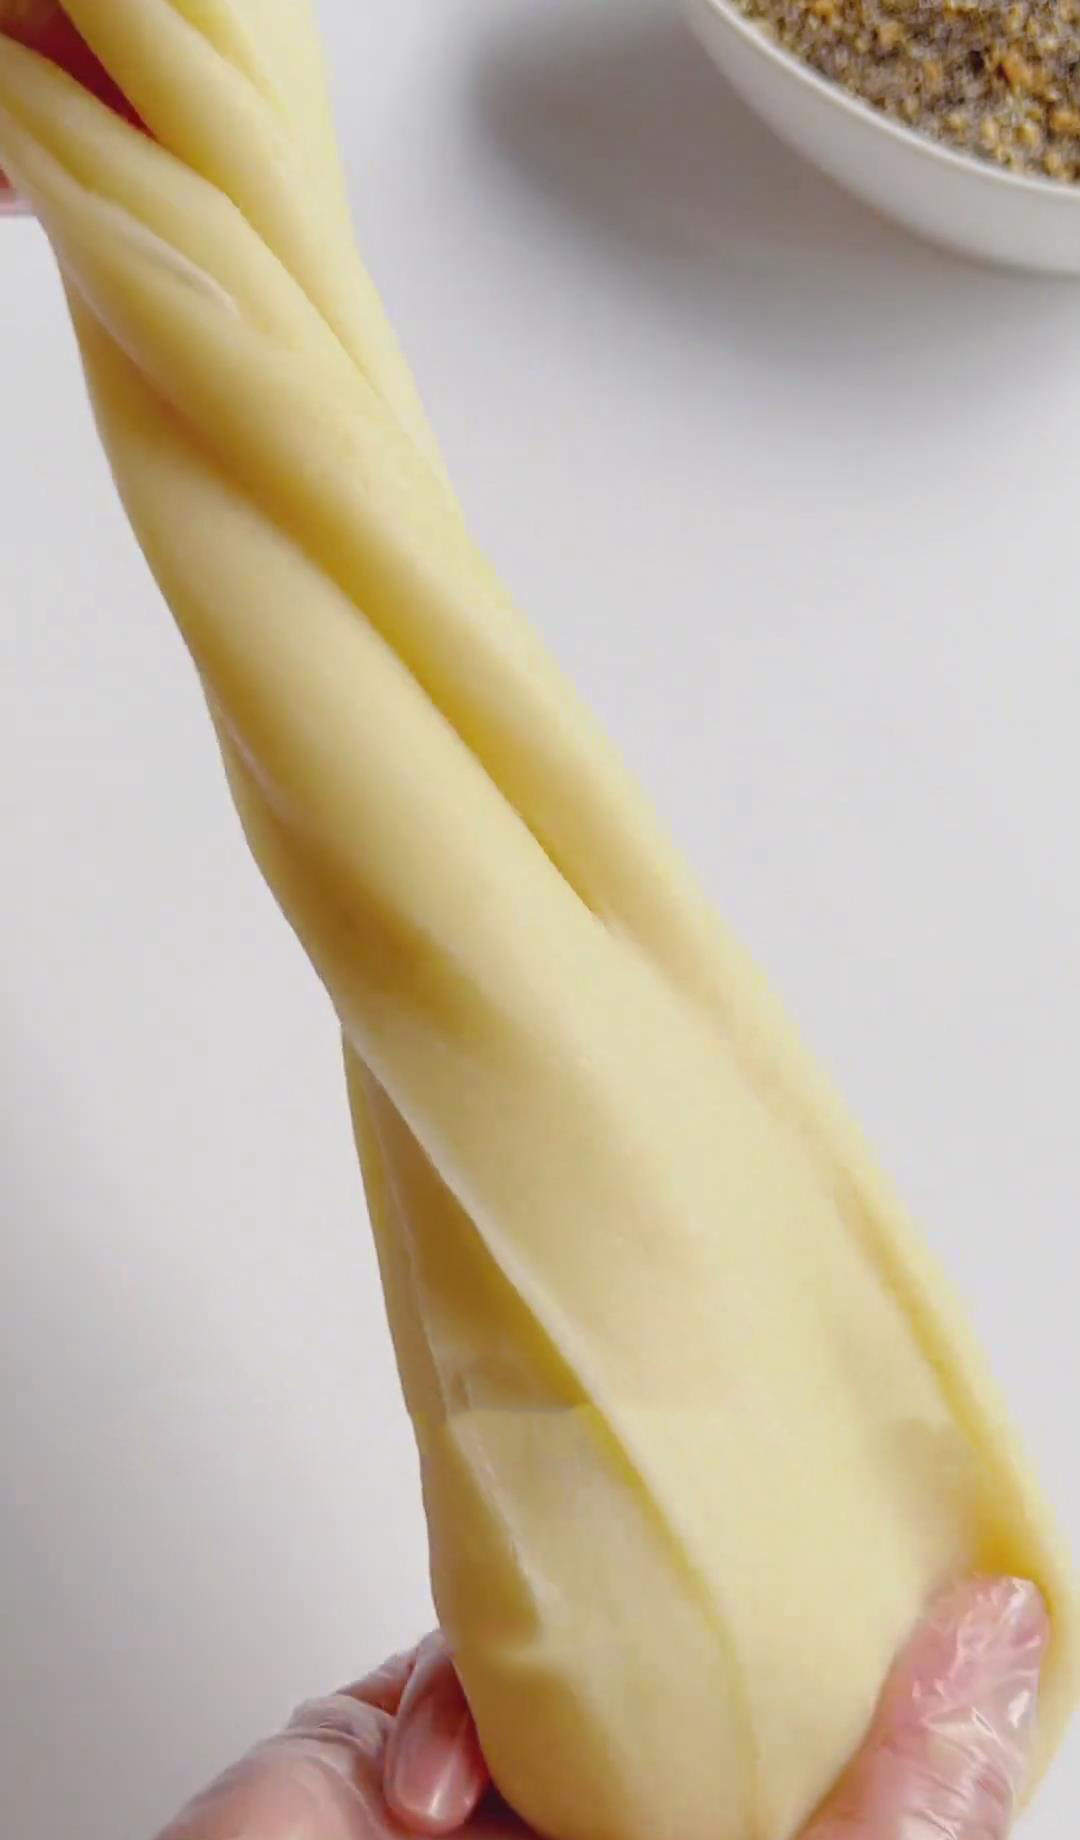
Step 3: Divide and Wrap
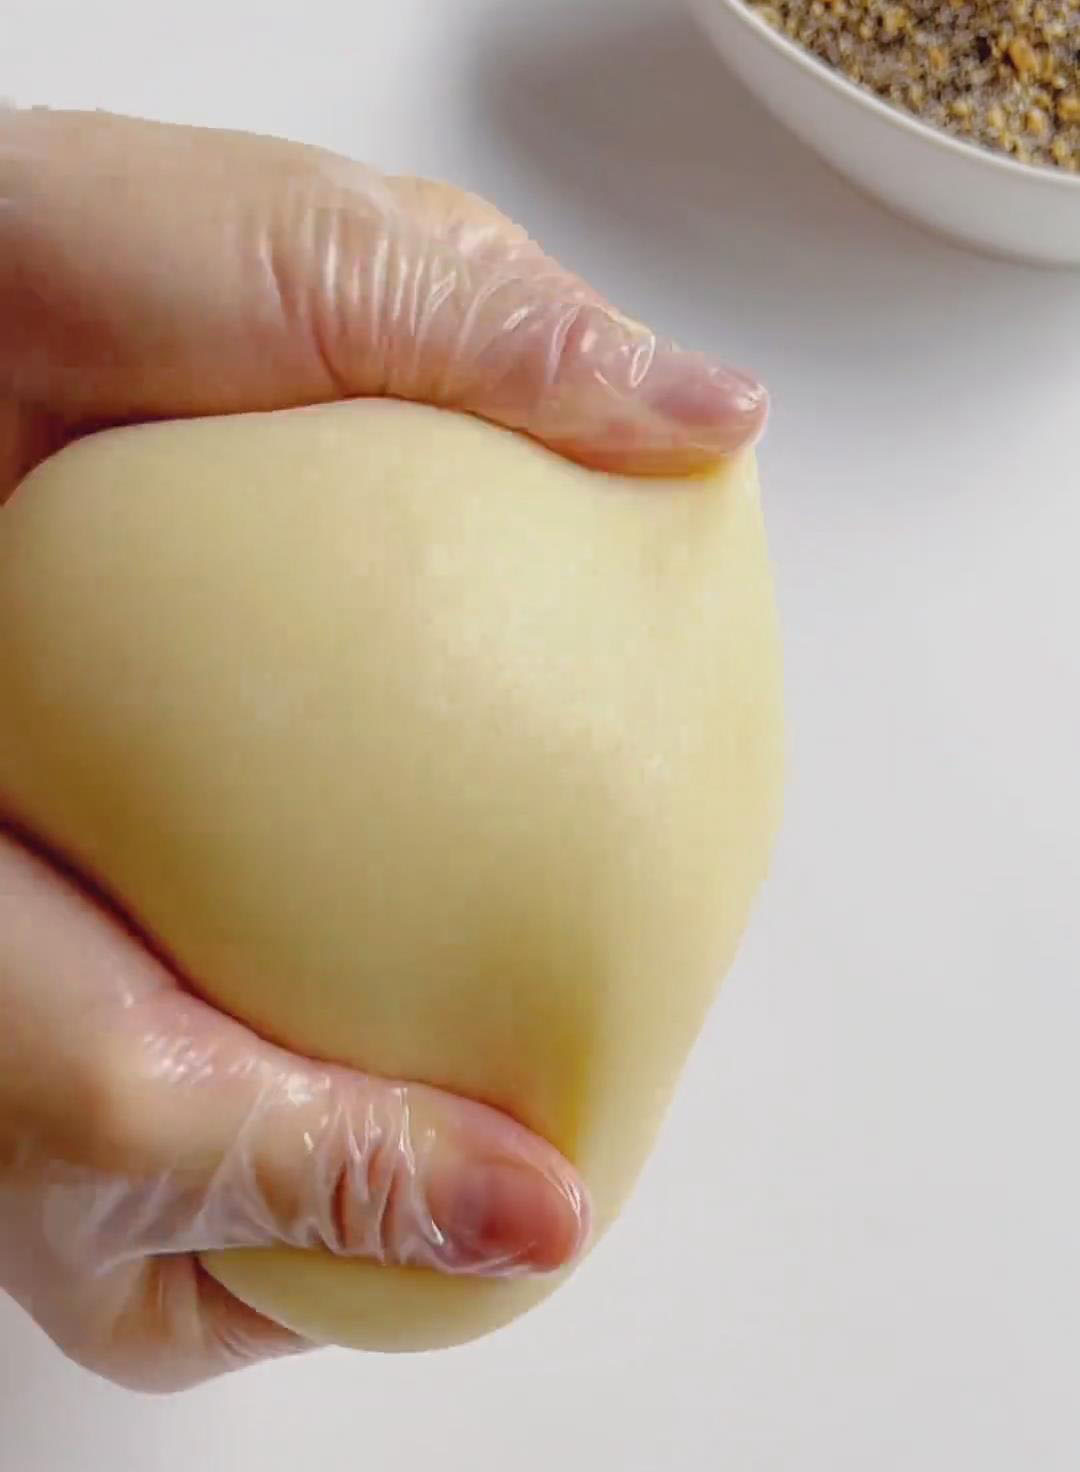
Divide dough into 45g pieces (about 8–10 total). Roll each into balls.
Flatten into discs 10–12cm wide, 0.3–0.5cm thick.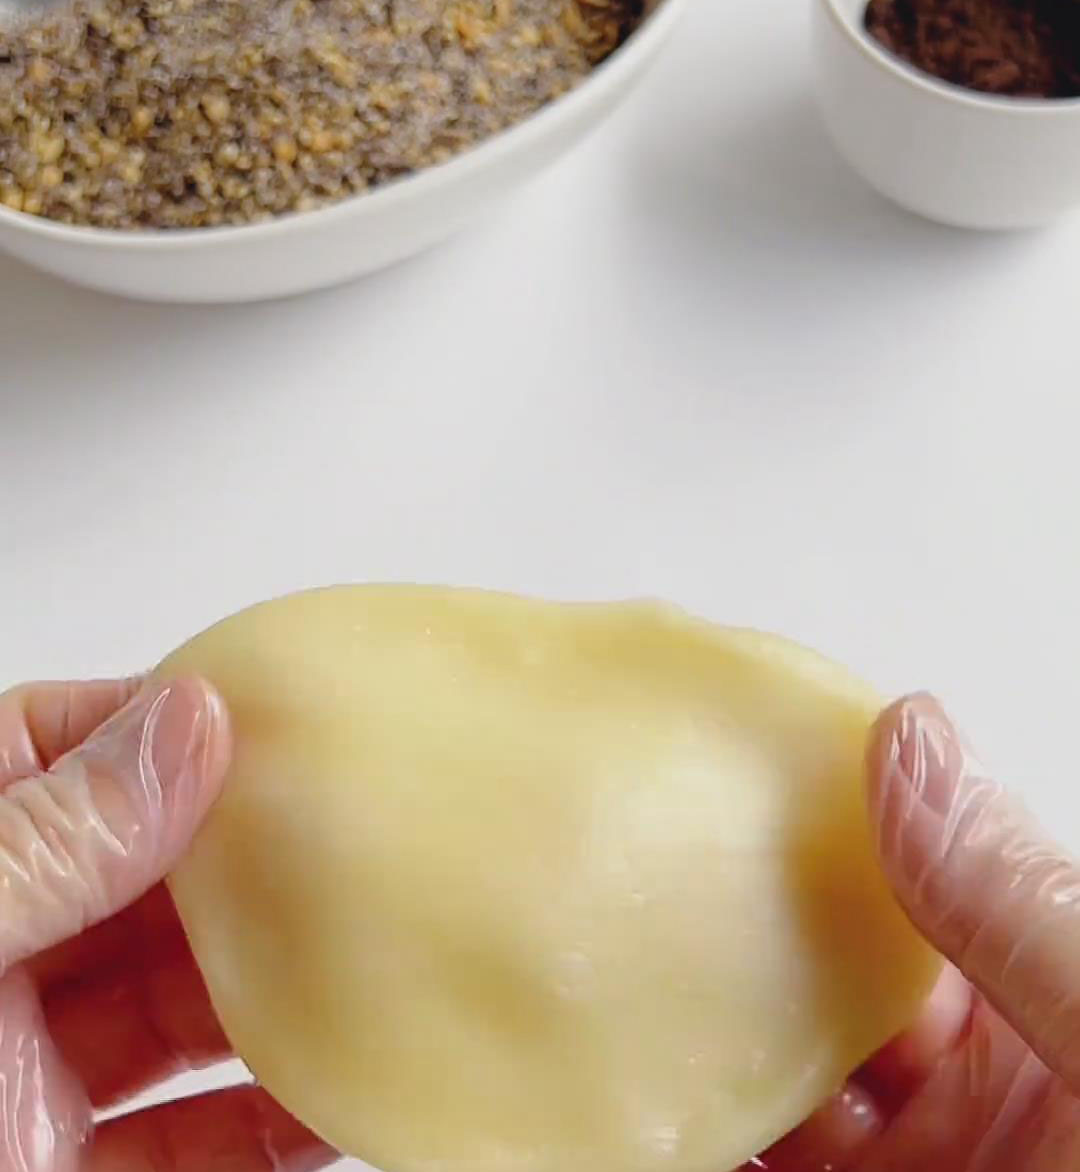
Scoop a little filling with a spoon and set it right in the center of the mochi skin.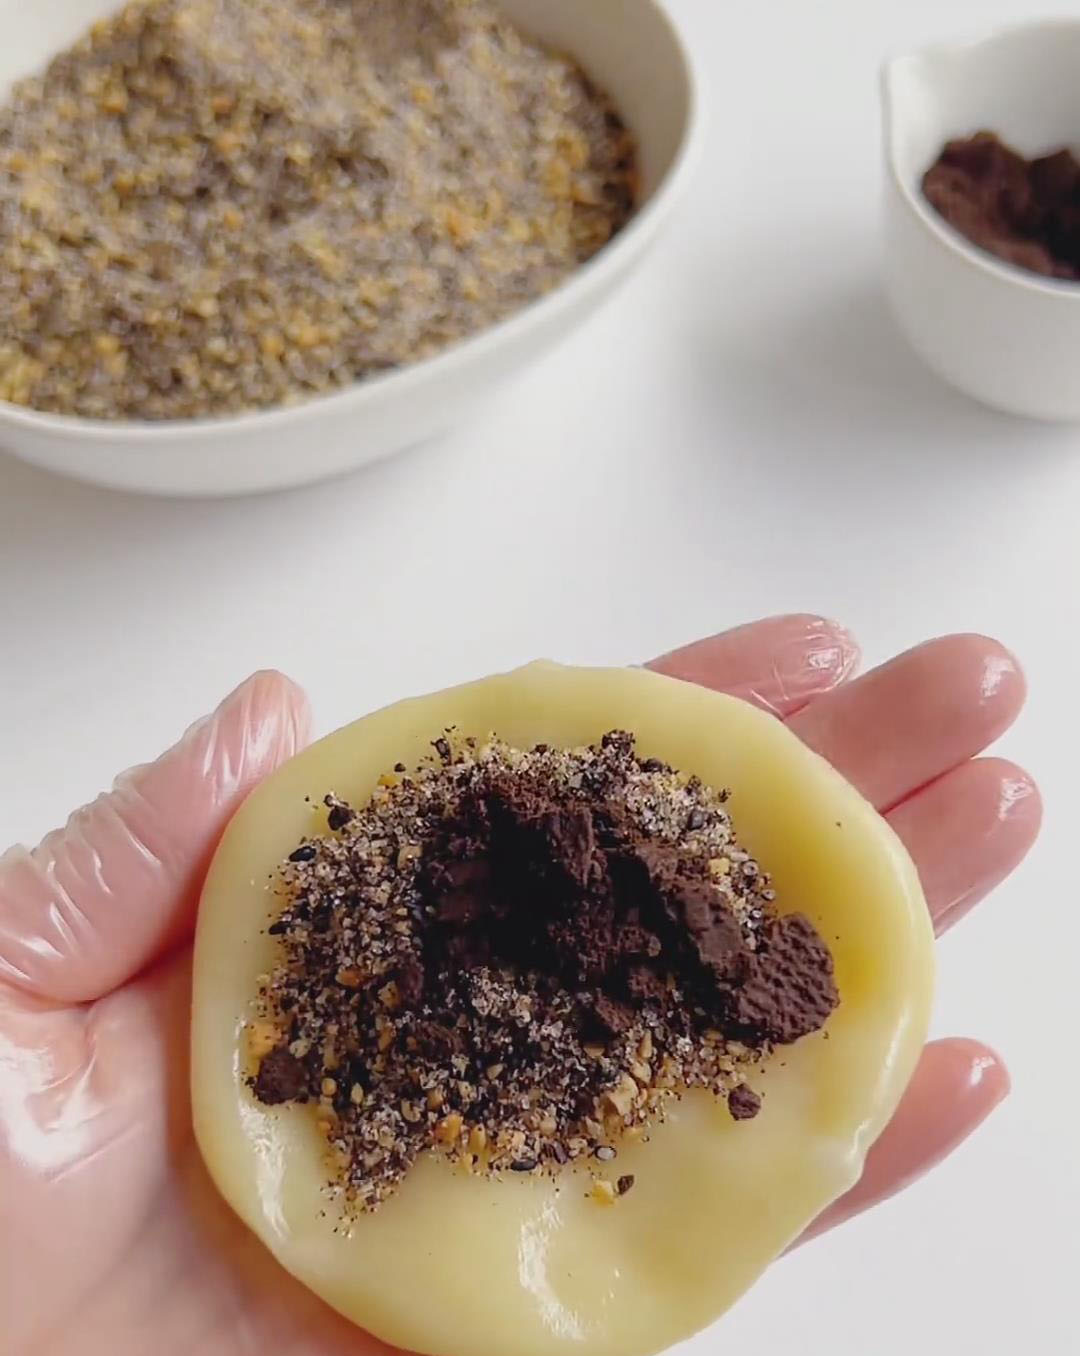
Fold edges over, pinch closed, trim excess dough if needed.
Step 4: Coat and Finish
Roll finished mochi in roasted soybean flour, coconut, or extra filling crumbs.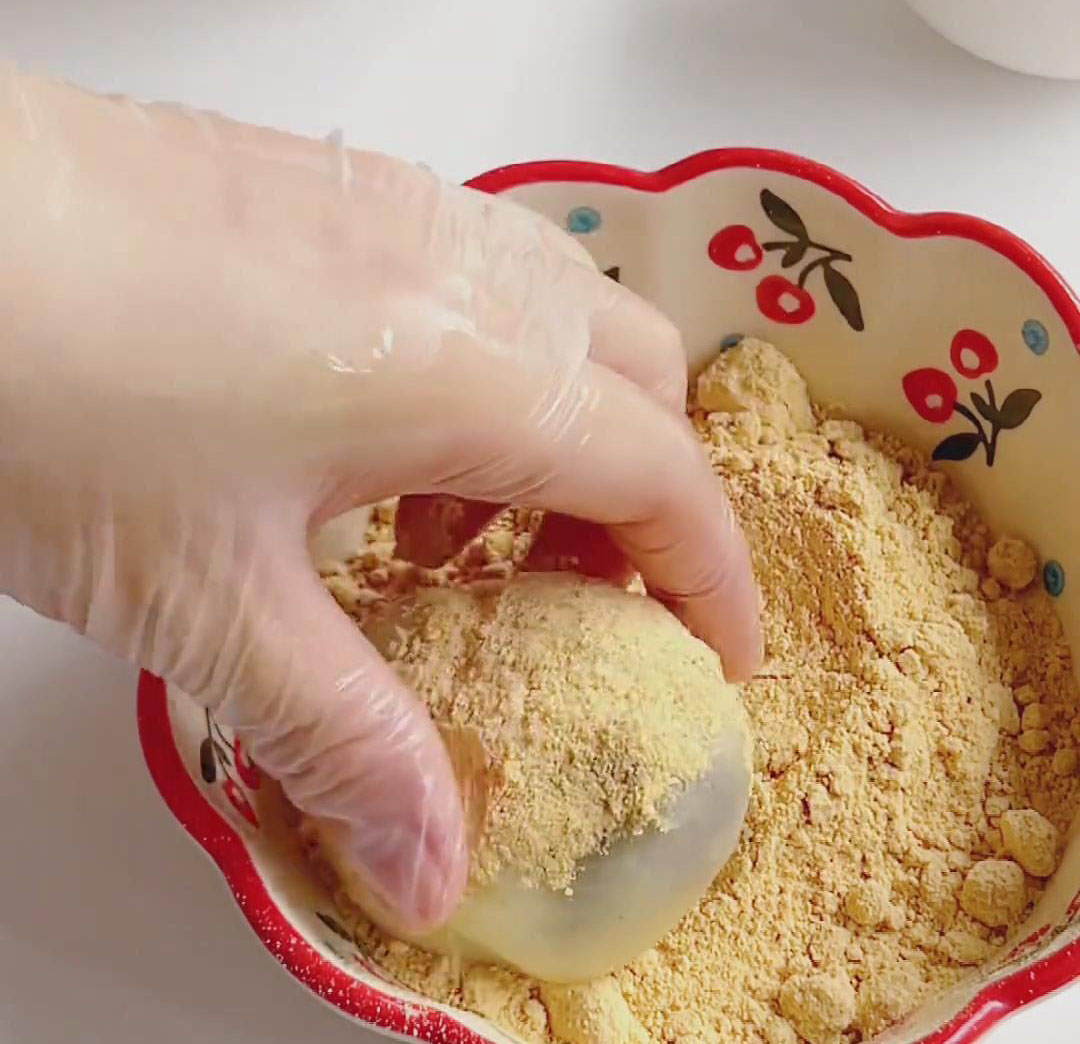
Shape into smooth rounds.
Serve immediately or chill for a soft, refreshing texture.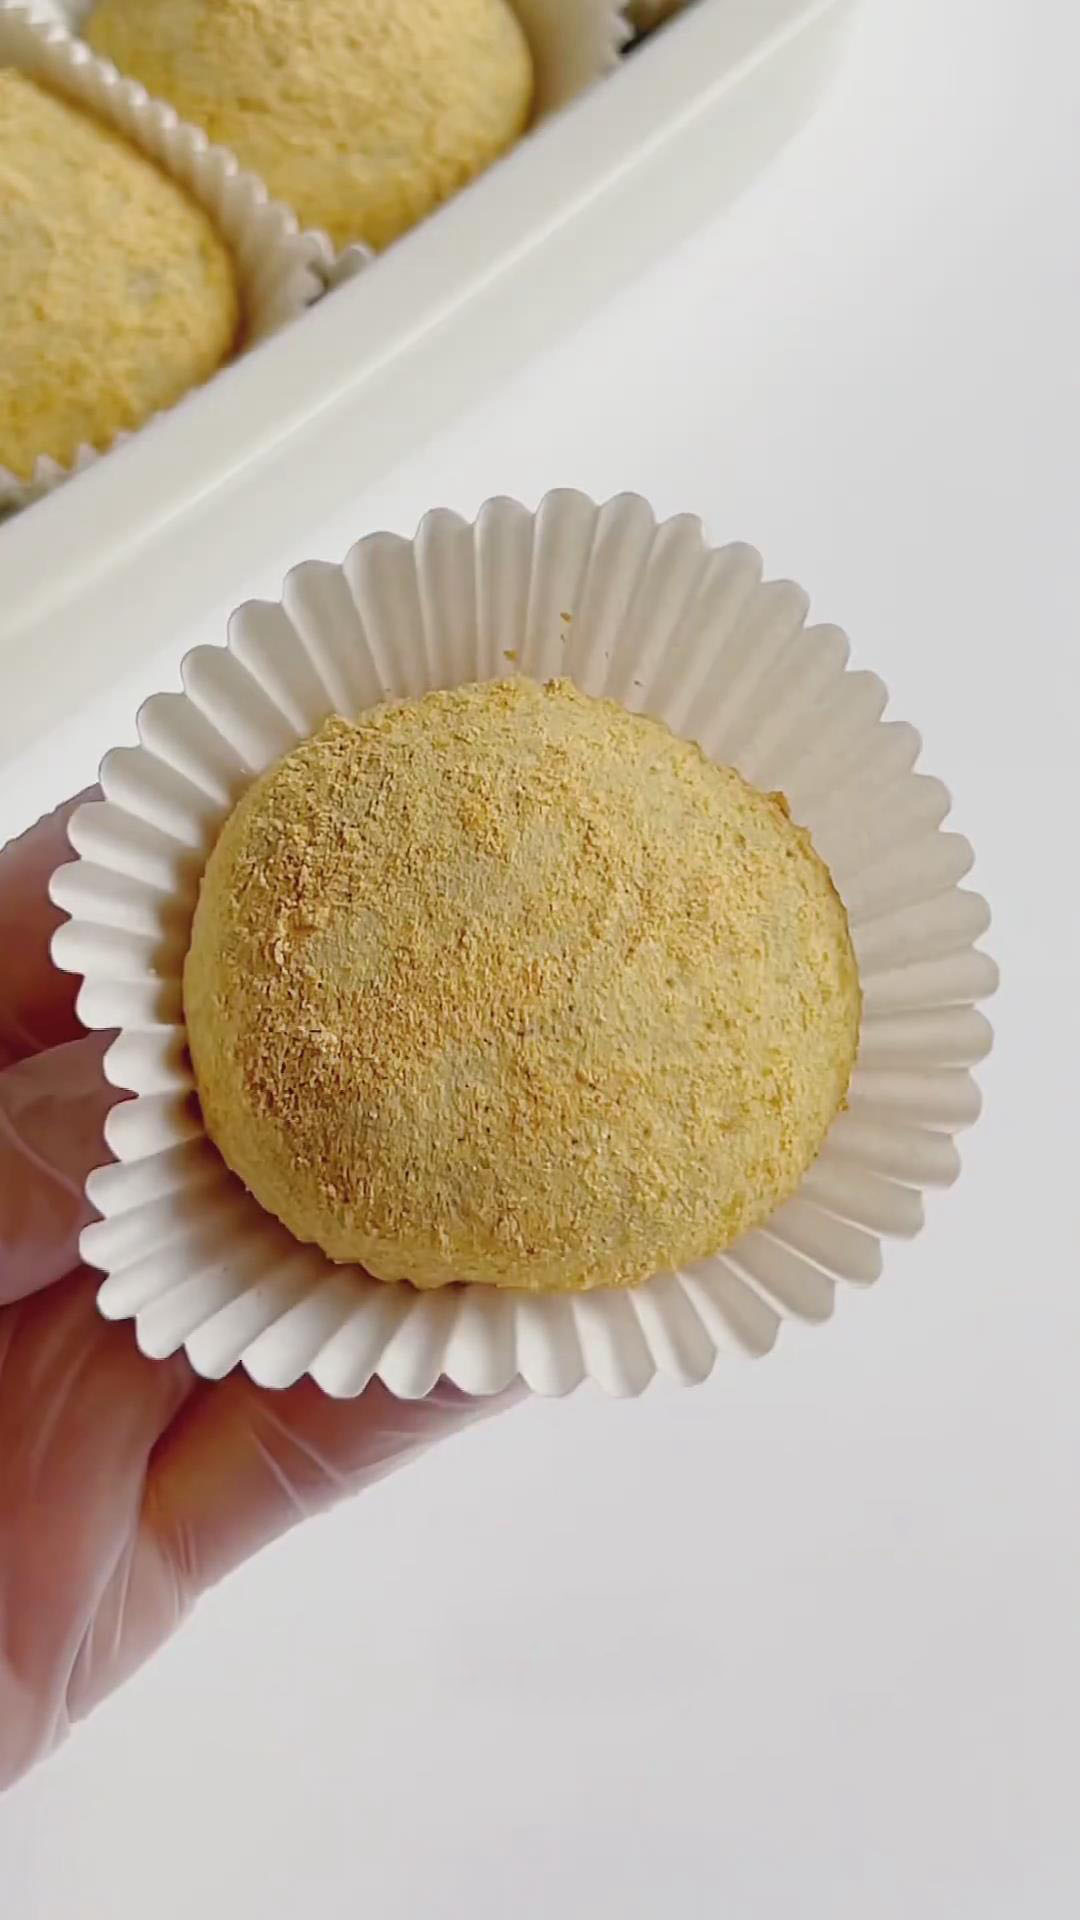
Frequently Asked Questions
Q: Can I freeze mochi?
A: Mochi tastes best fresh or chilled. Freezing can change the texture, making it harder and less chewy.
Q: Can I make the filling in advance?
A: Yes! You can prepare the filling balls 1 day ahead and refrigerate them until ready to wrap.
Q: My mochi is too sticky—what should I do?
A: Make sure to knead in butter fully and use roasted soybean flour or coconut for coating to prevent sticking.
Q: Can I make it less sweet?
A: Absolutely—reduce the sugar in both filling and skin to your liking.
Easy Oreo Peanut Mochi Recipe
Ingredients
Mochi Skin
- 200 g glutinous rice flour wet-milled preferred for smooth texture; avoid dry-milled
- 30 g cornstarch adds elasticity and prevents tearing; do not substitute
- 30 g sugar adjust ±5g for sweetness
- 250 ml whole milk or coconut milk if lactose intolerant
- 25 g unsalted butter softened; adds smoothness, prevents stickiness
- roasted soybean flour / desiccated coconut / ground filling as needed, for coating and anti-stick
Filling
- 80 g roasted peanuts peeled and crushed; for crunch and aroma
- 10 g roasted black sesame
- 15 g roasted white sesame
- 50 g sugar adjust ±10g to taste
- 30 g Oreo cookies cream removed, only biscuits; crushed for chocolate flavor and texture
Instructions
Step 1: Make the Filling
- Place peanuts, sesame seeds, Oreo biscuits, and sugar in a food processor.
- Pulse 10–15 seconds until coarse (do not over-process; keep texture).
- If no processor, crush in a sealed bag with a rolling pin.
Step 2: Prepare Mochi Skin
- In a bowl, mix glutinous rice flour, cornstarch, and sugar.
- Slowly whisk in milk until smooth, no lumps remain.
- Pour the mixture through a fine sieve into a heatproof container.
- Cover the container with plastic wrap, poke 10+ small holes.
- Steam over high heat for 25 minutes. Do not open lid during steaming.
- Remove, add butter while hot, fold until absorbed.
- When warm (about 40°C), knead for 5–8 minutes until smooth, elastic, and non-sticky.
Step 3: Divide and Wrap
- Divide dough into 45g pieces (about 8–10 total). Roll each into balls.
- Flatten into discs 10–12cm wide, 0.3–0.5cm thick.
- Scoop a little filling with a spoon and set it right in the center of the mochi skin.
- Fold edges over, pinch closed, trim excess dough if needed.
Step 4: Coat and Finish
- Roll finished mochi in roasted soybean flour, coconut, or extra filling crumbs.
- Shape into smooth rounds.
- Serve immediately or chill for a soft, refreshing texture.
Leave a Reply