
This persimmon daifuku is ultra-soft, stretchy, and filled with whipped cream and sweet persimmon purée. Steamed mochi skin, no oven needed, beginner-friendly and perfect for autumn and winter desserts.
What is Daifuku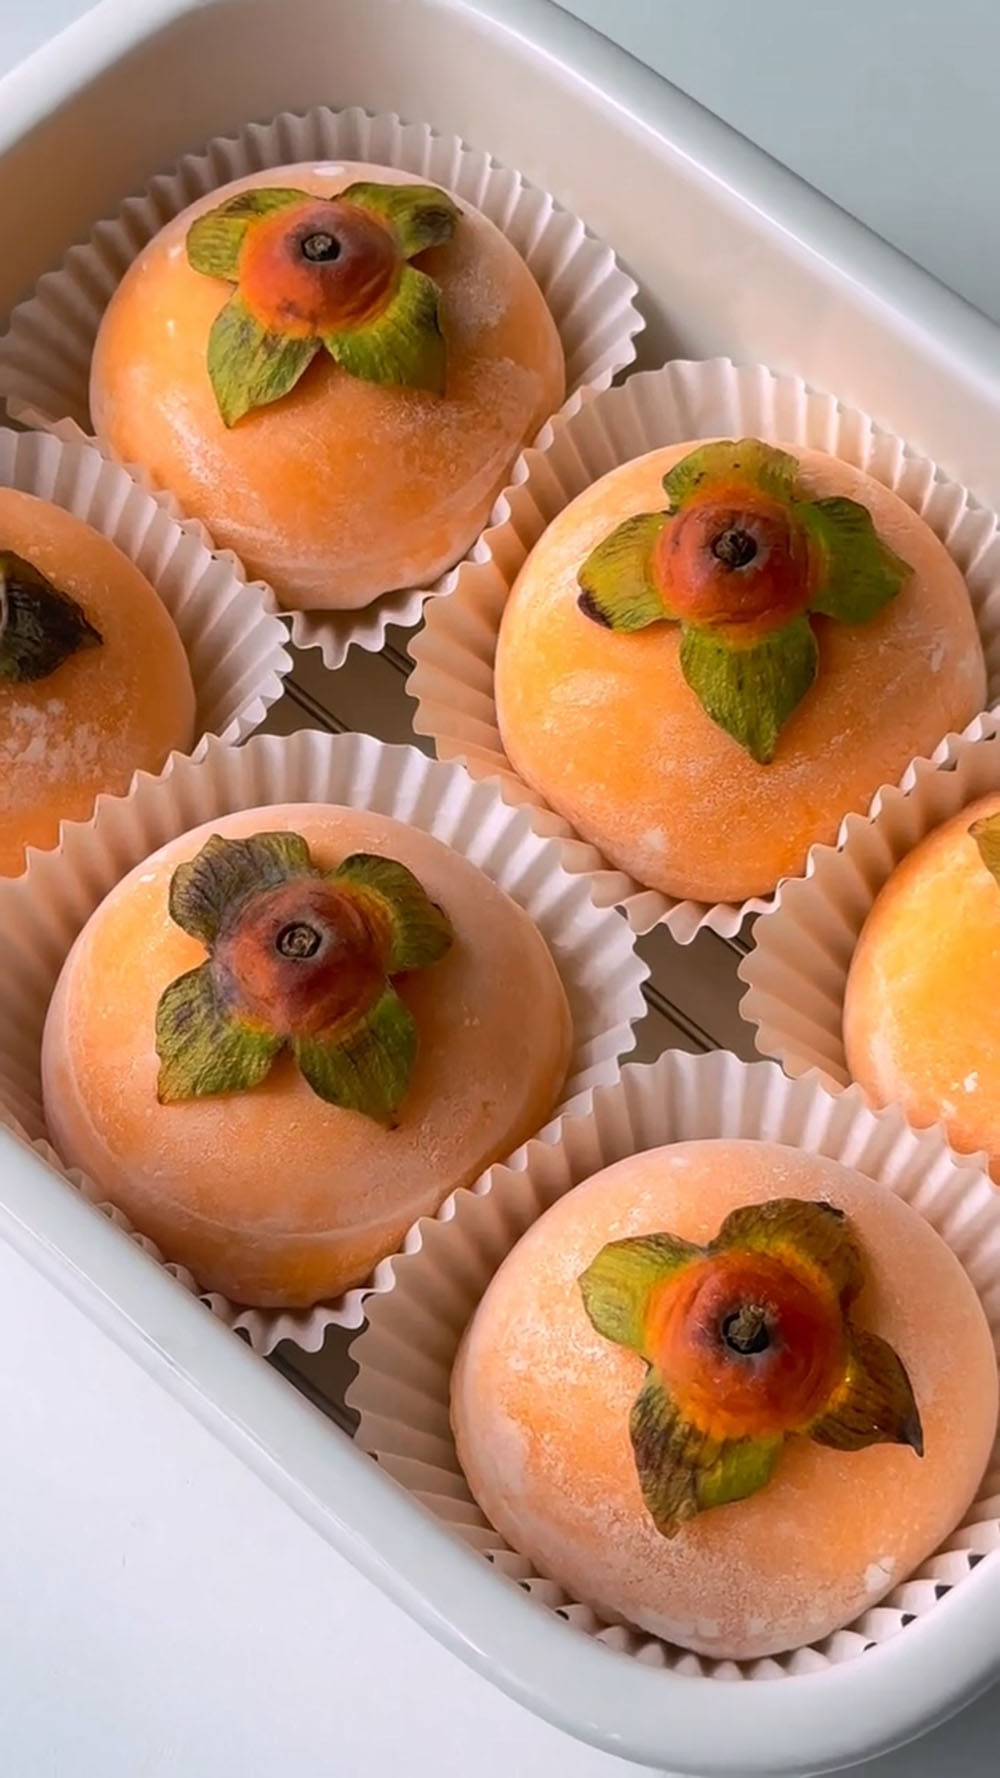
Daifuku is a traditional Japanese mochi dessert made with a soft, chewy glutinous rice skin wrapped around a sweet filling, and in this persimmon daifuku recipe, it’s taken to the next level with a stretchy, pillowy mochi exterior and a creamy, fruit-filled center.
Instead of the classic red bean paste, this version uses fluffy whipped cream and fresh persimmon purée, creating a light, naturally sweet filling that bursts when you bite into it.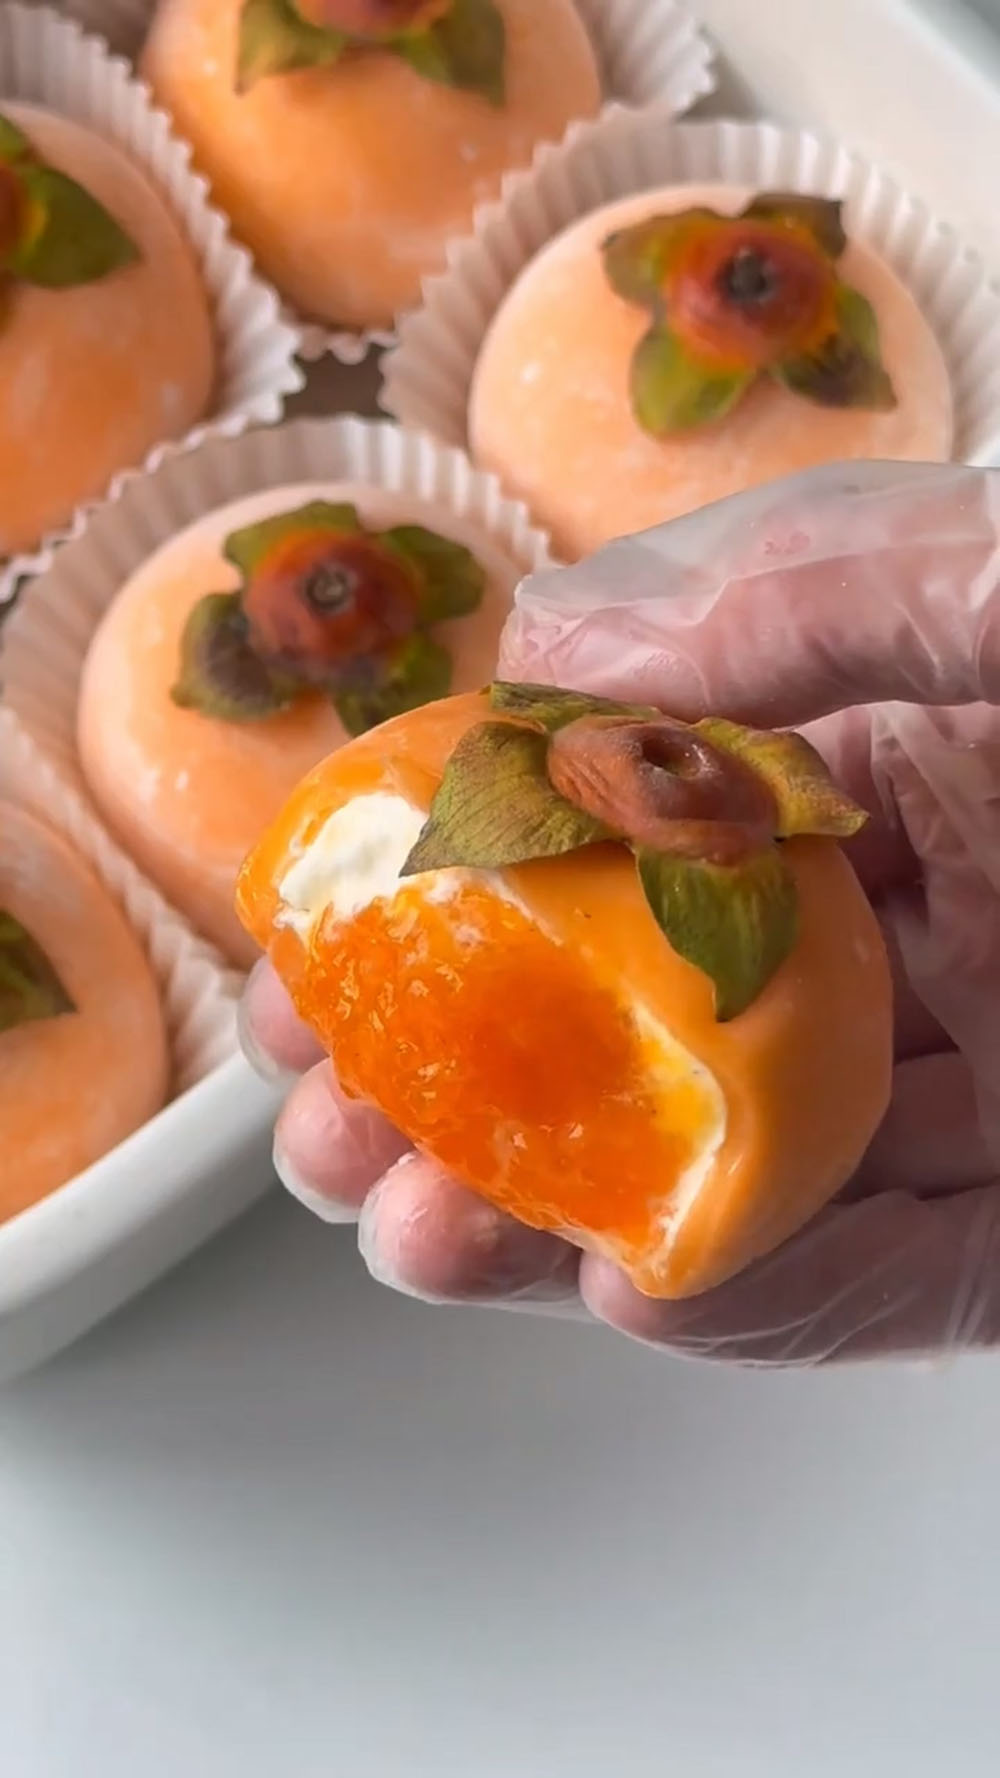
I’ve shared many daifuku recipes before.
Some of my absolute favorites include:
- Osmanthus Mochi
- Matcha Mochi Bites
- Brown Sugar Pearl Mochi
- Sweet Potato Mochi with Cheese
- Watermelon Mochi Bites
- Passionfruit Mochi
- Cherry Mochi
Why you’ll love this recipe
- The mochi skin is ultra-soft, stretchy, and elastic without being sticky or gummy.
- The filling combination of whipped cream and persimmon purée is light, creamy, and naturally sweet.
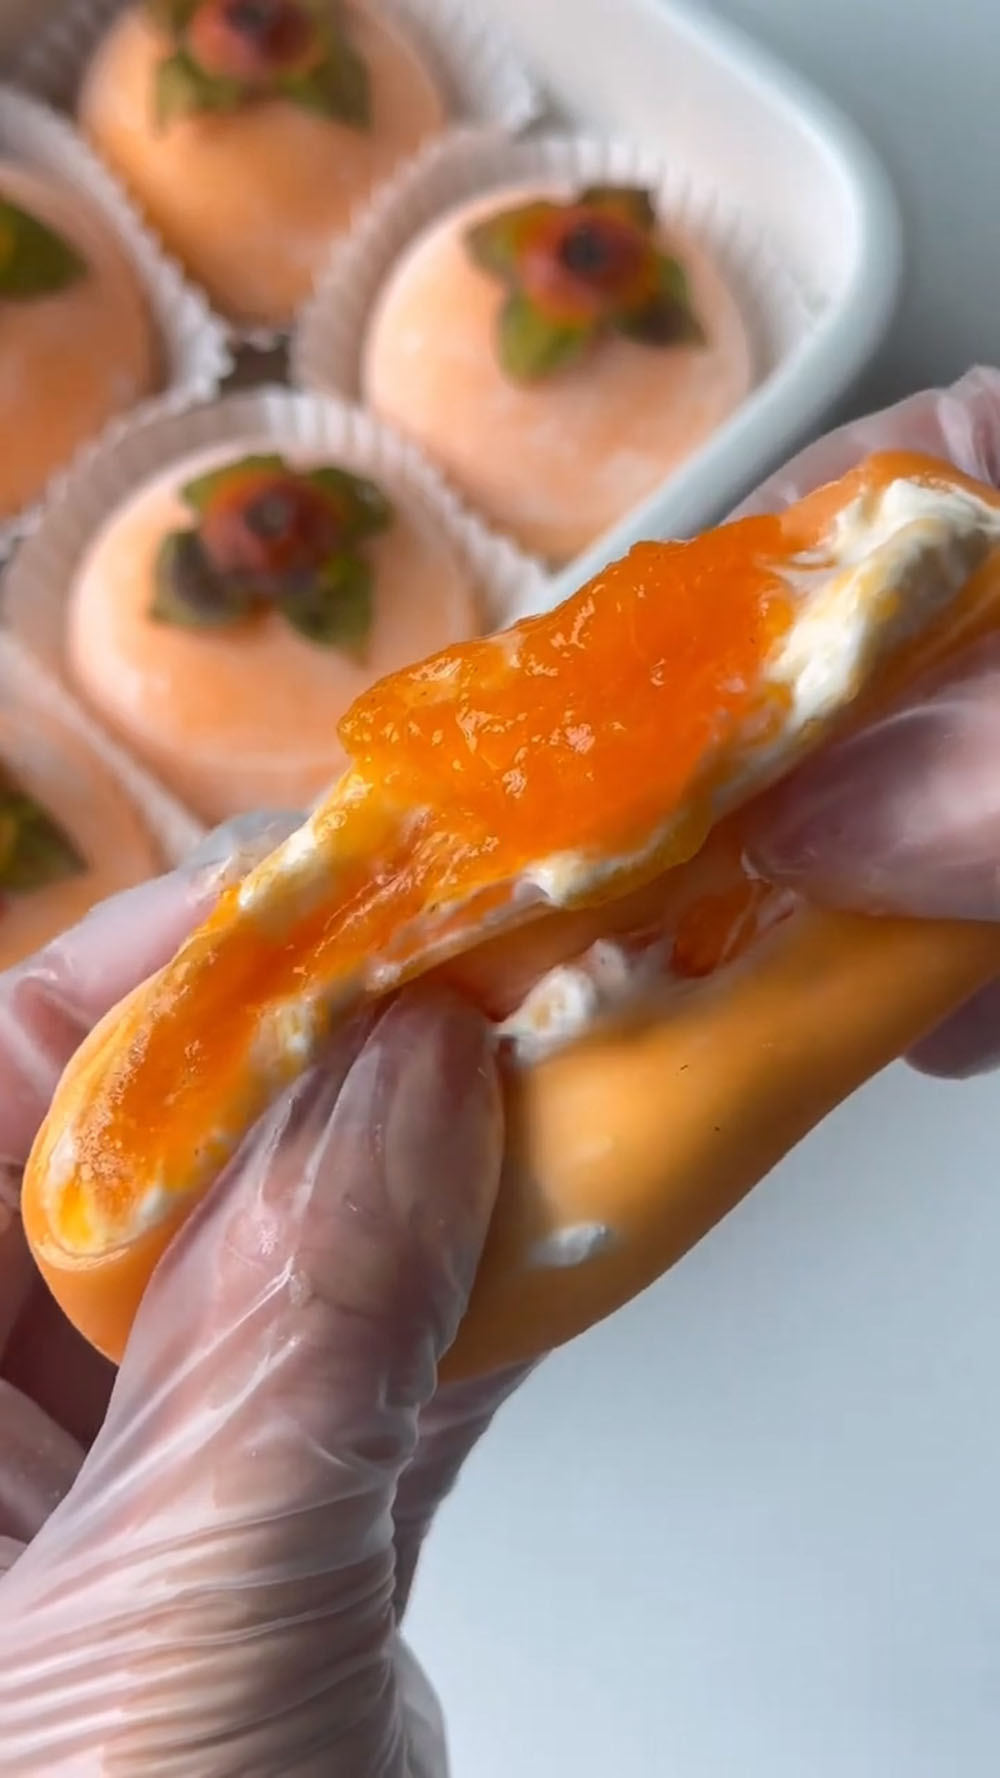
- Every bite has that satisfying lava-style burst without feeling heavy or greasy.
- No baking required — everything is steamed, making it beginner-friendly.
- Perfect for autumn and winter, with a cozy, chewy texture that’s incredibly comforting.
- Cute persimmon shape with symbolic meaning, great for gifting or special occasions.
Ingredients and Substitutions
- Glutinous Rice Flour – This is the essential ingredient for the chewy, stretchy “mochi” skin. Do not substitute with regular rice flour.
- Cornstarch – It’s crucial for adding resilience to the dough, preventing it from becoming too soft and sticky after steaming. The ratio to glutinous rice flour should not be altered.
- White Sugar – Sweetens the daifuku skin perfectly without overpowering the natural sweetness of the persimmons.
- Milk – Using milk instead of water creates a richer, more tender skin.
- Butter – Kneaded into the hot steamed dough, it adds flavor, richness, and helps make the final skin beautifully smooth and non-sticky.
- Orange Food Coloring (optional) – A few drops can enhance the natural “persimmon” color of the skin. This is purely aesthetic and can be omitted.
- Cooked Glutinous Rice Flour – This is our key dusting flour. You must toast raw glutinous rice flour in a dry pan until slightly yellow and fragrant to make “熟粉” (cooked flour). Using raw flour as dusting will result in a raw, unpleasant taste.
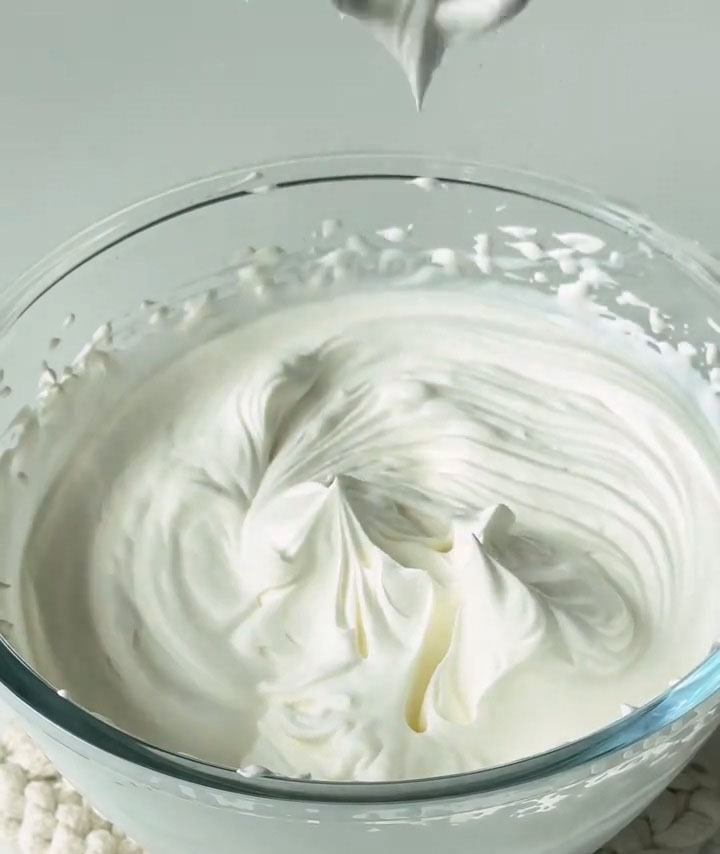
- Heavy Cream (Whipping Cream) – Needs to be whipped to stiff peaks to create a stable, pipeable filling that holds its shape and doesn’t make the skin soggy.
- Fresh Persimmons – Choose ripe, sweet persimmons that are soft but not mushy. The flesh should be easy to scoop and mash into a thick puree. Overly ripe, watery persimmons will make the filling runny and difficult to assemble.
Ingredients for Persimmon Daifuku
Daifuku Skin
- 120 g glutinous rice flour
- 30 g cornstarch
- 30 g white sugar
- 180 g milk
- 15 g butter
- A few drops orange food coloring (optional)
- Cooked glutinous rice flour, for dusting
Cream Filling
- 230 g heavy cream (whipping cream)
- 15 g white sugar
Persimmon Filling & Assembly
- Flesh of 2-3 ripe persimmons, mashed into a puree
- 6-8 persimmon calyxes, for decoration
How to Make Persimmon Daifuku
1. Prepare the Components
- Whip the Cream: In a chilled bowl, combine the heavy cream and 15g sugar. Whip with an electric mixer until stiff peaks form—the cream should be firm and hold its shape firmly on the whisk. Transfer to a piping bag and refrigerate immediately.
- Make the Persimmon Puree: Cut the tops off the persimmons and scoop out the soft, jelly-like flesh into a bowl. Mash thoroughly with a fork until you achieve a relatively smooth, jam-like consistency. Set aside.

- Make Cooked Flour: In a dry skillet over low heat, add 3-4 tablespoons of raw glutinous rice flour. Toast, stirring constantly, for 3-5 minutes until it becomes fragrant and turns a very pale yellow. Transfer to a bowl to cool. This is your essential dusting flour.
2. Steam and Knead the Daifuku Skin
- In a medium heatproof bowl (wide and shallow is best for even cooking), whisk together the glutinous rice flour, cornstarch, and 30g sugar. Gradually whisk in the milk until you have a completely smooth, lump-free batter.
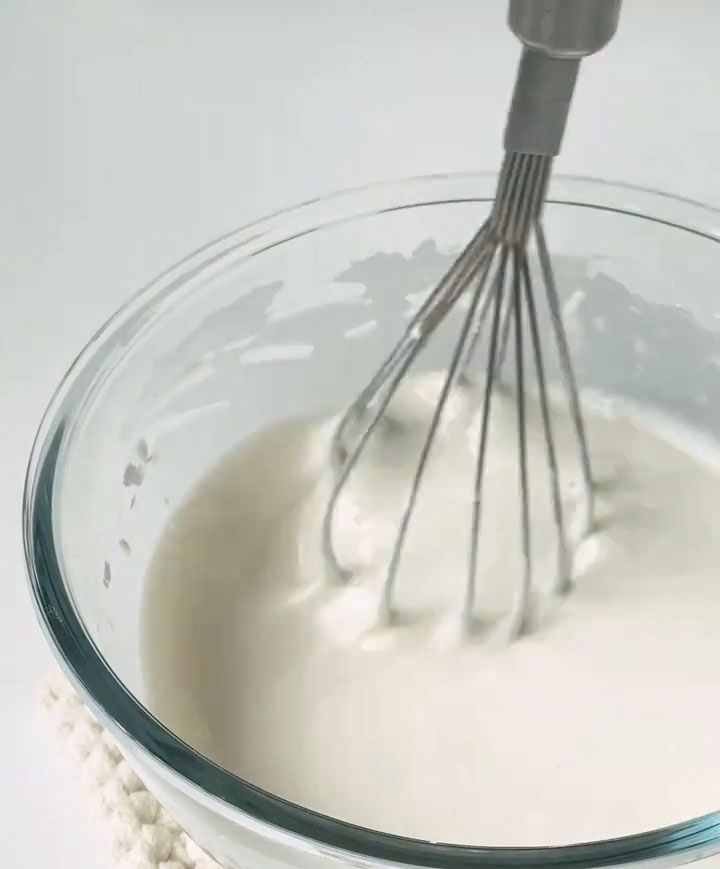
- Cover the bowl tightly with plastic wrap. Use a toothpick or knife to poke 5-6 small steam vents in the wrap.
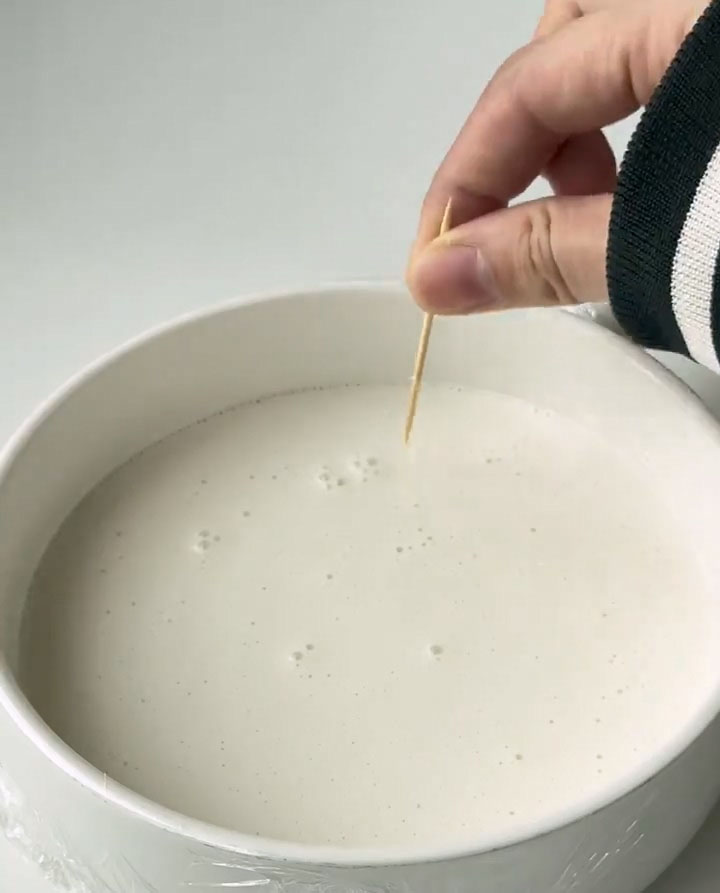
- Place the bowl in a steamer over boiling water. Steam for 25 minutes over medium heat, or until the dough is completely solid and opaque.
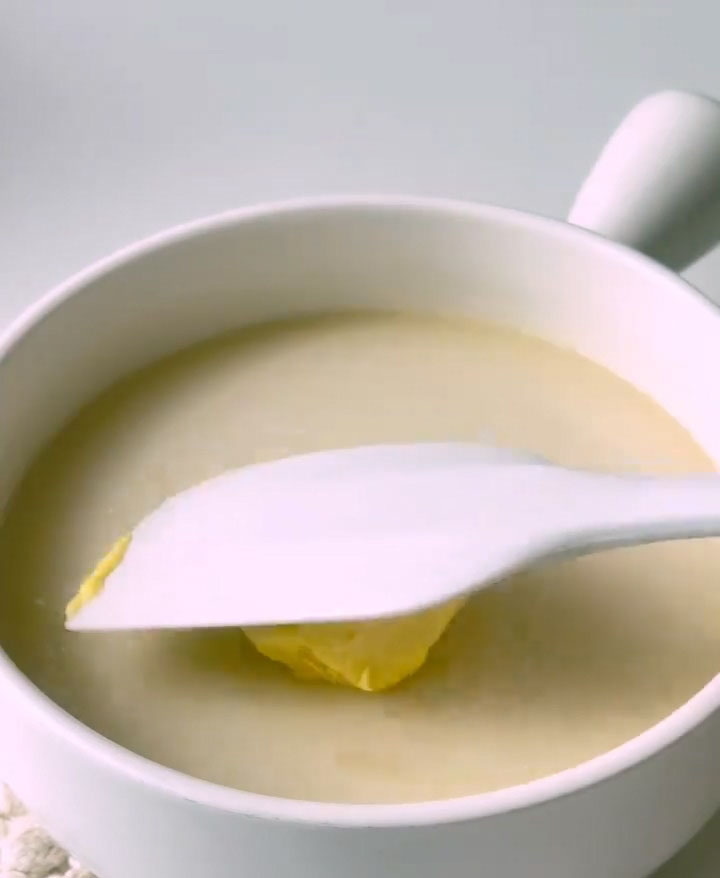
- Immediately transfer the hot dough to a work surface or a silicone mat. Be careful, it’s very hot. Add the butter on top. Using a spatula or silicone scraper, begin to fold and press the butter into the dough until it’s mostly incorporated and cool enough to handle.
- Put on food-safe gloves if you have them (this prevents sticking immensely). Begin to knead, stretch, and fold the dough. Knead until all the butter is fully absorbed and the dough is smooth. If using, add the food coloring now and knead until evenly distributed.
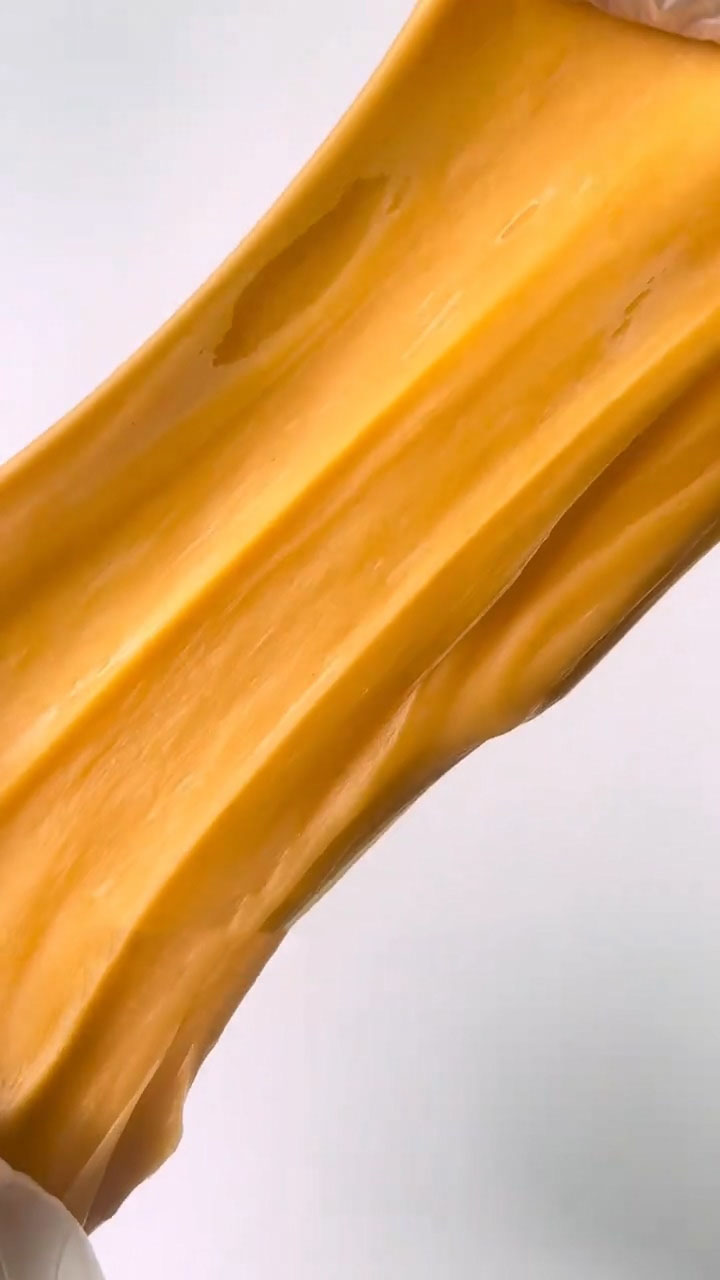
- The Key Step: Grab both ends of the dough and stretch it out, then fold it back. Repeat this stretching and folding process for 3-5 minutes. This develops the gluten-like structure, giving the skin its signature soft, stretchy, and chewy texture. The dough will become very smooth, elastic, and slightly shiny. Form it into a smooth log.
3. Assemble the Daifuku
- Generously dust your work surface and hands with the cooked glutinous rice flour. Divide the dough into 6-8 equal pieces (about 35g each for 8 pieces).
- Roll each small dough portion into a thin wrapper using a rolling pin.

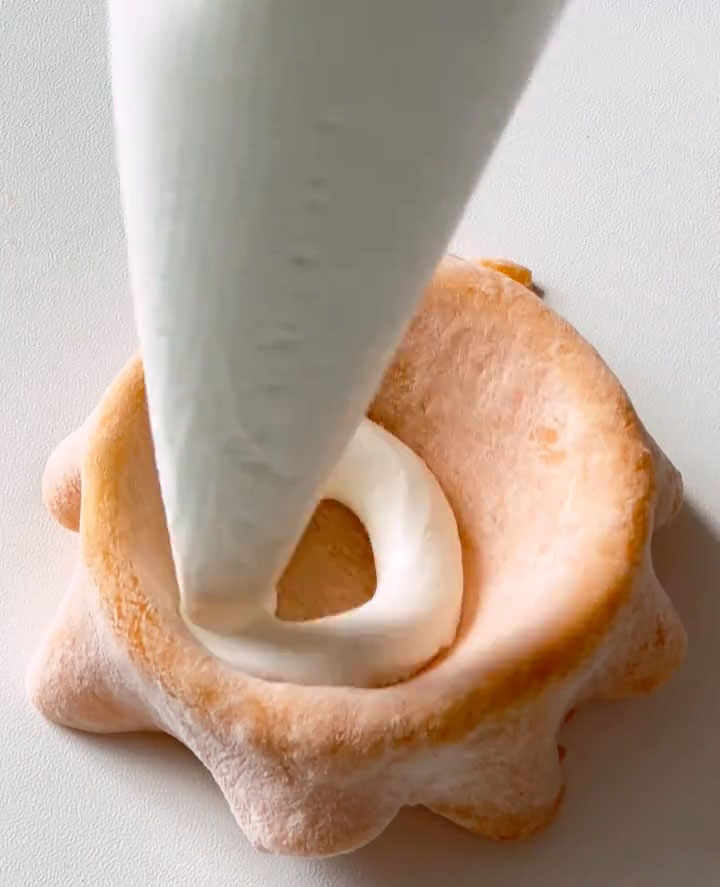
- Place the wrapper in a small bowl, shallow cup, or the cupped palm of your dusted hand to support it.
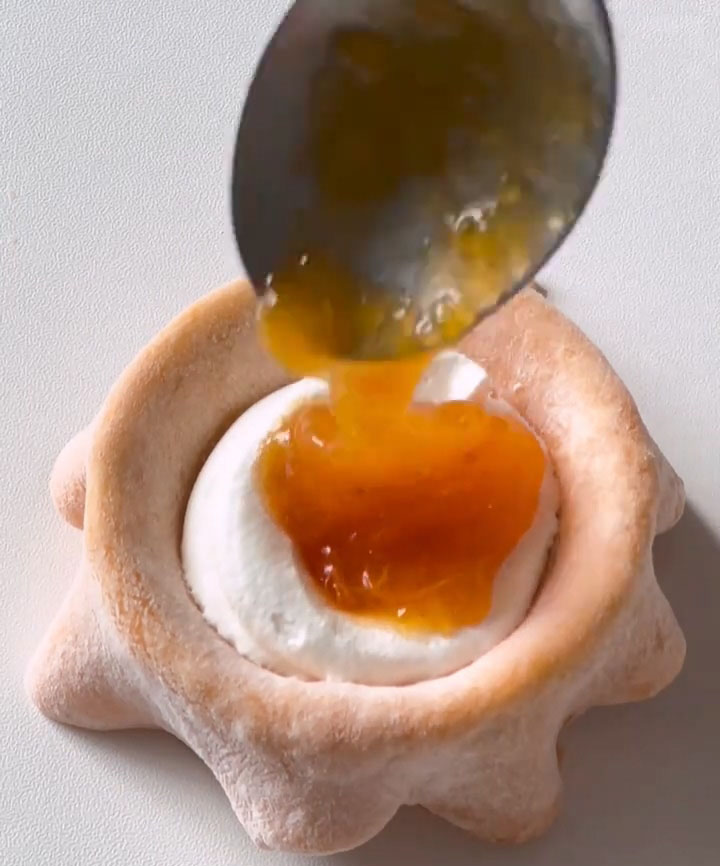
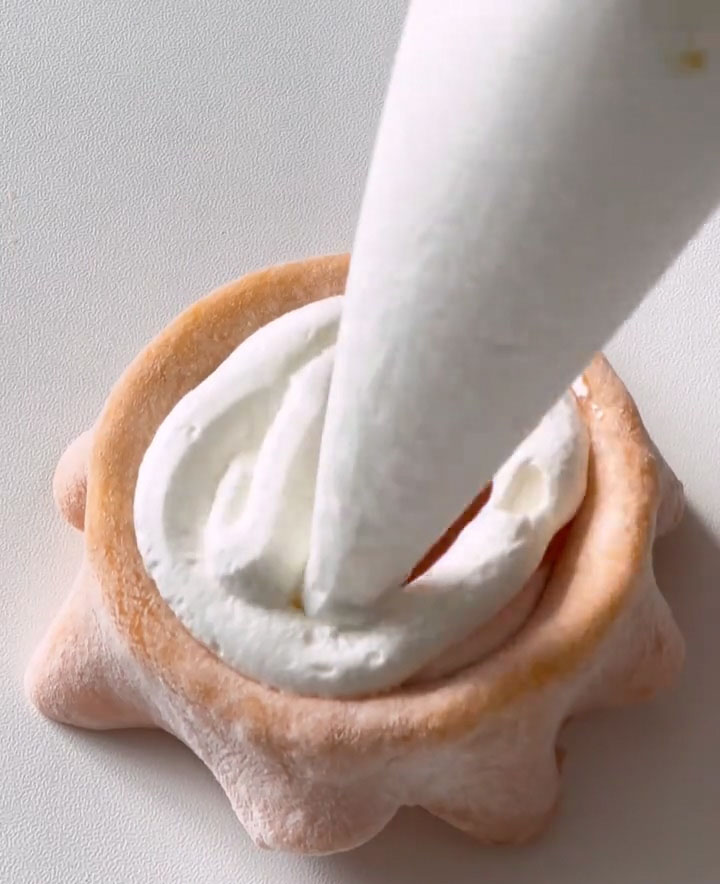
- Pipe a layer of the cold whipped cream into the center. Add 1-2 teaspoons of persimmon puree. Cover the puree completely with another layer of whipped cream.
- Carefully gather the edges of the wrapper up and over the filling. Pinch and pleat the dough together at the top to seal completely. Gently twist and pinch off any excess dough at the top.
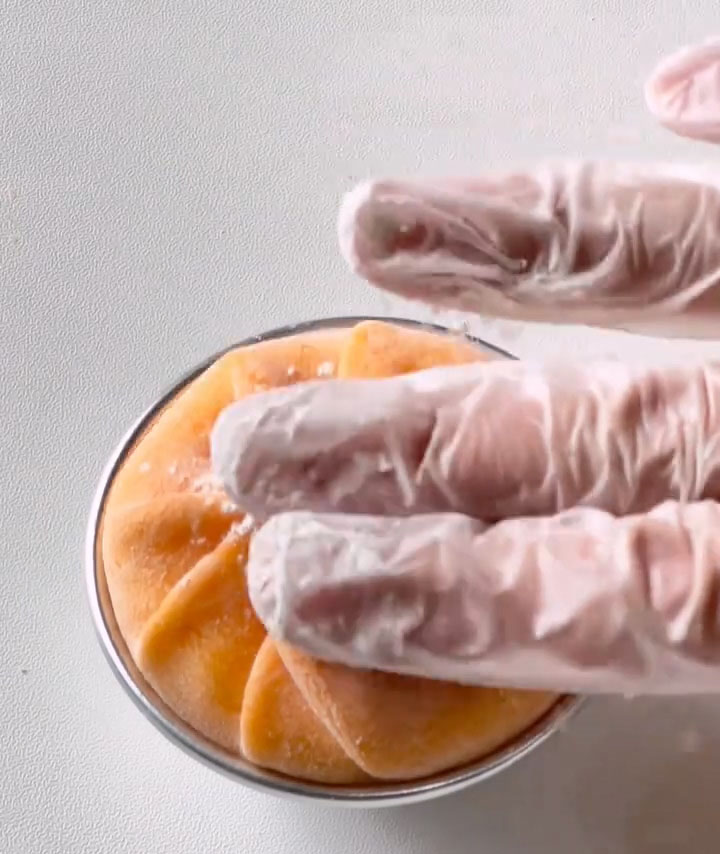
- Roll the sealed daifuku in your palms (dusted with more cooked flour) to smooth it into a round shape. Place it seam-side down on a tray dusted with cooked flour.
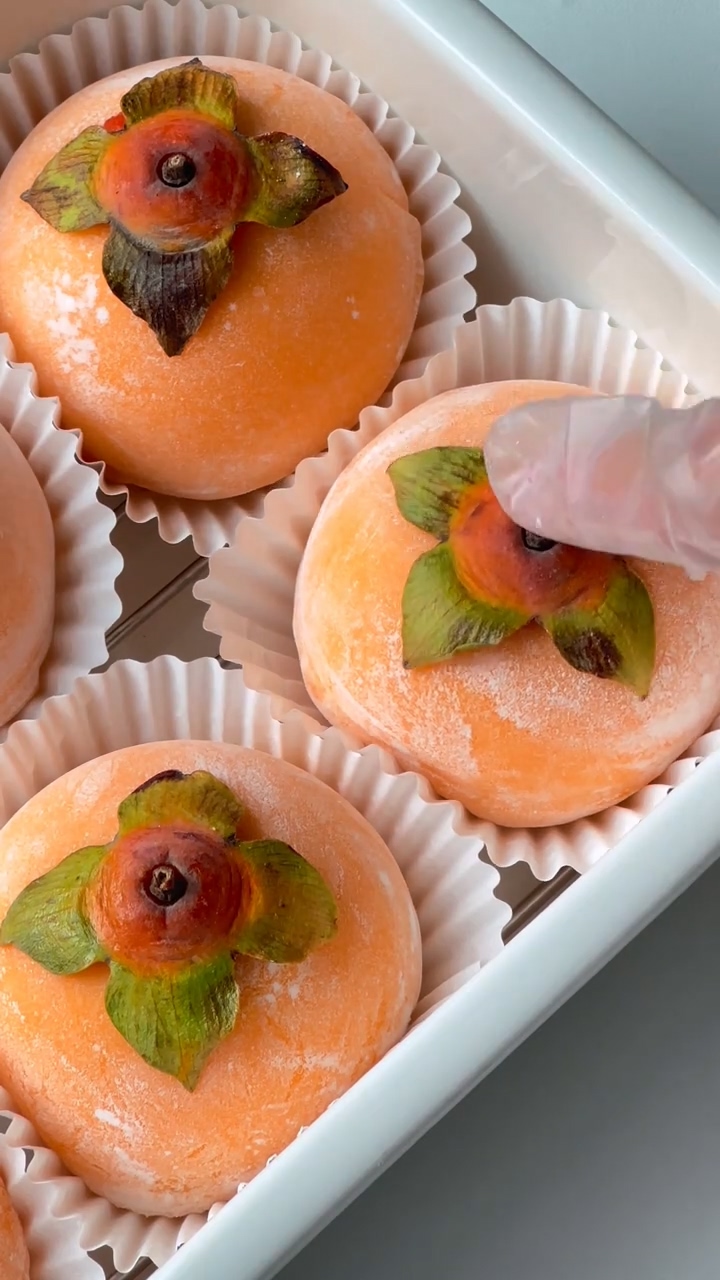
- Lightly brush off any excess flour from the top. Gently press a clean, dry persimmon calyx onto the top as decoration. Repeat with remaining dough and filling.
4. Serve
- Serve immediately for the best texture—the skin will be incredibly soft, stretchy, and the filling cool and bursting.
- If not eating right away, place in a single layer in an airtight container at room temperature for up to a few hours. For longer storage, see notes below.
Tips & Tricks
- Knead While Hot & Stretch: Kneading the butter into the steaming hot dough is crucial for smooth incorporation. The subsequent stretching-and-folding step is non-negotiable for achieving that perfect, elastic “pull.”
- Dust with Cooked Flour Only: Never use raw glutinous rice flour for dusting during assembly. It has a raw, powdery taste that will ruin the flavor. Always use the toasted “熟粉.”
- Keep Cream & Filling Cold: Work with well-chilled, stiff whipped cream. If the cream warms up and softens, it will weep and make the skin soggy, and the daifuku will be impossible to seal neatly.
- Choose Persimmons Wisely: The ideal persimmon is very soft and ripe for sweetness, but not so ripe that it’s watery. A firmer, less ripe persimmon will be difficult to mash and lack flavor.
- Seal Tightly: Ensure the final seal is pinched completely closed with no holes. This prevents the filling from leaking and helps maintain the perfect shape.
Frequently Asked Questions
Why is my daifuku skin hard and not stretchy?
This usually happens if the dough was under-kneaded or not stretched enough after steaming. Ensure you perform the stretching and folding process for a full few minutes until the dough is very smooth and pliable. Also, make sure it was steamed long enough to be fully cooked through.
Why did my daifuku become wet and sticky after a few hours?
This is almost always due to moisture from the filling (especially if the persimmons were too watery) or from the environment being humid. Using stiff whipped cream, proper persimmons, and a thorough dusting of cooked flour are your best defenses. Store them properly (see below).
Can I make these ahead of time?
They are truly best enjoyed the day they are made. However, you can prepare the components ahead: make the persimmon puree and cooked flour a day in advance. You can also whip the cream and keep it chilled in the piping bag for several hours. Assemble just before serving.
Storage Instructions
- Short-term (Same Day): Store in a single layer in an airtight container at cool room temperature for up to 6-8 hours.
- Refrigeration: If you must refrigerate, place in a single layer in an airtight container for up to 1 day. The skin will harden in the fridge. Let them sit at room temperature for 15-20 minutes before eating to soften slightly.
- Freezing is NOT recommended. It severely damages the texture of both the mochi skin (making it hard and crumbly) and the whipped cream filling.

Chewy Mochi Persimmon Daifuku (Beginner-Friendly Recipe)
This persimmon daifuku is ultra-soft, stretchy, and filled with whipped cream and sweet persimmon purée. Steamed mochi skin, no oven needed, beginner-friendly and perfect for autumn and winter desserts.Ingredients
Daifuku Skin
- 120 g glutinous rice flour
- 30 g cornstarch
- 30 g white sugar
- 180 g milk
- 15 g butter
- A few drops orange food coloring optional
- Cooked glutinous rice flour for dusting
Cream Filling
- 230 g heavy cream whipping cream
- 15 g white sugar
Persimmon Filling & Assembly
- Flesh of 2-3 ripe persimmons mashed into a puree
- 6-8 persimmon calyxes for decoration
Instructions
Prepare the Components
- Whip the Cream: In a chilled bowl, combine the heavy cream and 15g sugar. Whip with an electric mixer until stiff peaks form—the cream should be firm and hold its shape firmly on the whisk. Transfer to a piping bag and refrigerate immediately.
- Make the Persimmon Puree: Cut the tops off the persimmons and scoop out the soft, jelly-like flesh into a bowl. Mash thoroughly with a fork until you achieve a relatively smooth, jam-like consistency. Set aside.
- Make Cooked Flour: In a dry skillet over low heat, add 3-4 tablespoons of raw glutinous rice flour. Toast, stirring constantly, for 3-5 minutes until it becomes fragrant and turns a very pale yellow. Transfer to a bowl to cool. This is your essential dusting flour.
Steam and Knead the Daifuku Skin
- In a medium heatproof bowl (wide and shallow is best for even cooking), whisk together the glutinous rice flour, cornstarch, and 30g sugar. Gradually whisk in the milk until you have a completely smooth, lump-free batter.
- Cover the bowl tightly with plastic wrap. Use a toothpick or knife to poke 5-6 small steam vents in the wrap.
- Place the bowl in a steamer over boiling water. Steam for 25 minutes over medium heat, or until the dough is completely solid and opaque.
- Immediately transfer the hot dough to a work surface or a silicone mat. Be careful, it's very hot. Add the butter on top. Using a spatula or silicone scraper, begin to fold and press the butter into the dough until it's mostly incorporated and cool enough to handle.
- Put on food-safe gloves if you have them (this prevents sticking immensely). Begin to knead, stretch, and fold the dough. Knead until all the butter is fully absorbed and the dough is smooth. If using, add the food coloring now and knead until evenly distributed.
- The Key Step: Grab both ends of the dough and stretch it out, then fold it back. Repeat this stretching and folding process for 3-5 minutes. This develops the gluten-like structure, giving the skin its signature soft, stretchy, and chewy texture. The dough will become very smooth, elastic, and slightly shiny. Form it into a smooth log.
Assemble the Daifuku
- Generously dust your work surface and hands with the cooked glutinous rice flour. Divide the dough into 6-8 equal pieces (about 35g each for 8 pieces).
- Roll each small dough portion into a thin wrapper using a rolling pin.
- Place the wrapper in a small bowl, shallow cup, or the cupped palm of your dusted hand to support it.
- Pipe a layer of the cold whipped cream into the center. Add 1-2 teaspoons of persimmon puree. Cover the puree completely with another layer of whipped cream.
- Carefully gather the edges of the wrapper up and over the filling. Pinch and pleat the dough together at the top to seal completely. Gently twist and pinch off any excess dough at the top.
- Roll the sealed daifuku in your palms (dusted with more cooked flour) to smooth it into a round shape. Place it seam-side down on a tray dusted with cooked flour.
- Lightly brush off any excess flour from the top. Gently press a clean, dry persimmon calyx onto the top as decoration. Repeat with remaining dough and filling.
Serve
- Serve immediately for the best texture—the skin will be incredibly soft, stretchy, and the filling cool and bursting.
- If not eating right away, place in a single layer in an airtight container at room temperature for up to a few hours. For longer storage, see notes below.
Made this recipe? I’d love to see it!Tag @cookingwithchun and share it with #cookingwithchun on Instagram.
Leave a Reply