
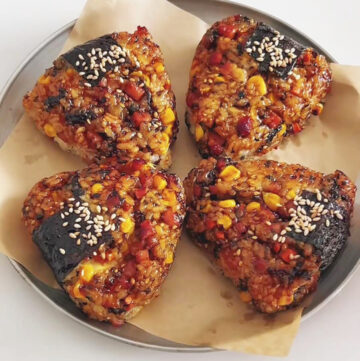
These Teriyaki Cheese Yaki Onigiri are crispy, melty, and so easy to make! Perfect for using leftover rice and made completely in the air fryer. No onigiri mold needed — just shape by hand! A kid-friendly snack you’ll make again and again.
Easy Yaki Onigiri with Melty Cheese Filling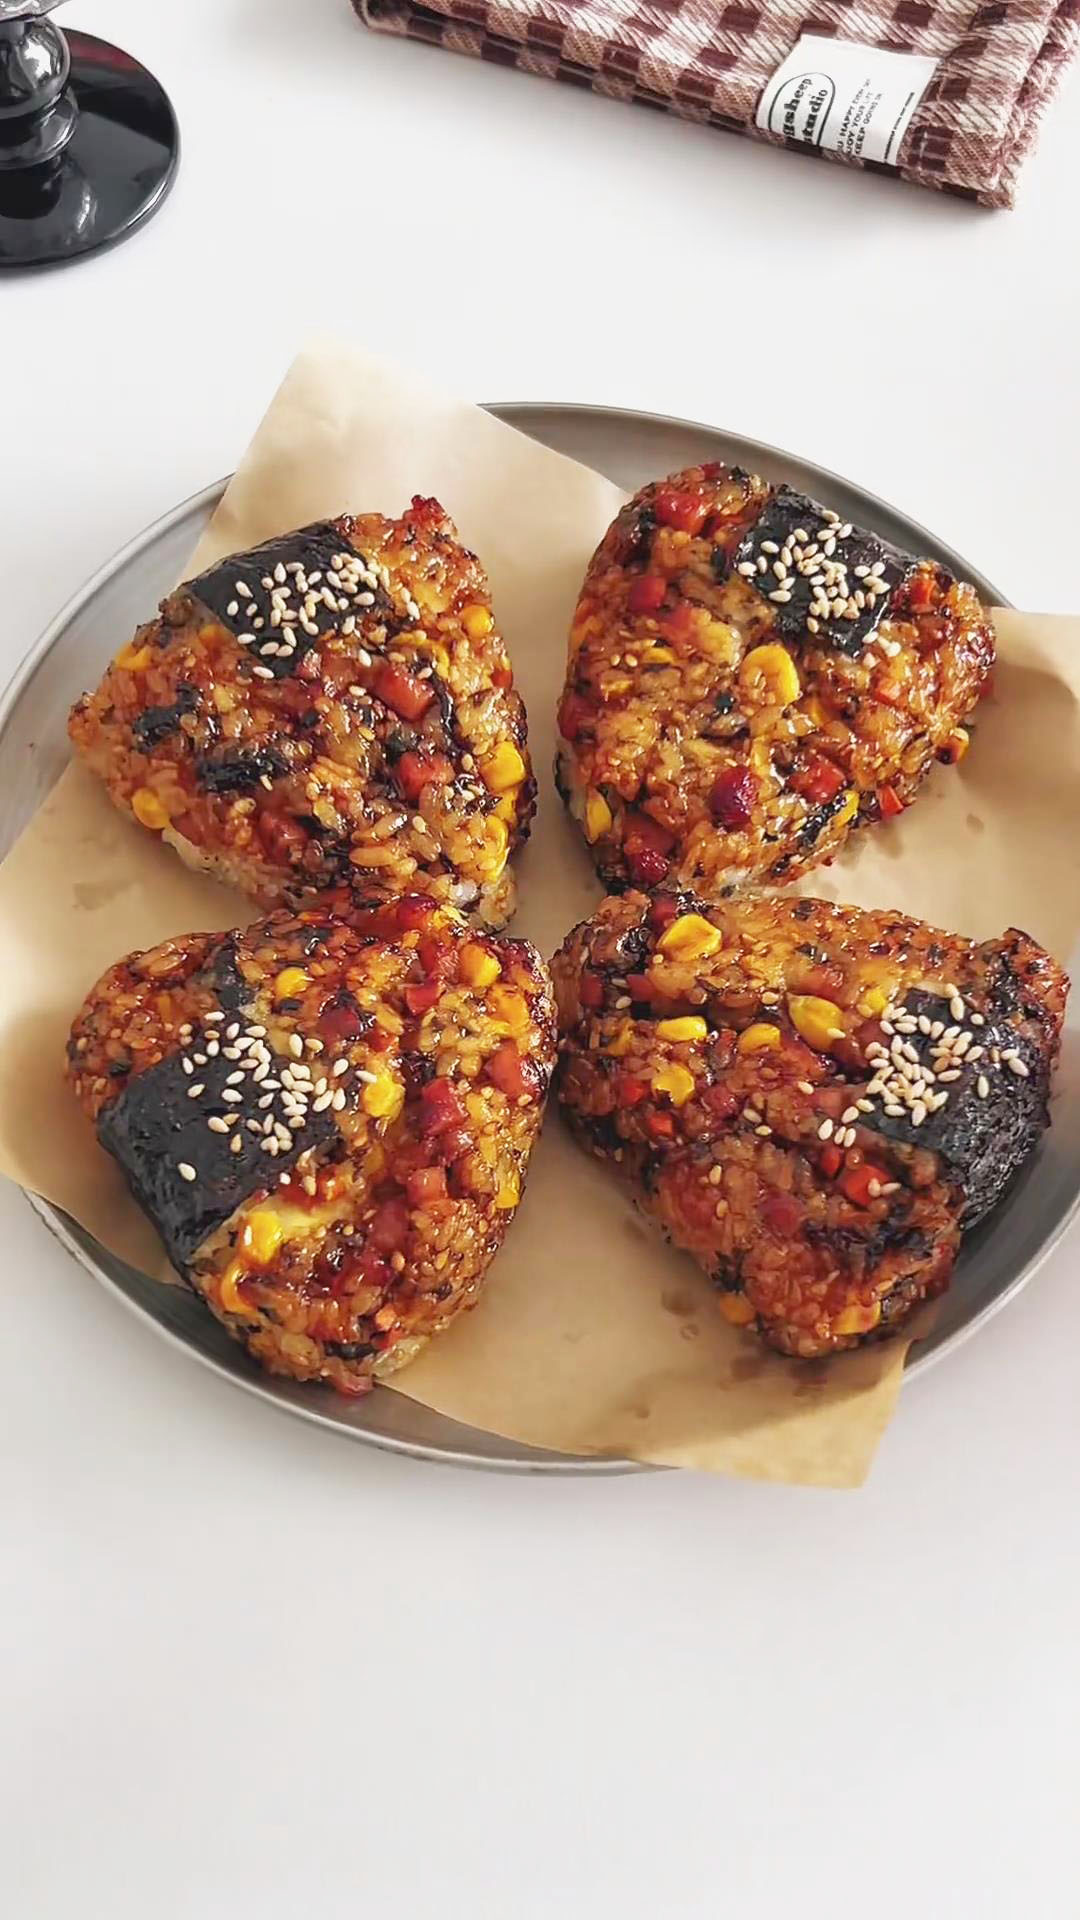
Last week, I was getting ready to take the kids out for a little weekend fun and found myself stuck on the classic question — what snacks should I bring?
I opened the fridge, spotted a bowl of leftover rice, and instantly knew what to make: their all-time favourite Grilled Rice Balls.
They absolutely loved them. Yaki Onigiri are easy to hold, not messy to eat, and perfect for picnics, car rides, or any on-the-go adventure.
And honestly, one of the best things about this recipe is how flexible it is.
You can use whatever bits and pieces you have in your fridge — veggies, meat, seaweed, cheese — it all works. It’s the ultimate “clean out the fridge” snack.
Another bonus? You don’t need any special onigiri mold or shaping tool.
Just follow my steps and you can easily shape the onigiri by hand.
It’s simple, relaxing, and surprisingly satisfying.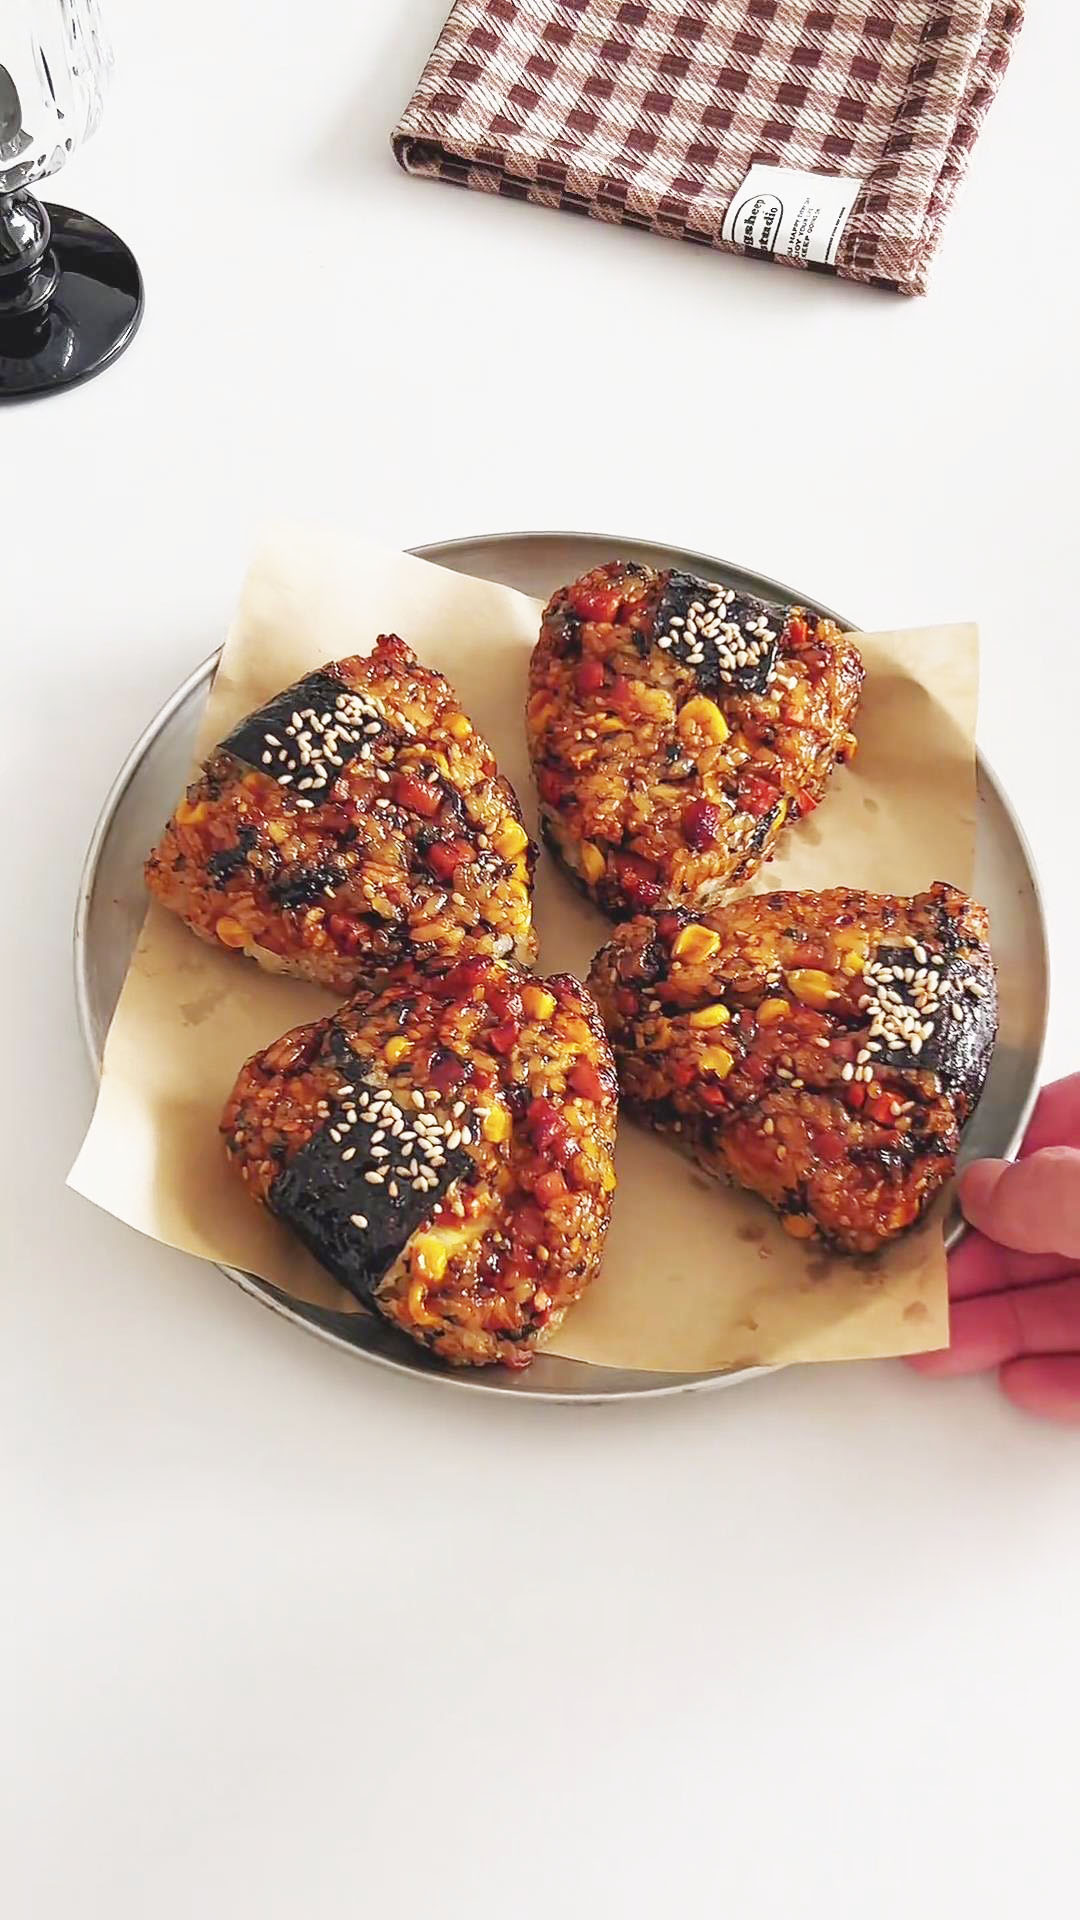
What Is Yaki Onigiri?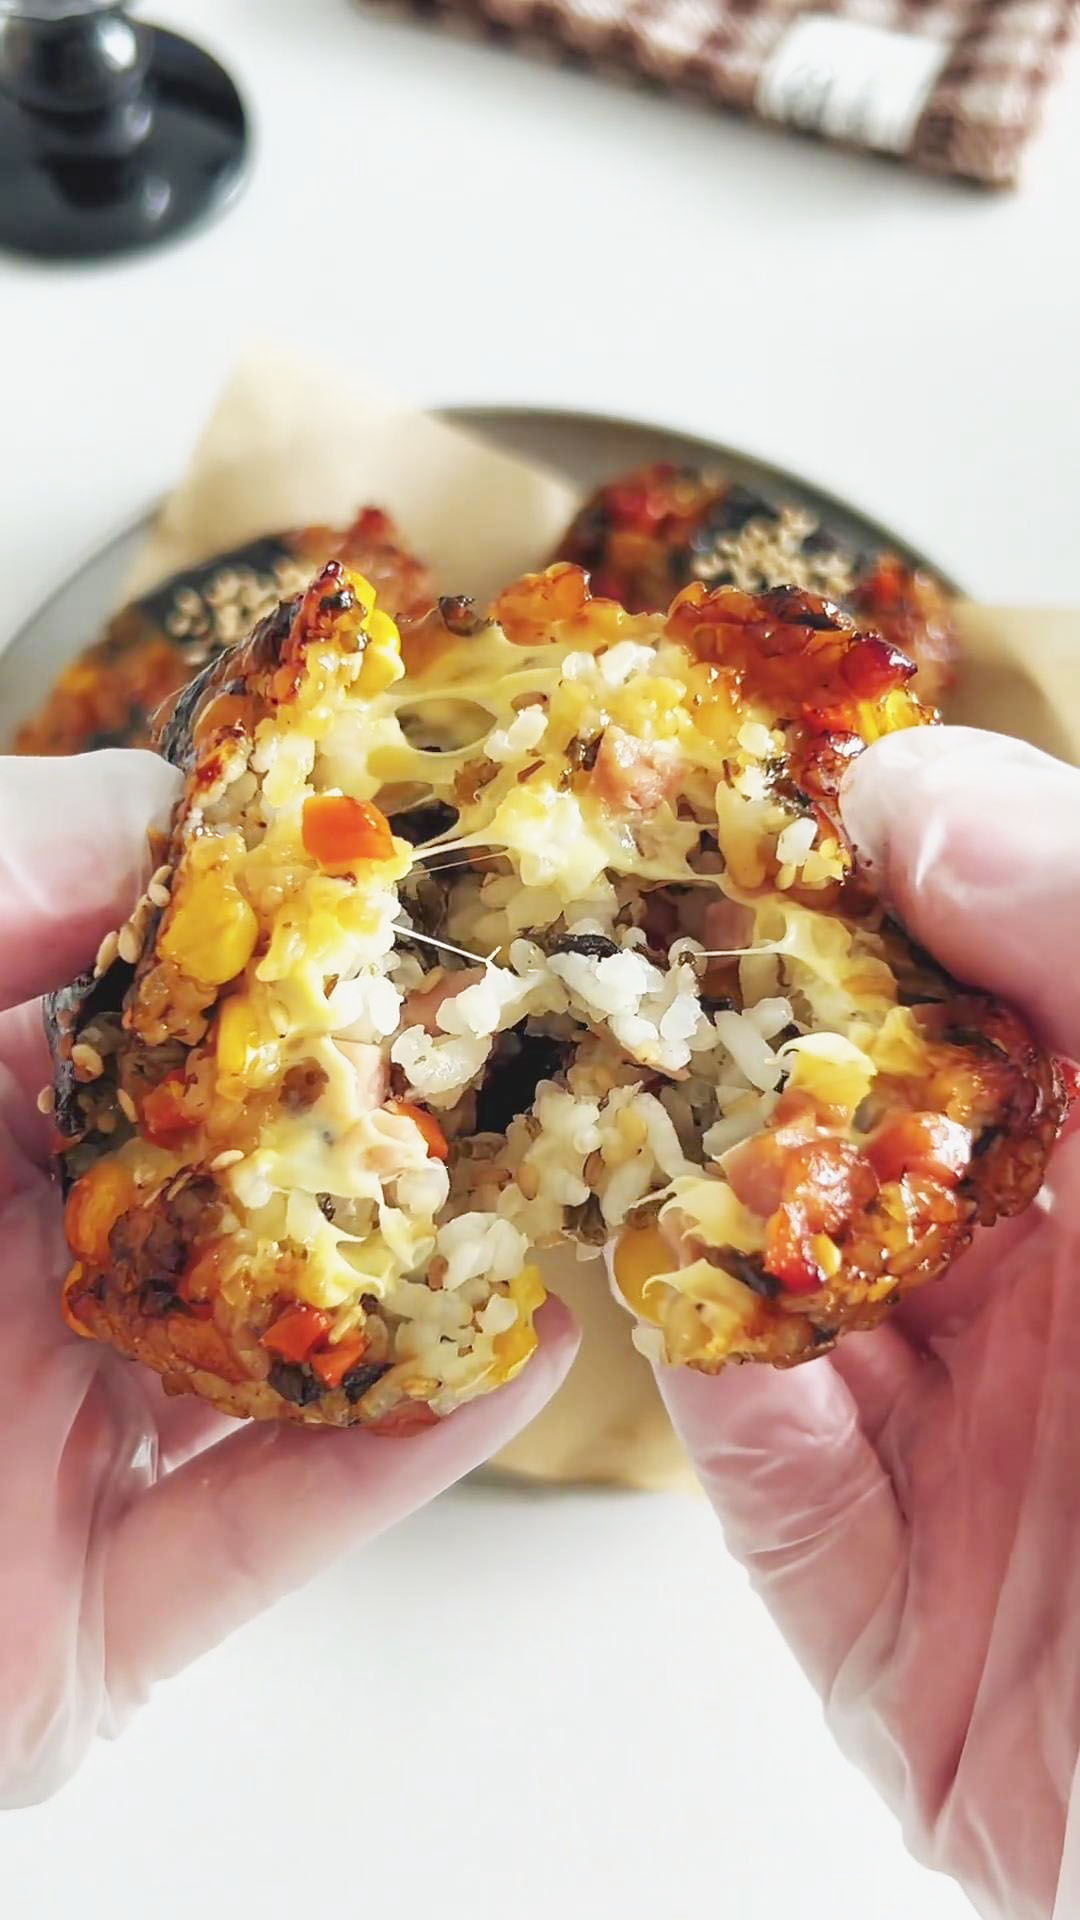
Yaki Onigiri is a Japanese grilled or pan-fried rice ball, typically brushed with a savory sauce until crispy on the outside.
While it’s traditionally cooked in a pan, I use an air fryer to make it even easier and less messy.
Why you‘ll love this recipe
- A flavour-packed upgrade to traditional onigiri: Every bite has savoury rice, veggies, meat, seaweed, and melted cheese.
- Perfectly crisp and caramelised on the outside: The teriyaki glaze cooks into a lacquered, sticky, flavourful coating.
- Great for using leftover rice: Cold rice shapes beautifully and gives the best texture once grilled.
- Air fryer friendly: No mess, no fuss — just brush, fry, flip, and enjoy.
- Customisable: Add tuna, pork floss, spice, or your favourite fillings to make it your own.
Ingredients and Substitutions
- Cooked leftover rice – Using cold, refrigerated rice is the key to success here, as the grains are firmer and less sticky, making the rice balls much easier to shape without falling apart.
- Cheese slices – I recommend using standard, thin-sliced processed cheese (like American cheese) for its superb melting quality and the classic “pull” you expect. In a pinch, shredded mozzarella works too.
- Carrot – Finely dicing the carrot adds a slight crunch and a pop of color. It’s mostly for texture, so you can easily swap it for another veggie like green peas.
- Luncheon meat (Spam) – This adds a crucial savory, salty, and meaty element that makes the rice balls feel substantial. Diced ham or cooked chicken breast are great alternatives.
- Corn kernels – A little sweetness and juicy bursts from the corn balance the other savory ingredients beautifully. Frozen corn that’s been thawed works perfectly.
- Shredded seaweed/seaweed flakes – This is your flavor powerhouse, adding that essential ocean-born umami directly into the rice mix. If you only have nori sheets, just tear or cut them into small pieces.
- Roasted seaweed sheets (nori) – Wrapping the bottom of the rice ball isn’t just for looks; it adds a wonderful contrasting flavor and makes them less messy to eat.
- Cooking oil – Just a tiny bit mixed into the rice helps bind everything together and makes shaping much smoother.
- Salad dressing/Mayonnaise – This is the secret ingredient for moisture and richness. It helps the rice stick and adds a subtle tang. For a non-mayo version, plain yogurt with a bit of sugar works.
- Soy sauce – The base of your teriyaki glaze, providing saltiness and depth.
- Oyster sauce – This gives the glaze body and a rich, savory umami flavor that soy sauce alone doesn’t have.
- Honey – I prefer honey for its floral sweetness and glossy finish in the glaze, which helps it caramelize beautifully. You can adjust the amount to perfectly balance the saltiness to your taste.
How to Make Teriyaki Cheese Yaki Onigiri
Mix the Rice
Place the leftover rice in a large bowl and drizzle in the cooking oil. 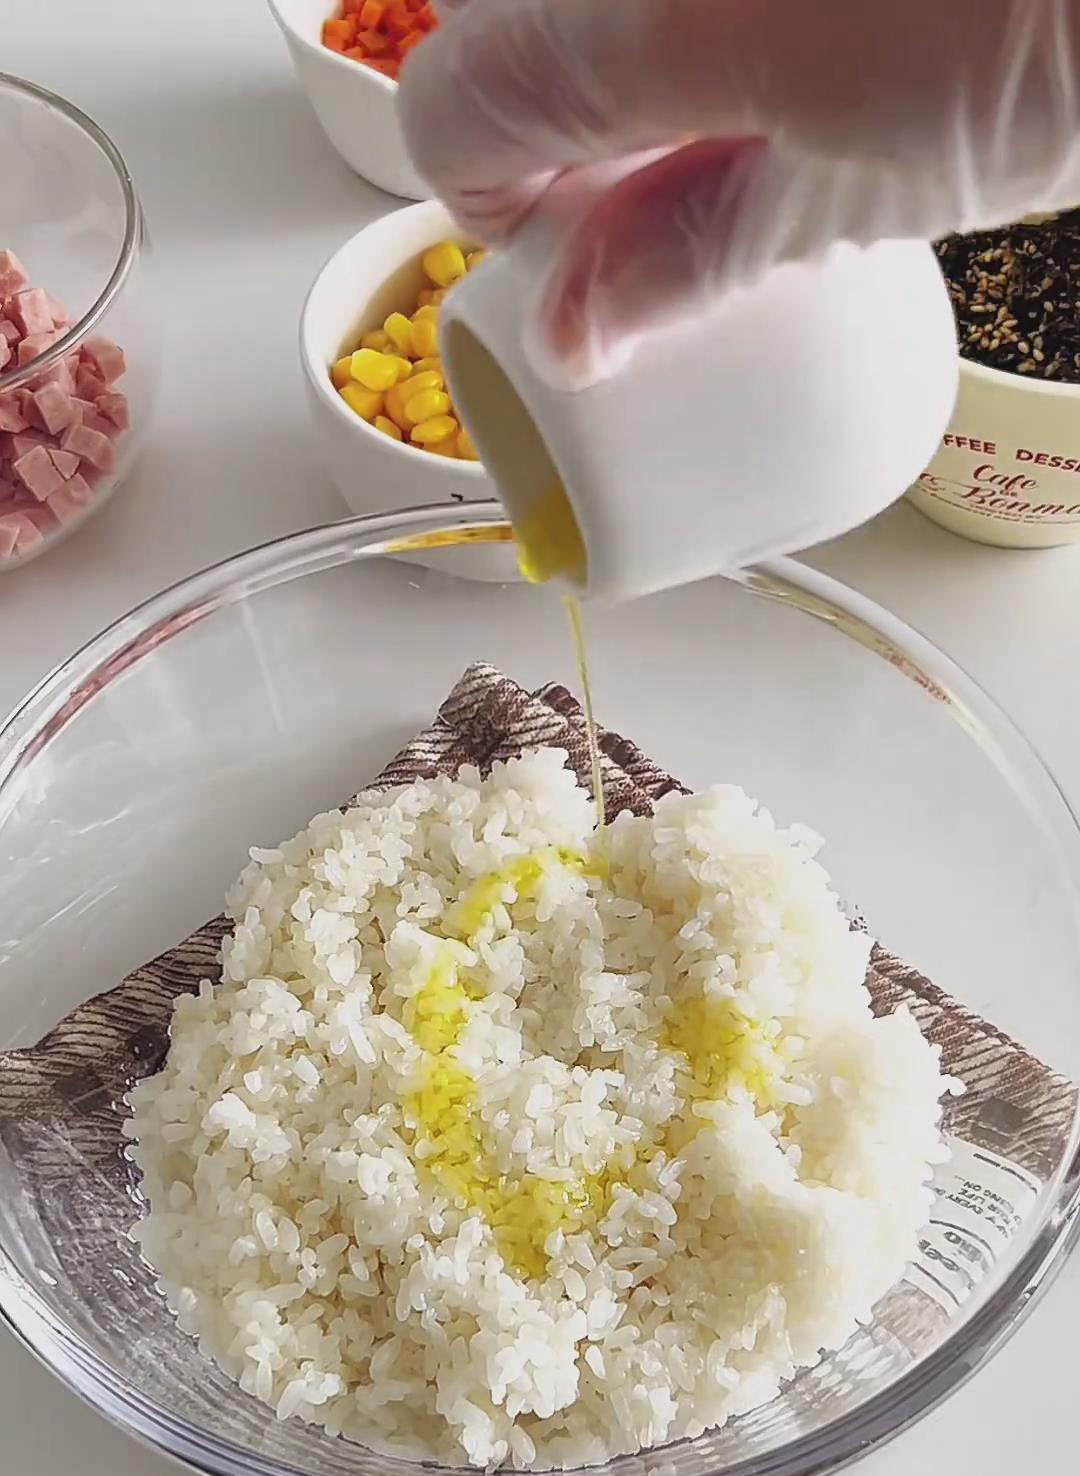
Add the diced carrots, luncheon meat, corn kernels, and seaweed flakes.
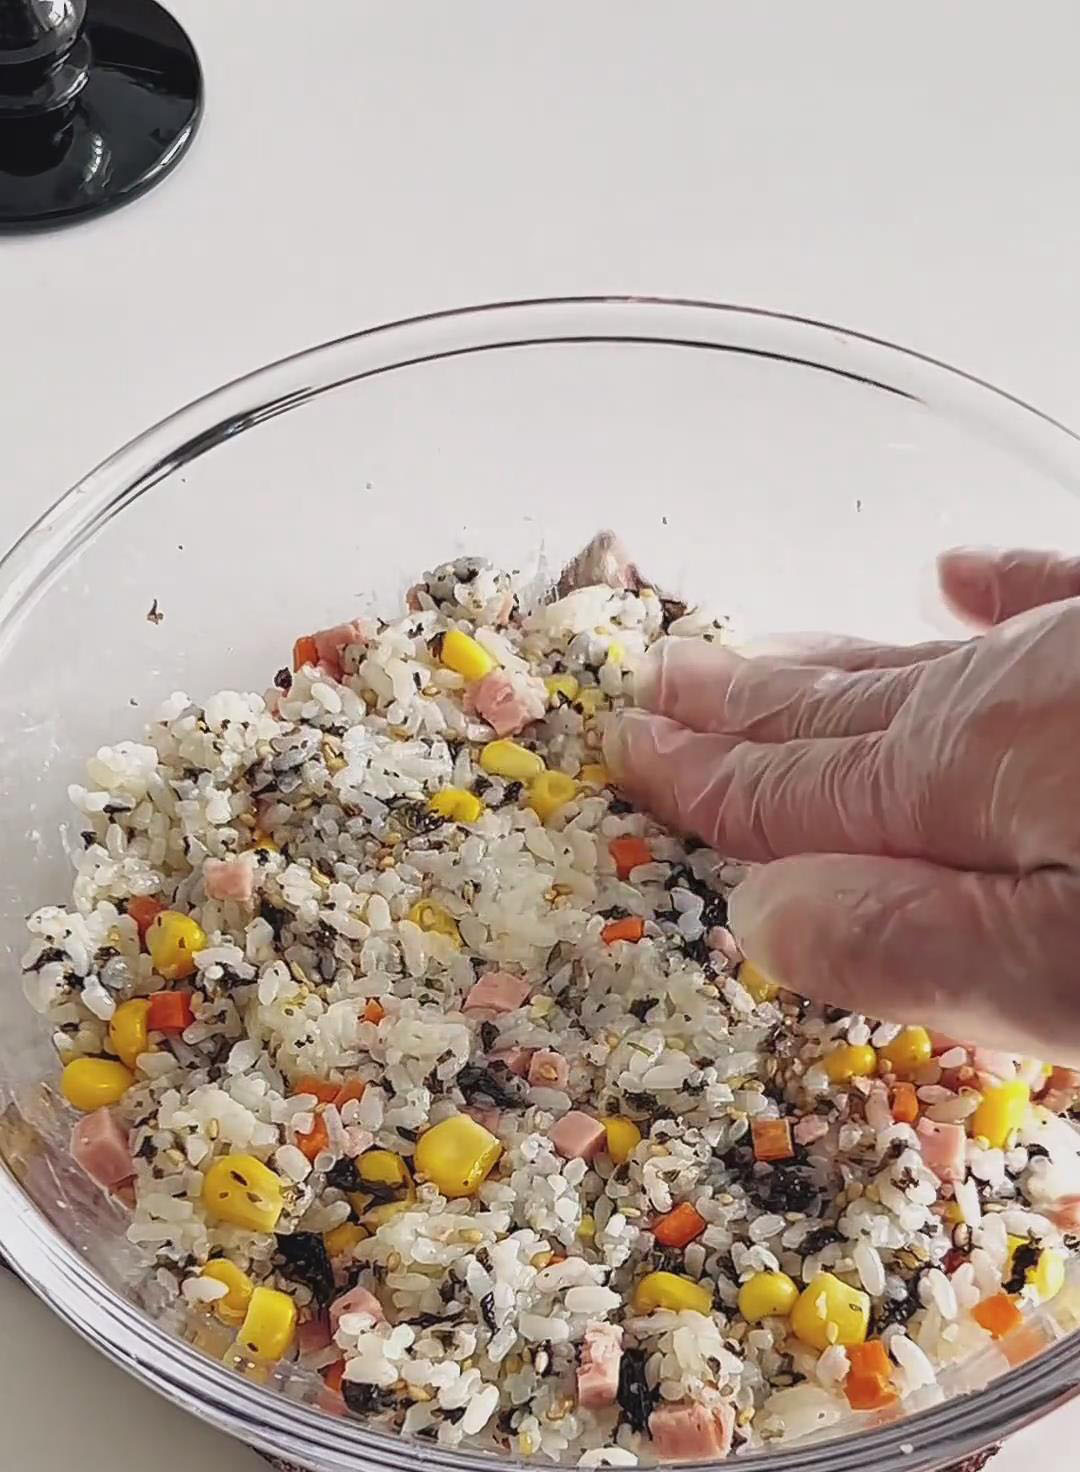
Squeeze in the mayonnaise and mix thoroughly until every grain of rice is coated and the ingredients are evenly combined.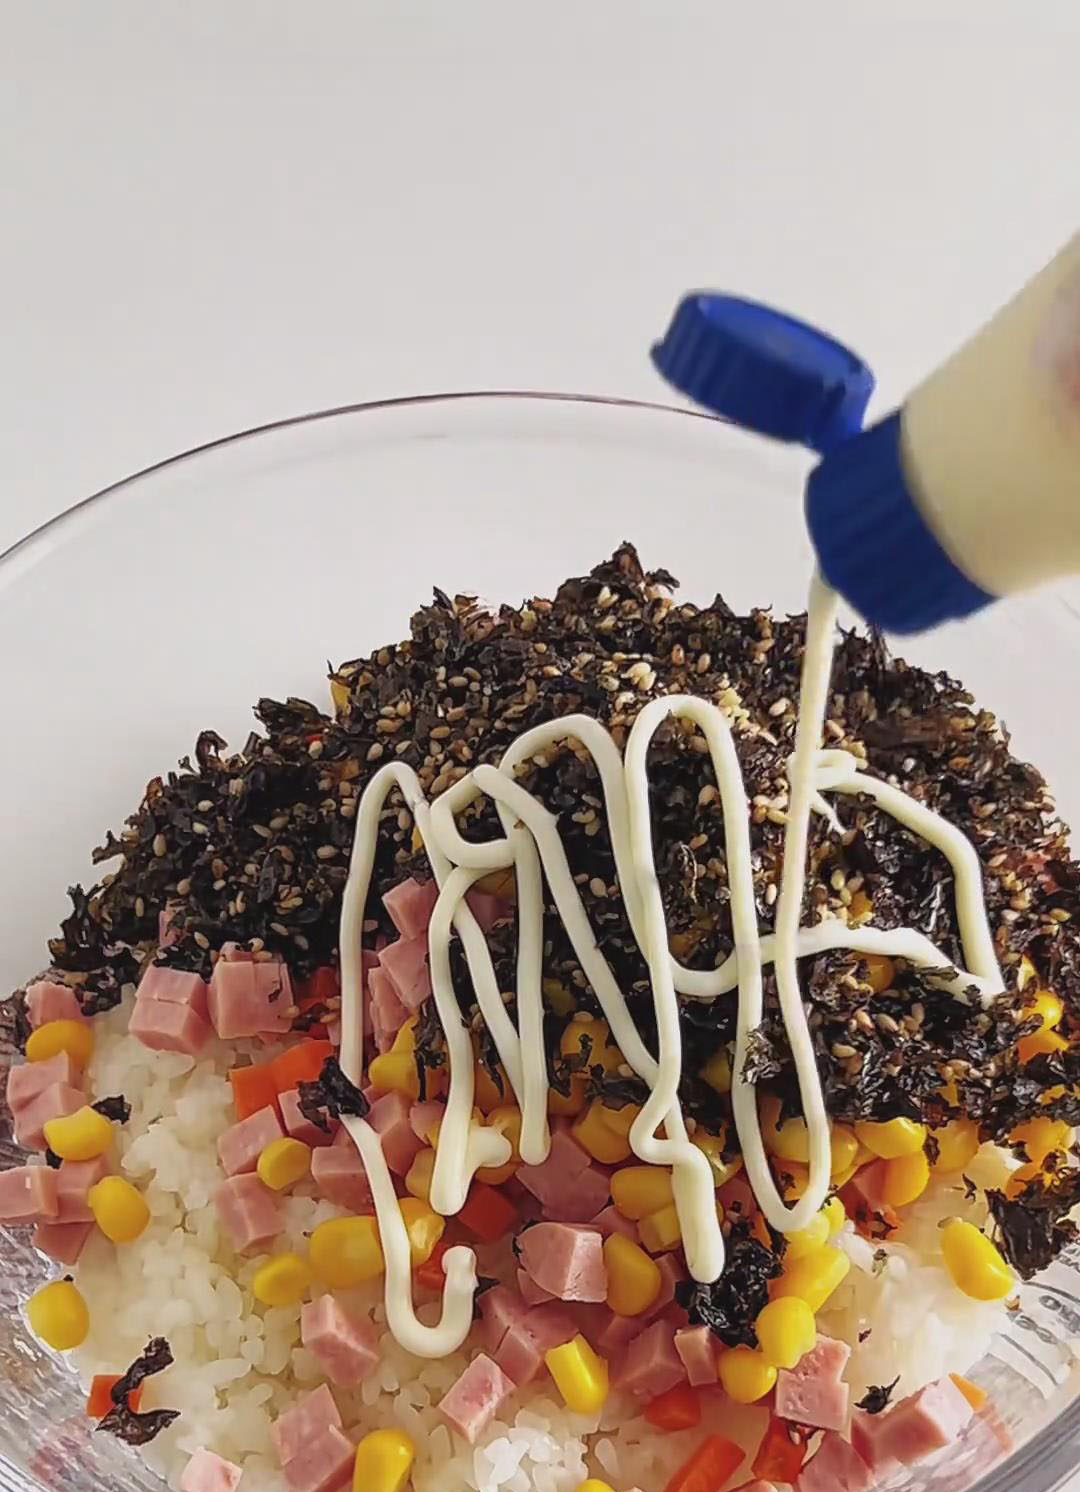
 Shape and Fill
Take about 70g of the rice mixture and flatten it into a disc in your palm.
Place one slice of cheese in the center (you can fold it to fit). 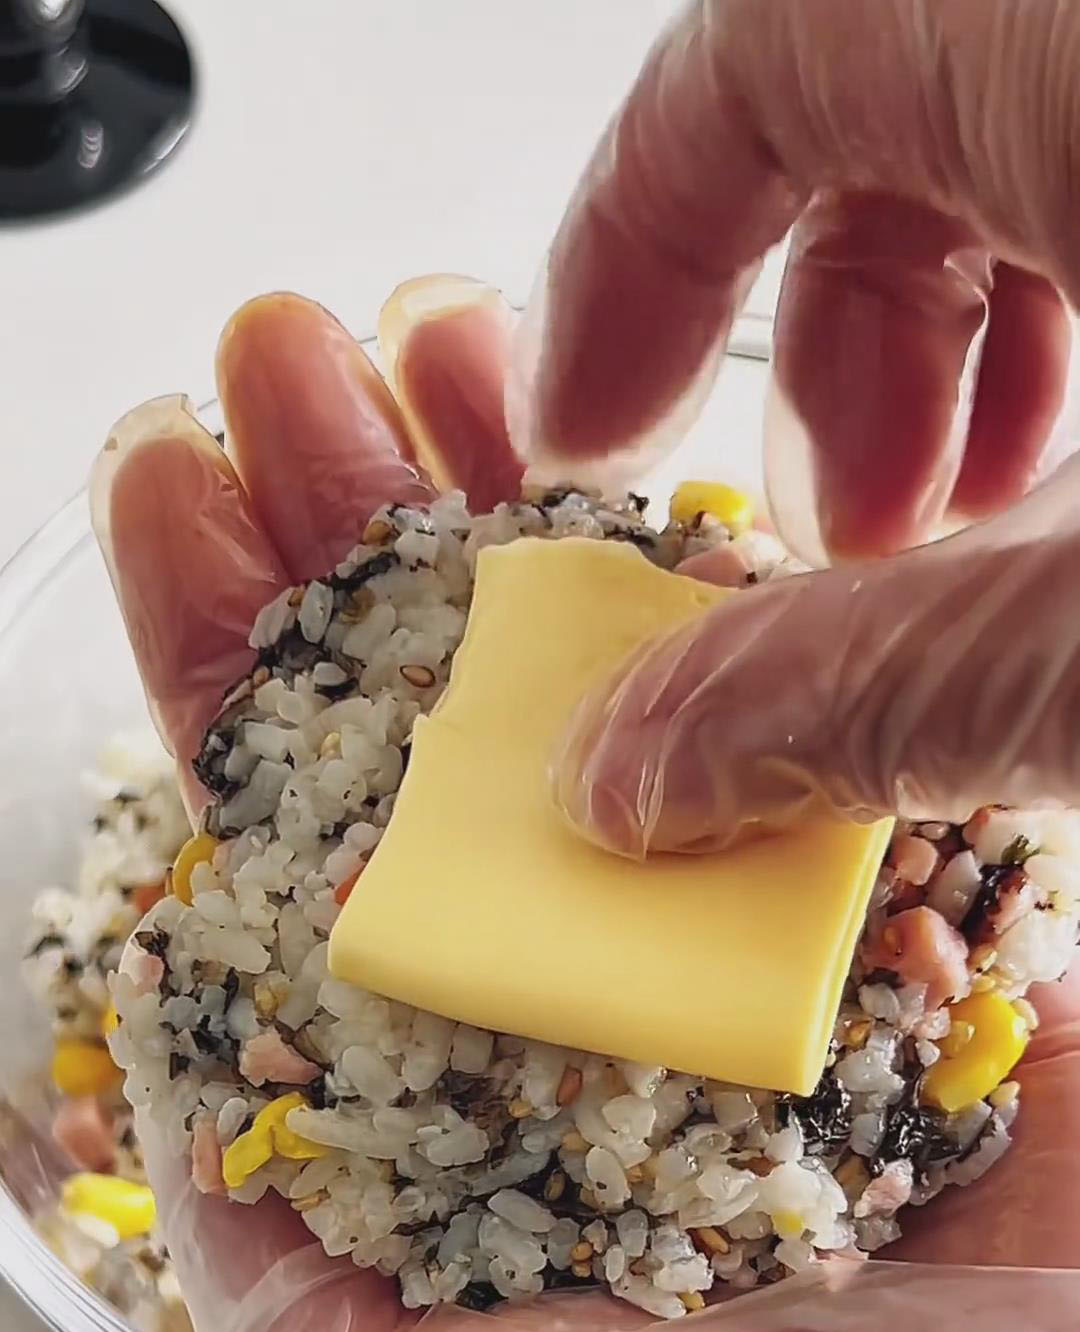
Top with another small portion of rice, then gently cup and press your hands to form a compact triangle (or round ball), ensuring the cheese is completely sealed inside with no gaps.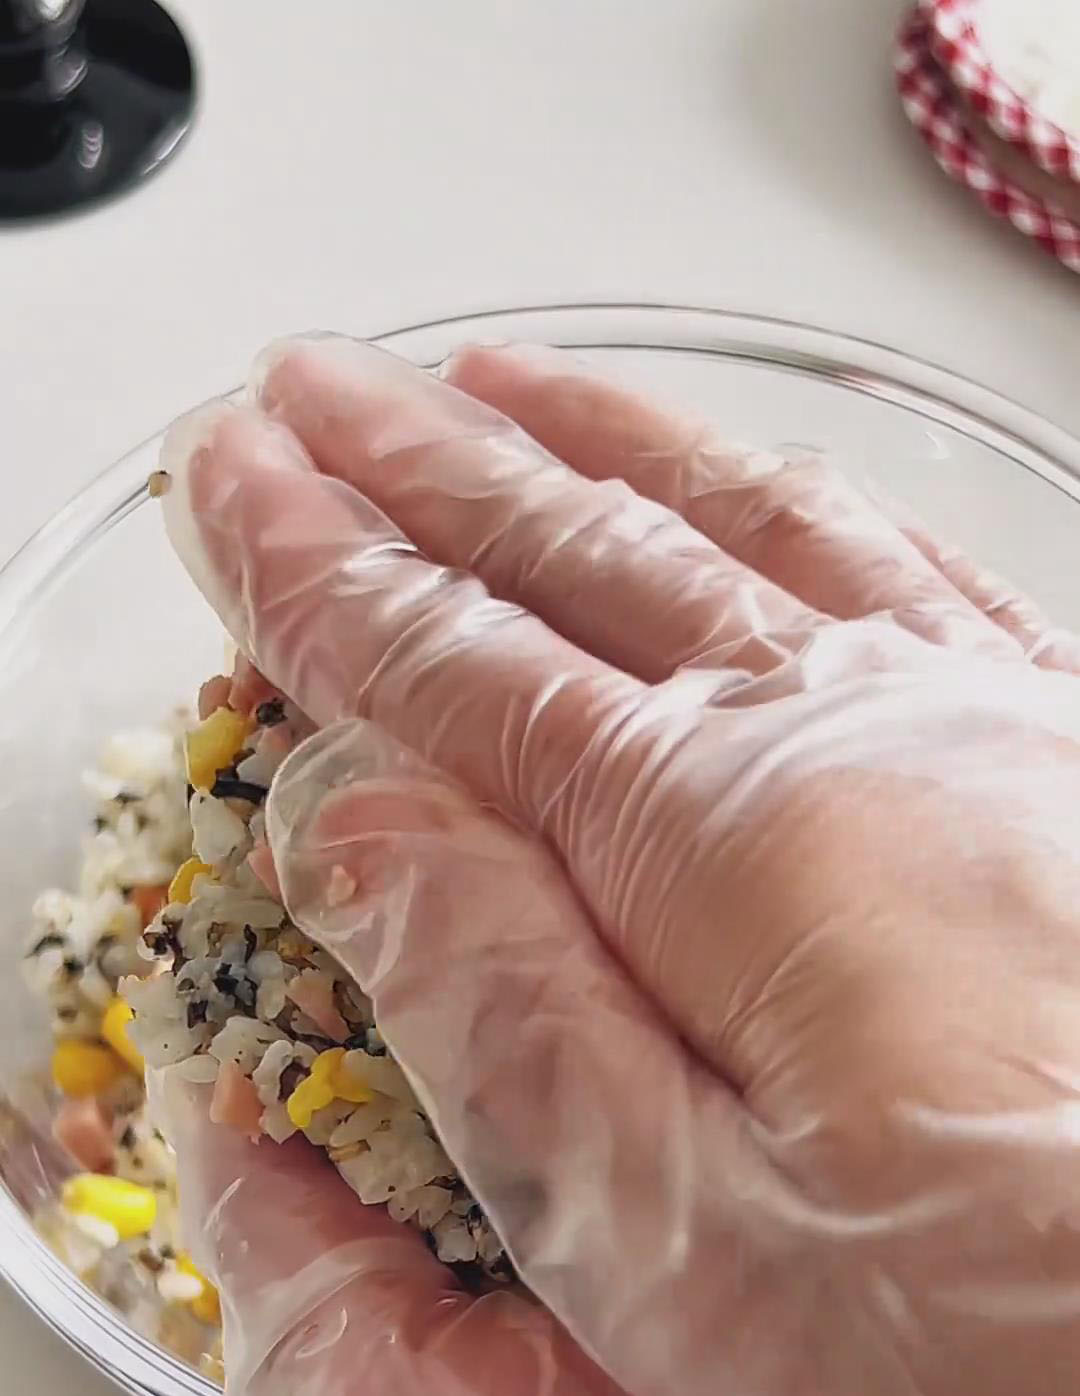
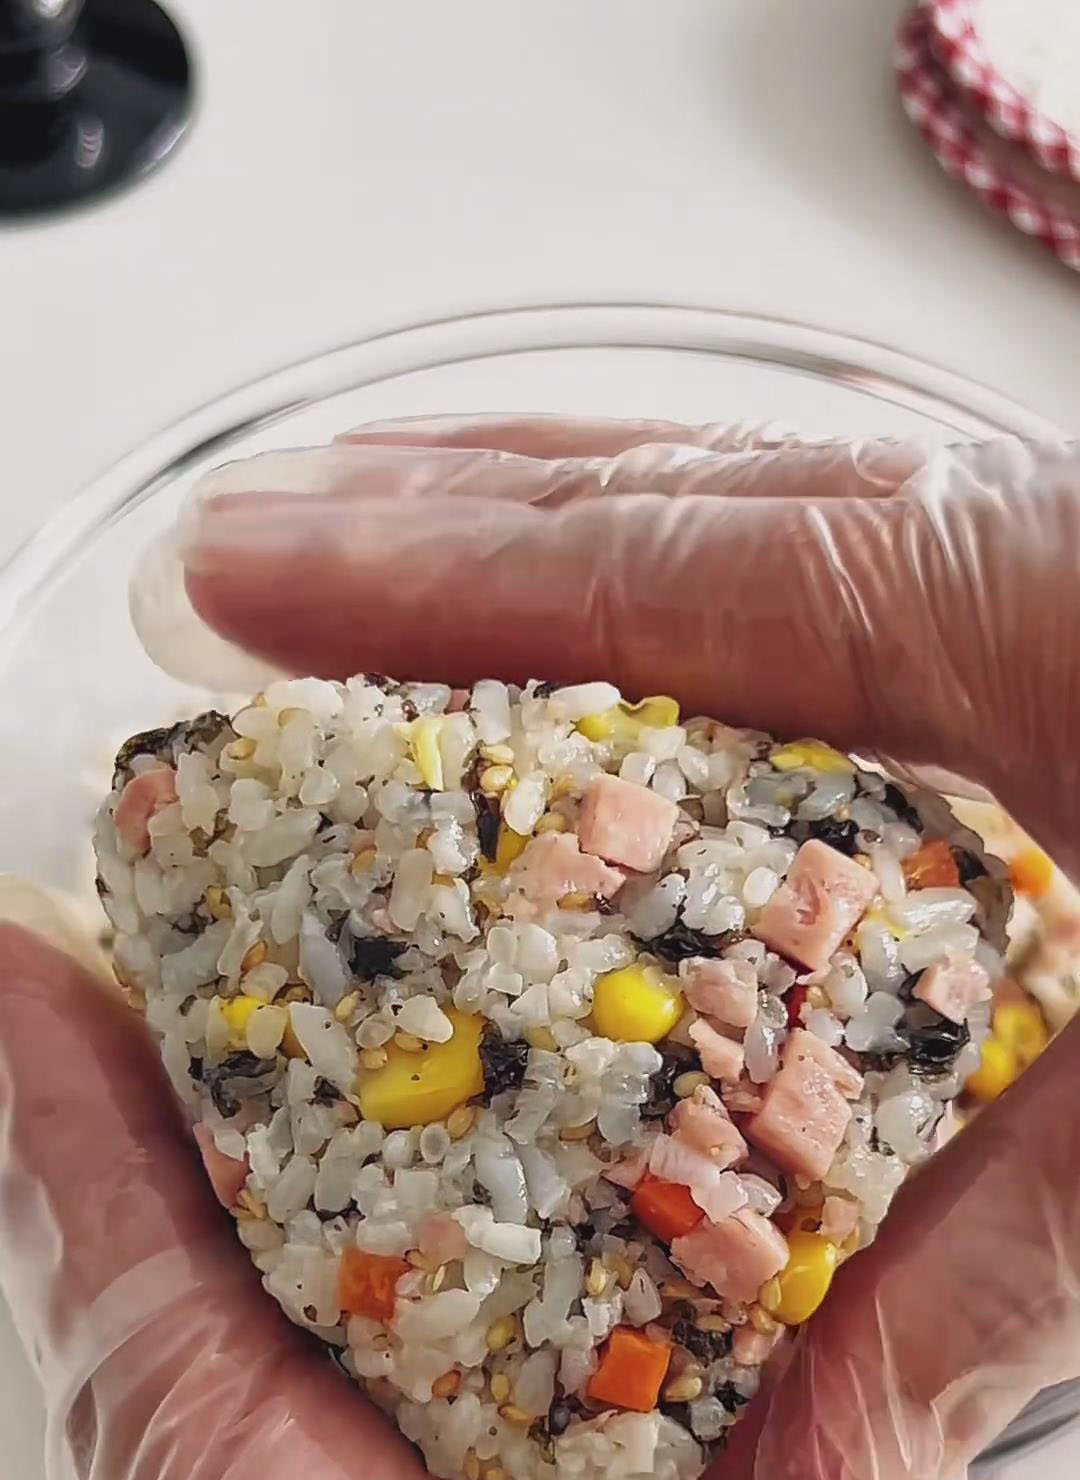
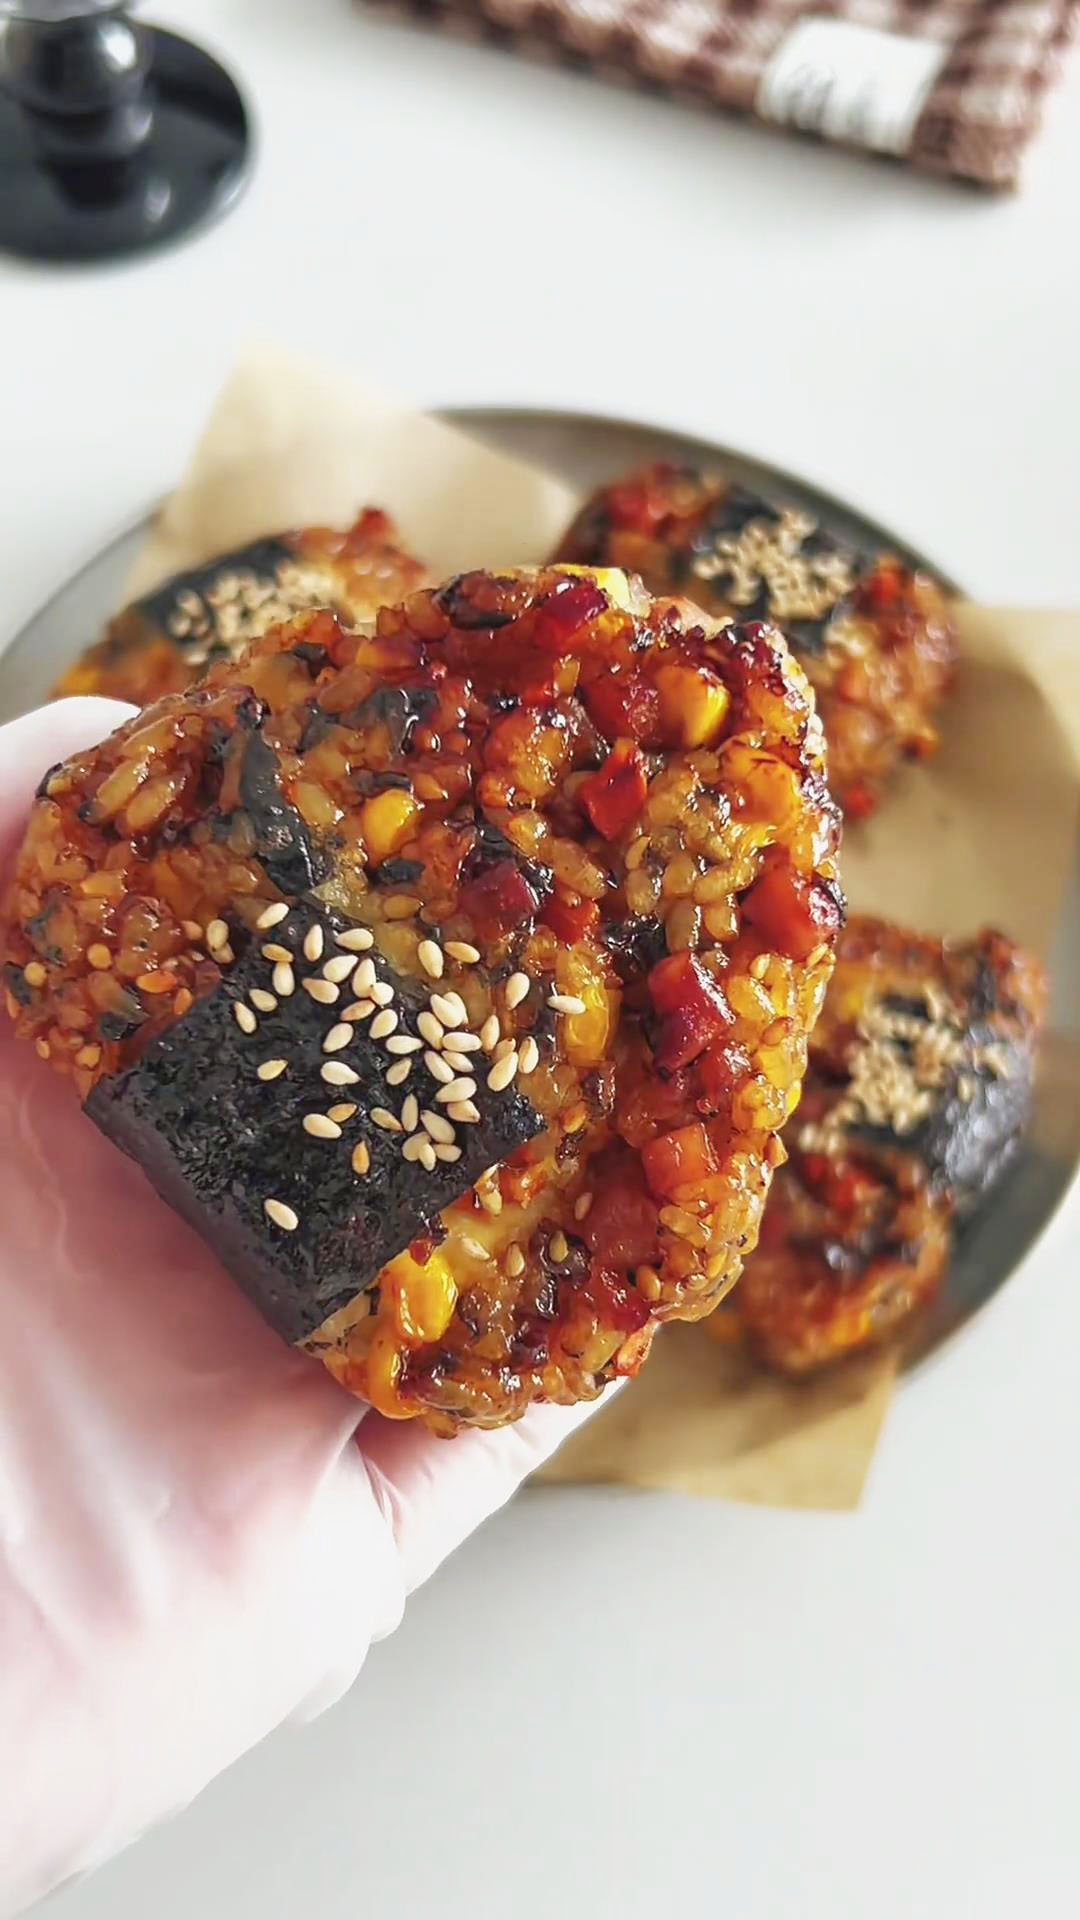
Wrap a sheet of nori around the bottom of the rice ball. Repeat to make 4 rice balls.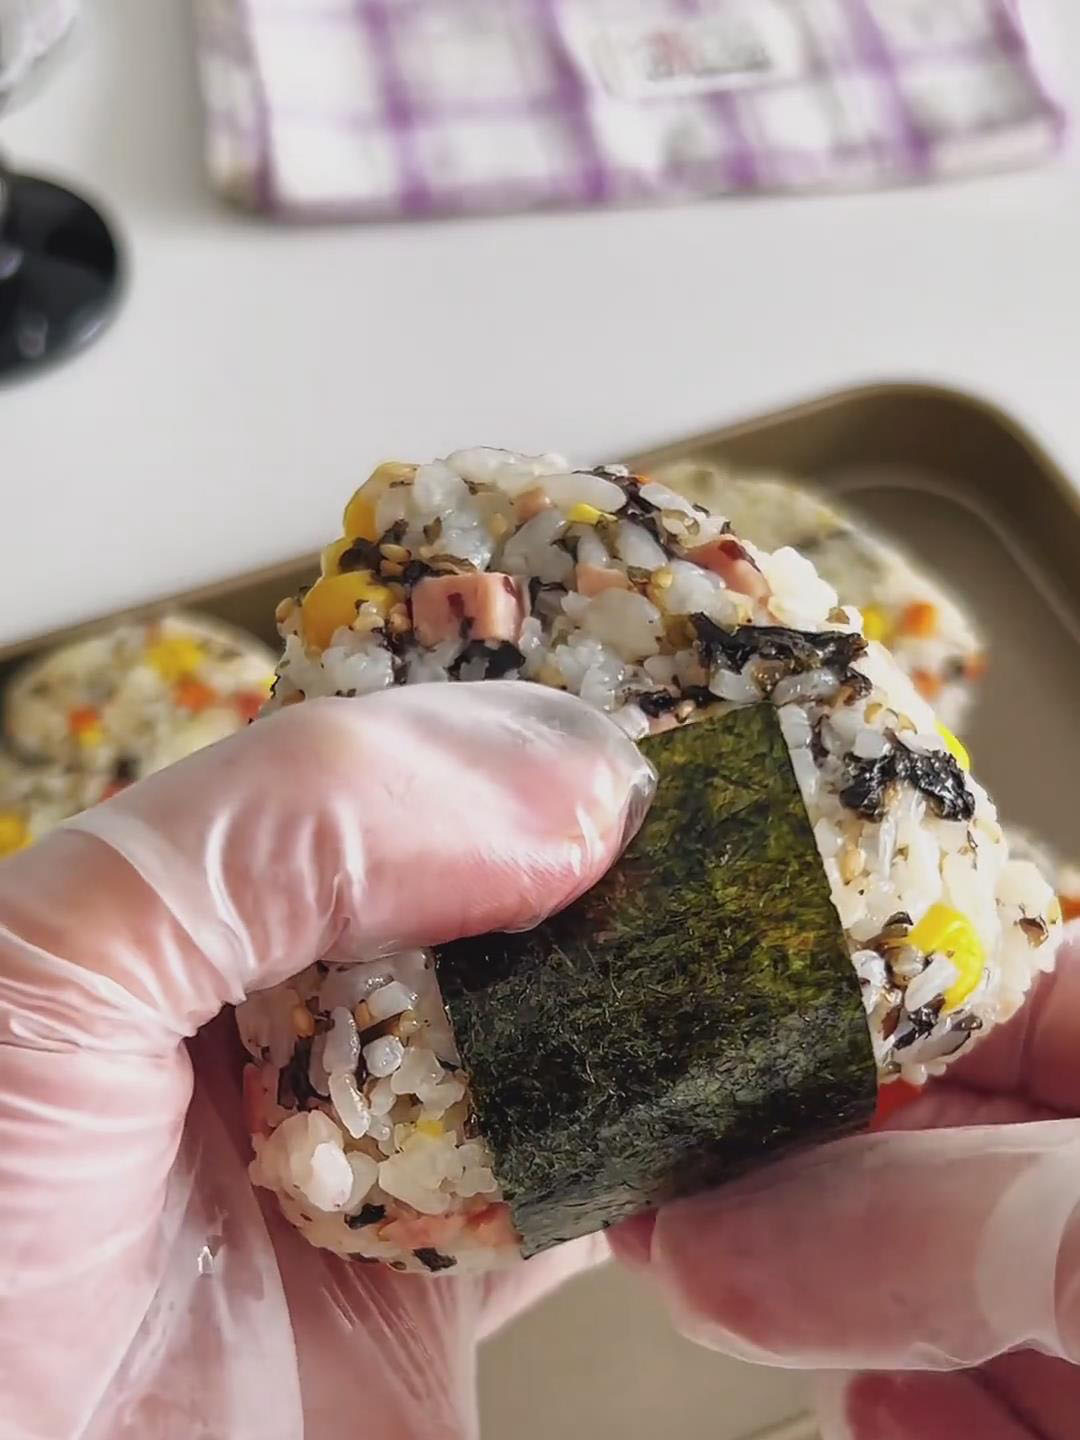
Make the Glaze and Cook
In a small bowl, whisk together the soy sauce, oyster sauce, and honey until smooth.
- Air Fryer Method: Place the rice balls in the air fryer basket. Brush the top and sides generously with the teriyaki glaze. Cook at 180°C (350°F) for 7 minutes. Carefully flip the rice balls, brush the other side with more glaze, and cook for another 7 minutes, or until the surface is caramelized and crispy.
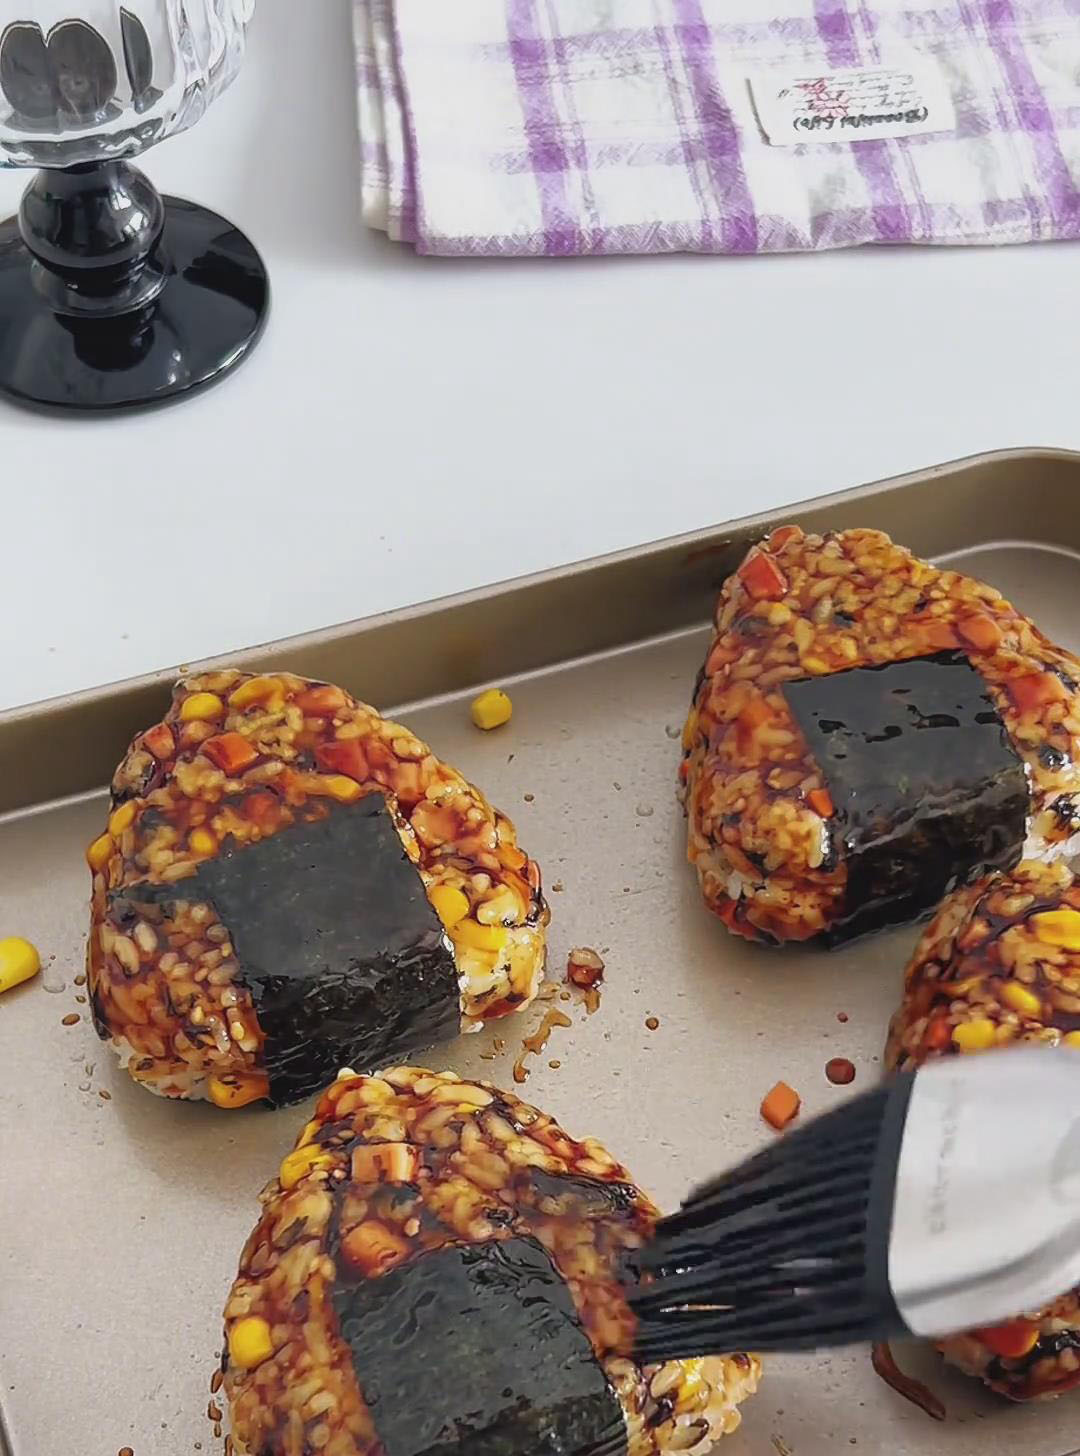
- Stovetop Method: Heat a non-stick pan over medium heat with a thin layer of oil. Place the rice balls in the pan and cook for 3-4 minutes until the bottom is golden. Flip, brush the cooked top with glaze, and cook another 3-4 minutes. Flip again, brush the other side, and cook until crispy and glazed on all sides.
Serve
Enjoy the Yaki Onigiri immediately while the cheese is hot and gooey!
Tips & Tricks
- Use leftover rice: Freshly cooked rice is too soft and sticky, while cold rice holds its shape perfectly and won’t fall apart.
- Don‘t skip the mayonnaise: A small amount adds moisture and helps bind the rice mixture so the onigiri stays firm.
- Shape gently: Apply even pressure when forming the onigiri—too much force makes the rice dense, but too light and it won’t hold.
- Glaze both sides: Brushing twice ensures the entire surface gets that glossy, caramelised teriyaki finish.
- No air fryer? Pan-fry with a thin layer of oil over low heat, then pour in the teriyaki glaze and lightly fry until coated and golden.
Frequently Asked Questions
Can I make these without cheese?
Yes! Just skip the cheese for a more traditional-style yaki onigiri.
My onigiri is falling apart — what went wrong?
Your rice may have been too hot or too dry. Use chilled leftover rice and include the mayonnaise and a touch of oil for better binding.
How do I reheat leftovers?
Air fry at 160°C for 5 minutes or microwave for 1 minute. The cheese becomes melty again and the rice softens nicely.
How long can they be stored?
Store in an airtight container and refrigerate for up to 1 day. Freshly made is best, but they reheat well.
Can I add other fillings?
Absolutely — tuna, pork floss, spicy mayo, kimchi, or cooked chicken all work beautifully.
Easy Yaki Onigiri with Melty Cheese Filling
Ingredients
For the Rice Balls
- 300 g cooked leftover rice slightly warmed
- 5 ml cooking oil
- 30 g carrot finely diced
- 50 g luncheon meat Spam, finely diced
- 30 g corn kernels cooked
- 30 g shredded seaweed seaweed flakes
- 15 g salad dressing mayonnaise
- 4 slices cheese
- 4 rectangular roasted seaweed sheets nori
For the Teriyaki Glaze
- 15 ml 1 tbsp soy sauce
- 15 ml 1 tbsp oyster sauce
- 15 g 1 tbsp honey (or to taste)
Instructions
Mix the Rice
- Place the leftover rice in a large bowl and drizzle in the cooking oil. Add the diced carrots, luncheon meat, corn kernels, and seaweed flakes.
- Squeeze in the mayonnaise and mix thoroughly until every grain of rice is coated and the ingredients are evenly combined.
Shape and Fill
- Take about 70g of the rice mixture and flatten it into a disc in your palm.
- Place one slice of cheese in the center (you can fold it to fit). Top with another small portion of rice, then gently cup and press your hands to form a compact triangle (or round ball), ensuring the cheese is completely sealed inside with no gaps.
- Wrap a sheet of nori around the bottom of the rice ball. Repeat to make 4 rice balls.
Make the Glaze and Cook
- In a small bowl, whisk together the soy sauce, oyster sauce, and honey until smooth.
- Air Fryer Method: Place the rice balls in the air fryer basket. Brush the top and sides generously with the teriyaki glaze. Cook at 180°C (350°F) for 7 minutes. Carefully flip the rice balls, brush the other side with more glaze, and cook for another 7 minutes, or until the surface is caramelized and crispy.
- Stovetop Method: Heat a non-stick pan over medium heat with a thin layer of oil. Place the rice balls in the pan and cook for 3-4 minutes until the bottom is golden. Flip, brush the cooked top with glaze, and cook another 3-4 minutes. Flip again, brush the other side, and cook until crispy and glazed on all sides.
Serve
- Enjoy the Yaki Onigiri immediately while the cheese is hot and gooey!
Leave a Reply