
I always get excited making these soft, chewy matcha daifuku filled with creamy cheesecake centers. It feels like wrapping little bites of happiness—and it’s so satisfying every single time!
Let me tell you about this Matcha Cream Cheese Daifuku recipe
I created this recipe when I was craving something indulgent yet refreshing. The slightly bitter matcha blends perfectly with rich cream cheese, all wrapped in a soft mochi skin. It’s the kind of treat you’ll want to keep stocked in your fridge, especially when you need a moment of joy or a shareable homemade gift.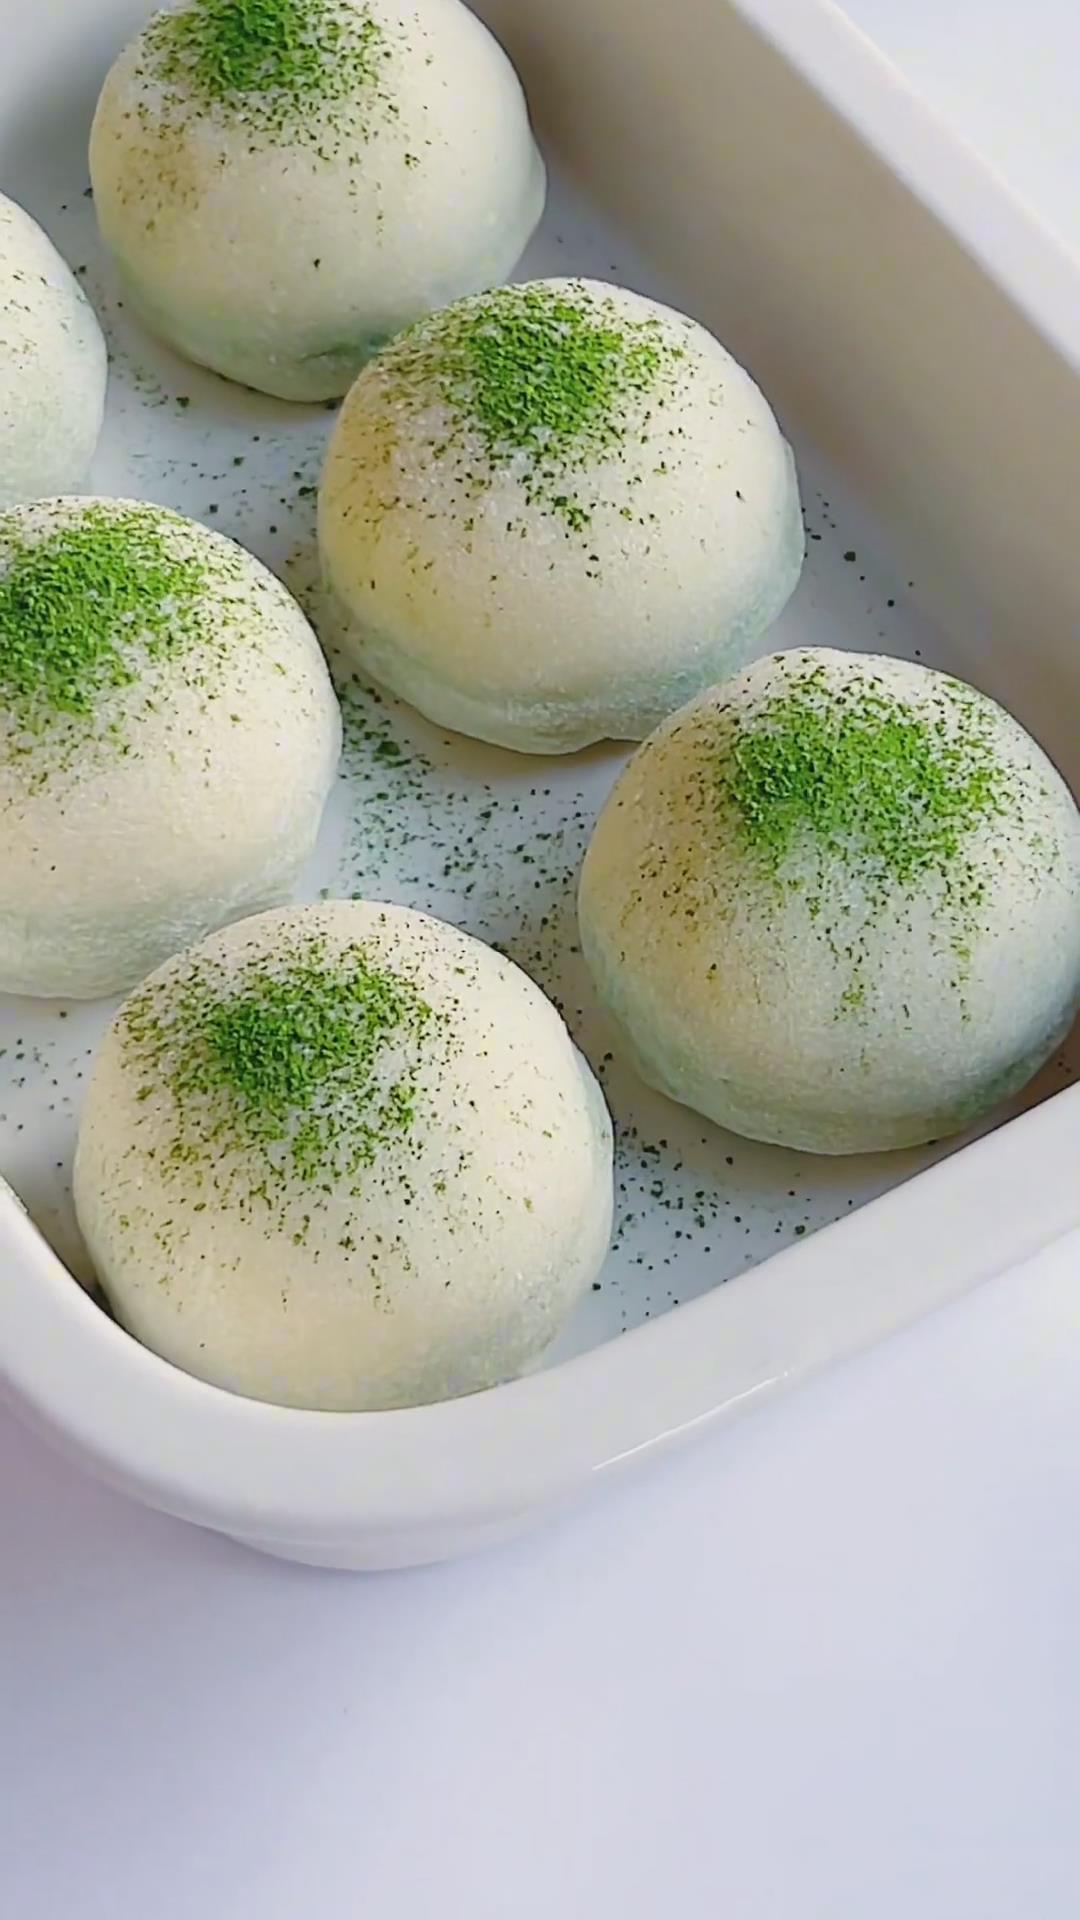
Why you‘ll love this recipe
- Soft and chewy mochi skin with a rich, creamy filling
- Gorgeous matcha flavor that’s not too sweet
- Freezer-friendly—make ahead and enjoy later
- Looks impressive, but the steps are simple and clear
- The texture is everything: smooth, cold, stretchy, and melt-in-your-mouth
Tips for Success (I‘ve made this several times!)
After making this recipe multiple times, I’ve picked up a few essential tricks that make a huge difference in the texture, handling, and final look of the daifuku. Here’s what I recommend:
- Prevent sticky mochi dough:
To keep the dough from sticking to your hands or the work surface, always use cooked glutinous rice flour. I make mine by dry-toasting regular glutinous rice flour in a pan over low heat until it turns slightly yellow and smells nutty. Generously dust your hands and the table while working—this will save you so much frustration! - Freeze the matcha filling completely:
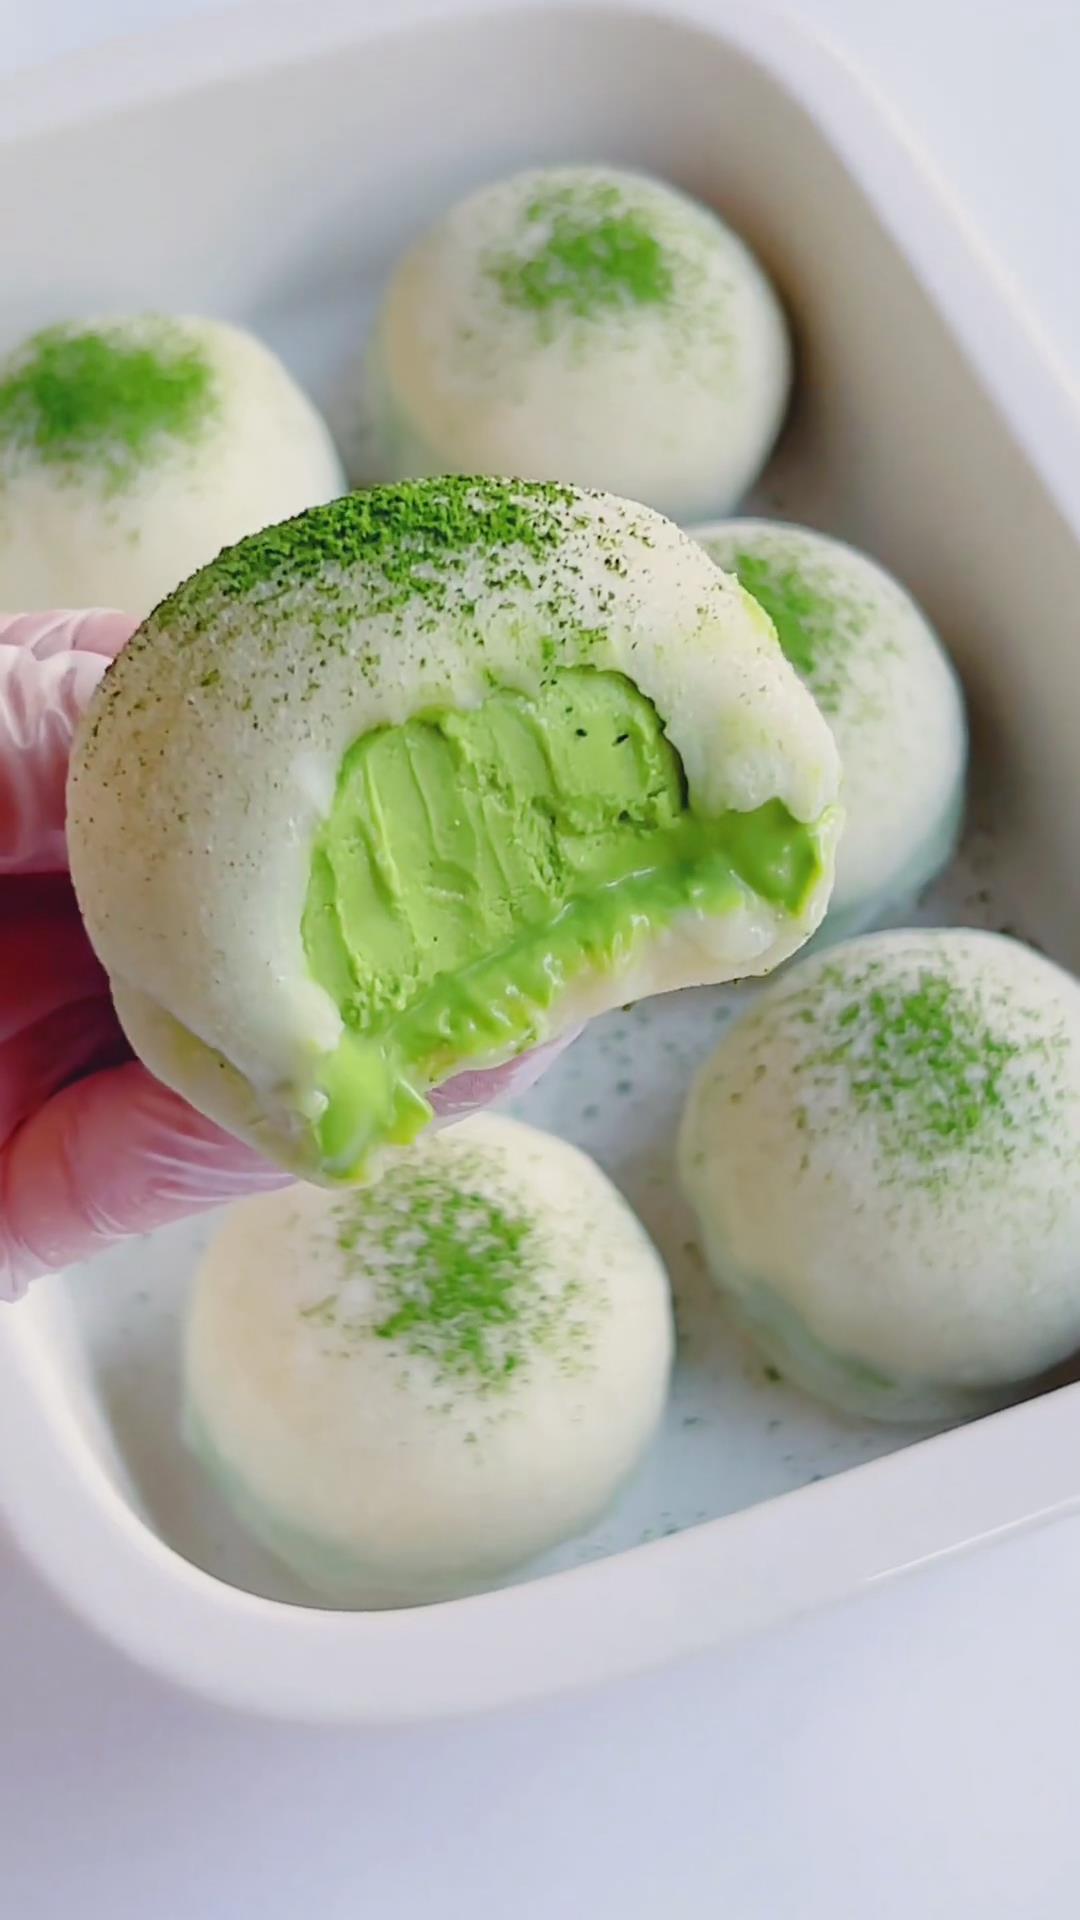
It’s crucialto freeze the cream cheese matcha filling until it’s rock solid. If it’s even slightly soft, it will melt in your hands during wrapping and break through the delicate mochi skin. I usually prepare the filling the night before and leave it in the freezer overnight for best results. - Knead the mochi while it‘s hot:
Right after steaming, I mix in the butter and knead the dough while it’s still warm. This step is so important—it gives the mochi its signature stretch and elasticity.
Ingredients
Matcha Cream Cheese Filling
- 200g cream cheese (softened)
- 25g granulated sugar
- 8g matcha powder (preferably Japanese matcha)
- 150g heavy cream (chilled before use)
Glutinous Rice Wrapper
- 120g glutinous rice flour
- 30g cornstarch
- 15g granulated sugar
- 180g whole milk
- 15g unsalted butter
Instructions
Make the Matcha Cream Cheese Filling
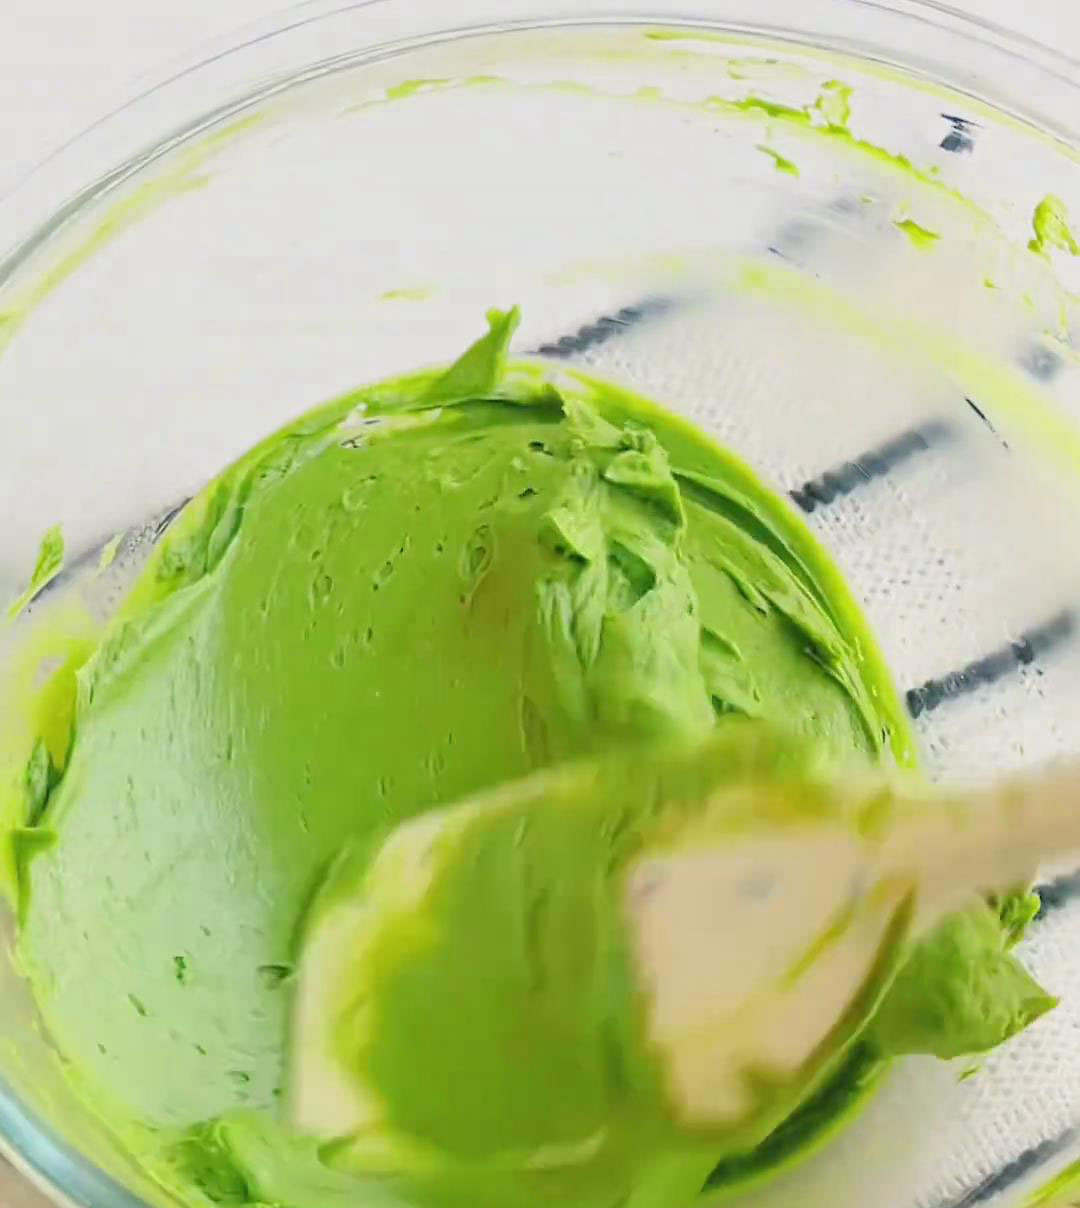
Mix the cream cheese base:
Place softened cream cheese in a large bowl. Add 25g granulated sugar and mix with a spatula until smooth and lump-free (about 2 minutes). Add 8g matcha powder and continue mixing until fully blended with no clumps.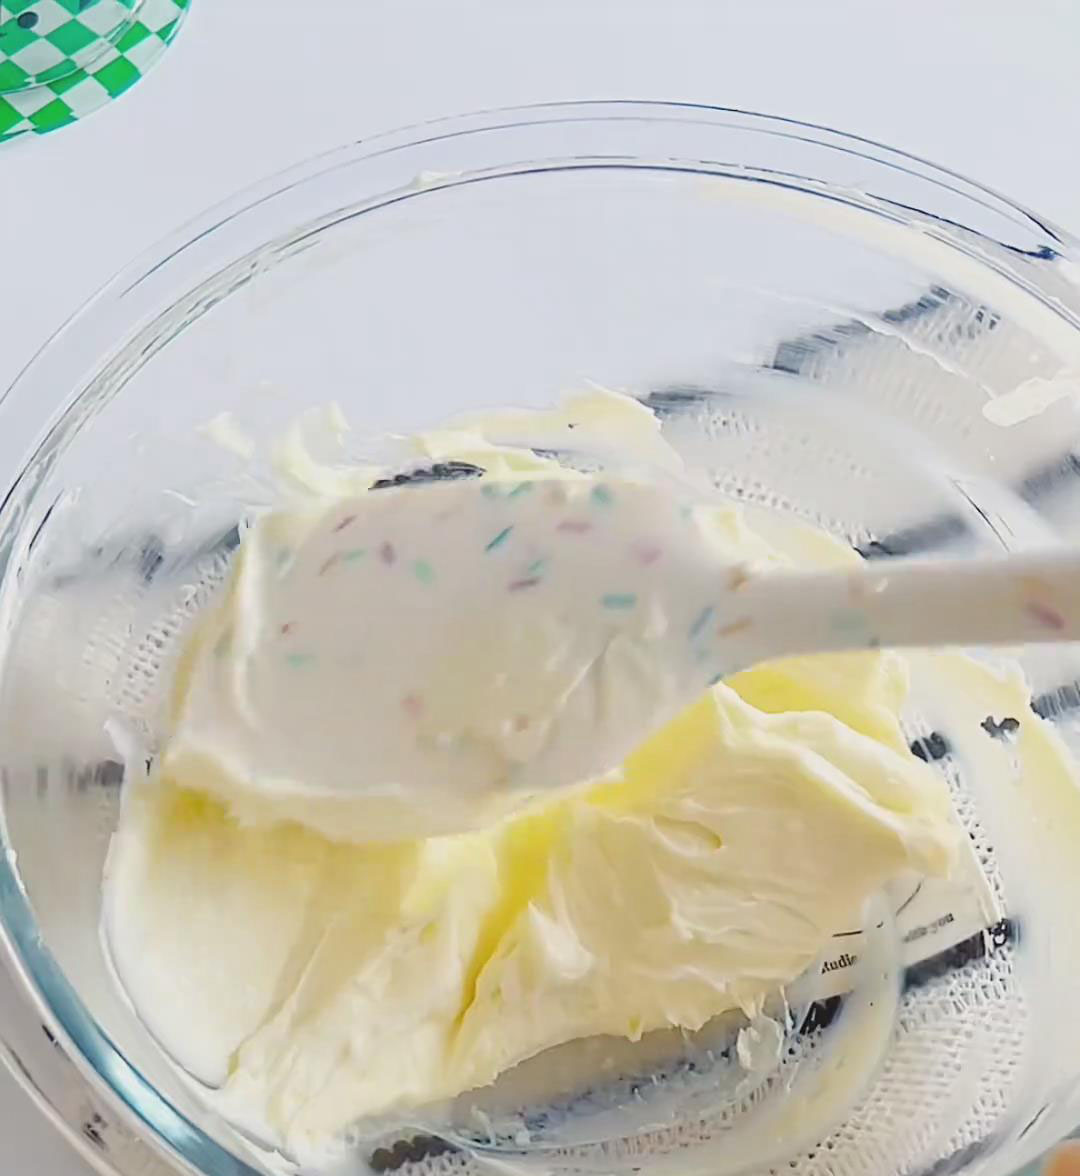
Add heavy cream:
Pour 150g cold heavy cream into the mixture. Use a manual whisk to stir until thick and creamy.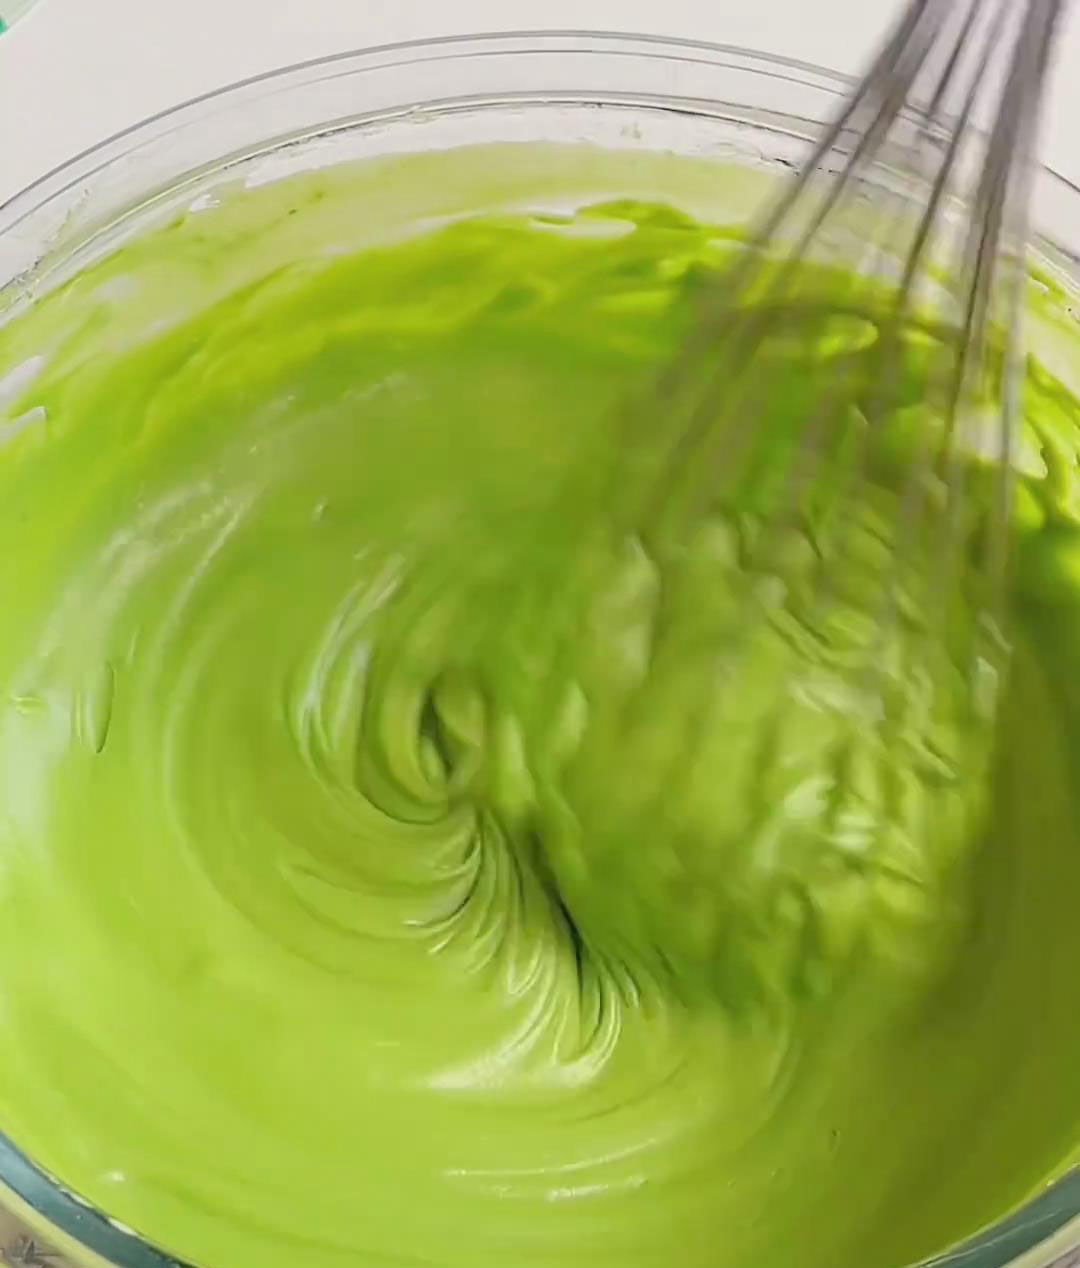
Freeze to set:
Transfer the mixture into a piping bag and pipe it into plastic wrap-lined molds (such as mini cake molds or ice cube trays), about 30g per piece. Freeze for at least 2 hours or overnight until solid.![]()
Make the Glutinous Rice Dough
Mix the batter:
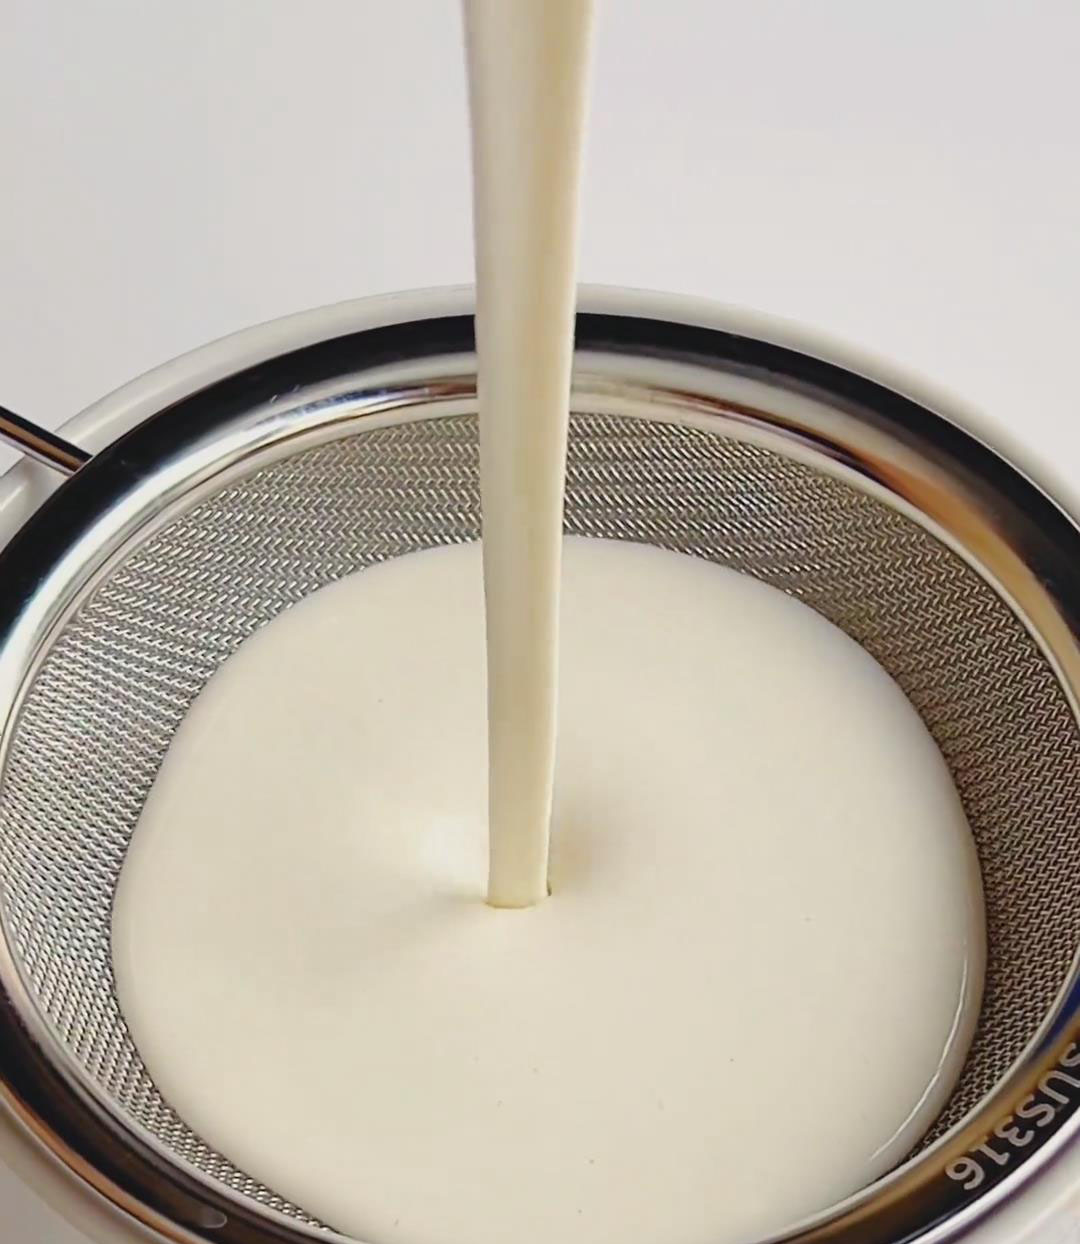
In a bowl, combine 120g glutinous rice flour, 30g cornstarch, 15g sugar, and 180g whole milk. Whisk until smooth and lump-free. (Strain once to ensure a fine, silky texture.)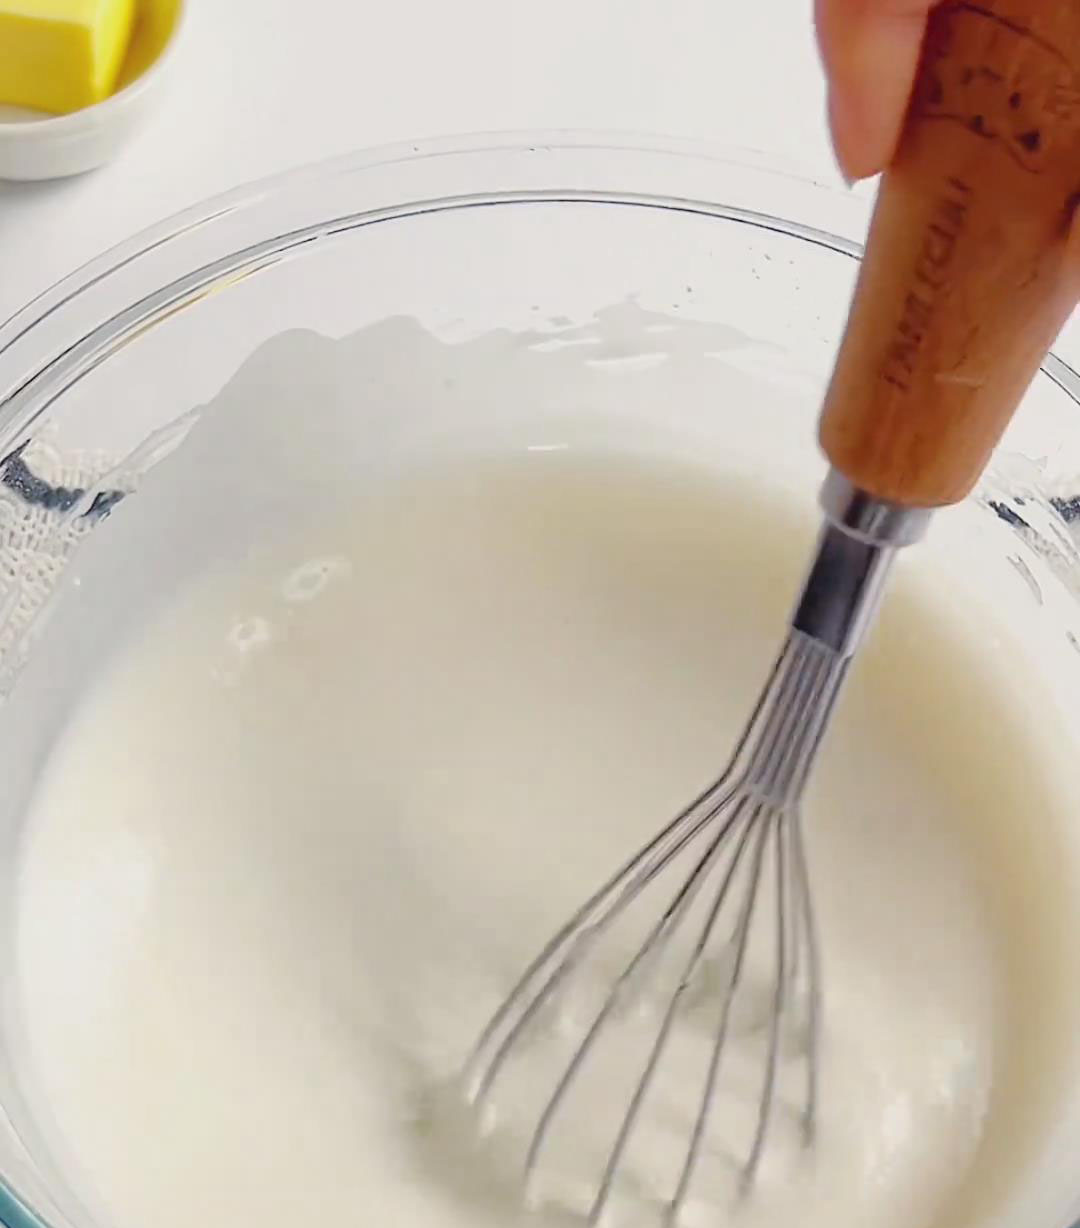
Steam the batter:
Cover the bowl with plastic wrap, pierce 5–6 holes with a toothpick, and steam over high heat for 20 minutes. Do not lift the lid while steaming. The dough is ready when it appears translucent and holds shape. Test the center with chopsticks to ensure it’s fully cooked.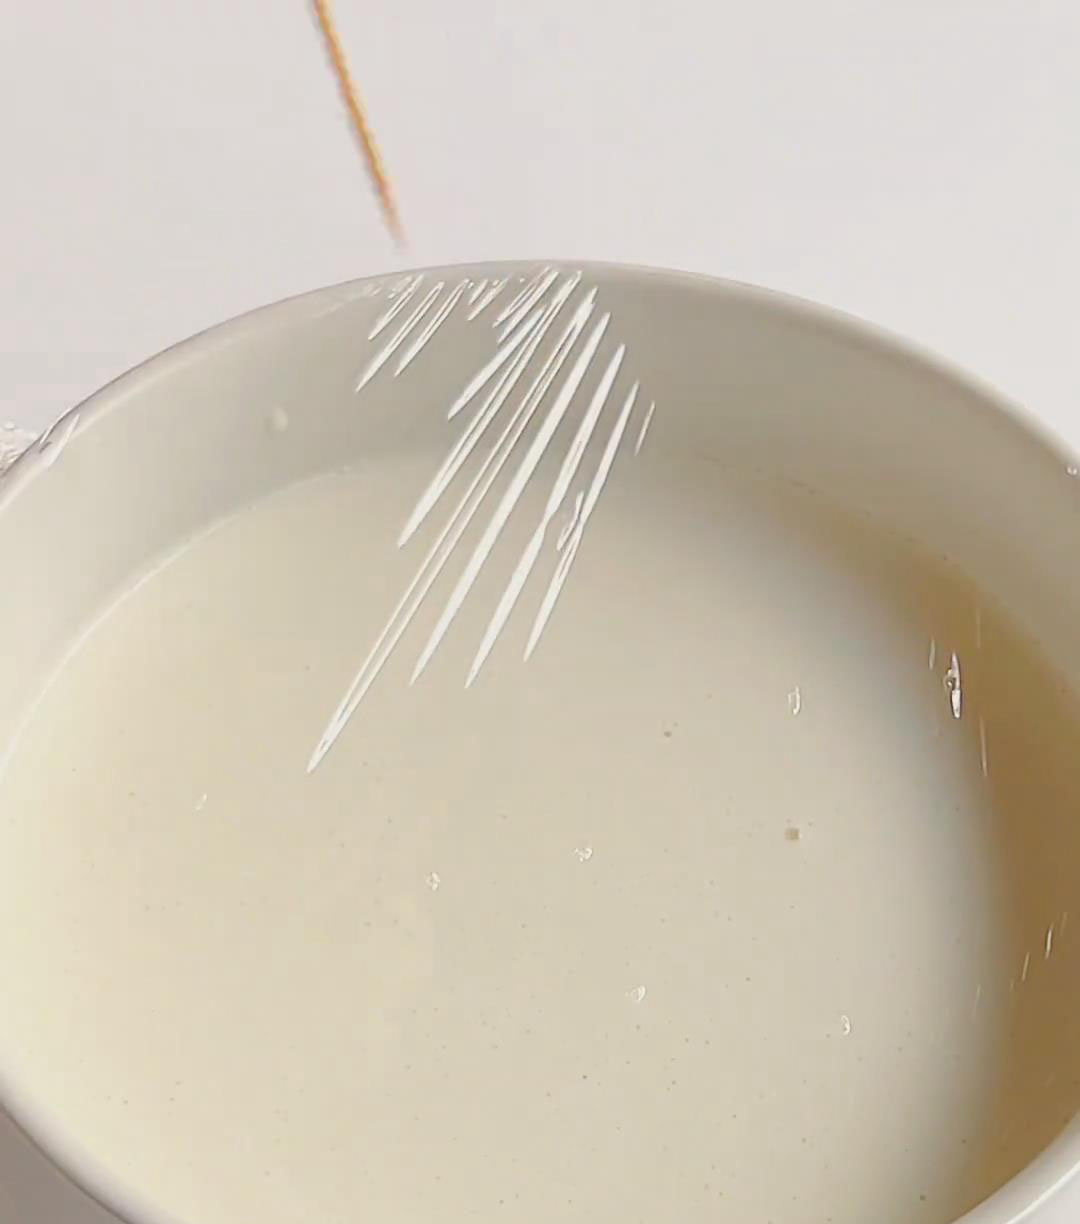
Incorporate the butter:
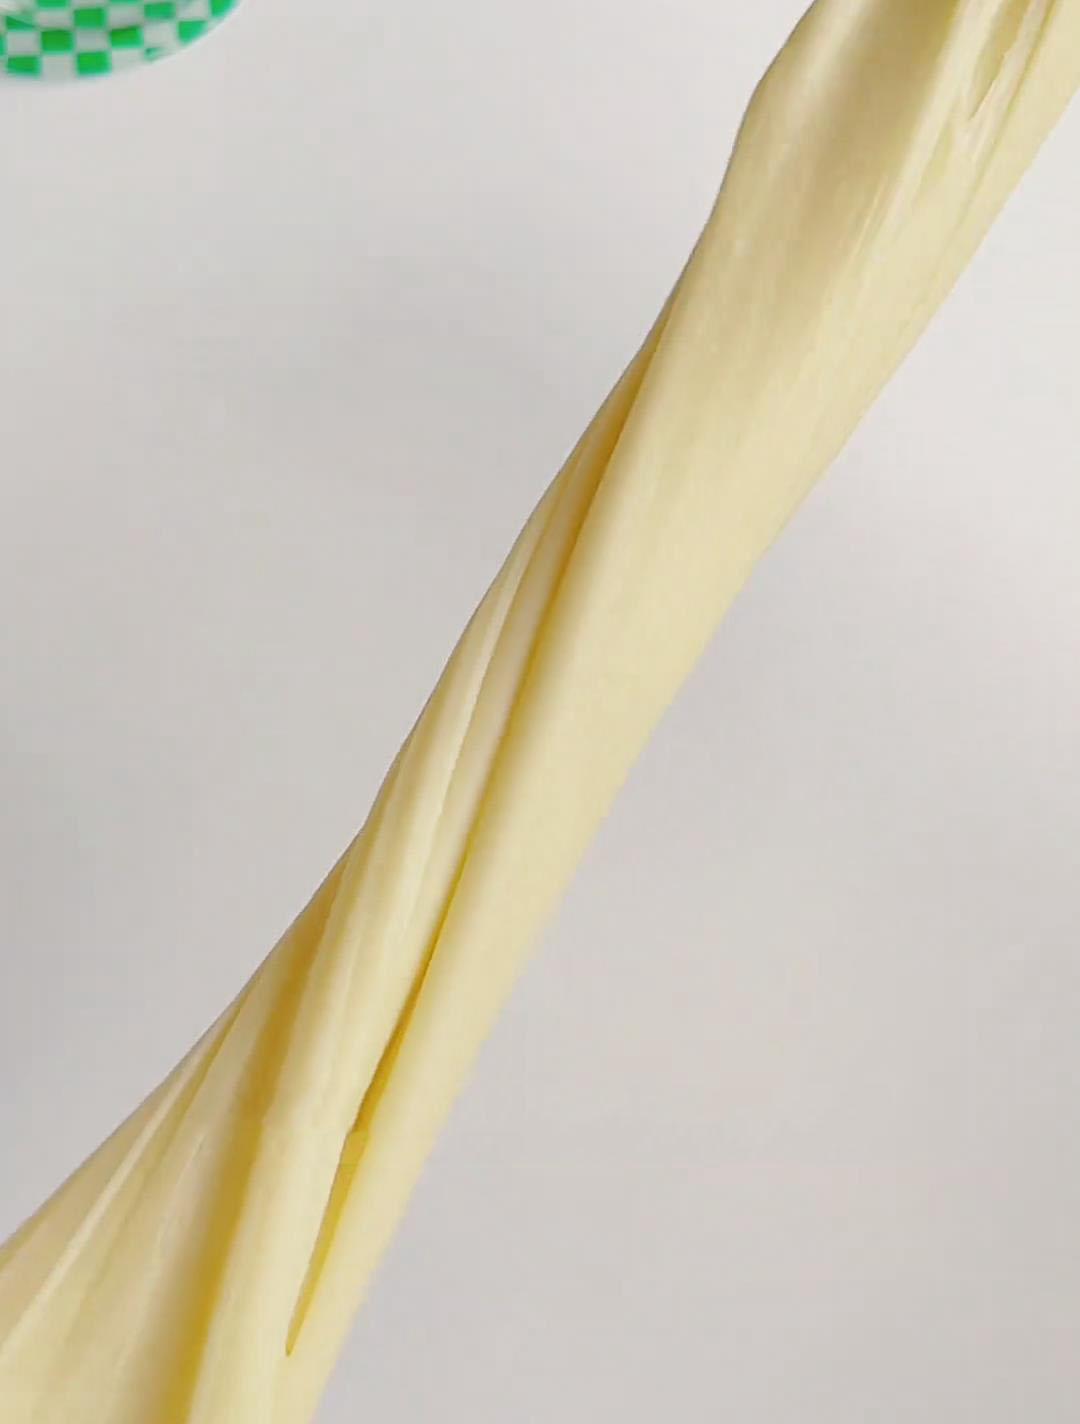
While still hot, add 15g butter. Mix with chopsticks until melted. Once cool enough to handle, wear gloves and knead/stretch the dough repeatedly until smooth and elastic, forming a thin translucent film when pulled.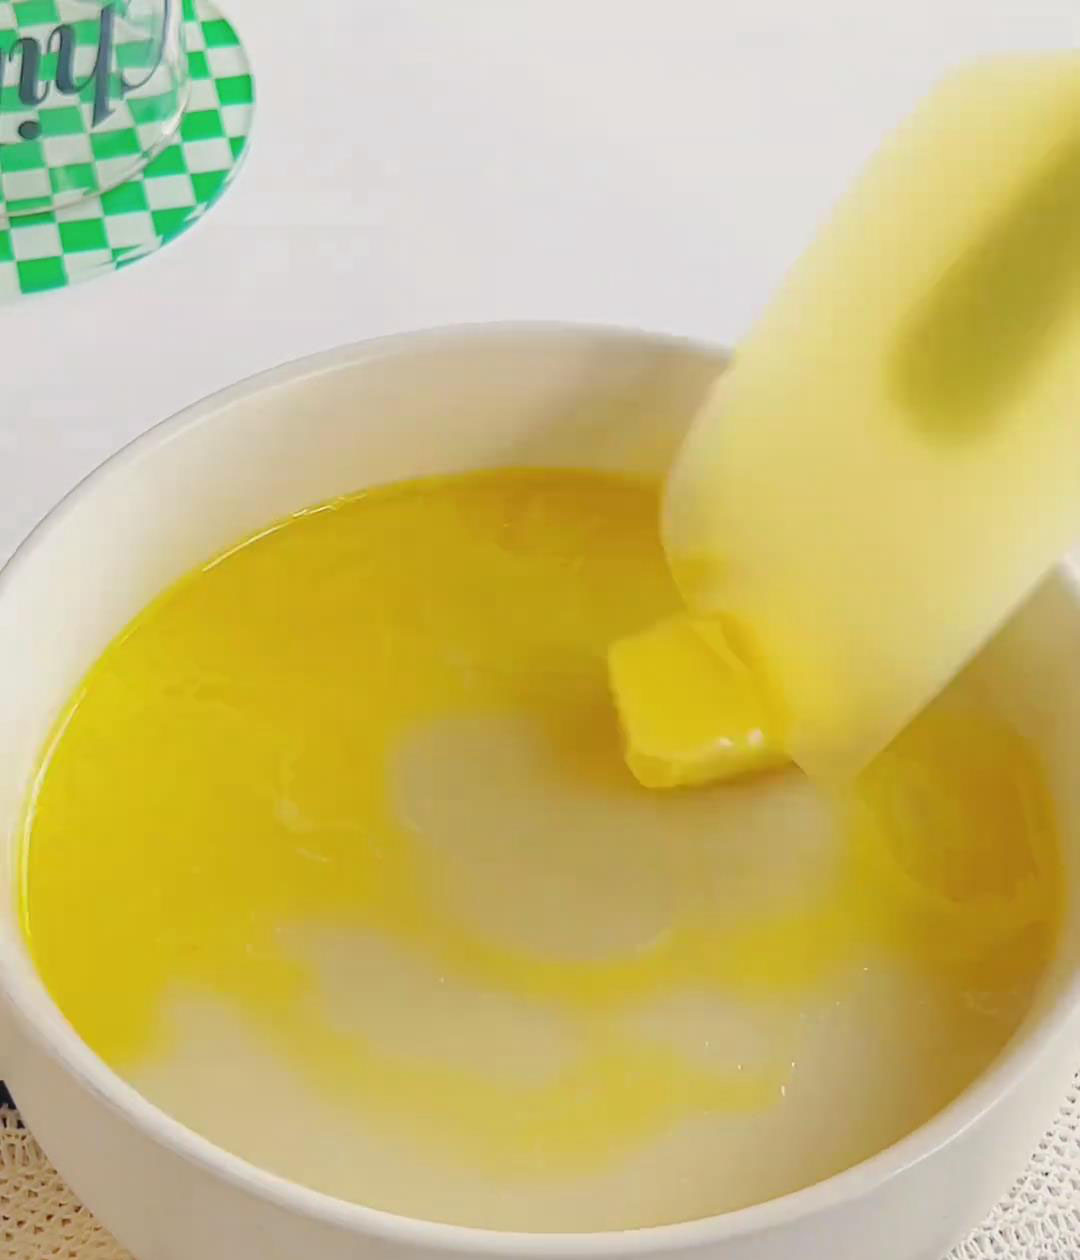
Wrap and Shape
Divide the dough:
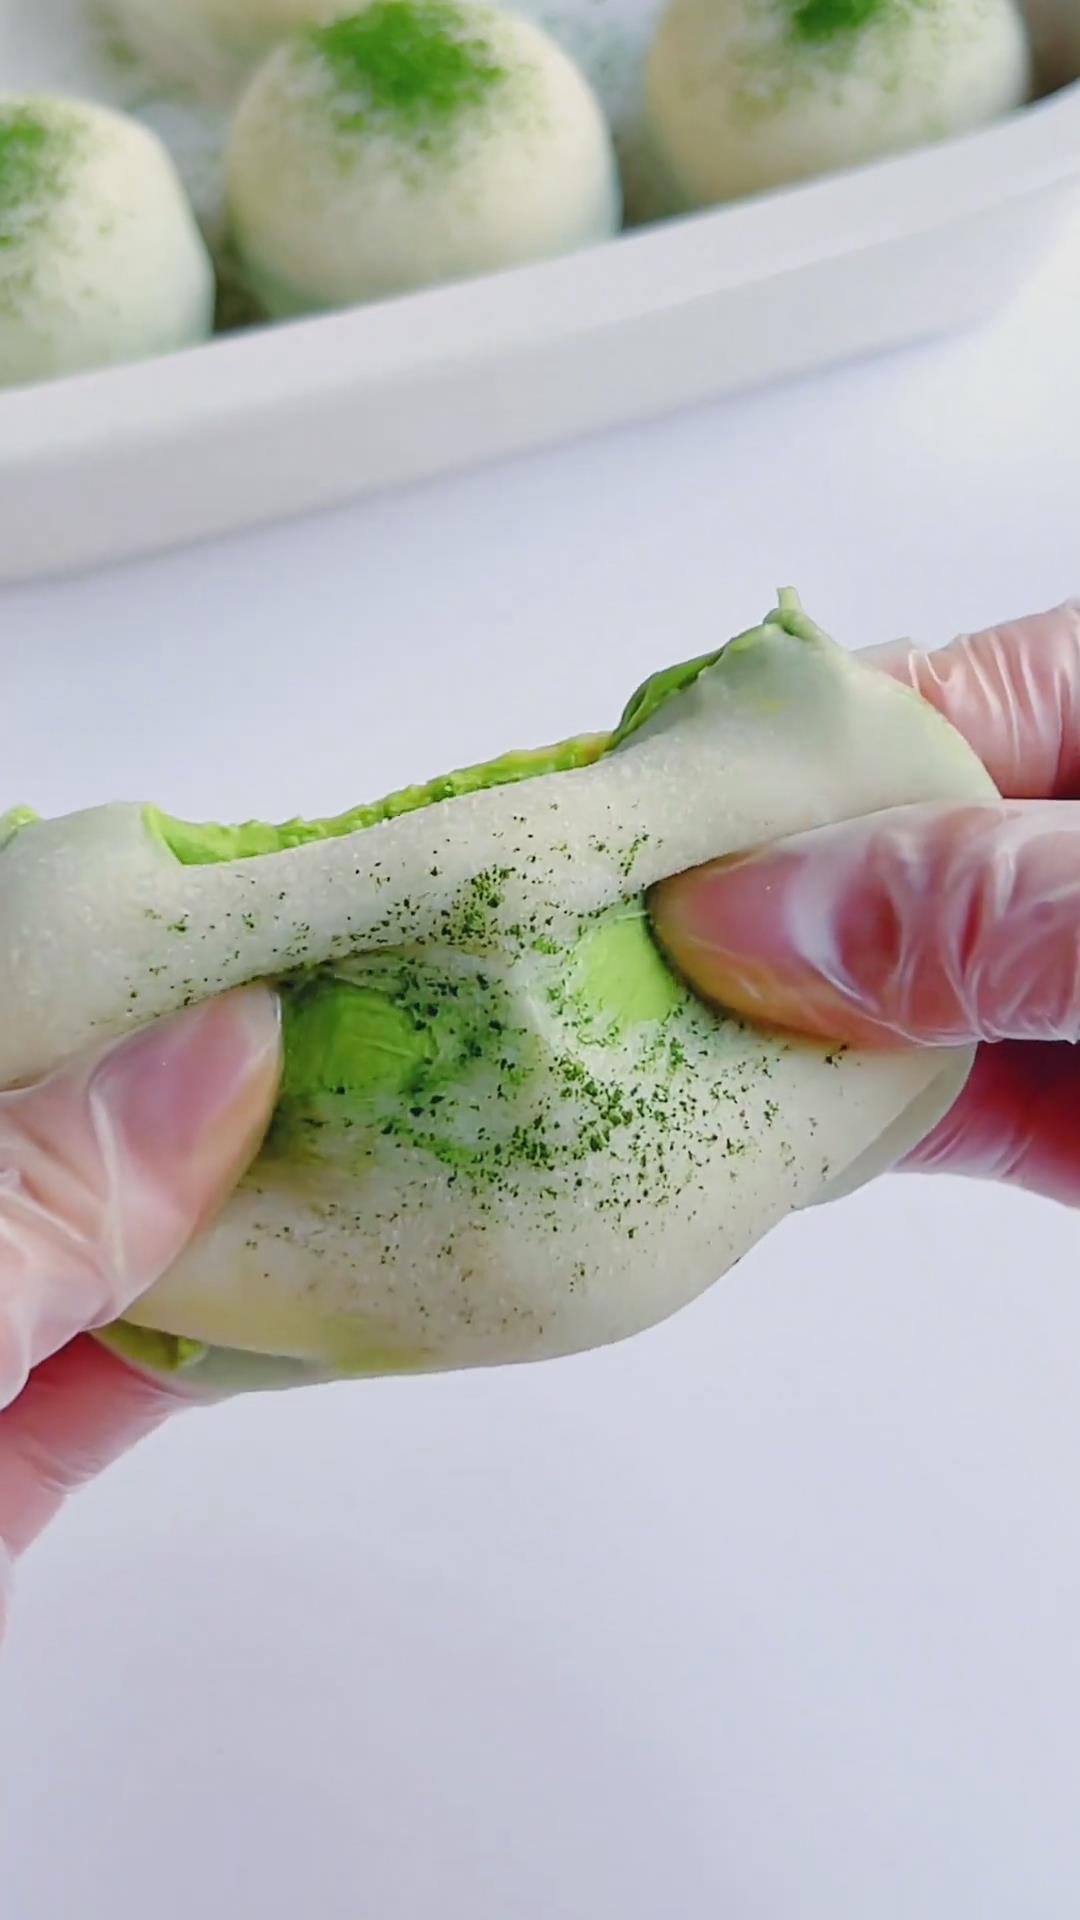
Split the mochi dough into 8–10 equal portions (about 40g each). Roll into balls, then flatten into circles approximately 10cm wide (edges thinner than the center). Dust your work surface with cooked glutinous rice flour to prevent sticking.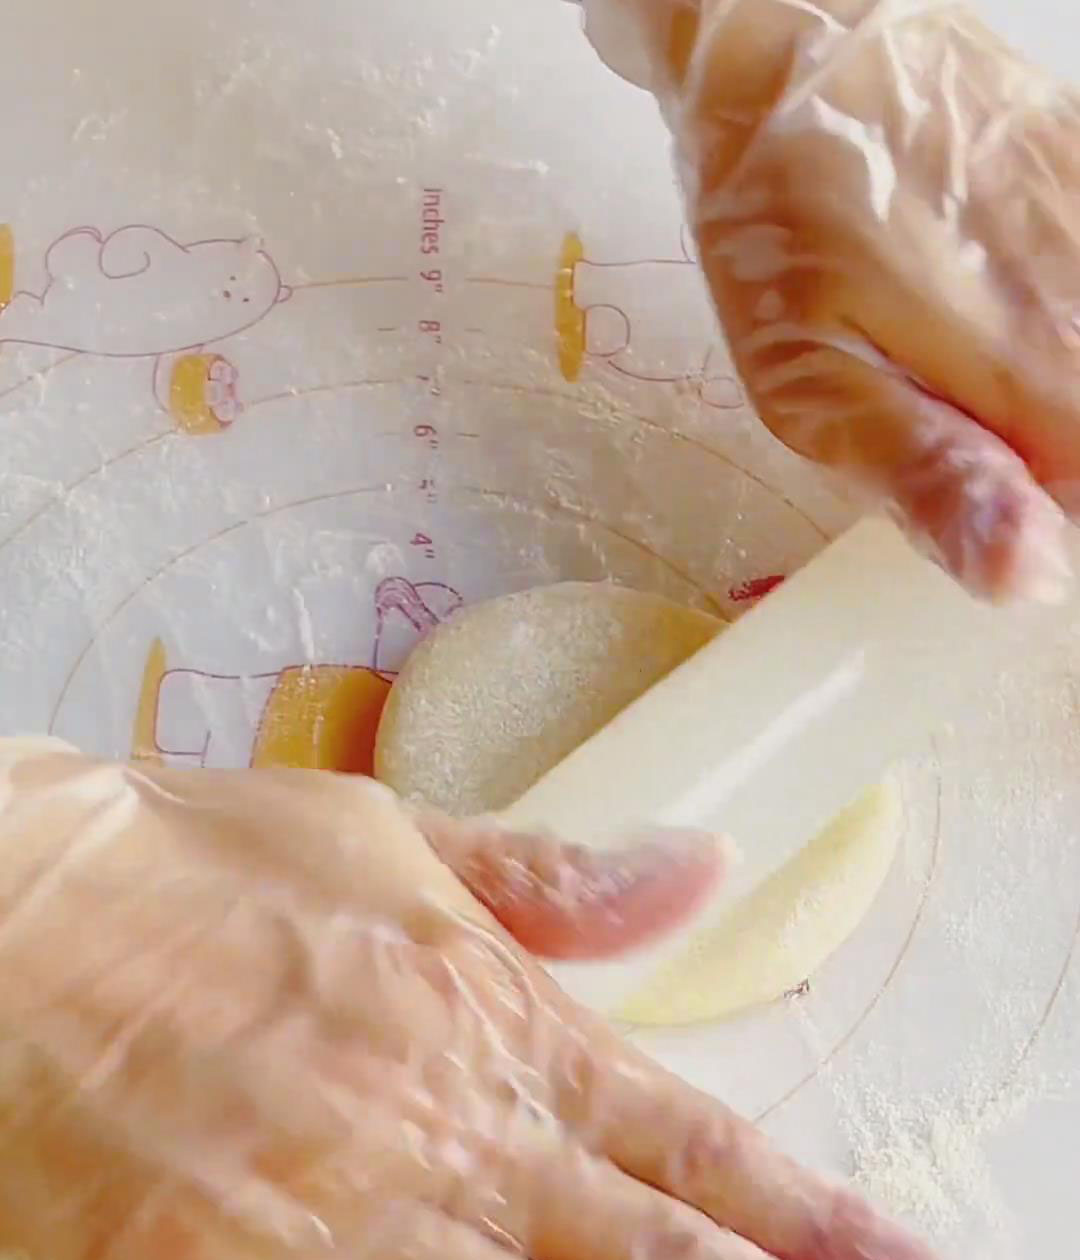
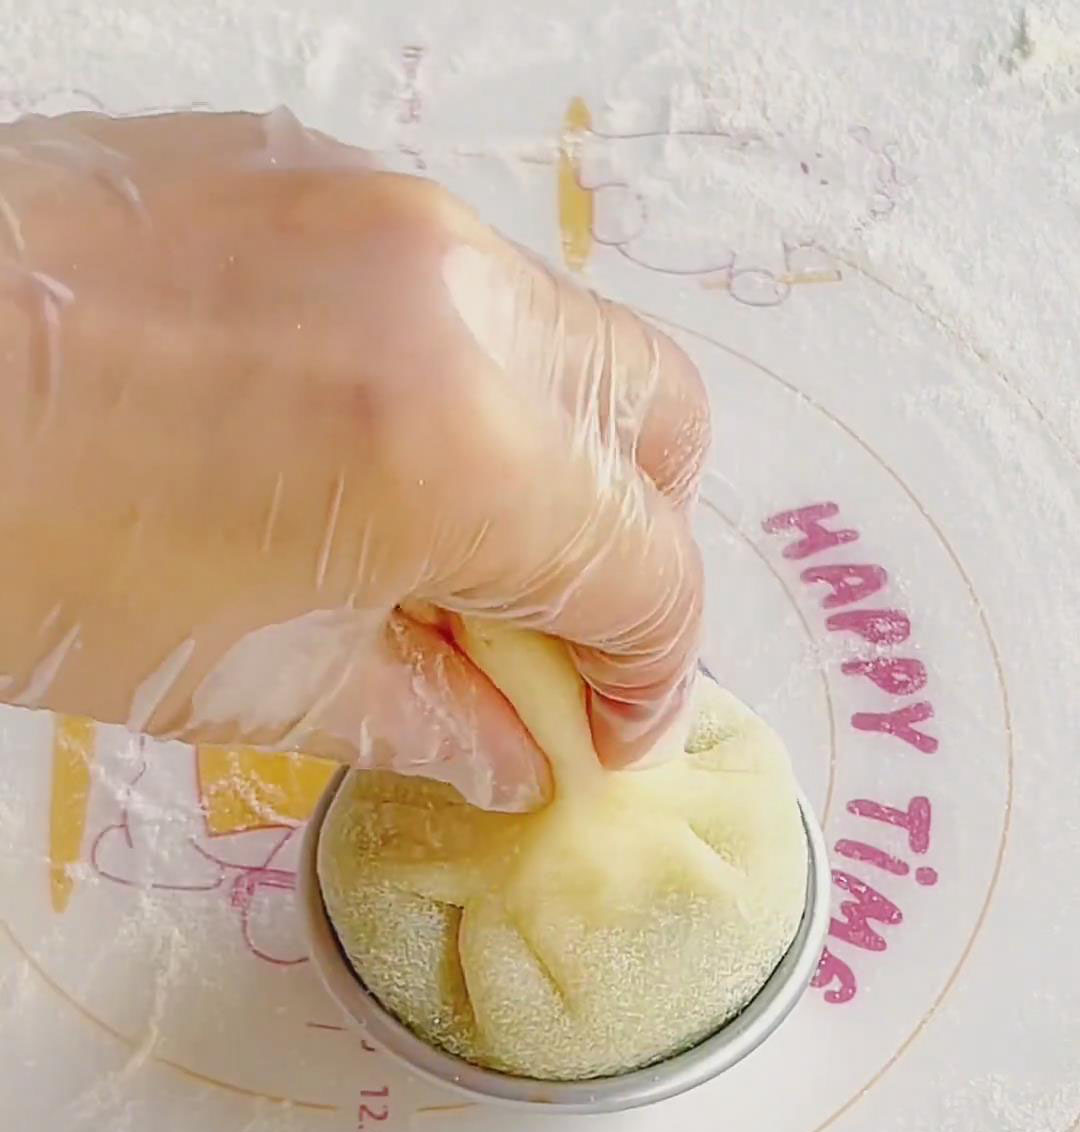
Wrap the filling:
Place one piece of mochi dough on your palm or a mold. Add one frozen matcha cream cheese portion. Pinch to seal and remove excess dough. Dust the outside with cooked glutinous rice flour.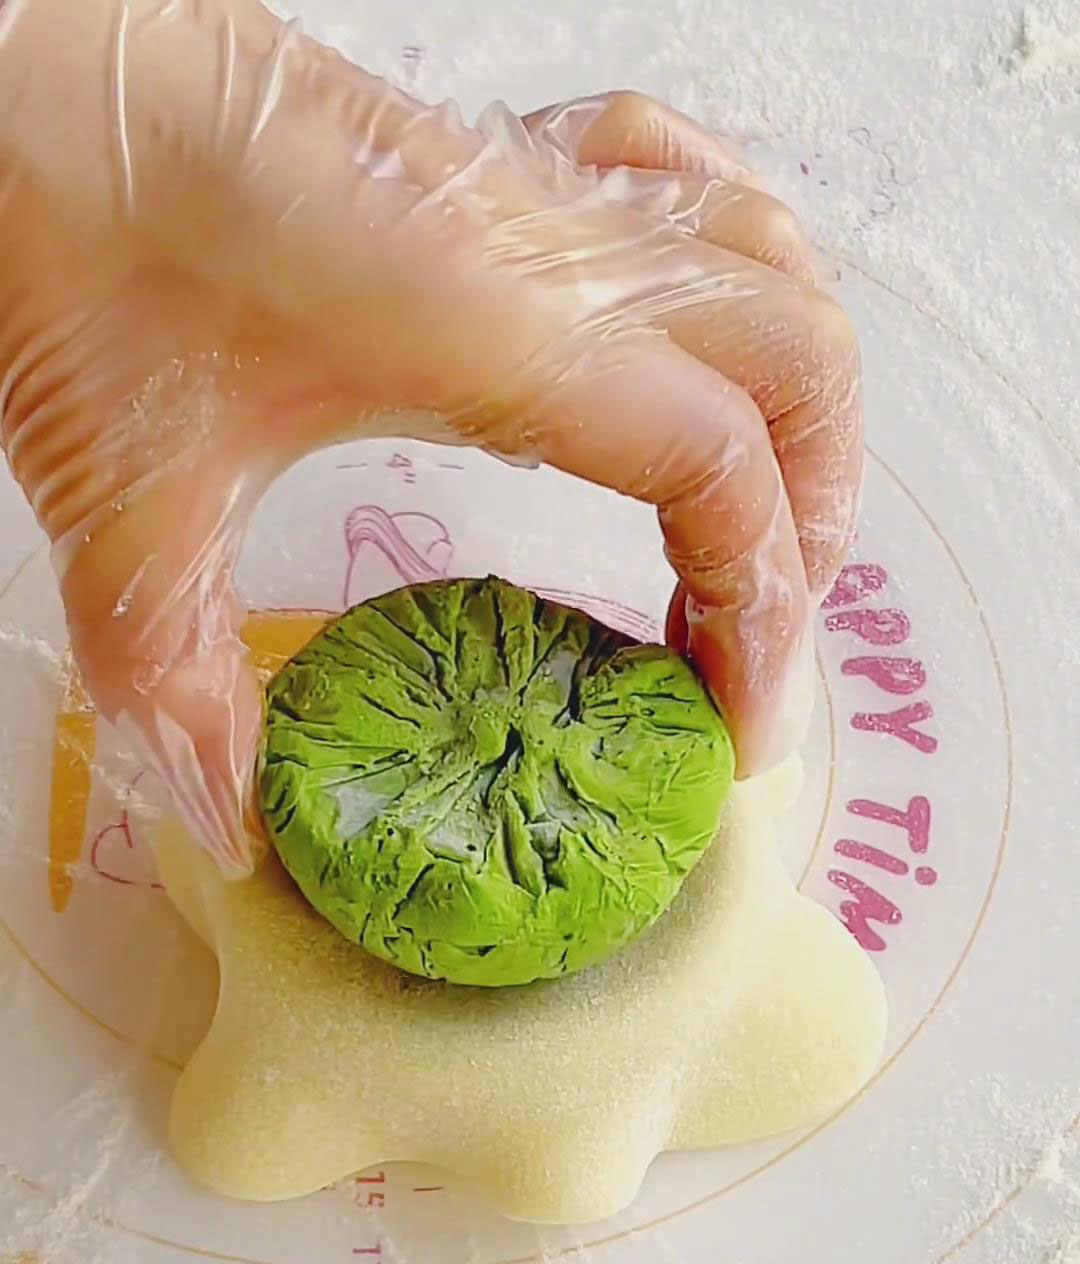
Chill and decorate:
Sift a light layer of matcha powder on top for decoration. Chill in the fridge for 30 minutes before serving for the best taste and texture.
Frequently Asked Questions
Q: Can I replace heavy cream with milk?
A: Not recommended. Heavy cream helps the filling set. You can try thick yogurt, but increase the freezing time.
Q: The dough sticks to my hands—what should I do?
A: Use plenty of cooked glutinous rice flour or rub a tiny bit of neutral oil on your gloves to prevent sticking.
Q: Can I use cocoa powder instead of matcha?
A: Yes! Swap in 5g cocoa powder to create Chocolate Cream Cheese Daifuku—equally delicious with a different vibe.

Homemade Matcha Cheesecake Daifuku
Ingredients
Matcha Cream Cheese Filling
- 200 g cream cheese softened
- 25 g granulated sugar
- 8 g matcha powder preferably Japanese matcha
- 150 g heavy cream chilled before use
Glutinous Rice Wrapper
- 120 g glutinous rice flour
- 30 g cornstarch
- 15 g granulated sugar
- 180 g whole milk
- 15 g unsalted butter
Instructions
Make the Matcha Cream Cheese Filling
- Mix the cream cheese base:
- Place softened cream cheese in a large bowl. Add 25g granulated sugar and mix with a spatula until smooth and lump-free (about 2 minutes). Add 8g matcha powder and continue mixing until fully blended with no clumps.
- Add heavy cream:
- Pour 150g cold heavy cream into the mixture. Use a manual whisk to stir until thick and creamy.
- Freeze to set:
- Transfer the mixture into a piping bag and pipe it into plastic wrap-lined molds (such as mini cake molds or ice cube trays), about 30g per piece. Freeze for at least 2 hours or overnight until solid.
Make the Glutinous Rice Dough
- Mix the batter:
- In a bowl, combine 120g glutinous rice flour, 30g cornstarch, 15g sugar, and 180g whole milk. Whisk until smooth and lump-free. (Strain once to ensure a fine, silky texture.)
- Steam the batter:
- Cover the bowl with plastic wrap, pierce 5–6 holes with a toothpick, and steam over high heat for 20 minutes. Do not lift the lid while steaming. The dough is ready when it appears translucent and holds shape. Test the center with chopsticks to ensure it's fully cooked.
- Incorporate the butter:
- While still hot, add 15g butter. Mix with chopsticks until melted. Once cool enough to handle, wear gloves and knead/stretch the dough repeatedly until smooth and elastic, forming a thin translucent film when pulled.
Wrap and Shape
- Divide the dough:
- Split the mochi dough into 8–10 equal portions (about 40g each). Roll into balls, then flatten into circles approximately 10cm wide (edges thinner than the center). Dust your work surface with cooked glutinous rice flour to prevent sticking.
- Wrap the filling:
- Place one piece of mochi dough on your palm or a mold. Add one frozen matcha cream cheese portion. Pinch to seal and remove excess dough. Dust the outside with cooked glutinous rice flour.
- Chill and decorate:
- Sift a light layer of matcha powder on top for decoration. Chill in the fridge for 30 minutes before serving for the best taste and texture.
Leave a Reply