
Looking for an easy blueberry dessert? This no gelatin blueberry tiramisu is smooth, creamy, and perfectly balanced with sweet and tangy flavors. No baking required—just layer and chill overnight!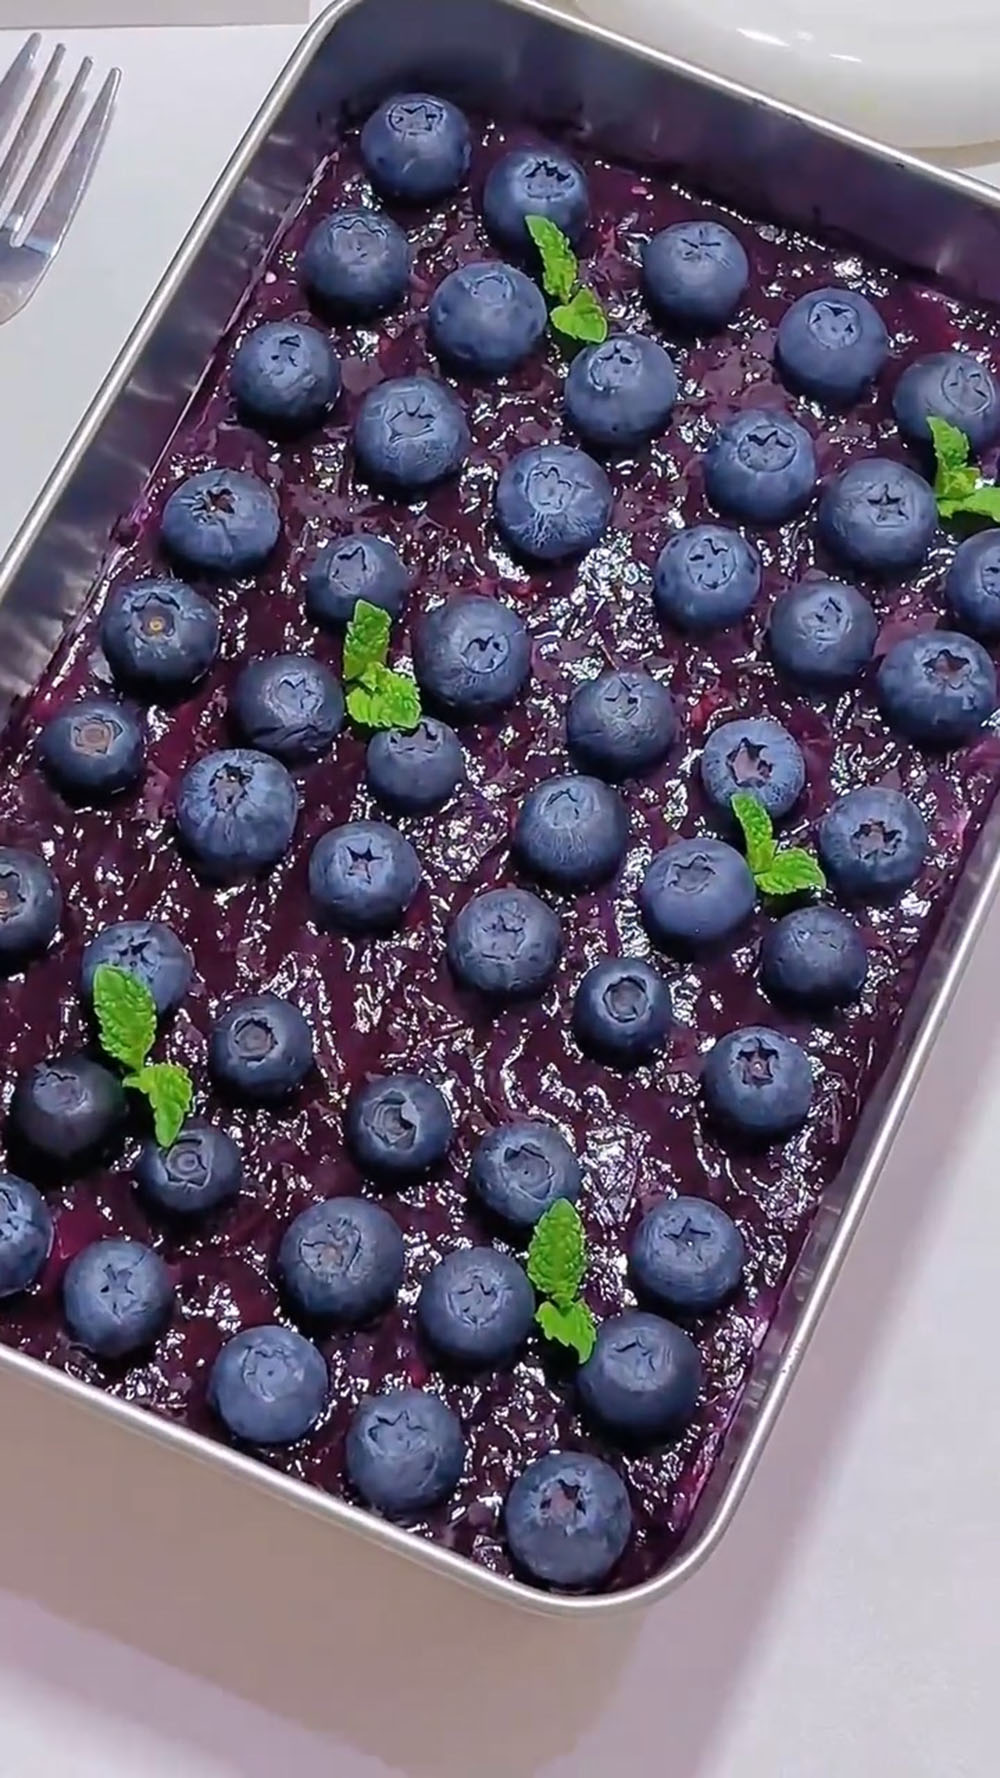
Tiramisu is one of my favorite make-ahead desserts. Just like mochi, once you understand the basic method, it becomes incredibly versatile and easy to adapt.
That’s what makes tiramisu so fun to make. The base stays the same—soft soaked layers and a rich, creamy filling—but the flavor possibilities are truly endless.
From fruity versions like mango tiramisu to Tiramisu Cookies, Matcha Tiramisu Egg Tarts, and even Tiramisu Basque Cake, each one brings a completely different experience while still keeping that signature texture we all love.
And since blueberries are one of my favorite fruits, I naturally wanted to turn them into a dessert like this.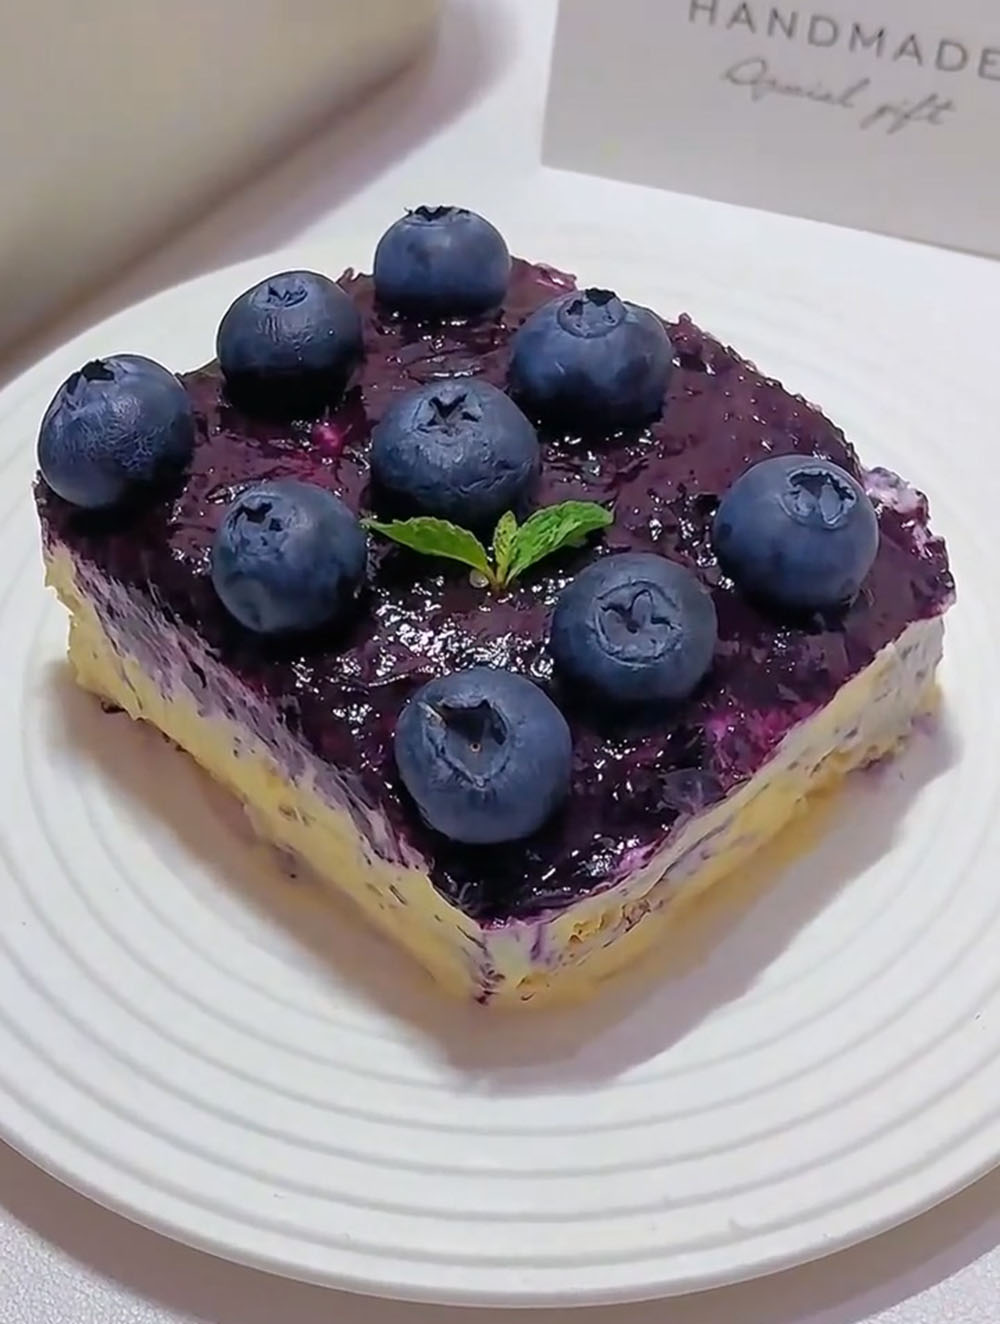
Why You’ll Love This Recipe
- No gelatin, no oven – This recipe sets beautifully in the refrigerator, making it incredibly simple and accessible for any home baker.
- Refreshingly balanced – The sweet-tangy blueberry jam pairs perfectly with the rich, creamy mascarpone, creating a dessert that’s refreshing without being greasy.
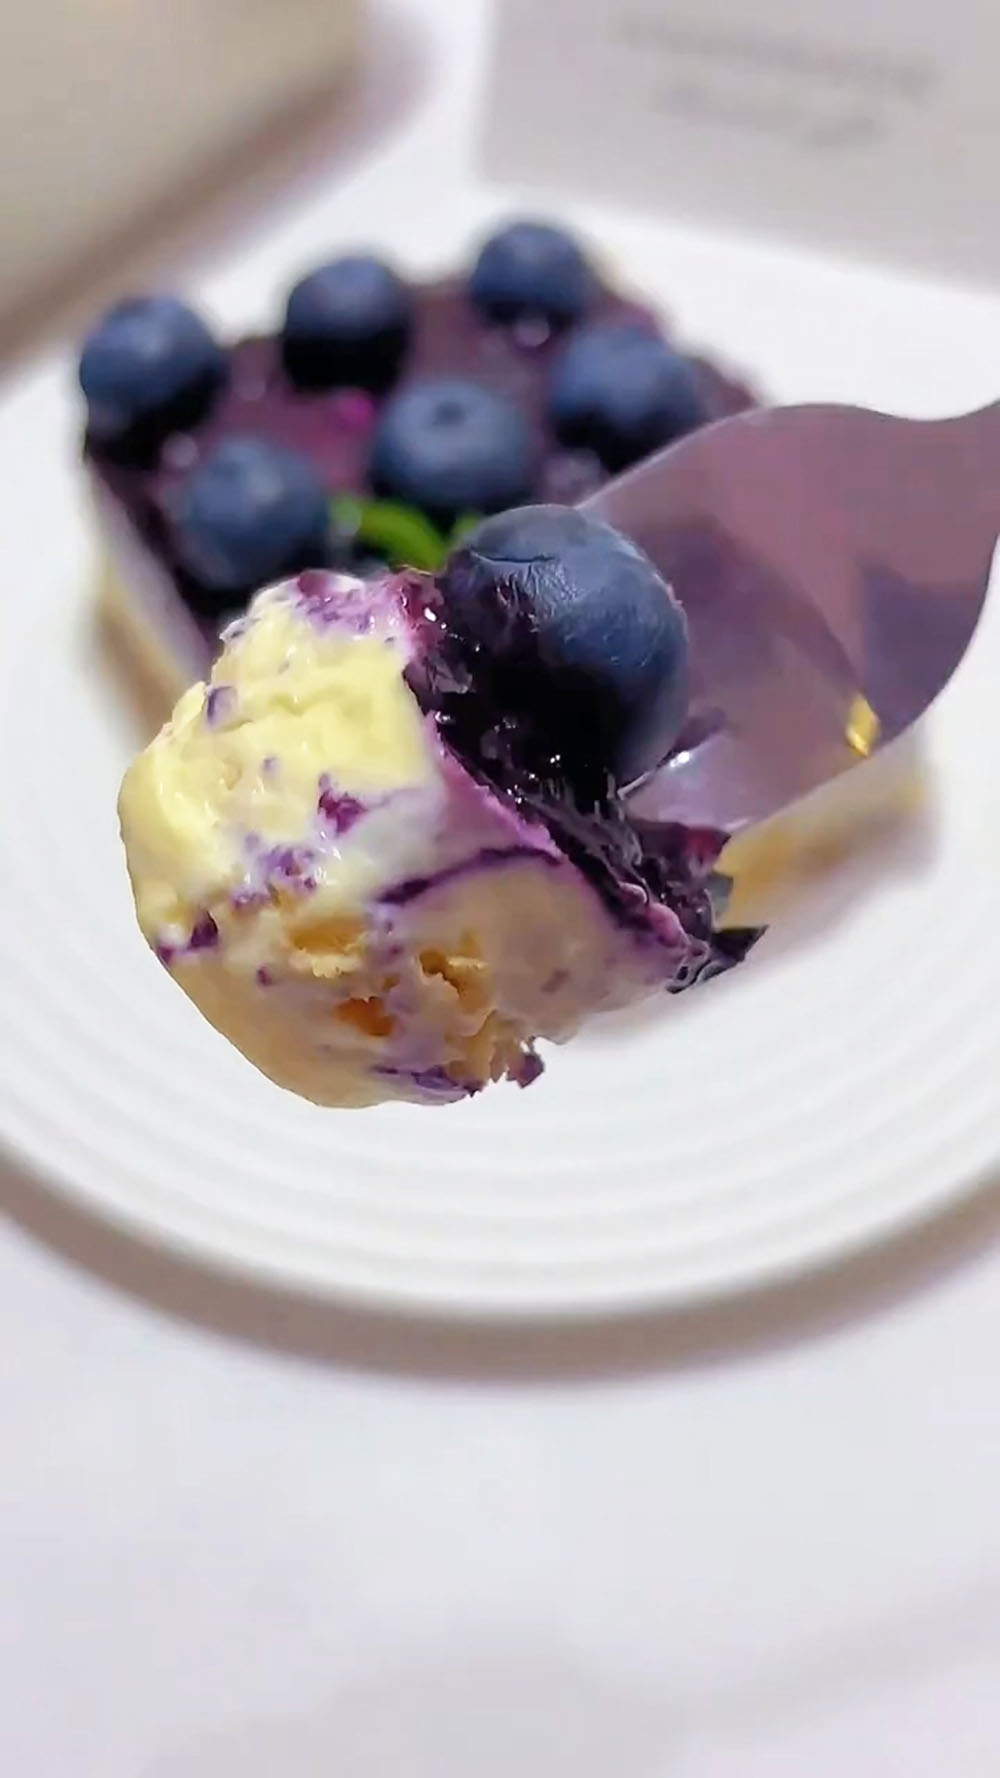
- Melts in your mouth – The texture is light, airy, and velvety, with ladyfingers that soften to a perfect sponge-like consistency overnight.
- Beginner-friendly – With clear steps and helpful tips, this recipe is designed to be foolproof—even for first-timers.
- Gorgeous presentation – Layers of creamy filling, deep purple jam, and a fresh blueberry topping make this dessert as beautiful as it is delicious.
Ingredients and Substitutions
- Egg yolks – You’ll need the yolks to create a rich, creamy base for the mascarpone mixture. Using pasteurized, ready-to-eat eggs allows you to skip the hot water bath and whisk them directly, which is a great time-saver if you have them on hand.
- Granulated sugar – Just the right amount of sugar is used here to sweeten the egg yolk mixture without making the dessert overly sweet.
- Mascarpone cheese – This soft, rich Italian cheese is the heart of any tiramisu. It gives the dessert its signature velvety texture. Be sure to bring it to room temperature before using so it blends smoothly without lumps.
- Heavy cream – Whipped to a thick, yogurt-like consistency, heavy cream adds lightness and volume to the mascarpone mixture.
- Ladyfingers – Also known as savoiardi, these light, sponge-like biscuits are the traditional base for tiramisu. If you have the time, I highly recommend making them at home—I even have a step-by-step guide to help you through it.
- Milk – A quick dip in milk softens the ladyfingers just enough. It’s a simple, neutral soak that lets the blueberry jam and mascarpone cream take center stage.
- Blueberry jam – Spread between the layers and brushed on top, blueberry jam adds vibrant color, fruity sweetness, and a pleasant tang that cuts through the richness of the cream.
- Fresh blueberries – These are for the final garnish. They add a pop of color, a burst of fresh flavor, and a lovely textural contrast to the creamy dessert.
- Mint leaves – Optional but highly recommended for decoration. Mint adds a fresh, bright note and makes the final presentation look professional and inviting.
Ingredients
Blueberry Mascarpone Cream
- 70 g egg yolks
- 30 g granulated sugar
- 250 g mascarpone cheese, room temperature
- 250 g heavy cream
Assembly & Soak
- 24–30 ladyfingers
- Milk (for dipping, amount as needed)
- Blueberry jam (for layering and topping)
Topping
- Fresh blueberries
- Fresh mint leaves (optional, for garnish)
How to Make Blueberry Tiramisu
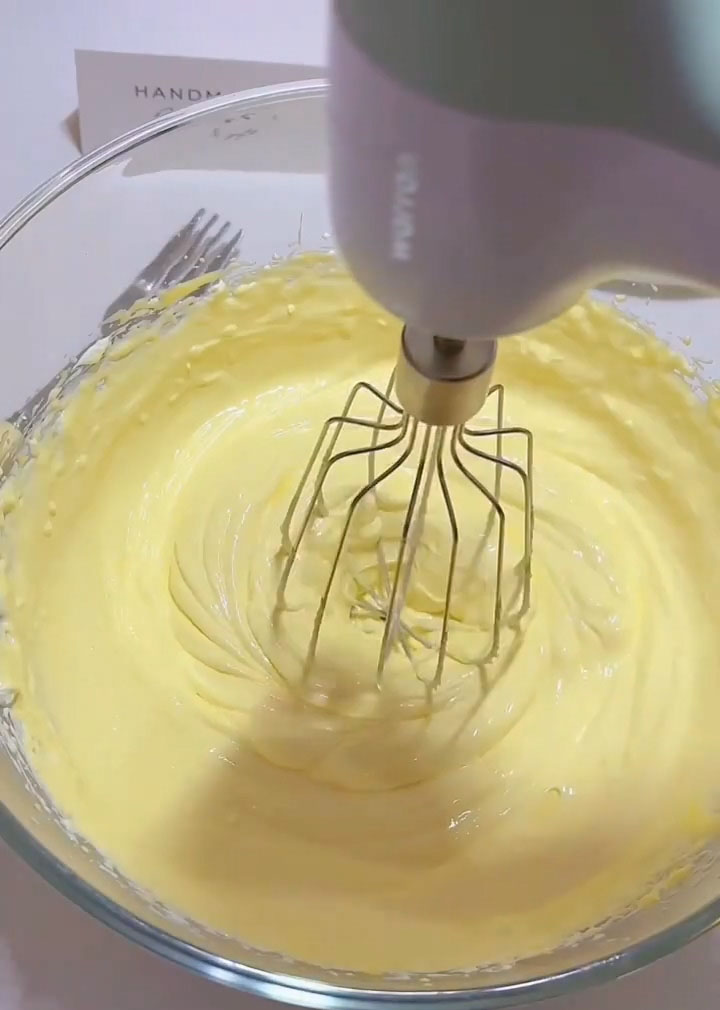
1. Make the Sterilized Egg Yolk Mixture
In a mixing bowl, combine 70g egg yolks and 30g granulated sugar. Whisk together until well combined. Place the bowl over a pot of simmering water and continue whisking until the mixture becomes thick, pale, and fluffy.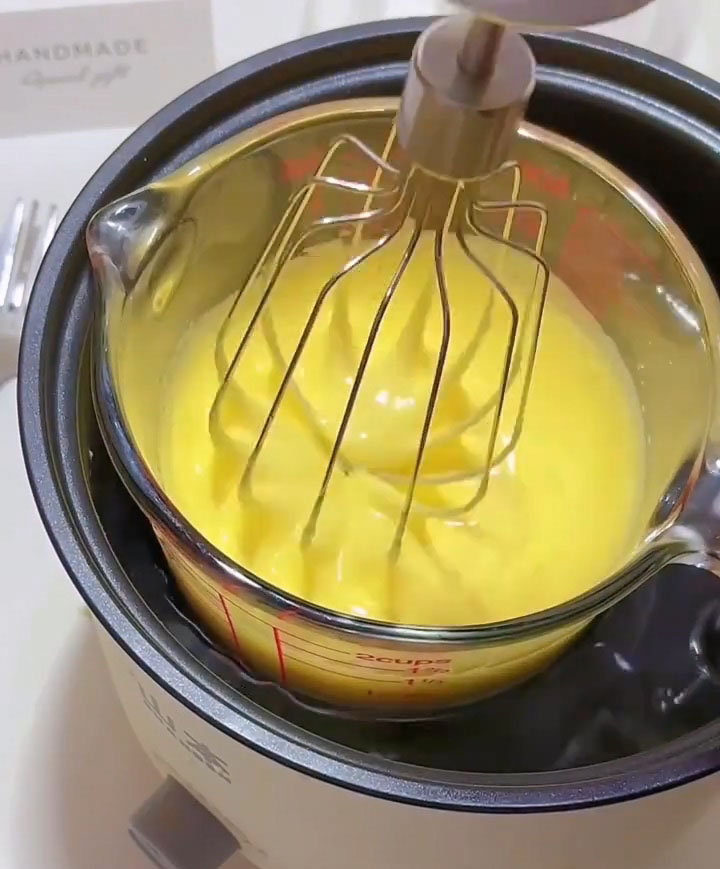
If you’re using pasteurized, ready-to-eat eggs, you can skip the hot water bath and simply whisk the egg yolks and sugar until pale and thick.
2. Prepare the Cheese Base
In a separate bowl, place 250g mascarpone cheese. Using a hand mixer on low speed, beat the mascarpone until it becomes smooth and free of lumps. Gradually add the cooled egg yolk mixture in two batches, mixing well after each addition until fully incorporated.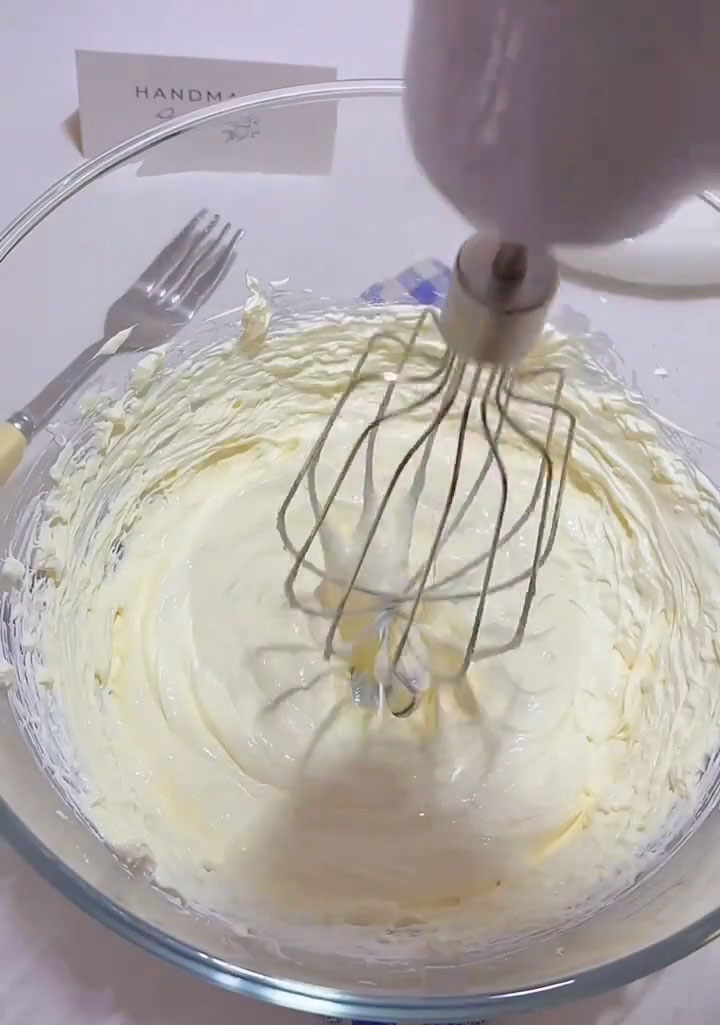
3. Make the Whipped Cream Mixture
In another bowl, pour 250g heavy cream. Whip the cream until it reaches a thick, yogurt-like consistency—soft peaks that hold their shape but remain creamy.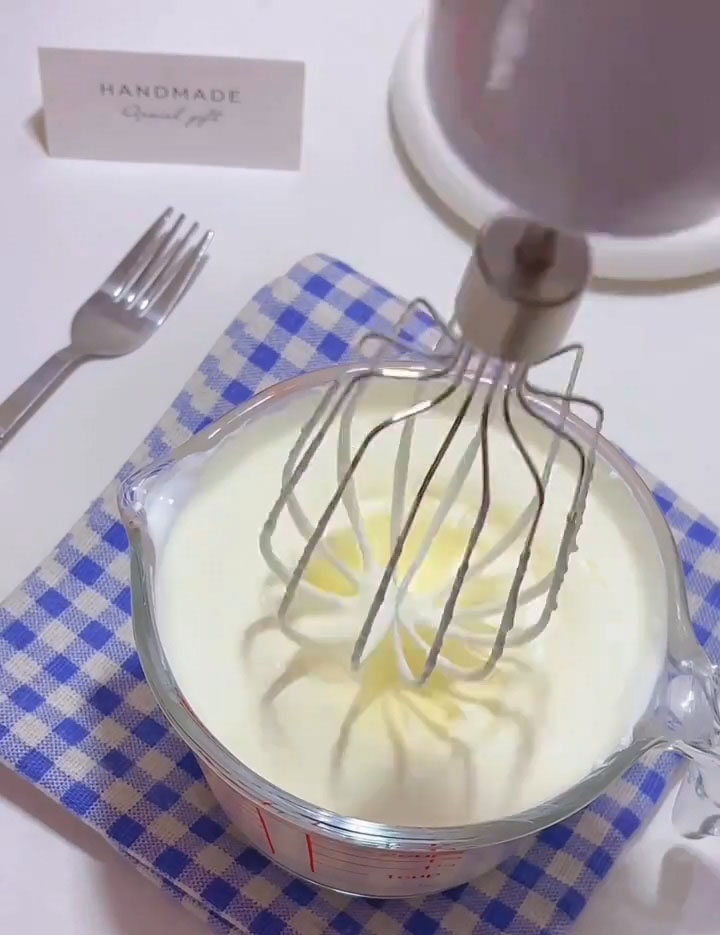
Add the whipped cream to the mascarpone and egg yolk mixture. Gently fold together using a spatula. Be careful not to stir vigorously in circles, as this can deflate the cream and cause the mixture to lose its airy texture.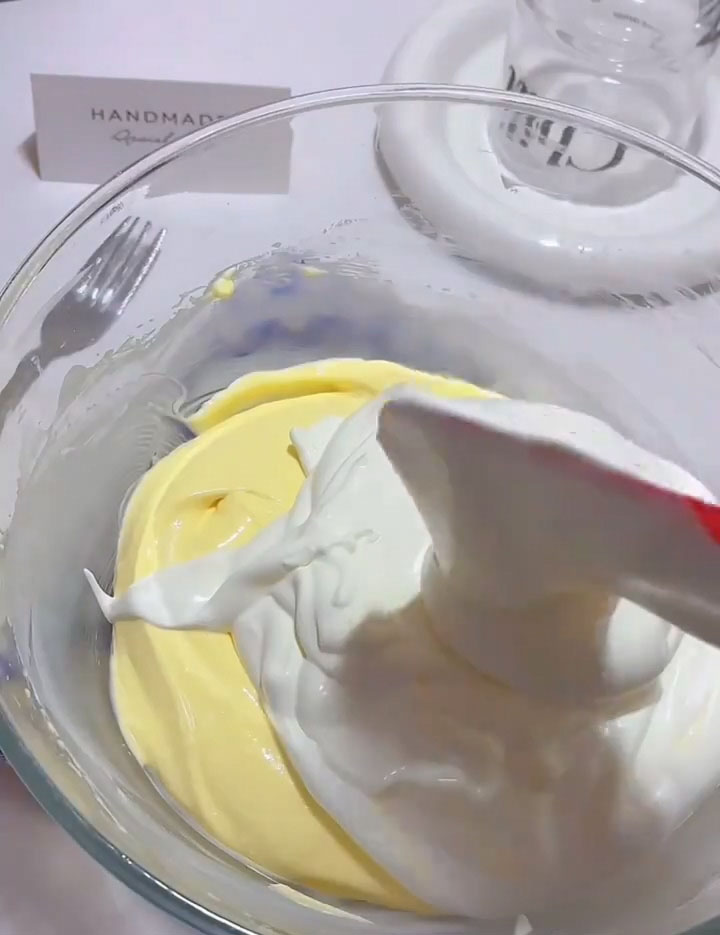
4. Assemble the Layers
Use a 22×14×6 cm (or similarly sized) baking dish or container.
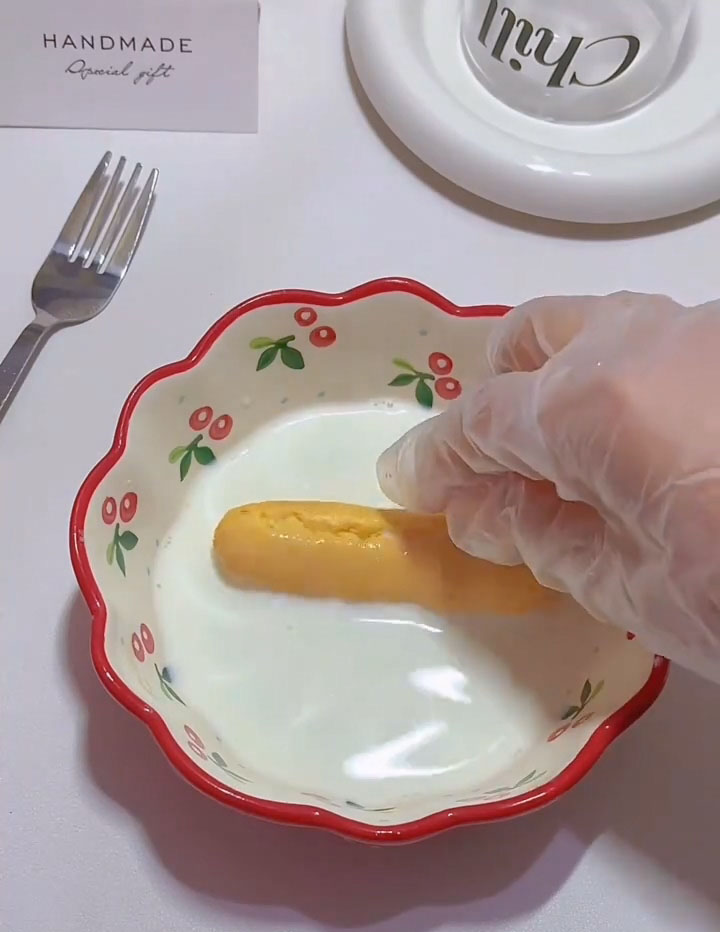
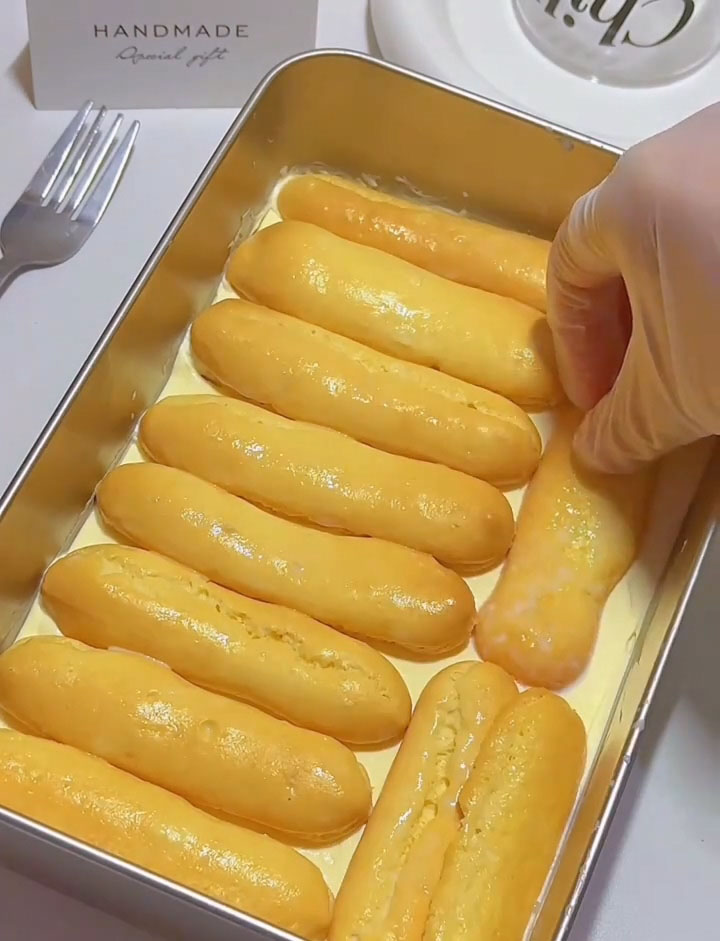
- First layer: Quickly dip ladyfingers into milk—just a brief dip on both sides—and arrange them in a single layer to cover the bottom of the dish.

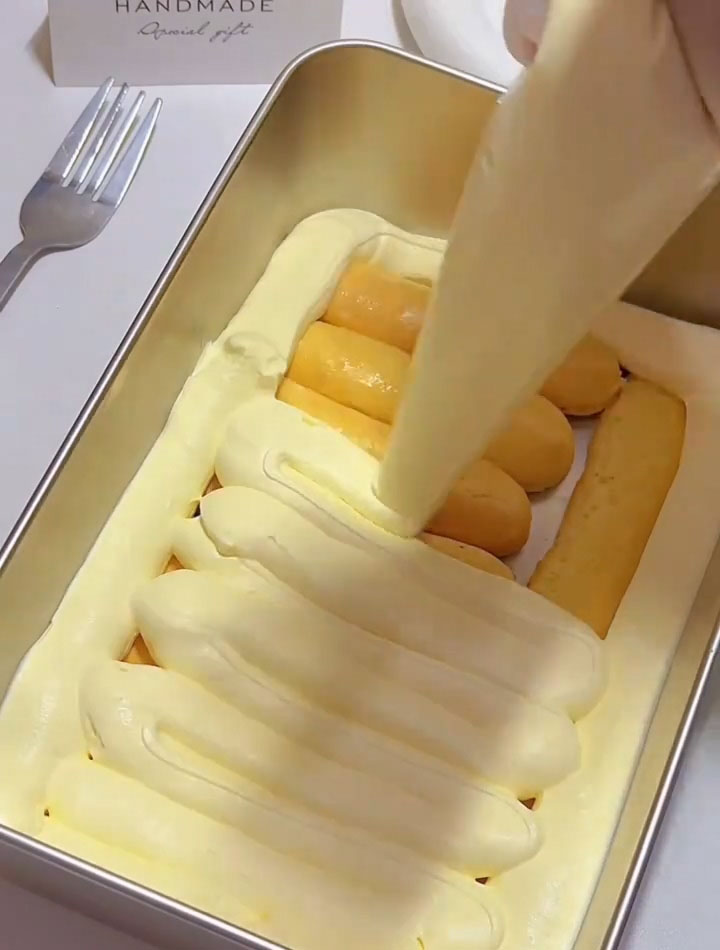
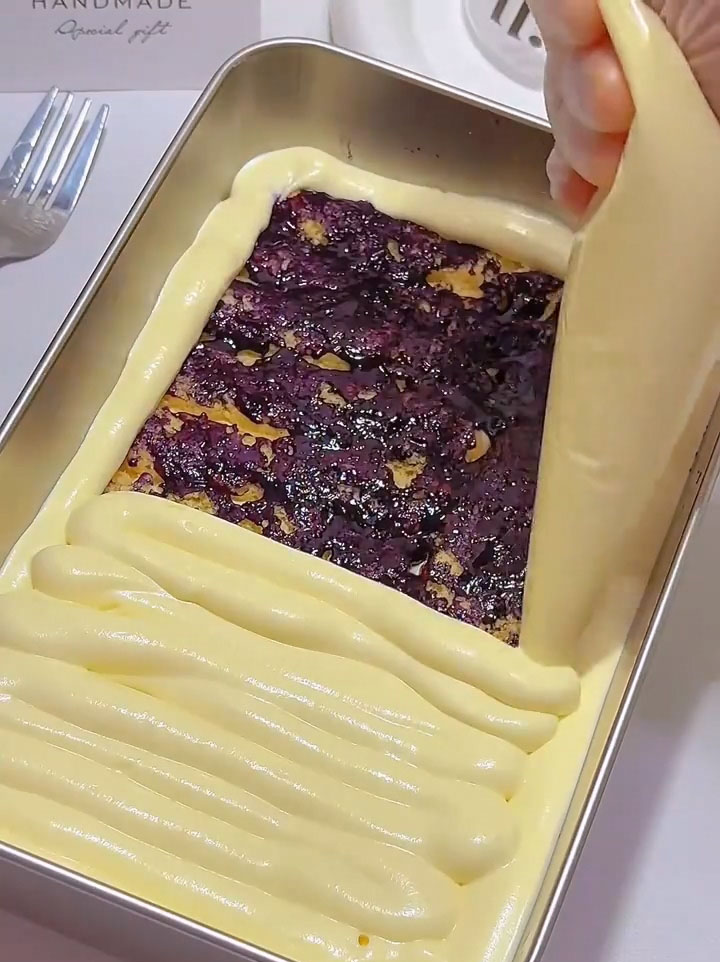
- Pipe or spread a layer of the mascarpone cream mixture over the ladyfingers, smoothing it out evenly.
- Second layer: Add another layer of milk-dipped ladyfingers.
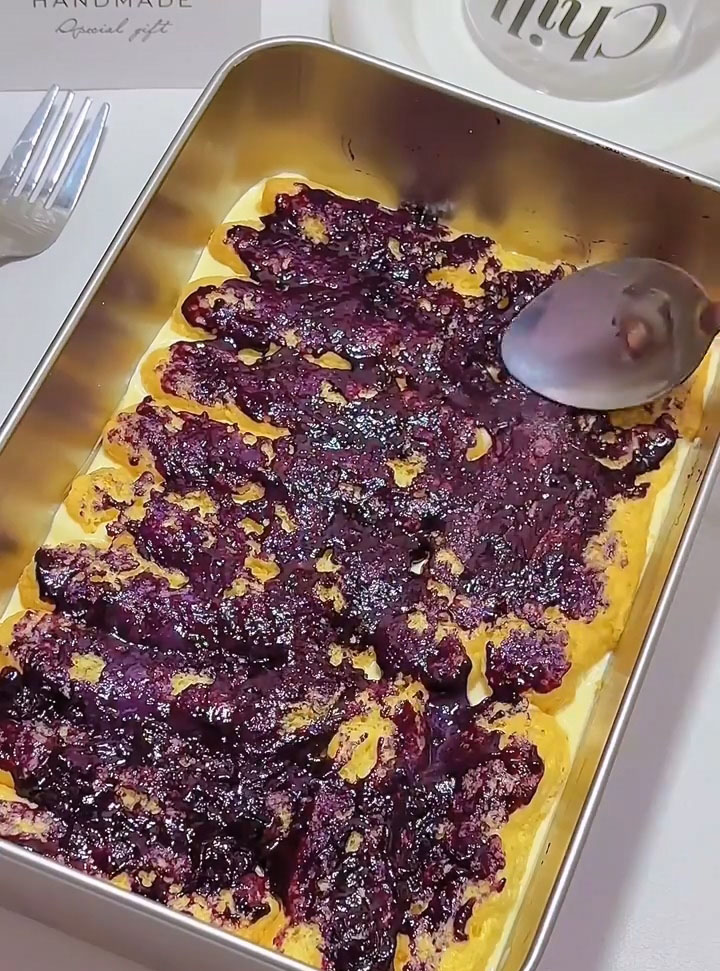
- Spread a layer of blueberry jam over the ladyfingers, smoothing it flat.
- Top layer: Add the remaining mascarpone cream mixture and spread it evenly across the top, smoothing the surface.
5. Chill and Decorate
Cover the dish with a lid or plastic wrap and refrigerate overnight. This allows the dessert to set properly and the flavors to meld beautifully.
Once chilled and set, spread a thin layer of blueberry jam over the top surface.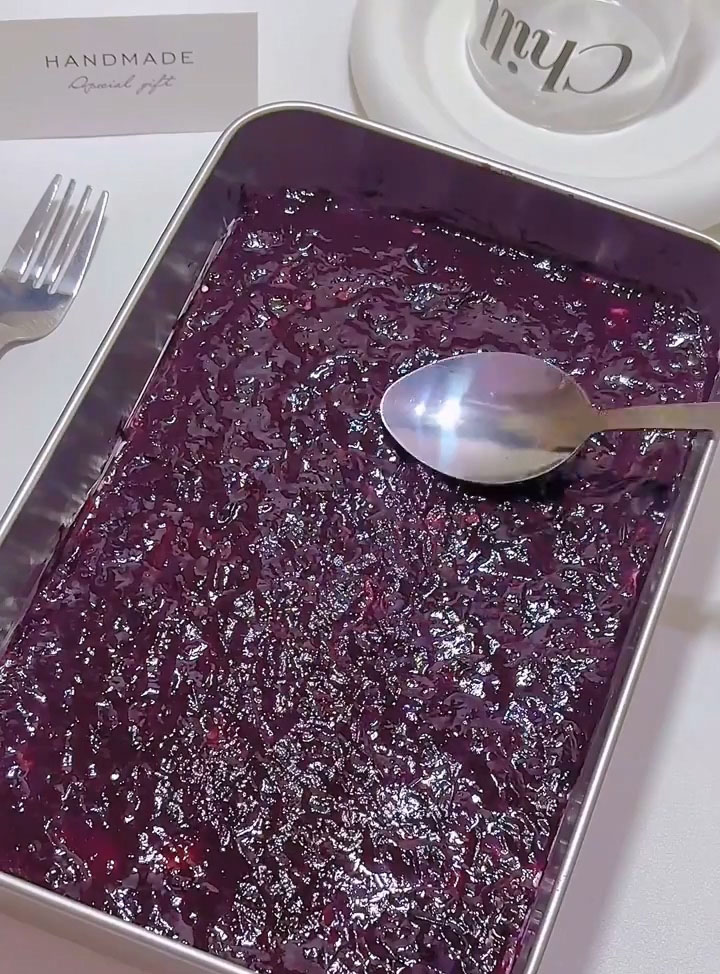
Garnish with fresh blueberries and mint leaves for a beautiful finishing touch.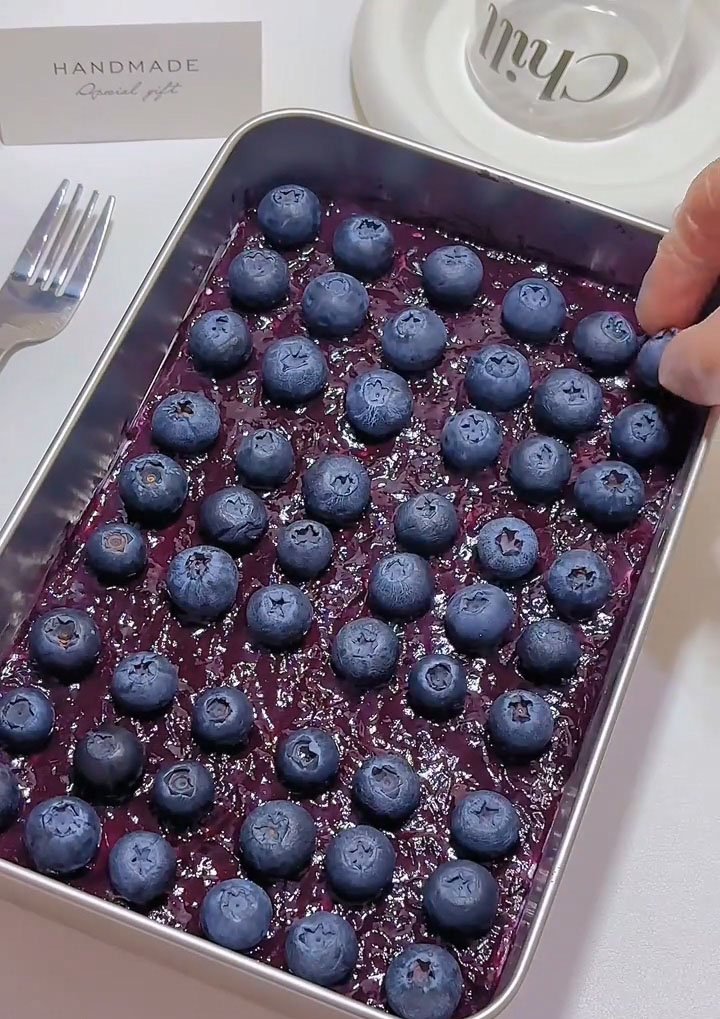
Storage
Store any leftover blueberry tiramisu in the refrigerator, covered, for up to 3–4 days. The dessert actually holds up quite well, though the ladyfingers will continue to soften over time.
Tips & Tricks
- Use pasteurized eggs for convenience – If you have access to pasteurized, ready-to-eat eggs, you can skip the hot water bath entirely. Simply whisk the yolks and sugar directly until thick and pale. It saves time and simplifies the process.
- Bring mascarpone to room temperature – Cold mascarpone can be difficult to blend smoothly and may leave lumps in your cream. Take it out of the refrigerator at least 1–2 hours before you start to ensure a silky, lump-free texture.
- Don’t oversoak the ladyfingers – A quick dip in milk is all they need. If you let them sit in the liquid, they’ll become overly soggy and release too much moisture into the dessert. The overnight chilling will soften them perfectly.
- Fold gently to preserve airiness – When combining the whipped cream with the mascarpone mixture, use a gentle folding motion with a spatula. Stirring too vigorously or in circles can deflate the cream and result in a denser, less airy texture.
- Chill overnight for best results – Tiramisu truly transforms in the refrigerator. Overnight chilling allows the cream to firm up and the ladyfingers to soften to that perfect, cake-like texture. Patience here makes all the difference.
Frequently Asked Questions
Why is my tiramisu runny or wet?
If your tiramisu turns out wet or runny, the most common cause is oversoaking the ladyfingers. A quick dip is all that’s needed—any more and they’ll release excess liquid as the dessert sits. Another possibility is overwhipping the cream, which can cause it to separate and become watery.
Can I make this in advance?
Absolutely! Tiramisu is an ideal make-ahead dessert. You can prepare it 1–2 days before serving and keep it chilled in the refrigerator. In fact, making it ahead allows the flavors to meld and the texture to develop beautifully.
Do I need to use pasteurized eggs?
Not necessarily. If you use the hot water bath method described in the recipe, the eggs are gently heated to a safe temperature. If you’re concerned or prefer extra precaution, using pasteurized eggs is a great option that also allows you to skip the double boiler step.
Can I use a different fruit jam?
Yes! While blueberry is the star here, you can easily experiment with other fruit jams like raspberry, strawberry, or blackberry. Each will bring its own unique flavor and color to the dessert.
Why does this recipe not use gelatin?
This tiramisu relies on the natural thickening power of whipped cream, mascarpone, and the chilling process to set. The structure comes from the combination of these ingredients, making gelatin unnecessary and keeping the texture light and creamy.
More Tiramisu Variations You’ll Love
- Easy Lemon Tiramisu
- No-Bake Oreo Tiramisu
- Easy Strawberry Tiramisu
- Mango Tiramisu Recipe
- Easy Tiramisu Cookies Recipe
- Easy No-Bake Tiramisu
- Matcha Tiramisu Egg Tarts Recipe
- The Best Tiramisu Basque Cake
Fresh Mango Tiramisu – Easy No-Bake Dessert Everyone Loves
Ingredients
Mascarpone Cream
- 70 g egg yolks approximately 4 large yolks
- 30 g white sugar
- 250 g mascarpone cheese room temperature
- 250 g heavy cream
Assembly
- Ladyfingers as needed
- Whole milk for dipping
- Mango jam as needed
Topping
- Fresh mango cubes
- Blueberries
- Mint leaves
Instructions
For the Mascarpone Cream
- Prepare the egg yolk mixture – In a medium mixing bowl, combine the egg yolks and white sugar.
- Pasteurize over hot water – Place the bowl over a pot of gently simmering water. Using a hand mixer or whisk, beat continuously until the mixture becomes thick, pale, and fluffy. The heat gently pasteurizes the eggs without scrambling them. Tip: If you're using pasteurized, ready-to-eat eggs, you can skip the hot water bath and simply beat until thick and pale.
- Cool the yolk mixture – Remove the bowl from the heat and set aside. Allow the mixture to cool to room temperature. This prevents it from melting the mascarpone when combined.
- Whip the mascarpone – In a separate large bowl, beat the room-temperature mascarpone cheese on low speed until completely smooth and free of lumps.
- Combine mascarpone and yolks – Add the cooled egg yolk mixture to the mascarpone in two batches, gently mixing after each addition until fully incorporated. Set aside.
- Whip the heavy cream – In another bowl, whip the heavy cream until it reaches a thick, yogurt-like consistency with soft peaks. Do not overwhip to stiff peaks, as you'll be folding it into the mascarpone mixture.
- Fold together – Add the whipped cream to the mascarpone-egg mixture. Gently fold with a spatula using a cutting motion until no streaks remain. Be careful not to stir vigorously in circles, as this will deflate the airy texture.
Assemble the Mango Tiramisu
- Prepare the ladyfingers – Pour a shallow layer of whole milk into a wide, shallow dish. Working with one ladyfinger at a time, quickly dip both sides into the milk—just a swift dunk on each side. Do not soak. Allow any excess milk to drip off briefly before placing in the mold.
- First layer of ladyfingers – Arrange the dipped ladyfingers in a single layer across the bottom of a 22×14×6 cm (approximately 8.5×5.5×2.5 inch) mold or baking dish. Break a few ladyfingers if needed to fill gaps.
- First layer of cream – Spread half of the mascarpone cream over the ladyfingers. Use an offset spatula or the back of a spoon to smooth it into an even layer.
- Second layer of ladyfingers – Dip another set of ladyfingers in milk (using the same quick-dip method) and arrange them in a single layer over the cream.
- Mango jam layer – Spread a generous, even layer of mango jam over the ladyfingers. Smooth it out gently.
- Final cream layer – Spread the remaining mascarpone cream over the mango jam. Smooth the top carefully to create an even surface.
- Chill – Cover the mold tightly with plastic wrap or a lid. Refrigerate for at least 8 hours, preferably overnight. This resting time is essential—it allows the cream to set properly and the ladyfingers to soften into that perfect cake-like texture.
Decorate and Serve
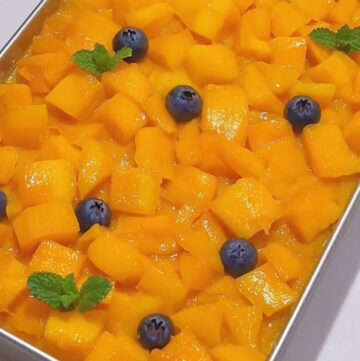
- Add the top mango layer – Once fully chilled and set, spread a thin, even layer of mango jam over the top of the tiramisu.
- Garnish – Cover the surface generously with fresh mango cubes. Arrange blueberries and mint leaves on top for a beautiful, fresh finish.
- Serve – Slice and serve chilled. For clean slices, use a large knife wiped clean between cuts.
Leave a Reply