
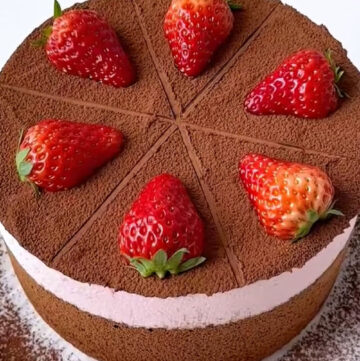
Soft chocolate cake, airy strawberry mousse, and a glossy chocolate finish—every slice of this strawberry chocolate layer cake is rich, fresh, and perfectly balanced. A beautiful homemade dessert that looks stunning and tastes even better.
I have to admit, this cake does look like it has quite a few steps at first glance. It might seem a little intimidating when you read through the process, but trust me on this one — it’s much easier than it looks.
As long as you take your time and measure the ingredients accurately, everything comes together very smoothly.
Each step is straightforward, and once you get into the rhythm, the cake practically makes itself.
The result is absolutely worth it: a beautiful, well-structured cake with incredible flavor that makes all the effort feel effortless in the end.

Why you’ll love this recipe
- It delivers three distinct layers: moist chocolate cake, airy strawberry mousse, and smooth chocolate ganache.
- The flavours are perfectly balanced—rich but not heavy, sweet with a gentle tang.
- Each component is made using clear, manageable steps, making it beginner-friendly despite the elegant result.
- It’s a stunning dessert for afternoon tea, celebrations, or special occasions.
- The texture contrast in every bite makes this cake incredibly satisfying and memorable.
Ingredients and substitutions
- Butter (softened) – Softened butter adds moisture and richness to the chocolate cake layer. If needed, corn oil can be used instead, though the flavour will be slightly lighter.
- Dark chocolate (about 70% cocoa) – I recommend using dark chocolate with a cocoa content around 70% for a deep chocolate flavour without being overly sweet. Regular chocolate can be used if that’s what you have on hand.
- Milk (hot, preferably whole milk) – Hot milk helps melt the chocolate and butter smoothly. Whole milk gives the best flavour, but other types will still work.
- Cocoa powder (pure cocoa) – This boosts the chocolate intensity of the cake. Be sure to sift it to prevent lumps.
- Cake flour (low-gluten flour) – Cake flour keeps the sponge soft and tender. Do not substitute with all-purpose or bread flour, as the texture will become dense.
- Eggs (separated) – The yolks add richness to the batter, while properly whipped egg whites provide lift and structure. Make sure the whites are completely free of oil and water.
- Sugar – Used mainly for whipping the egg whites and adjusting sweetness. You can slightly reduce it if you prefer a less sweet cake.
- Cream cheese (room temperature) – This is essential for the strawberry mousse layer. Fully softened cream cheese ensures a smooth, lump-free texture.
- Strawberry jam – This provides the signature sweet-tangy strawberry flavour. If unavailable, homemade strawberry purée with added sugar can be used.
- Whipping cream (well chilled) – Chilled dairy whipping cream whips up smoothly and gives the mousse its light, airy texture.
- Gelatin – This is crucial for setting the strawberry mousse so the layers stay clean and stable.
- Pink food coloring (optional) – Used only for visual appeal. The cake will taste the same without it.
- Cocoa powder & fresh strawberries – Used for decoration, adding both visual contrast and flavour.
How to Make Strawberry Chocolate Layer Cake
Part 1: Make the Dark Chocolate Sponge Cake
- Prep: Preheat your oven to 150°C (300°F).
- Melt Chocolate Base: Combine the butter and chopped dark chocolate in a heatproof bowl. Melt gently over a pot of simmering water (double boiler), stirring until smooth. Remove from heat and whisk in the 55g of hot milk until combined.
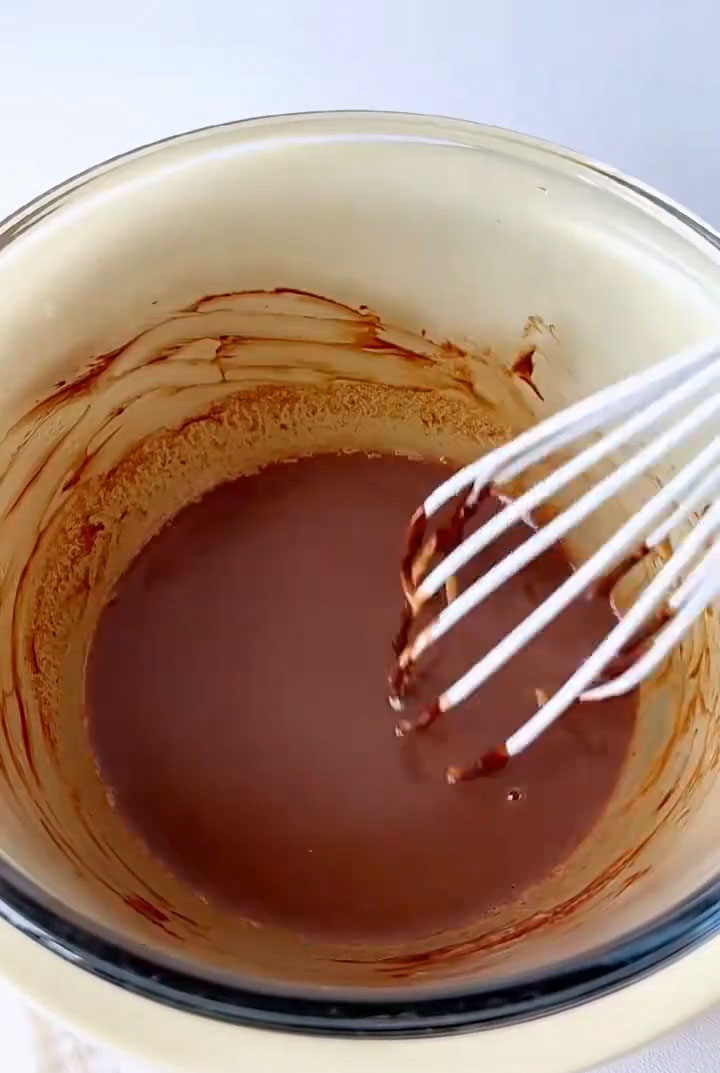
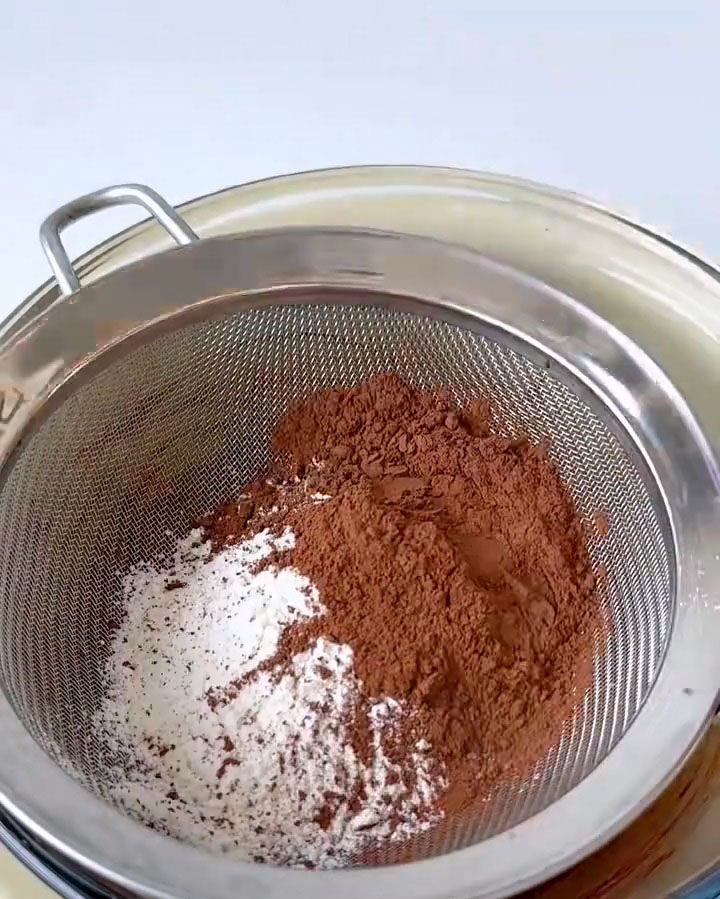
- Mix Dry into Wet: Sift the low-gluten flour and cocoa powder directly into the chocolate mixture. Whisk until just combined and no dry streaks remain.
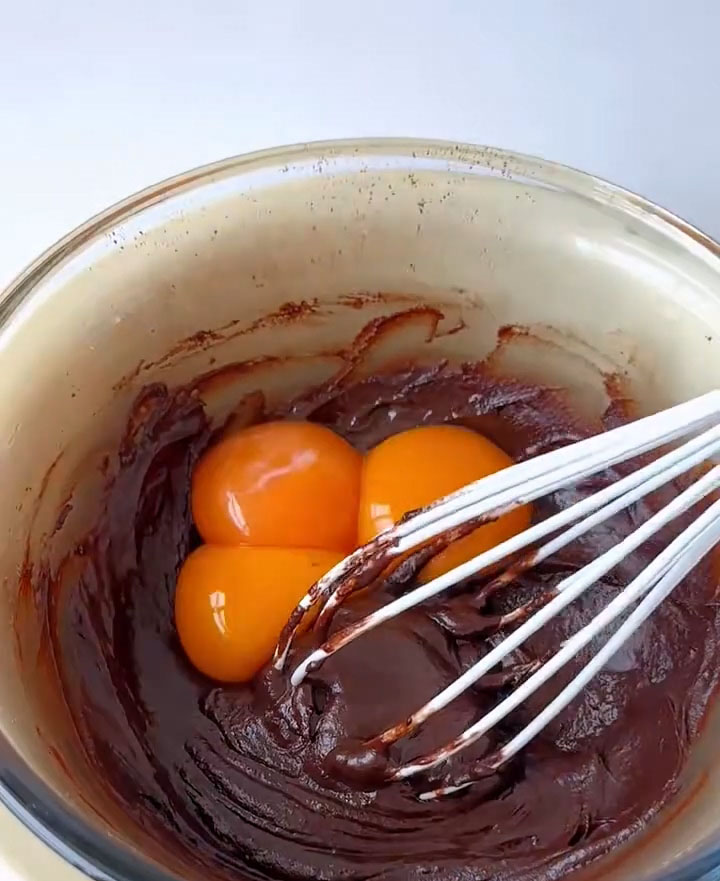
- Add Yolks: Add the 3 egg yolks to the batter and whisk until you have a smooth, thick, and homogeneous chocolate batter.
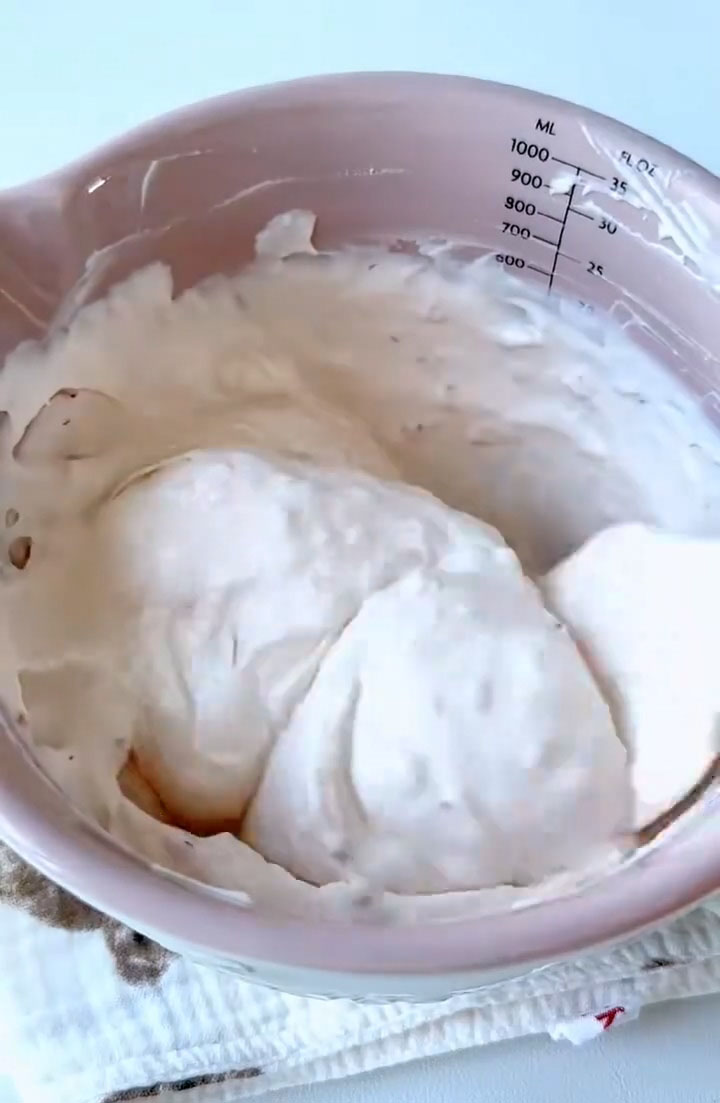
- Whip the Meringue: In a separate, impeccably clean and dry bowl, whip the 3 egg whites with sugar using an electric mixer. Continue whipping until you reach stiff peaks—the meringue should be glossy, and the peak should stand straight up when you lift the whisk.

- Fold: Add about one-third of the meringue to the chocolate batter and fold gently to lighten it. Then, pour this mixture back into the remaining meringue. Using a spatula, fold gently but thoroughly until no white streaks remain. Be careful not to deflate the air.

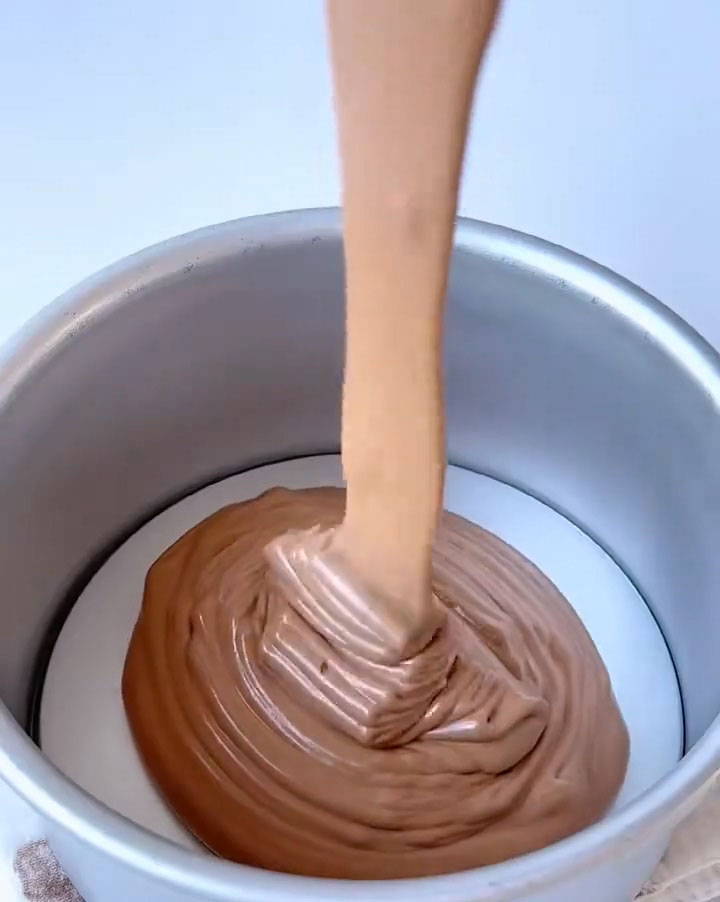
- Bake: Pour the batter into the prepared pan. Gently tap it on the counter to release large bubbles. Bake on the middle rack for 45 minutes, or until a toothpick inserted into the center comes out clean.
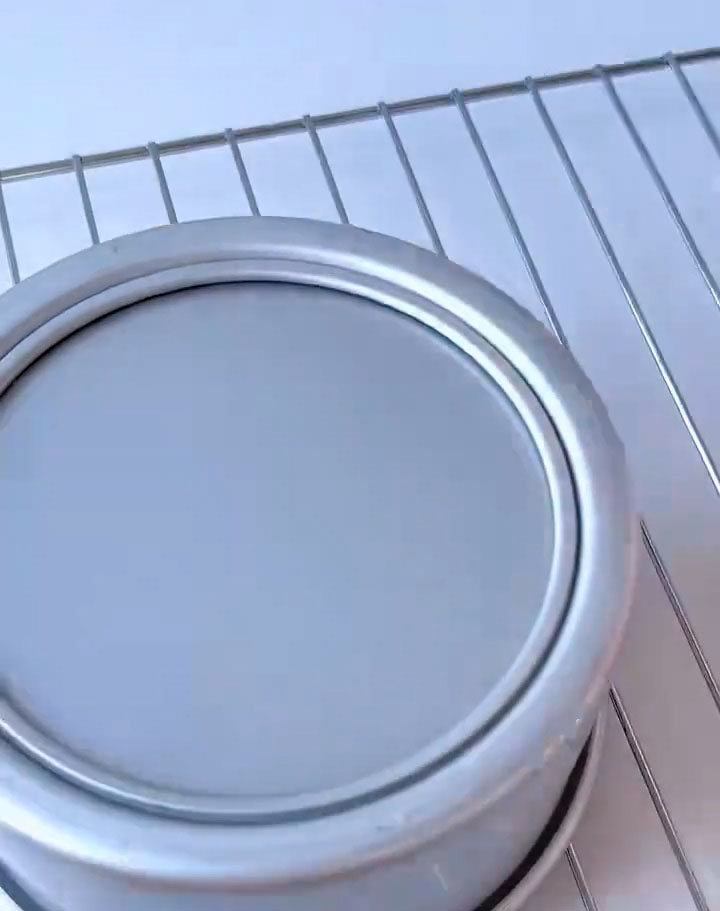
- Cool: Immediately upon taking it out of the oven, invert the cake pan onto a wire rack. Let it cool completely upside down in the pan. This prevents it from collapsing. Once cool, run a knife around the edges to release it.
Part 2: Make the Strawberry Mousse Layer
- Prepare the cake: Wrap the cooled cake with an acetate strip or cake ring.
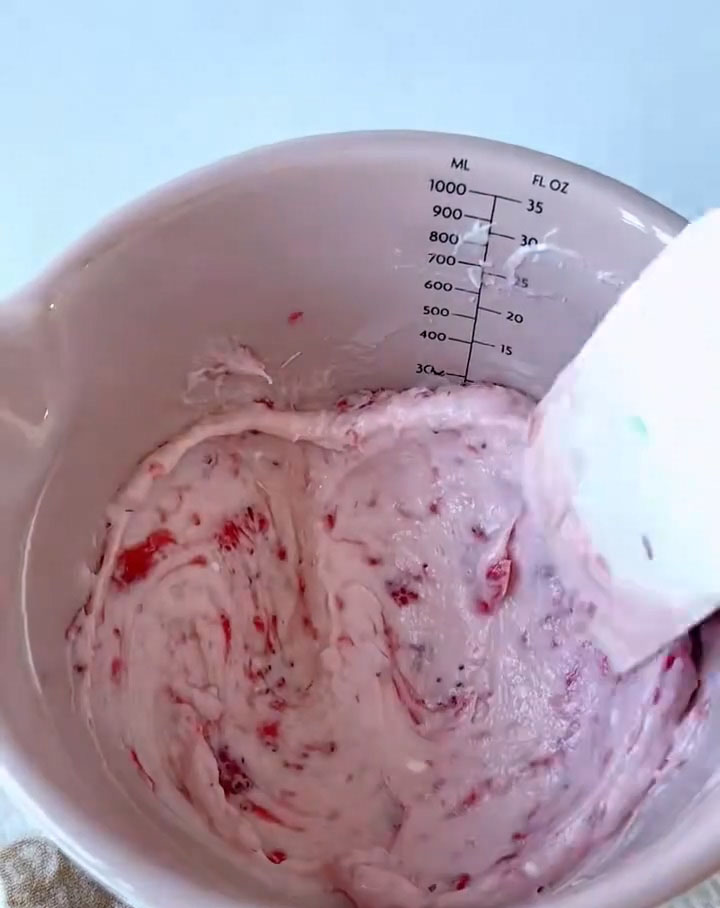
- Make Cheese Base: In a bowl, beat the softened cream cheese and 20g of sugar until smooth and creamy. Add the strawberry jam and mix until fully incorporated and smooth.
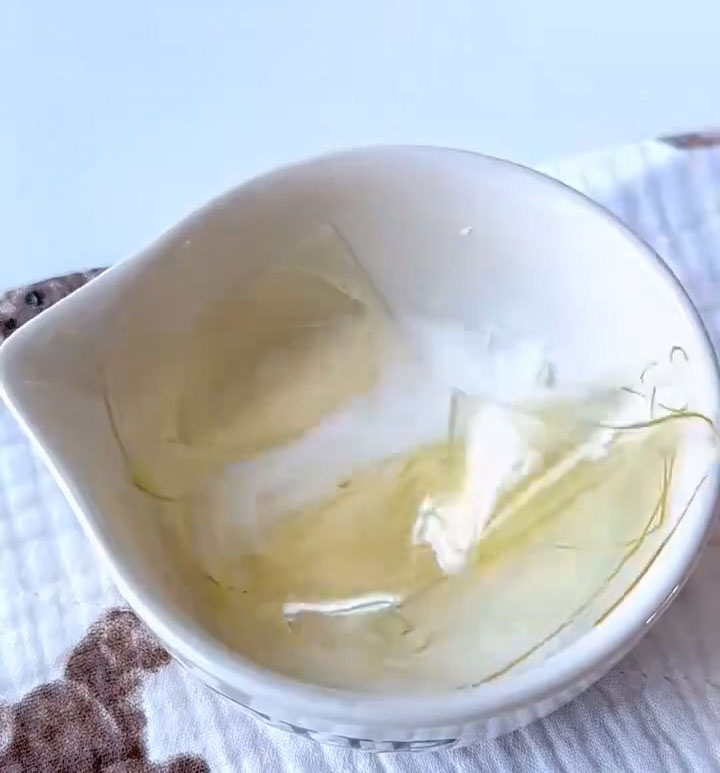
- Bloom Gelatin: If using gelatin sheets, soak them in a bowl of ice water for 5-10 minutes until soft. Squeeze out all excess water. Heat the 40g of milk until hot (not boiling), add the softened gelatin, and stir until it’s completely dissolved. Let this mixture cool to room temperature.
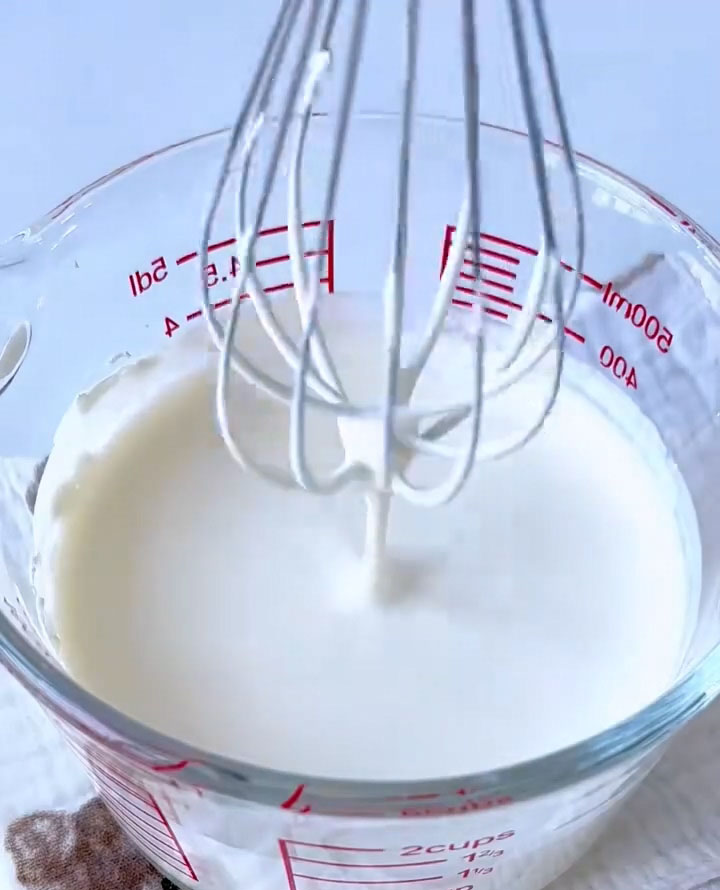
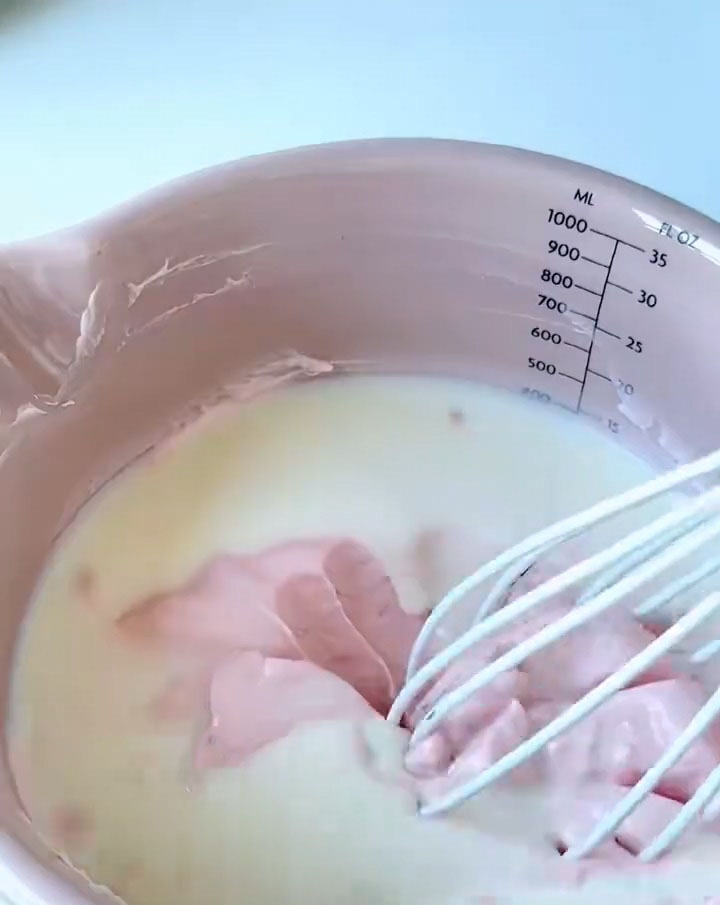
- Whip Cream: In a chilled bowl, whip the 150g of cold whipping cream until it just reaches a thick, pourable consistency similar to yogurt or soft-serve ice cream (soft peaks). Do not overwhip.
- Combine: Gently fold the whipped cream into the strawberry-cheese mixture until nearly combined. If using, add the pink food coloring and mix until evenly combined. Finally, pour in the cooled, liquid gelatin and fold everything together until uniform.

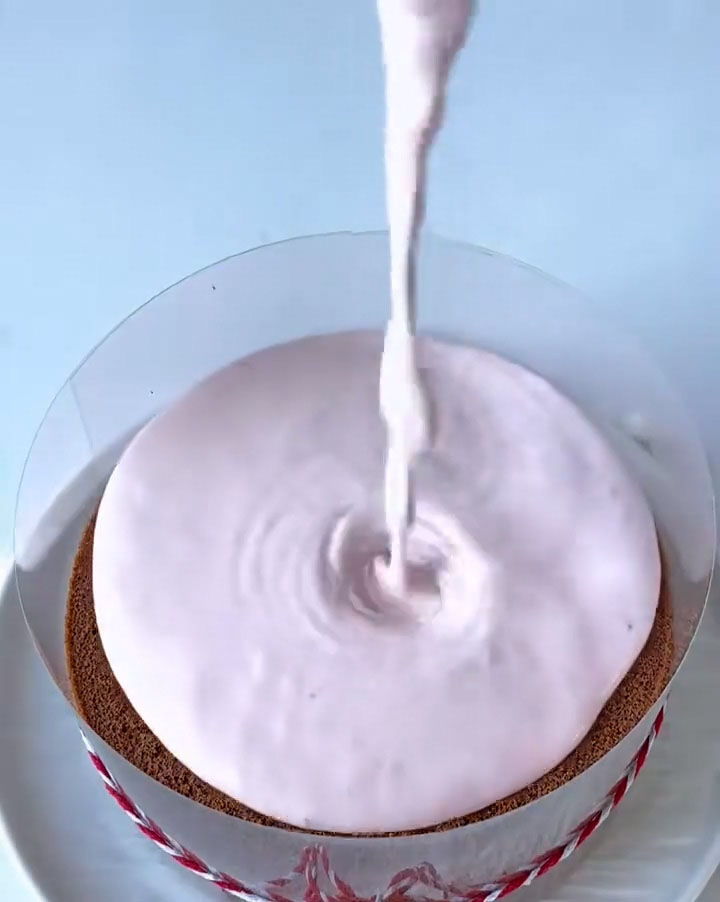
- Pour & Set: Pour the strawberry mousse over the chocolate cake layer in the prepared pan. Smooth the top with a spatula. Refrigerate for at least 4 hours, or preferably overnight, until the mousse is completely firm to the touch.
Part 3: Make the Ganache & Decorate
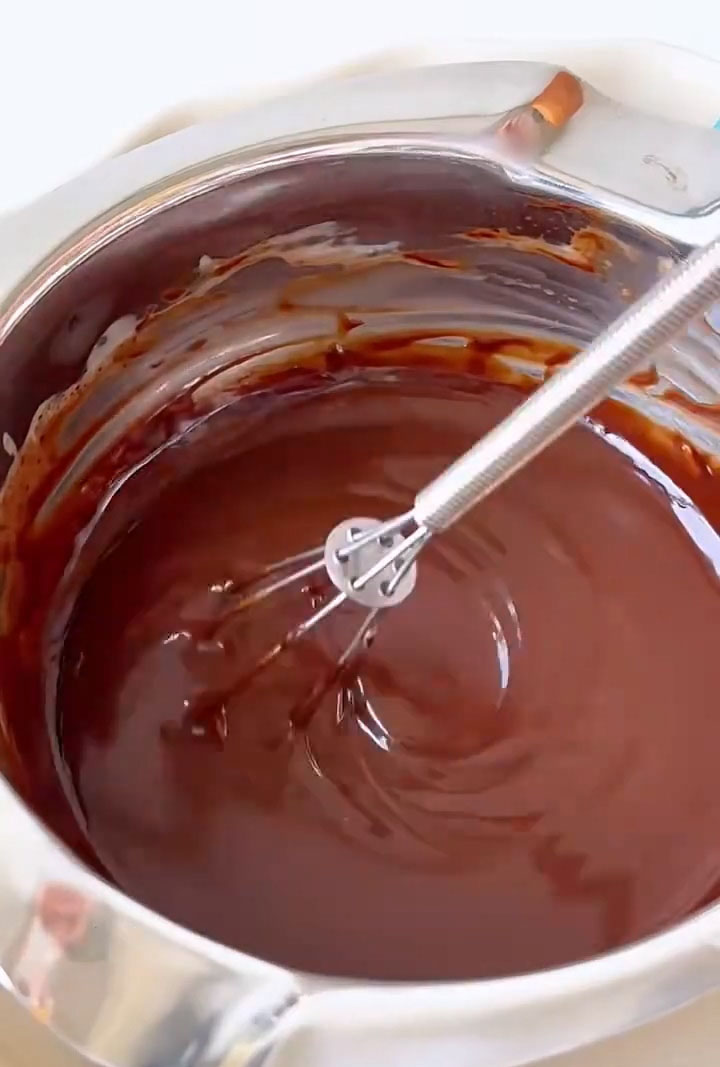
- Make Ganache: Place 60 g of dark chocolate and 75 g of whipping cream into a bowl. Heat it over a water bath, stirring until completely melted and smooth. Let it cool to hand-warm temperature.
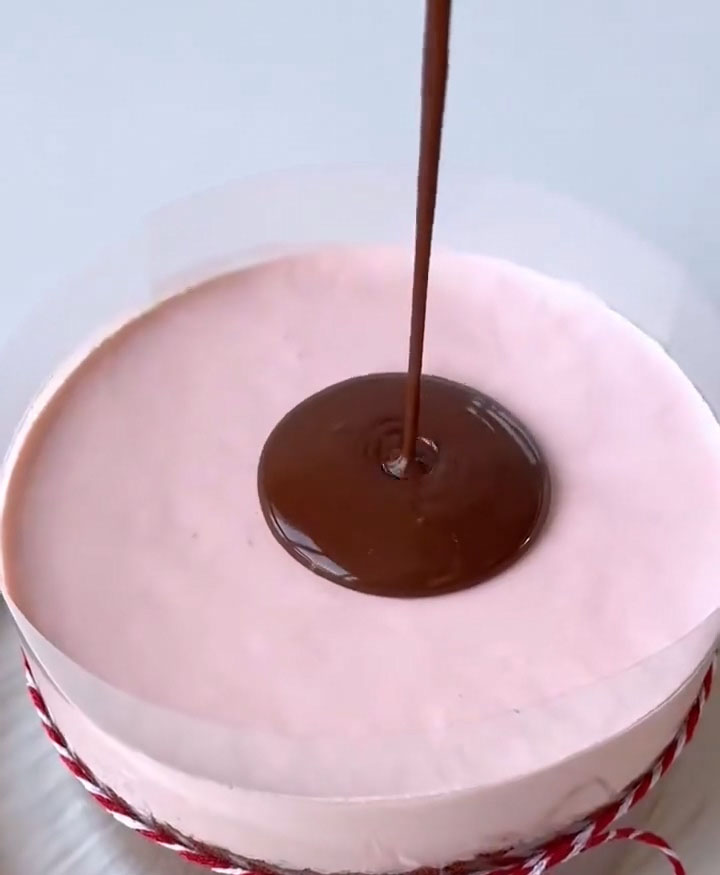
- Glaze the Cake: Remove the set cake from the fridge. Pour the lukewarm ganache onto the center of the cake.
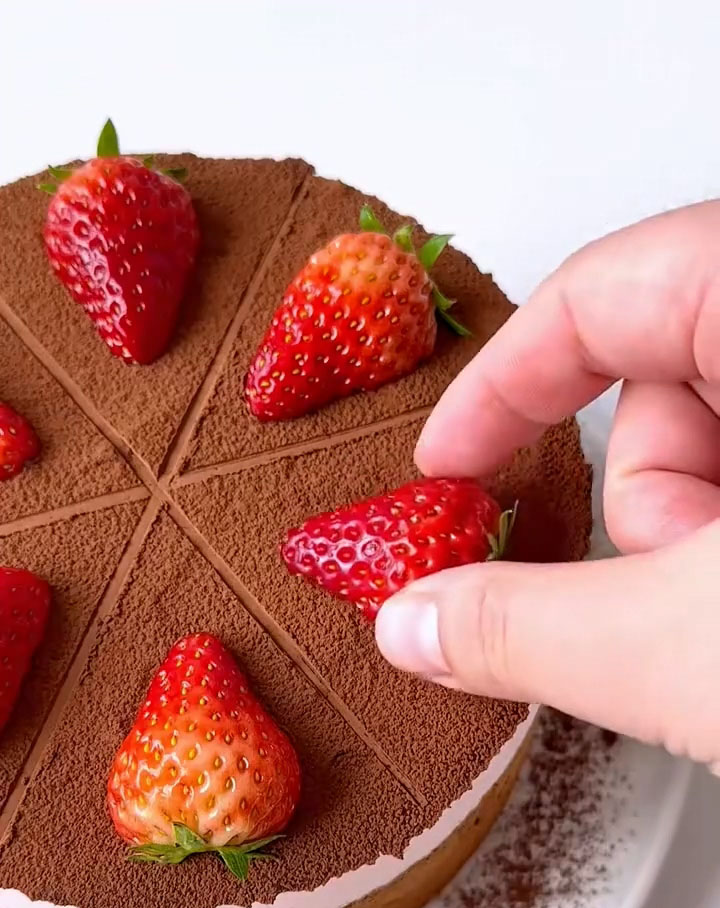
- Final Chill & Decorate: Return the cake to the fridge for 20-30 minutes to let the ganache set. Before serving, dust the top lightly with cocoa powder and decorate with fresh strawberries. Slice and enjoy.

Tips & Tricks
- Meringue Mastery for the Cake: A stable, stiff-peak meringue is non-negotiable for a tall, fluffy sponge. Ensure there is absolutely no yolk or grease in your egg white bowl. Adding the sugar gradually helps it dissolve and stabilize the foam.
- Cool the Cake Upside Down: This classic chiffon/sponge technique uses gravity to stretch the cake’s structure as it cools, preventing it from sinking in the middle. Don’t skip this step.
- Temperature Control for the Mousse: The dissolved gelatin must be at room temperature before adding it to the mousse. If it’s too hot, it will melt the whipped cream. If the mousse mixture seems too soft after mixing, chill it for 10-15 minutes before pouring over the cake to prevent it from seeping.
- The Perfect Ganache Consistency: The ganache should be fluid enough to pour and create drips, but not so hot that it melts the mousse. Lukewarm is the key. If it thickens too much as it cools, you can briefly microwave it in 5-second bursts or add a tiny drizzle of warm cream.
- Chill for Success: Patience is your best tool. The long chill for the mousse (4+ hours) is essential for a clean slice. An overnight chill is even better, as it allows all the flavors to develop fully.
Frequently Asked Questions
Can I use a different size pan?
This recipe is calibrated for a 6-inch pan, which gives nice, tall layers. Using an 8-inch pan will result in much thinner layers and require adjusting baking/chilling times. It’s best to stick with a 6-inch pan or scale the recipe up accordingly.
My mousse layer didn’t set firmly. What happened?
This is usually due to: 1) Not measuring the gelatin correctly, 2) Not dissolving the gelatin completely in the hot milk, or 3) Adding the gelatin solution when it was still too hot, which melted the whipped cream and broke the structure. Ensure you follow the gelatin steps precisely.
Can I use frozen strawberries instead of jam?
You can, but it will change the texture. Thaw and completely puree frozen strawberries, then cook them down with a little sugar to evaporate excess moisture and concentrate the flavor. You’ll need about 100g of reduced puree to replace the 70g of jam.
How far in advance can I make this cake?
It’s an excellent make-ahead dessert. You can assemble the cake (with mousse) up to 2 days in advance. Add the ganache glaze up to 1 day before serving. Store it covered in the refrigerator.
Why did my chocolate sponge crack or sink?
Cracking can be from an oven that’s too hot. Sinking is typically caused by: under-whipped meringue, over-mixing when folding (which deflates the batter), under-baking, or not cooling it upside down. Ensure your meringue is at stiff peaks and handle the batter gently.
Stunning Strawberry Chocolate Layer Cake Recipe
Ingredients
Dark Chocolate Sponge Cake
- 20 g unsalted butter
- 35 g dark chocolate 70%, chopped
- 55 g whole milk
- 40 g low-gluten flour cake flour
- 9 g unsweetened cocoa powder
- 3 large eggs separated
- 40 g granulated sugar
Strawberry Mousse Layer
- 110 g full-fat cream cheese softened
- 20 g granulated sugar
- 70 g strawberry jam
- 5 g gelatin sheets or powder
- 40 g whole milk
- 150 g cold whipping cream heavy cream
- A drop of pink food coloring optional
Chocolate Ganache Glaze
- 60 g dark chocolate 70%, finely chopped
- 75 g whipping cream heavy cream
Decoration
- Unsweetened cocoa powder for dusting
- 4-5 fresh strawberries
Instructions
Part 1: Make the Dark Chocolate Sponge Cake
- Prep: Preheat your oven to 150°C (300°F).
- Melt Chocolate Base: Combine the butter and chopped dark chocolate in a heatproof bowl. Melt gently over a pot of simmering water (double boiler), stirring until smooth. Remove from heat and whisk in the 55g of hot milk until combined.
- Mix Dry into Wet: Sift the low-gluten flour and cocoa powder directly into the chocolate mixture. Whisk until just combined and no dry streaks remain.
- Add Yolks: Add the 3 egg yolks to the batter and whisk until you have a smooth, thick, and homogeneous chocolate batter.
- Whip the Meringue: In a separate, impeccably clean and dry bowl, whip the 3 egg whites with sugar using an electric mixer. Continue whipping until you reach stiff peaks—the meringue should be glossy, and the peak should stand straight up when you lift the whisk.
- Fold: Add about one-third of the meringue to the chocolate batter and fold gently to lighten it. Then, pour this mixture back into the remaining meringue. Using a spatula, fold gently but thoroughly until no white streaks remain. Be careful not to deflate the air.
- Bake: Pour the batter into the prepared pan. Gently tap it on the counter to release large bubbles. Bake on the middle rack for 45 minutes, or until a toothpick inserted into the center comes out clean.
- Cool: Immediately upon taking it out of the oven, invert the cake pan onto a wire rack. Let it cool completely upside down in the pan. This prevents it from collapsing. Once cool, run a knife around the edges to release it.
Part 2: Make the Strawberry Mousse Layer
- Prepare the cake: Wrap the cooled cake with an acetate strip or cake ring.
- Make Cheese Base: In a bowl, beat the softened cream cheese and 20g of sugar until smooth and creamy. Add the strawberry jam and mix until fully incorporated and smooth.
- Bloom Gelatin: If using gelatin sheets, soak them in a bowl of ice water for 5-10 minutes until soft. Squeeze out all excess water. Heat the 40g of milk until hot (not boiling), add the softened gelatin, and stir until it's completely dissolved. Let this mixture cool to room temperature.
- Whip Cream: In a chilled bowl, whip the 150g of cold whipping cream until it just reaches a thick, pourable consistency similar to yogurt or soft-serve ice cream (soft peaks). Do not overwhip.
- Combine: Gently fold the whipped cream into the strawberry-cheese mixture until nearly combined. If using, add the pink food coloring and mix until evenly combined. Finally, pour in the cooled, liquid gelatin and fold everything together until uniform.
- Pour & Set: Pour the strawberry mousse over the chocolate cake layer in the prepared pan. Smooth the top with a spatula. Refrigerate for at least 4 hours, or preferably overnight, until the mousse is completely firm to the touch.
Part 3: Make the Ganache & Decorate
- Make Ganache: Place 60 g of dark chocolate and 75 g of whipping cream into a bowl. Heat it over a water bath, stirring until completely melted and smooth. Let it cool to hand-warm temperature.
- Glaze the Cake: Remove the set cake from the fridge. Pour the lukewarm ganache onto the center of the cake.
- Final Chill & Decorate: Return the cake to the fridge for 20-30 minutes to let the ganache set. Before serving, dust the top lightly with cocoa powder and decorate with fresh strawberries. Slice and enjoy.
Leave a Reply