No-Bake Purple Mochi Recipe (Soft for Days!)
A stunning purple dessert that tastes as good as it looks! This taro mochi recipe is soft, stretchy, and filled with layers of creamy goodness.
Ingredients
Taro Filling
- 250 g taro steamed and drained, net weight
- 30 g white sugar
- 4 g purple sweet potato powder
- 90 g milk
Filling Cream
- 250 g heavy cream
- 25 g white sugar
Mochi Skin
- 100 g glutinous rice flour
- 30 g cornstarch
- 8 g purple sweet potato powder
- 35 g white sugar
- 170 g whole milk
- 20 g butter
- Cooked glutinous rice flour for dusting, as needed
Instructions
Make the Taro Filling
- Steam the taro until completely tender. Drain off any excess water thoroughly.
- Weigh out 250g of the steamed taro and place it in a mixing bowl.
- Add 30g white sugar, 4g purple sweet potato powder, and 90g milk.
- Mash everything together into a smooth, uniform paste.
- For an ultra-smooth, luxurious texture, pass the mashed taro through a fine-mesh sieve. Set aside.
Whip the Cream
- In a chilled mixing bowl, combine 250g heavy cream and 25g white sugar.
- Whip using an electric hand mixer or stand mixer with a whisk attachment until the cream reaches a thick, yogurt-like consistency.
- Transfer the whipped cream to a piping bag and set aside in the refrigerator.
Make the Mochi Skin
- In a mixing bowl, combine 100g glutinous rice flour, 30g cornstarch, 8g purple sweet potato powder, and 35g white sugar. Pour in 170g whole milk and stir until the batter is completely smooth and lump-free.
- Strain the batter through a fine-mesh sieve directly into a non-stick pan.
- Add 20g butter to the pan.
- Cook over low heat, stirring constantly with a spatula. The mixture will gradually thicken and come together.
- Continue cooking and stirring until the dough forms a solid ball that pulls away cleanly from the sides of the pan and no longer sticks to your spatula. This is crucial — undercooked dough will be sticky and will harden quickly.
- Transfer the cooked dough to a clean surface. Allow it to cool slightly until you can handle it comfortably.
- Knead and stretch the dough repeatedly — fold it, pull it, press it — until it becomes smooth, glossy, and highly elastic. This develops the gluten-like structure that keeps mochi soft and stretchy.
Assemble the Mochi
- Lightly dust your work surface, hands, and rolling pin with cooked glutinous rice flour.
- Pinch off a piece of mochi dough (about 30-40g per mochi, depending on your desired size).
- Roll the dough into a thin, flat disc, about 3-4 inches in diameter.
- Place the disc into a small bowl or dome-shaped mold, gently pressing it into the bottom and up the sides.
- Pipe a layer of whipped cream into the center of the mochi skin.
- Add a spoonful of the taro filling on top of the cream.
- Pipe another layer of whipped cream over the taro filling.
- Gather the edges of the mochi skin up and over the filling, pinching them together to seal. The bowl helps hold everything in place while you work.
- Pinch off and trim any excess dough at the seal to keep the bottom from becoming too thick.
- Dust the bottom of the finished mochi with a little more cooked glutinous rice flour to prevent sticking.
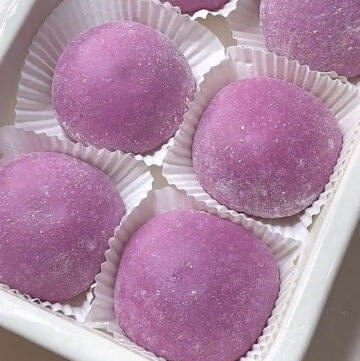
- Place the finished mochi into a paper liner.
- Repeat with the remaining dough and fillings.
Made this recipe? I’d love to see it!Tag @cookingwithchun and share it with #cookingwithchun on Instagram.